 Previous ArticleNext Article
If you are enabled for one or more projects of your Advanced Services engagement, you can start uploading documents against these projects.
Uploading a document onto DCP initiates the life-cycle of that document as explained in a previous article.
Uploading a document sets the initial version of the document and it can have multiple versions to evolve through its life-cycle.
From the landing page, in the top left area above the table grid, click on the '+' icon and choose Add File. This will open the document drop-zone.

You can drag and drop one or more files directly into the document drop-zone or you can click the hyperlinked text 'Browse files from the system' to open up your default file browser. Select your file to be uploaded. Multiple files can be uploaded at once. Once dropped you will get an indication of the upload progress.
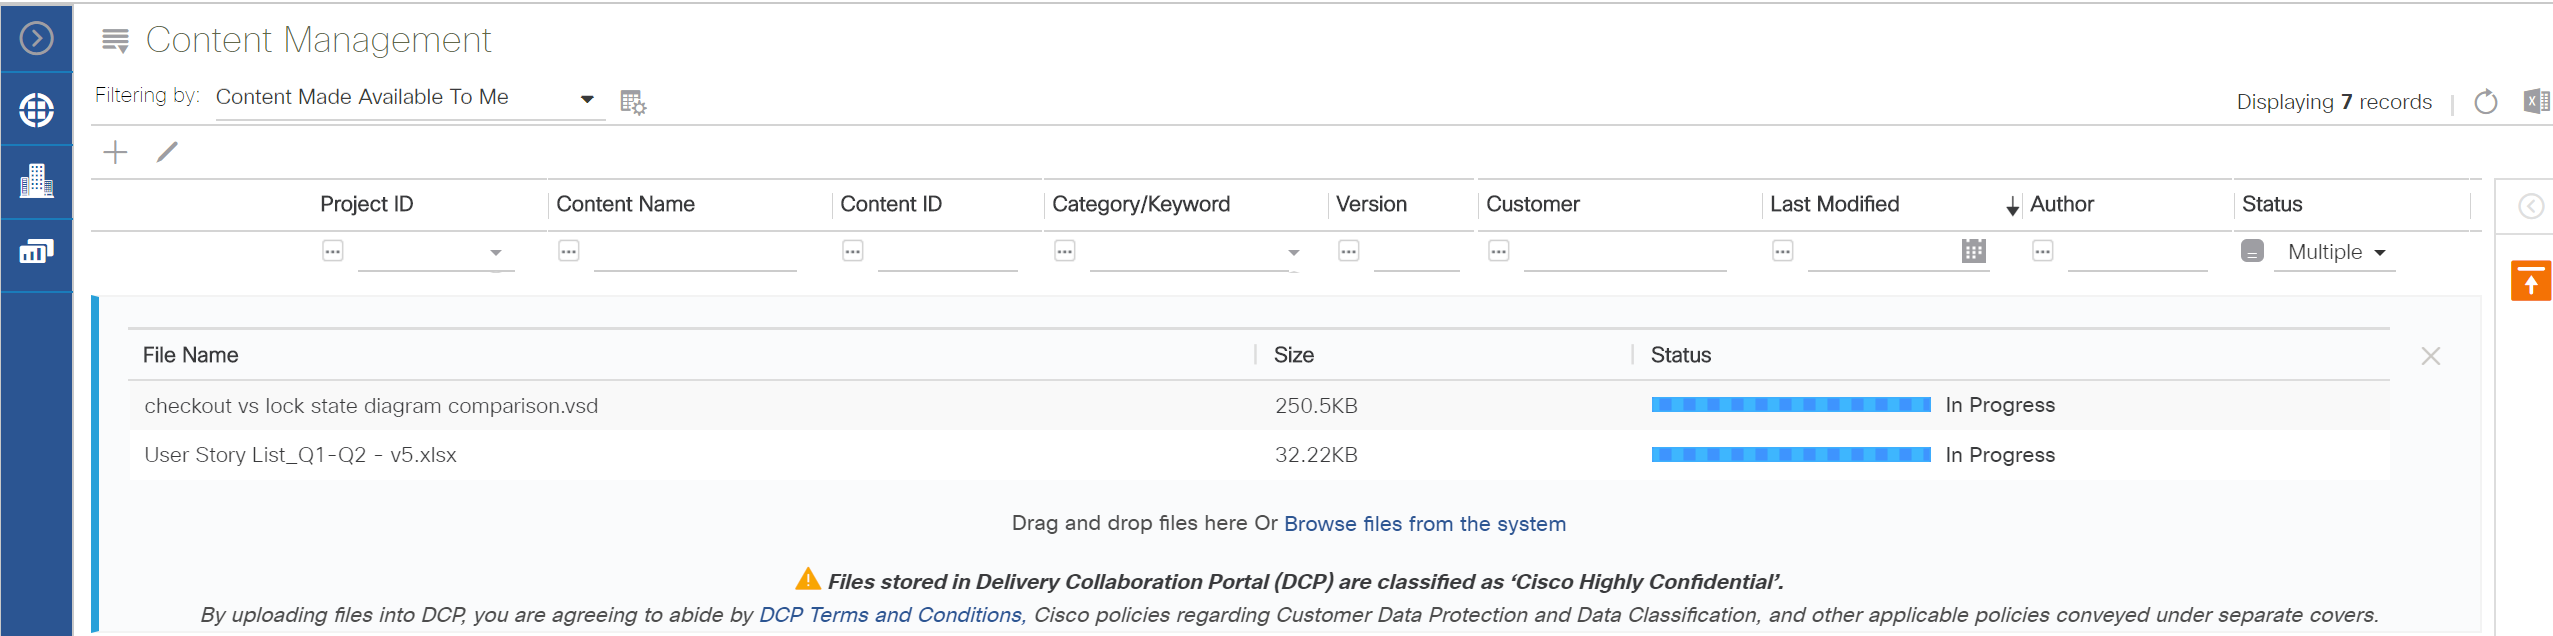
You will be able to continue performing tasks on other documents during the upload. At any time you can come back and pause your cursor over the 'upload indicator'  in the action pane to see how the upload is progressing. Once the upload is complete, you will get a success notification.
Default meta-data tagging will be applied to the uploaded documents:
- The title will set to the the file name.
- Content-category will be set to 'Deliverable'.
- Status will equal to 'Pre-Draft'.
- Version number will be set to '0.1'.
In the next articles we explain how this tagging can be updated to your needs by editing the properties.
As mentioned in a previous article, all documents that you upload, will have to be tagged to a project for quality and traceability purposes.
If only 1 project has been enabled for you to upload documents, that project will automatically be tagged to the documents you upload.
If you have been enabled to more than 1 project for document upload, no project will be pre-selected and you will have to edit the properties to select the right project after the document is uploaded. You will be able to choose from the projects that have been enabled to you for document upload.
Alternatively you can also use the Left Pane Filter to pre-tag documents being uploaded with a PID. When a PID is selected from the Left Pane Filter prior uploading the document(s) and you have been enabled for document upload to that selected PID, then the document(s) being uploaded will be tagged with that project.
After your documents are uploaded, you might have to refresh your table by clicking on the 'refresh'  icon on the top-right corner above the table grid. You also want to make sure that the filter combination of preset/custom table configurations, Left Pane Filter and column filters allow to show your uploaded documents per the default tagging that is applied as explained above.
Note: If you have defined workviews and wish to work in the context of a workview, select the workview from the Left Pane Filter.
If you have a folder structure created under the workview, navigate to the appropriate folder. Open the drop-zone and upload your documents directly in the selected folder/workview.
Uploading a document under a workview is optional. How to get access to workviews or how to create your own workviews is explained in later articles in this user guide.
Related articles:
Updating Essential Properties via In-line Editing
How to Apply a Workview
Managing Documents & Folders
Left Pane Filter
 Table of Content
 Previous ArticleNext Article