- Cisco Community
- Technology and Support
- Collaboration
- Collaboration Knowledge Base
- Troubleshooting BLF (Busy Lamp Field) Appearance Issues in Cisco Unified Attendant Console
- Subscribe to RSS Feed
- Mark as New
- Mark as Read
- Bookmark
- Subscribe
- Printer Friendly Page
- Report Inappropriate Content
- Subscribe to RSS Feed
- Mark as New
- Mark as Read
- Bookmark
- Subscribe
- Printer Friendly Page
- Report Inappropriate Content
11-10-2010 05:37 AM - edited 03-12-2019 09:33 AM
Introduction
This document helps in troubleshooting the BLF appearance issues in Cisco Unified Attendant Console. This is appplicable to CUBAC, CUDAC, and CUEAC 8.0.0.5
Pre-Requisite Configuration Check list:
- Before beginning the troubleshooting process, make sure layer 3 network connectivity exists between:
- The CUxAC server and the CUCM servers it communicates with
- The Active Directory DCs configured in CUCM and the CUCMs.
- The Attendant Console Operator PCs and the CUxAC server
Verify Data Execution Prevention (DEP) is set to disabled for Essential Windows Programs on the CUxAC Server. This applies to Windows 2003 and Windows 2008.
Verify User Account Control is disabled on the CUxAC Server (Windows 2008 only)
Make note of any firewalls between the servers and the client PC. If there are firewalls on the client PC or the server, make sure they are not configured to block any of the necessary ports.
CUxAC is not supported on VMWare at this time.
Verify the NIC binding order on the CUxAC server is correct and that the NIC with the IP Address CUxAC is configured with is listed first.
Verifying the User Directory Configuration
Perform these steps to verify the directory configuration in th CUCM.
- Log into the CUCM Administration webpage.
- Go to System > LDAP > LDAP Directory and select the LDAP Configuration that is being used.
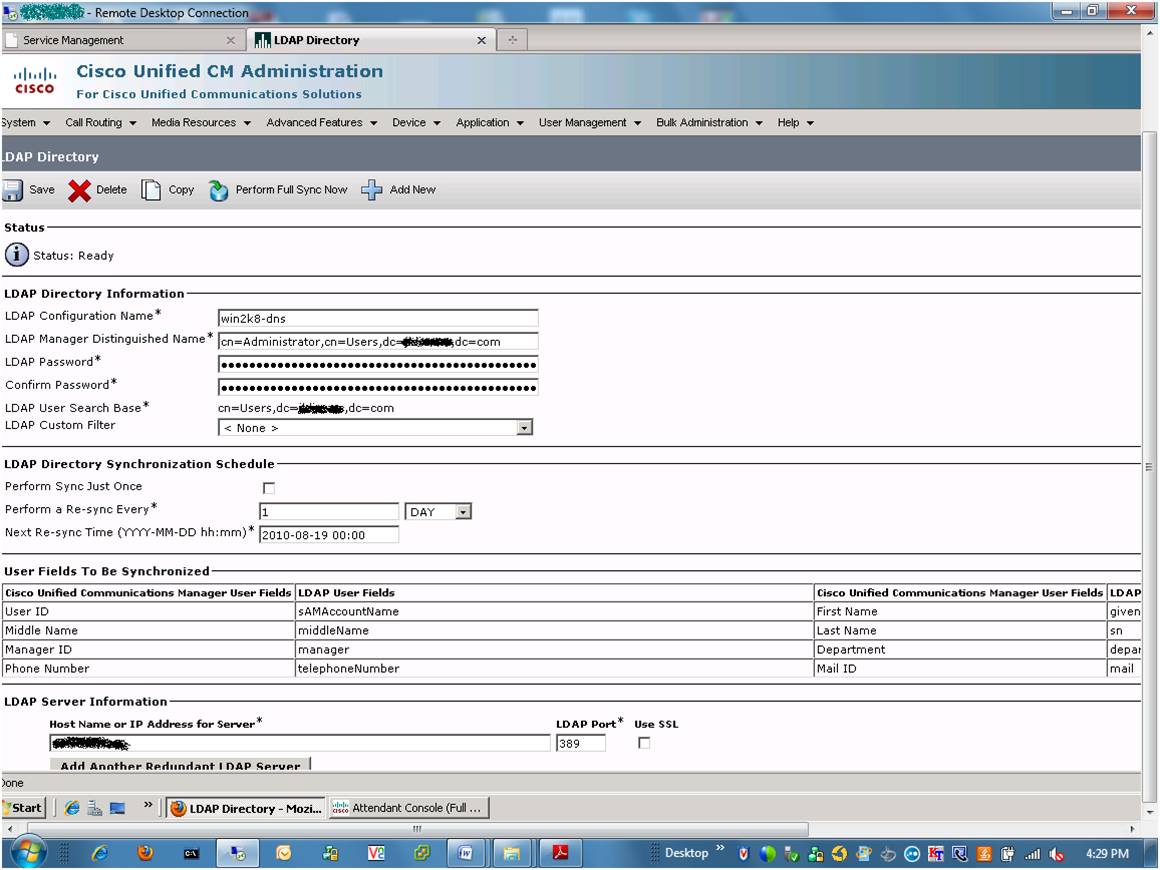
- Verify the hostname and IP address field here is correct. This needs to be the hostname or IP address of an active Domain Controller.
- Verify the port is configured as 389 or 3268. You can choose to perform the Full Sync Now to verify connectivity.
- Verify the OU, CN, and DC are all valid for the customer’s AD structure.
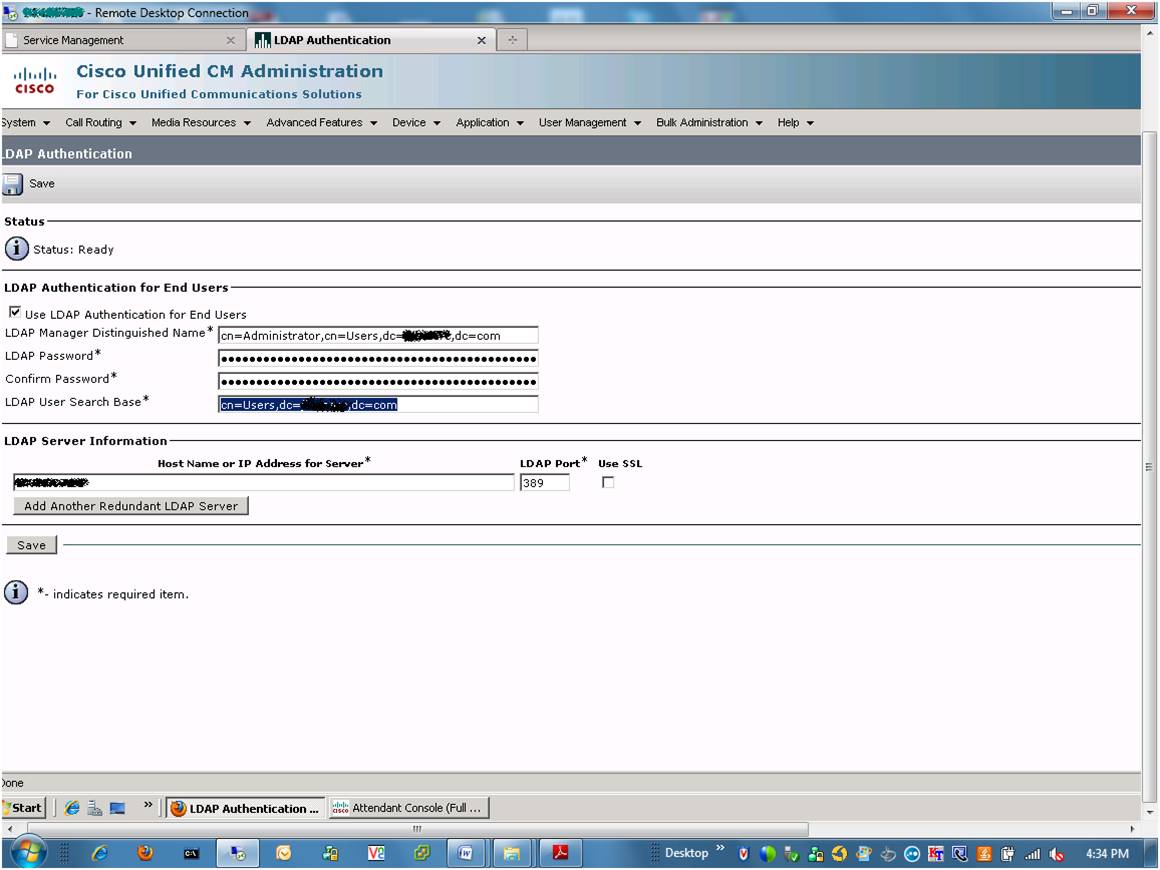
- Go to System > LDAP > LDAP Authentication to check if LDAP Authentication is being used.
- Verify the end user’s being viewed by the operator are found on the CUCM’s End User page. Go to User Management > End User to search for the same.
- Verify their login using the CCMUser page.
- If the user is not listed under End Users or cannot login via the CCMUser page, this CUCM issue needs to be resolved before proceeding.
Next, you need to verify the directory configuration on CUxAC. Perform these steps:
- From the WebAdmin page, go to System Configuration > Directory Synchronization. Verify contact synchronization is enabled and that a schedule is set. Auto Synchronization on startup is useful as well.

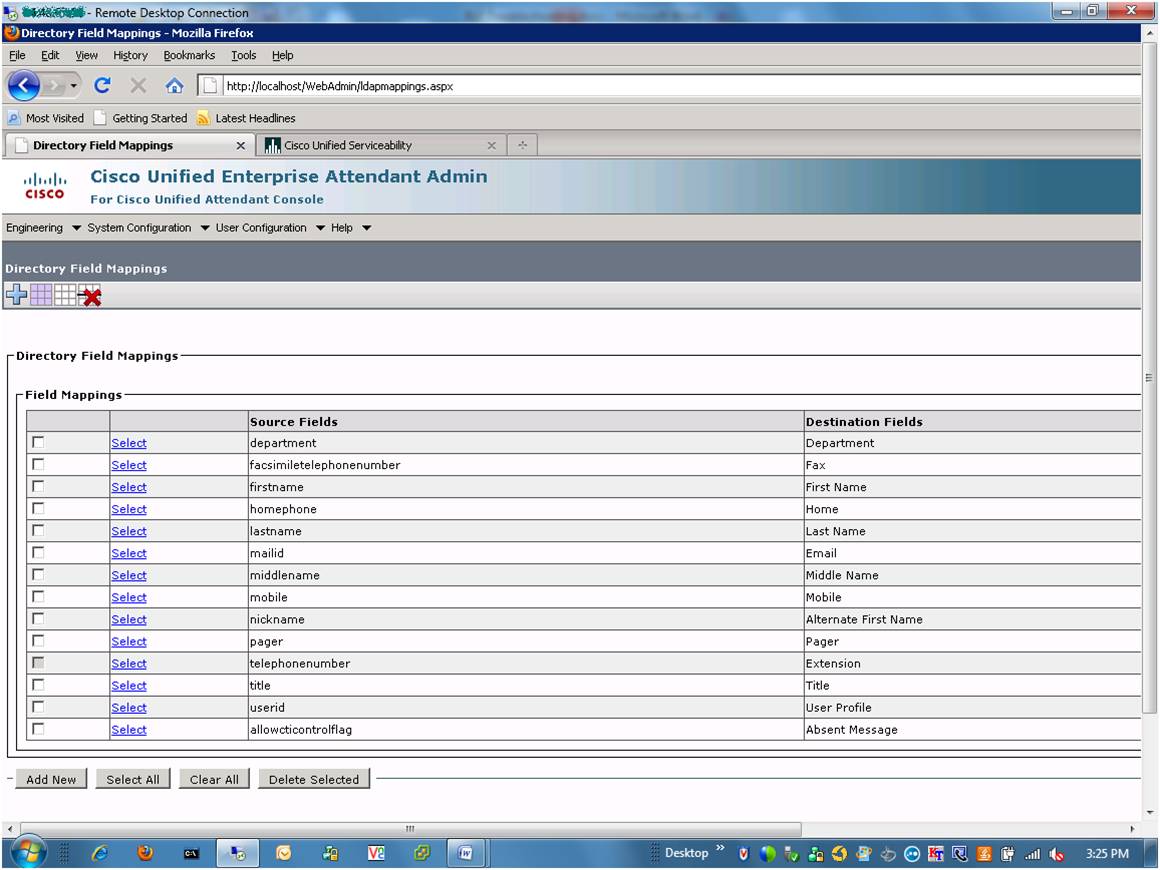
- Verify the Directory Field Mappings page has mappings for fields that are populated in CUCM. The name fields are important, and the telephone number to Extension mapping is mandatory.
- For a user and their device status to appear in the internal directory, their extension (from the telephoneNumber field on CUCM) needs to fall within the Minimum and Maximum internal device digit length. These values are found on the WebAdmin page by going to User Configuration > General Properties. The default maximum internal device digit length is 4.
Verifying the CUxAC End User Configuration
Verify the end user specified in CUxAC is associated with the super users group and that it has the following roles assigned:
- Standard CTI Allow Call Park Monitoring
- Standard CTI Allow Calling Number Modification
- Standard CTI Allow Control of All Devices
- Standard CTI Allow Reception of SRTP Key Material
- Standard CTI Enabled
Verify the steps to configure this user have been followed for the specific version of CUCM that CUxAC is integrating with. The required configuration is found in the CUxAC 8.0.0.5 Admin/Install Guide –
http://www.cisco.com/en/US/docs/voice_ip_comm/cucmac/arc/cubdacag8005.pdf
Confirm the CUxAC End User can authenticate using the CCMUser page (https://x.x.x.x/ccmuser where x.x.x.x is the IP address of the CUCM). This validates whether the password in CUCM or AD is correct.
Go to Windows Start > Settings > Control Panel > Phone and Modem Options. On the Advanced tab, select the installed Cisco TSP. Click Configure and then select the User tab. Verify the user configuration in the Cisco TSP is populated with this user.
Device and Employee End User Configuration
Perform these steps for Device and Employee End User Configuration:
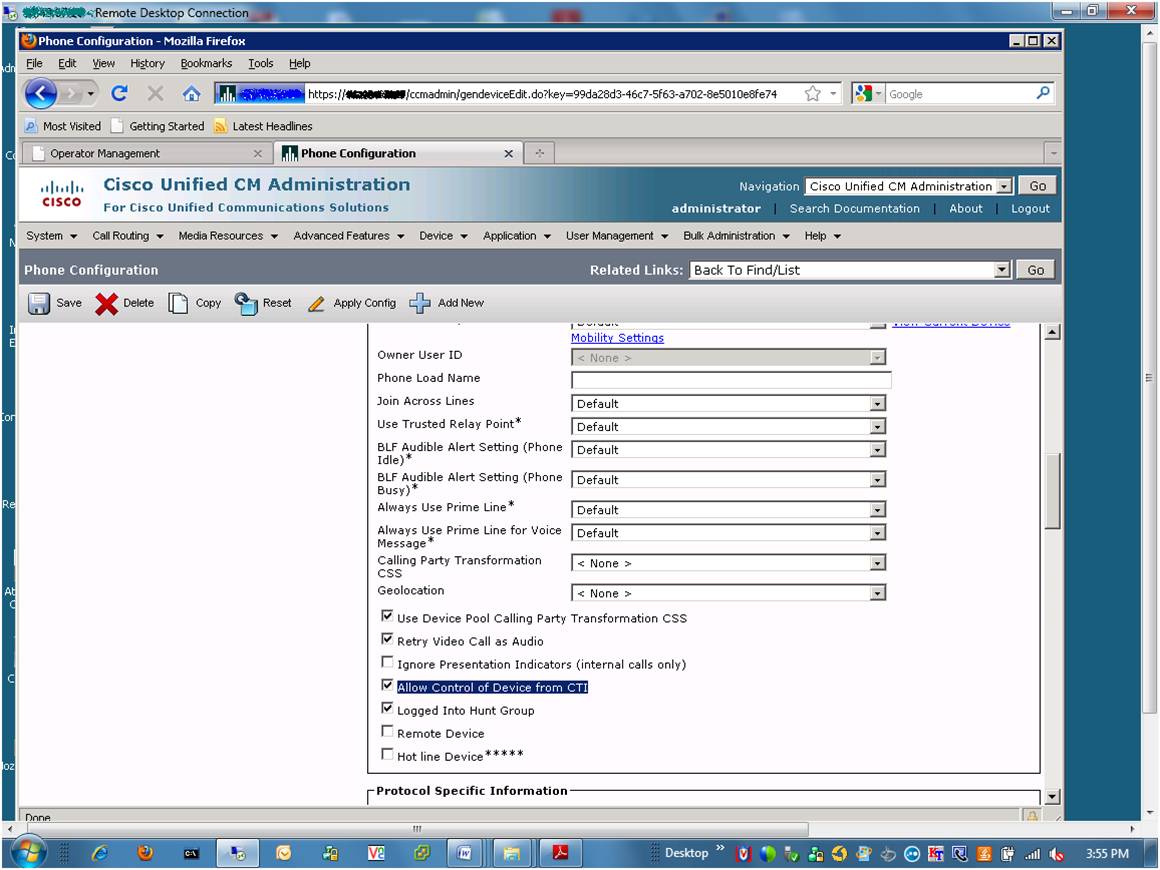
- In CUCM Administration, navigate to Device > Phone and select a user’s phone that is not showing BLF status on the AC Operator GUI.
Verify the “Allow Control of Device from CTI checkbox is checked.
- Select the line DN, scroll down to the directory number information, and verify that the Allow control of device from CTI is selected here as well.
- Confirm the MAC address of the phone is associated with this DN. You can try dis-associating and re-associate the phone to this DN as a troubleshooting step.
- Verify the line is not shared, as shared lines are not supported.
- CUxAC uses the telephone number field on CUCM to populate the extension field within the CUxAC directory. Find the affected user on CUCM by searching the End User directory and verify that the telephone number field is being populated with a valid DN.

Checking the Database Access
Check the database access by performing these steps:
- On the CUxAC admin page, go to Engineering > Database Management. Click Test Connection here to make sure the DB is up and running.
- Next, you need to make sure the operator PC can access and authenticate to the database. Perform these steps:
- Make sure you can ping the CUEAC server by hostname, because the SQL connection uses the hostname rather than the IP address. If it cannot, add the hostname and IP address of the CUxAC server to the local host file on the Operator Console PC.
- Make sure you can telnet to the server on TCP port 1433.
- Watch the bottom of the operator console during the login process, make sure “Database Not Connected” changes to Database Connected
- From the Windows Control Panel, open Administrative Tools and select Data Sources (ODBC).
- Test an ODBC connection to make sure the DB is running and accessible from the operator PC. The default user name is sa with a password of Z1ppyf0rever
Operator Console Configuration
- Presence takes precedence and is automatically configured by default on the operator console. The phone will always as On Hook if Presence is not integrated, but has not been disabled on the console. If you are not using the Presence Plug-In, make sure it is disabled. This is done on the operator console by going to Options > Preferences and selecting the Presence tab. Enable Cisco Presence Information should be unchecked.
- Verify the Cisco Unified Attendant BLF Plug-In shows Active in the Service Management page in WebAdmin. The BLF column will be blank on the operator console if this service is not in a running state.
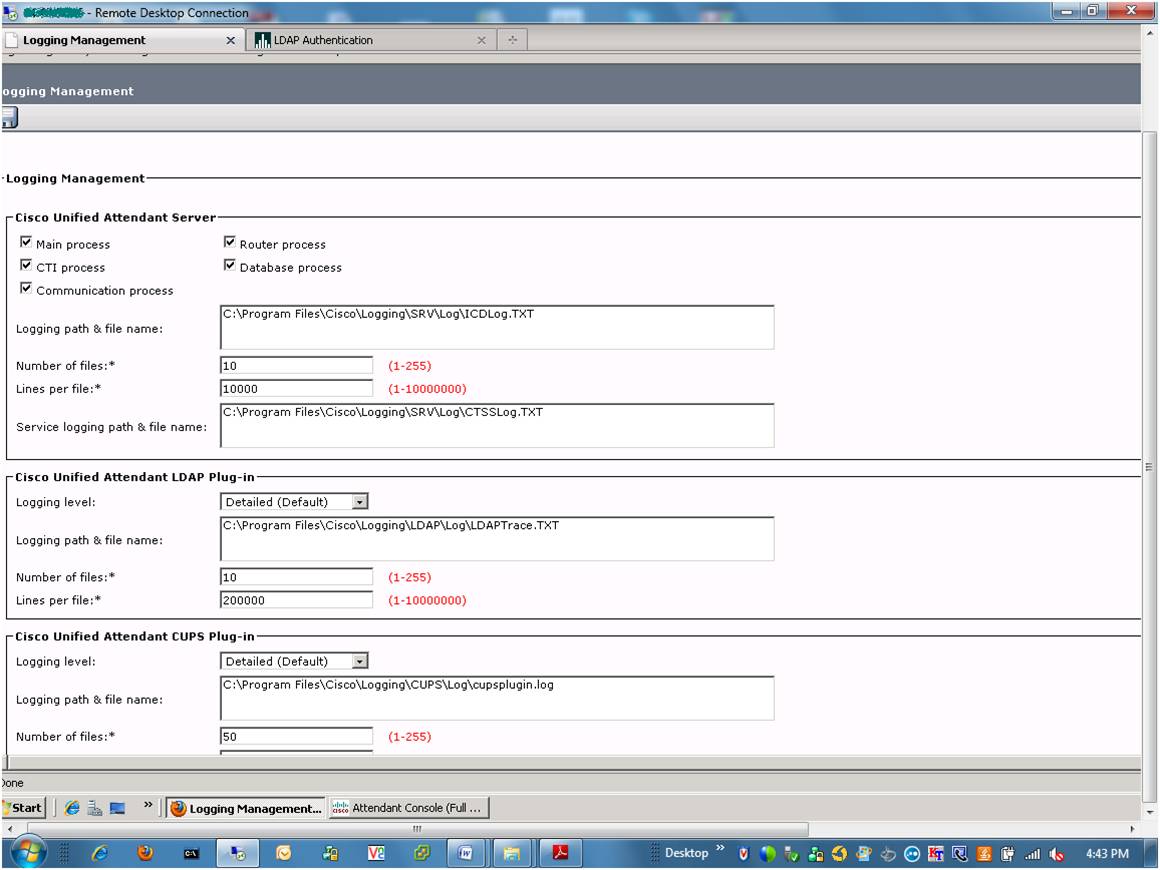
Trace Settings and Log Collection for BLF
- On the WebAdmin page, navigate to Engineering > Logging Management. Make sure all 5 processes are checked for the Cisco Unified Attendant Server section.
- TSP Logging also needs to be enabled. Perform these steps:
- Go to Windows > Start > Settings > Control Panel.
- Open Phone and Modems and click the Advanced tab to find the installed Cisco TSP.
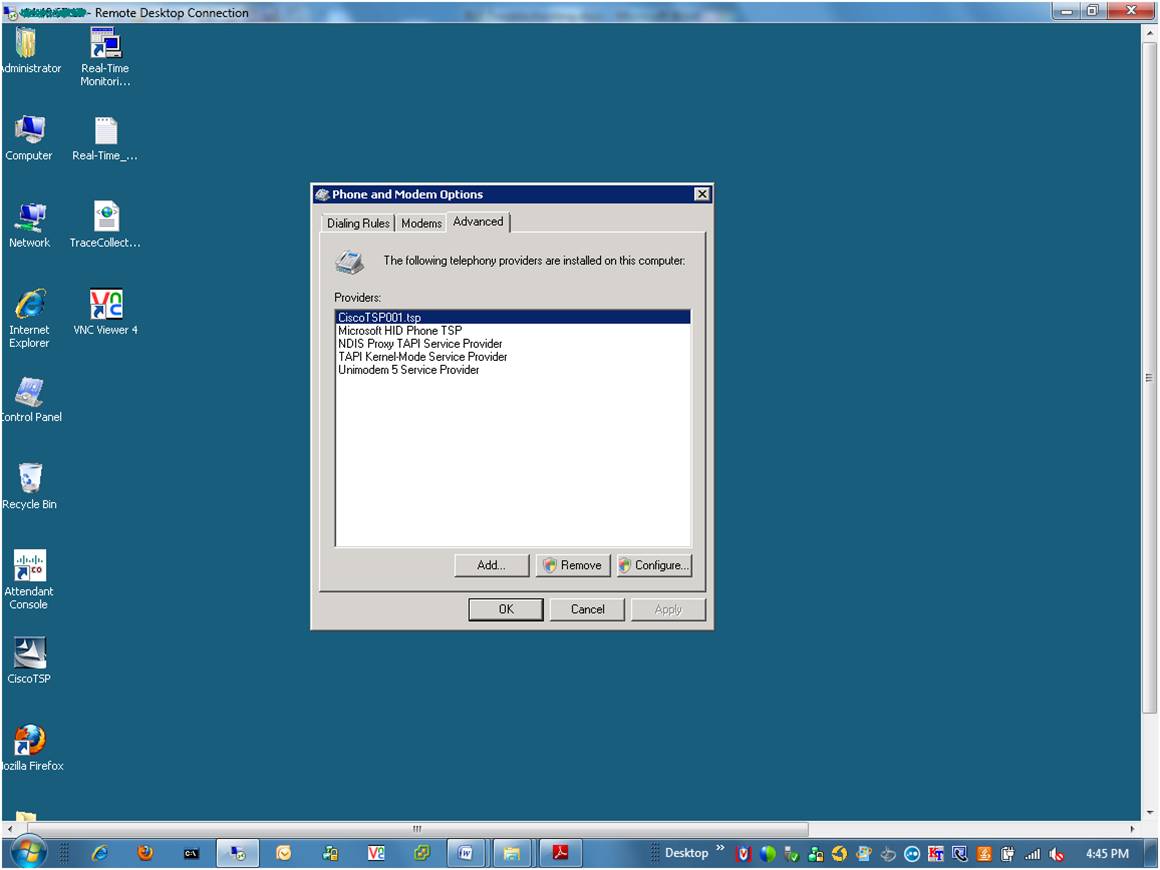
- Click the Configure button and then select the Trace tab.
- Set the tracing as per the screenshot below, making sure TSP Trace, CTI Trace, and TSPI trace are all enabled.

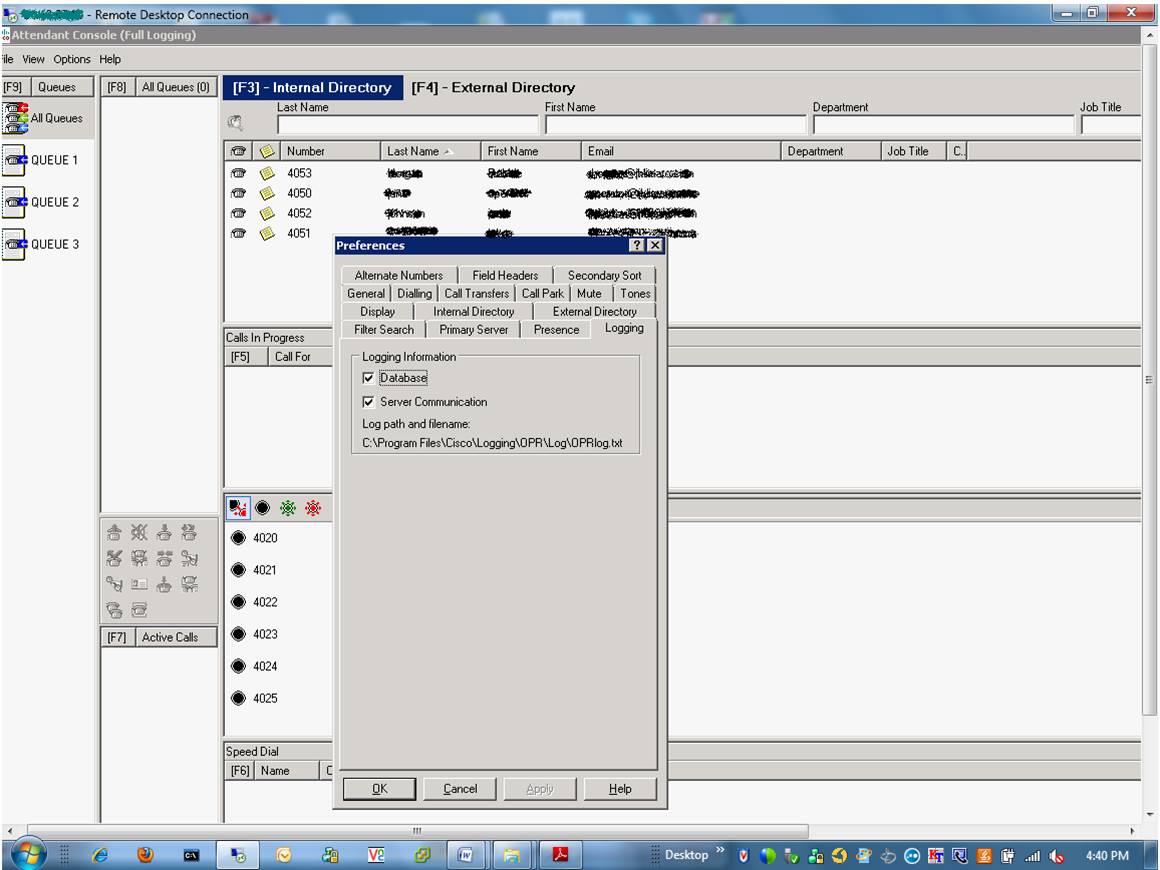
- Enable tracing on the Operator Console. This is found on the Logging Tab in the Preferences box. Select the Database and Server Communication checkboxes here and click OK.
- Now, you need to get a clear picture of the problem by reproducing the issue with synchronized services. Perform these steps:
- On the CUCM Administration page, go to the System > LDAP Directory page and click the Perform Full Sync Now . Allow at least 5 minutes for the LDAP sync to refresh the CUCM DB.
- Stop and then Start the LDAP Plug-in and BLF Plug-in services from the WebAdmin Engineering > Service Management page > Cisco Unified Attendant Server.
- On the CUxAC server, collect the files from:
C:\Program Files\Cisco\Logging
C:\Temp\TSP*.log
From the Attendant Console Operator PC, collect:
C:\Program Files\Cisco\Logging\OPR\Log
- Mark as Read
- Mark as New
- Bookmark
- Permalink
- Report Inappropriate Content
I know this is an old post but its still very useful. Also make sure you enter the phone MAC address in CUCM with all uppercase letters.
Find answers to your questions by entering keywords or phrases in the Search bar above. New here? Use these resources to familiarize yourself with the community: