- Cisco Community
- Technology and Support
- Data Center and Cloud
- Data Center and Cloud Knowledge Base
- APIC CIMC Upgrade Procedure via CIMC Virtual Media
- Subscribe to RSS Feed
- Mark as New
- Mark as Read
- Bookmark
- Subscribe
- Printer Friendly Page
- Report Inappropriate Content
- Subscribe to RSS Feed
- Mark as New
- Mark as Read
- Bookmark
- Subscribe
- Printer Friendly Page
- Report Inappropriate Content
07-28-2020 10:45 AM - edited 08-26-2020 11:55 PM
Introduction
Let me start by telling you that there is already a very nice document in the Cisco Community Forums which describes the procedure to upgrade the APIC CIMC. In case you came across this document before looking into the mentioned one, here is the link for your reference.
https://community.cisco.com/t5/data-center-documents/apic-cimc-upgrade-procedure/ta-p/3216002
The purpose of the present document is not to re-invent the wheel. As mentioned, the above document makes a perfectly good job explaining the steps to upgrade the APIC CIMC.
I'm looking to share my experience with what I think can be found beneficial for the Cisco Community and presents a slightly different approach than the described in the other document. Let me show you next.
Scenario
In my particular case, I am:
- Upgrading from an APIC-SERVER-L3 / C220 M5 - CIMC version from 4.0(1a) to CIMC version 4.1(1g)
- The latter is the latest Cisco UCS Host Upgrade Utility (HUU) at the time of the writing
- The exact image file name is ucs-c220m5-huu-4.1.1g.iso and can be found here.
Pre-requisites
The main point is that the HUU .iso file has been downloaded from Cisco.com and has been stored in a Web Server that is accessible from the APIC over the network using the HTTP protocol.
- The benefit is that the HUU .iso file can be loaded from a local Web Server as opposed that loaded from your laptop over the Internet.
- About the Web Server, this can be any Web Server running on top of Linux or Windows... The scope of this document doesn't cover how to setup a Web Server but this can be easily find in tons fo tutorials available all over the Internet. The most common WebServers for Linux are Apache2 (httpd) and nginx.
Note that additionally to HTTP, other protocols that can be used on CIMC to pull the ISO file are NFS and CIFS. Although I have not personally attempt to use those for this process, I assume they work perfectly fine as well.
The method described on the other document refers to the use of CIMC's vKVM Console Virtual Media > Map CD/DVD to load the HUU .iso file from your computer. This means, if you're working from home and connect to the Data Center network via VPN (common these days...) the process may get compromised by any sporadic instability caused on the Internet service and of course the constrain of the internet speed.
The process itself takes around 35-45 minutes. Depending on the bandwidth and delay from CIMC to the Web Server. The closer these are the better.
This takes for granted time you have already verified the HUU .iso file is correctly reachable over HTTP from CIMC.
IMPORTANT
The APIC node to be upgraded will of course be out of the cluster. This is, if you have an ACI production environment, make sure that you have majority on the cluster.
Always keep backups and follow best practices before attempting to upgrade.
APIC CIMC Upgrade Procedure via CIMC Virtual Media
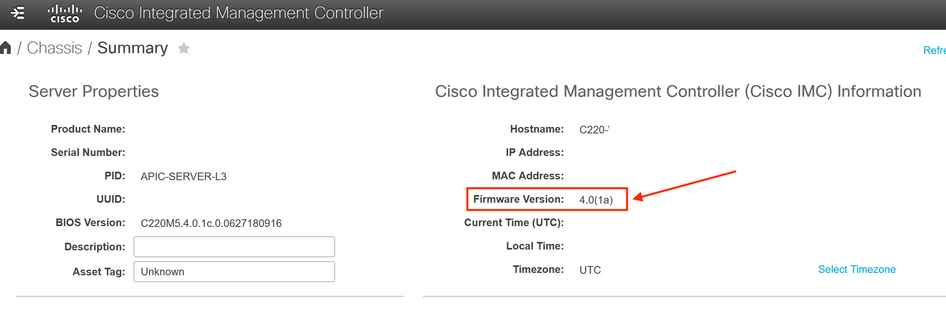
0. Verify the current CIMC version.
You can see the current CIMC version in the main screen once you log in via Web GUI to CIMC.
You can also see the version via CLI by login to CIMC via SSH.
C220-XXXXXXXXABC# show version
Firmware Version
--------------------
4.0(1a)
C220-XXXXXXXXABC#
1. SSH into the CIMC CLI and configure the access to the HUU .iso file via HTTP.
You will notice that in this example:
- 192.168.23.112 is the IP address of the CIMC.
- 192.168.10.84 is the IP address of the WebServer storing the HUU .iso file
The main command here is:
system# scope vmedia
system /vmedia # map-www volume_name http://http_server_ip_and_path iso_file_name
For example:
login as: admin
admin@192.168.23.112's password:

C220-XXXXXXXXABC# scope vmedia
C220-XXXXXXXXABC /vmedia # map-www huu http://192.168.10.84/files ucs-c220m5-huu-4.1.1g.iso
Server username:

C220-XXXXXXXXABC /vmedia # show mappings
Volume           Map-Status               Drive-Type Remote-Share                Remote-File              Mount-Type
---------------- ------------------------ ---------- --------------------------  ------------------------ --------
huu              OK                       CD         http://192.168.10.84/files  ucs-c220m5-huu-4.1.1g... www

C220-XXXXXXXXABC /vmedia # show mappings detail
Volume huu:
    Map-Status: OK
    Drive-Type: CD
    Remote-Share: http://192.168.10.84/files
    Remote-File: ucs-c220m5-huu-4.1.1g.iso
    Mount-Type: www
    Mount-Options: noauto,username=,password=
C220-XXXXXXXXABC /vmedia #
If you get a different result than "Map-Status: OK" while executing show mappings detail, you need check:
1. Is CIMC able to connect with port 80 on the WebServer (no Firewalls blocking port 80)?
2. Is the WebServer service running on the Host?
3. Are the file permissions enough to be able to access the file?
You will get an error similar to the following in case you are facing one or more of the mentioned issues.
C220-XXXXXXXXABC /vmedia #  show mappings detail
Volume huu:
    Map-Status: "ERROR: mount.httpfs2: couldn't connect socket: 111 Connection refused. "
    Drive-Type: CD
    Remote-Share: http://192.168.10.84/files
    Remote-File: ucs-c220m5-huu-4.1.1g.iso
    Mount-Type: www
    Mount-Options: noauto,
C220-WZP24181WNZ /vmedia #
2. Reboot the APIC.
You can SSH into the APIC or get Console access via CIMC vKVM to it.
Run the 'acidiag reboot' command and type y. Enter to proceed.
3. Boot from Cisco CIMC-Mapped vDVD
At this point you need to get Console Access via CIMC vKVM.
Click on Launch KVM on the upper-right part of CIMC's main screen to get access to it.
After rebooting the APIC and waiting approximately 2 minutes (this time my vary) CIMC will show you the initial screen.
Wait approximately another 2 minutes for the screen with the Cisco logo to appear.
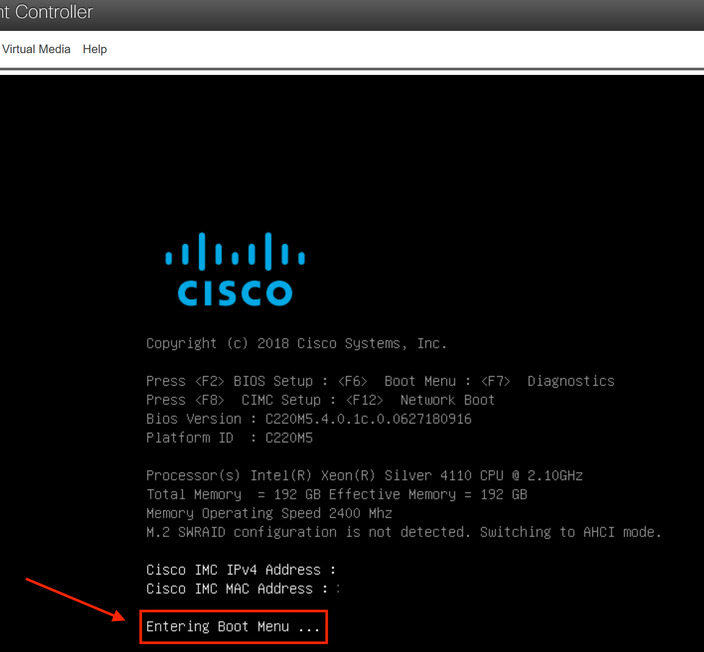
Press F6 here to get the boot menu.
If done right, you'll see the text Entering Boot Menu ... last.
Wait a few more seconds. The screen will present you with the boot order list.
Here you must select Cisco CIMC-Mapped vDVD option.
4. Upgrade using the HUU menu.
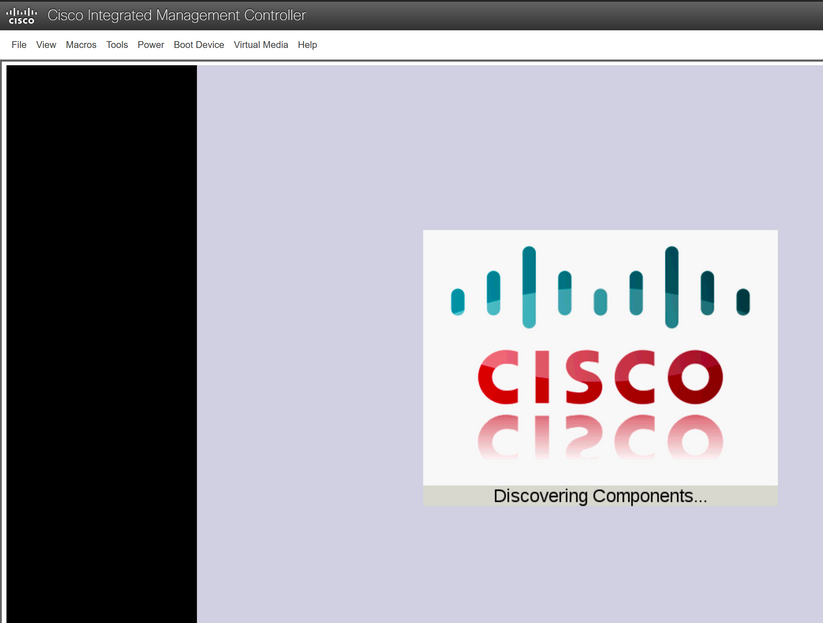
The first scree you will see after choosing the boot device is:
Wait a couple of minutes and you will see the agreement screen. To continue click I Agree.
Next screen:
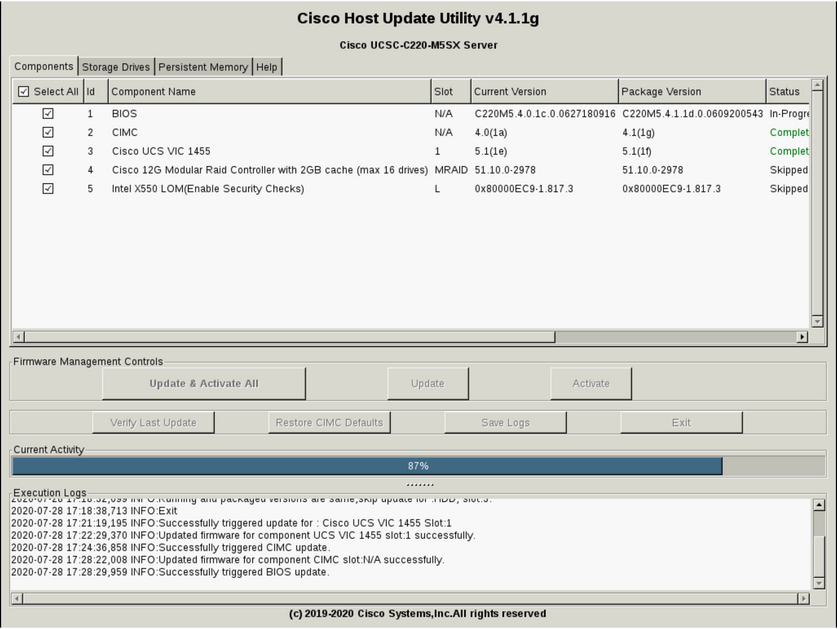
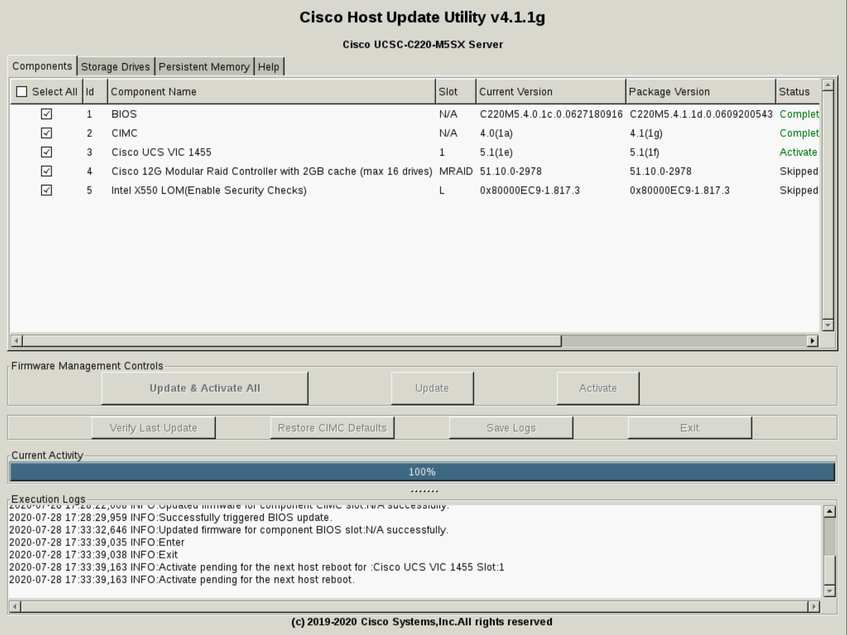
And finally here where you need to take action. Click on Update & Activate All.


 |
 |
After the process completes, give another 5-7 minutes (may vary) for CIMC to activate the new code and reload.
CIMC will be now upgraded!
Find answers to your questions by entering keywords or phrases in the Search bar above. New here? Use these resources to familiarize yourself with the community:
