Introduction
This document shows a step by step procedure to upgrade the firmware on UCS C-Series Rack Mounted Servers. This procedure is applicable only for standalone C-series servers. When upgrading the firmware of a C-Series Rack-Mount Server, it is important to keep the BIOS and CIMC at the same release level. These components are tested together for each release and a version mismatch may cause unpredictable system operation. The Cisco UCS C200 M2 blade server firmware upgrade procedure must be done during a maintenance window.
Prerequisites
Before upgrading the server firmware make sure to download correct firmware from Cisco website.
Download Home > Products > Unified Computing and Servers > Cisco UCS C-Series Rack-Mount Standalone Server Software.
Click on Cisco UCS C200 M2, download Unified Computing System (UCS) Server Firmware and download the file..
Important Note
When upgrading the firmware of a C-Series Rack-Mount Server, it is important to keep the BIOS and CIMC at the same release level. These components are tested together for each release and a version mismatch may cause unpredictable system operation. When you upgrade the BIOS, you must also upgrade the CIMC firmware to the same version or the server will not boot. Do not power down the server until the BIOS and CIMC firmware are matching or the server will not boot. It is strongly recommended that you do not attempt to upgrade by more than two release versions. For example, if your current version is Release 1.0, do not attempt to upgrade directly to Release 1.3. Instead, upgrade first to Release 1.2, then to Release 1.3.
Firmware Upgrade
The below procedure documents all the required steps to do the upgrade.
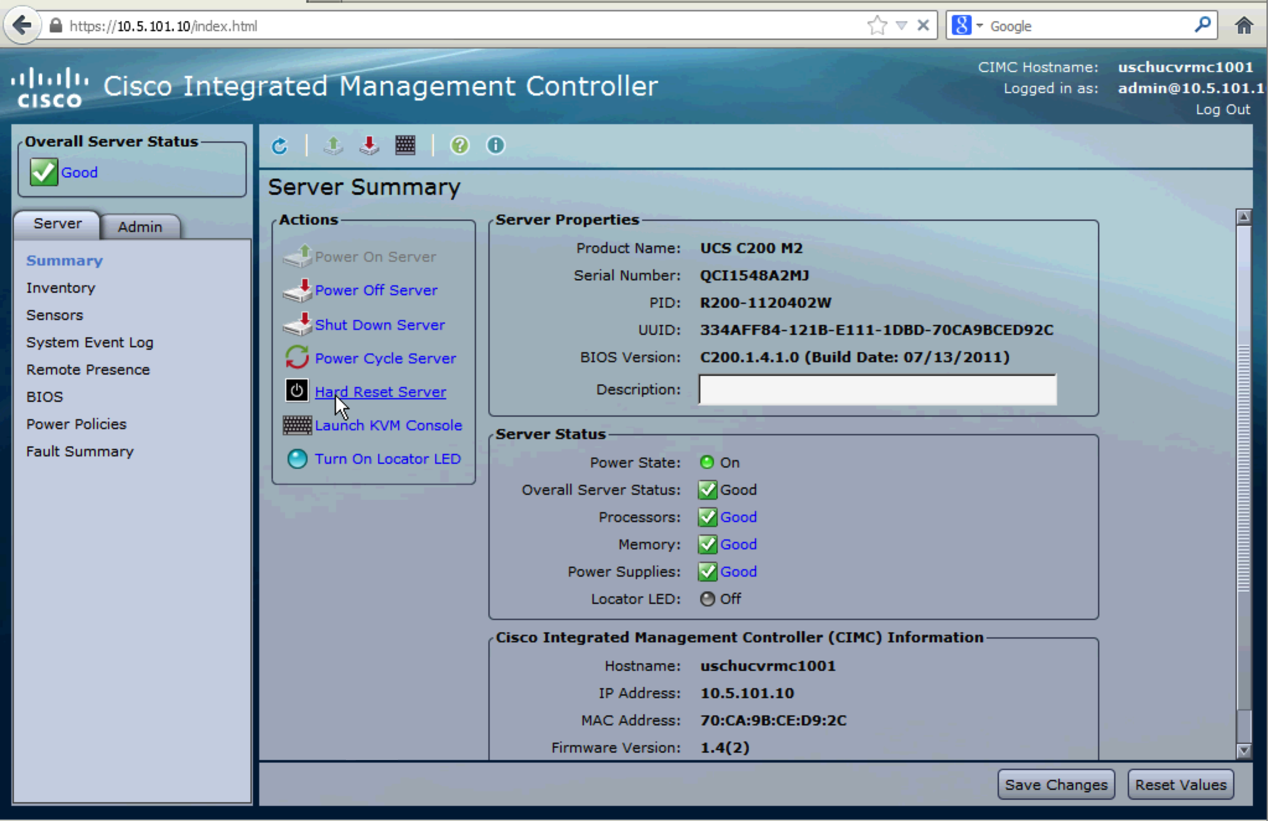
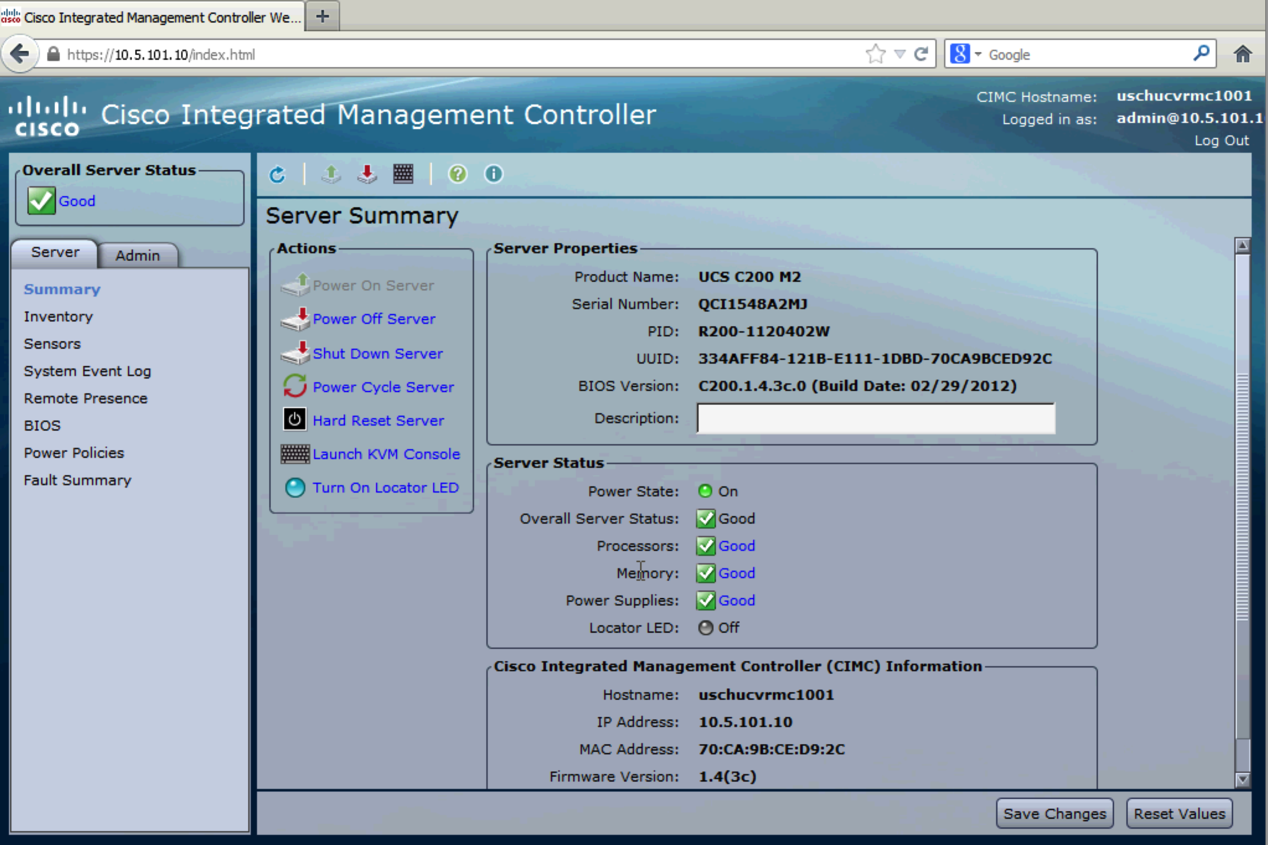
1. Open CIMC Web UI and verify the firmware version.
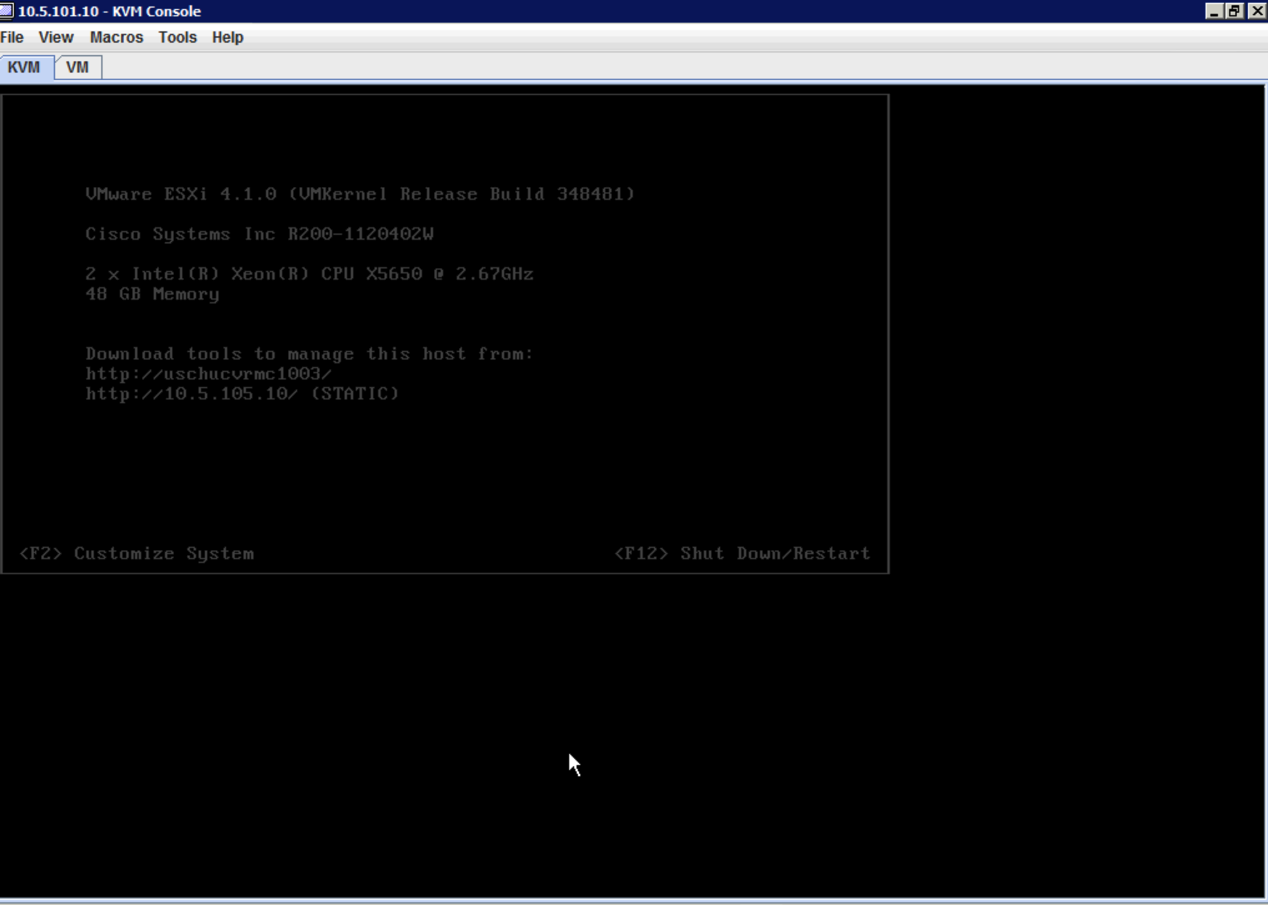
2. Open up the KVM console of ESXi server and verify the IP Address.
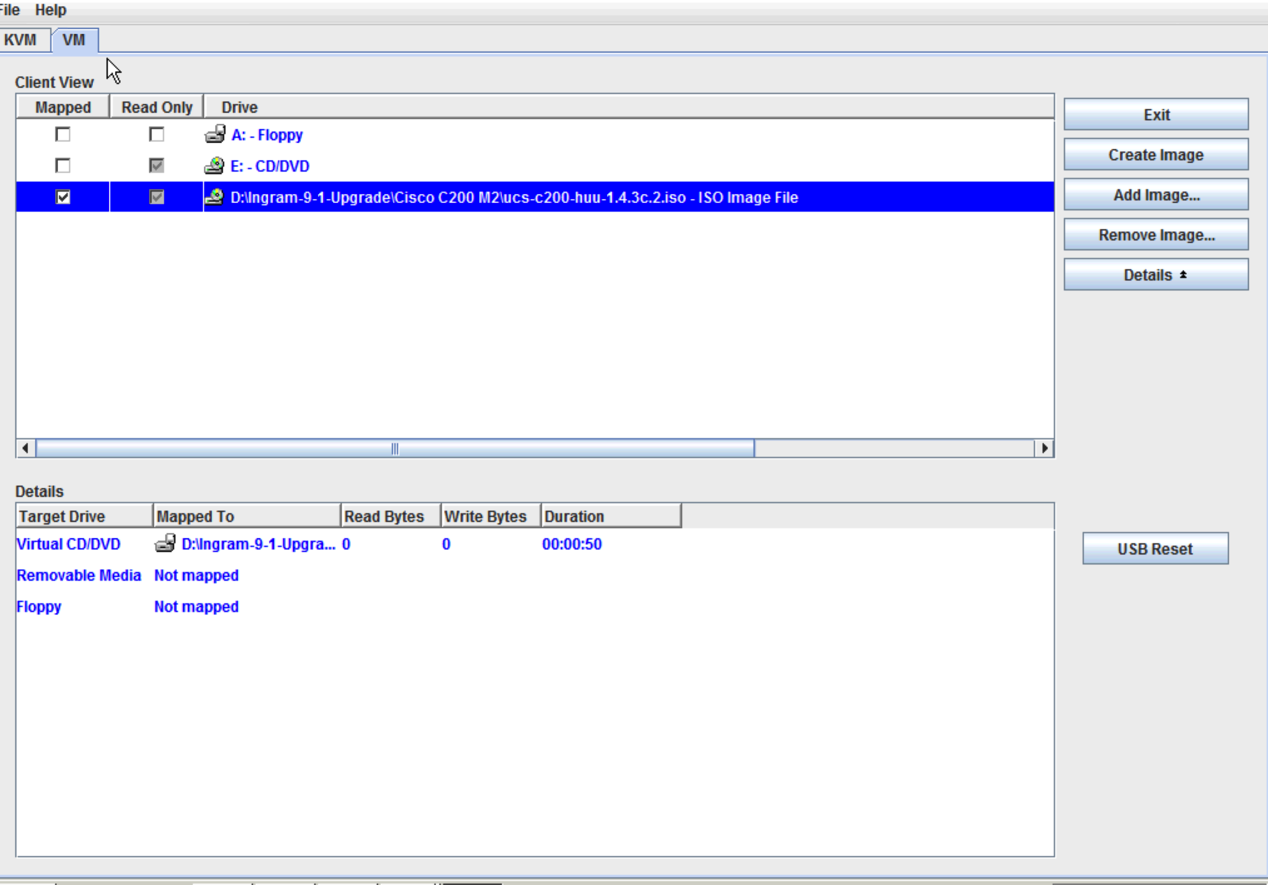
3. Mount the C-Series 1.4(3c) firmware iso image by adding image button on VM Tab.
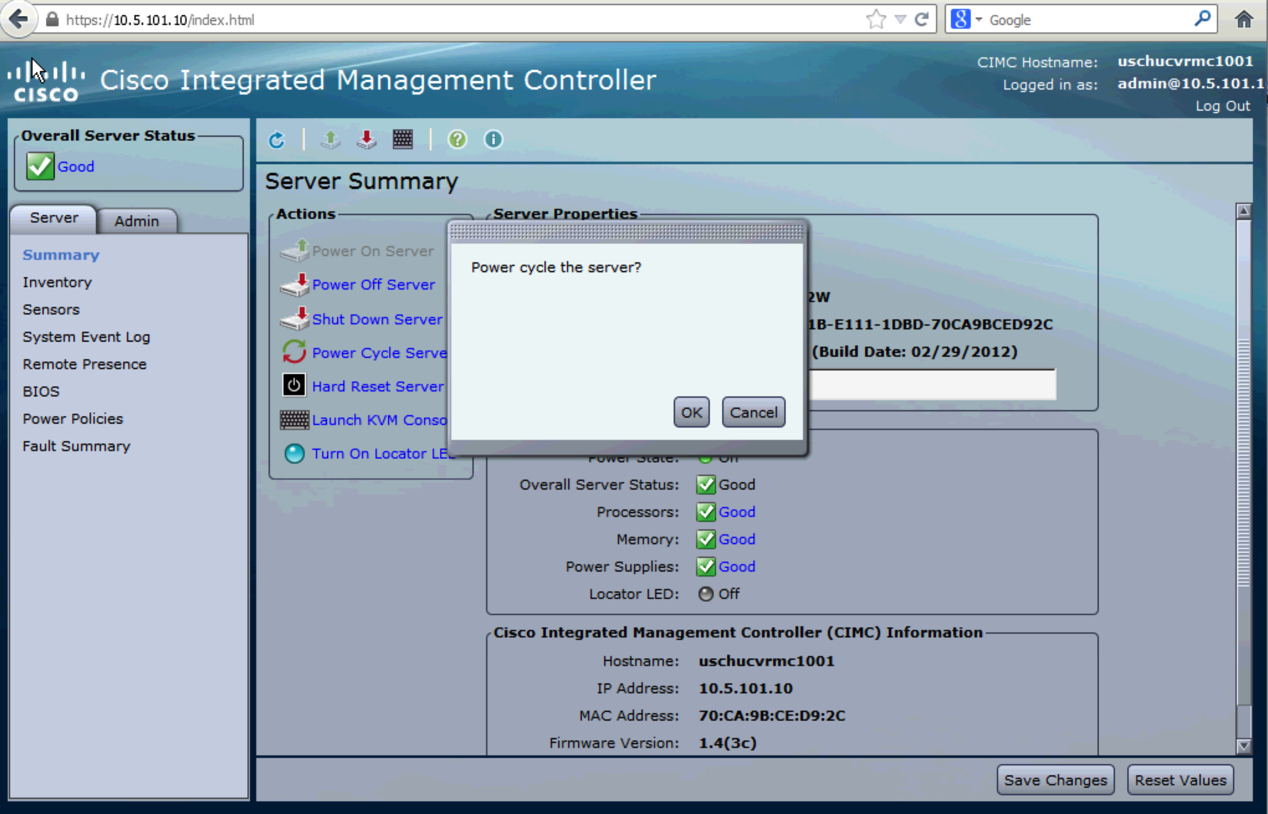
4. Reboot the ESXi server to boot from iso image.
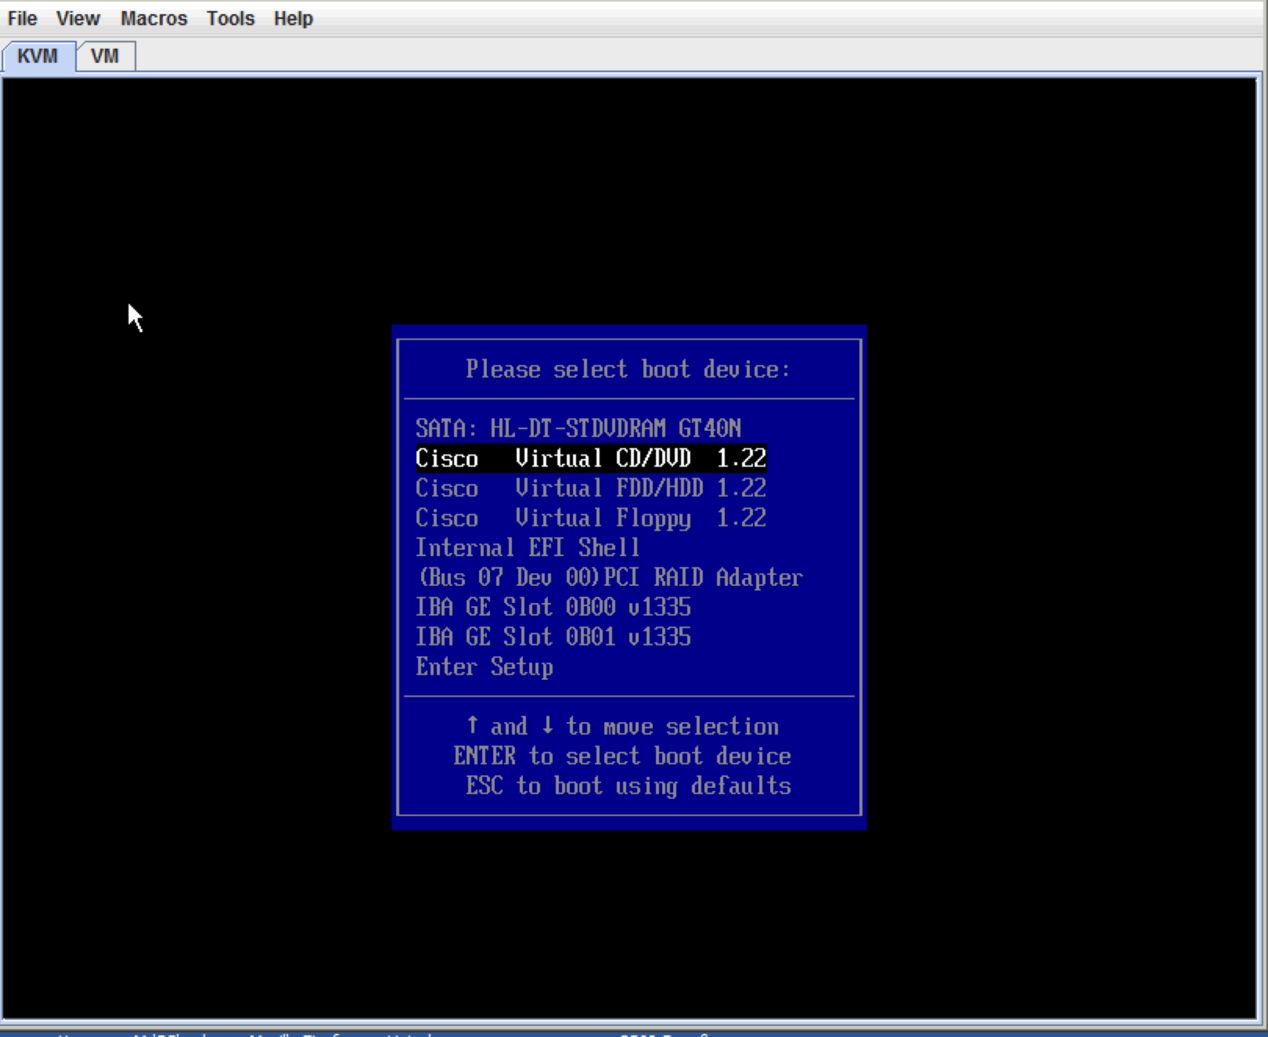
5. Press the F6 key to reboot the server from iso image and select the Cisco Virtual drive option.
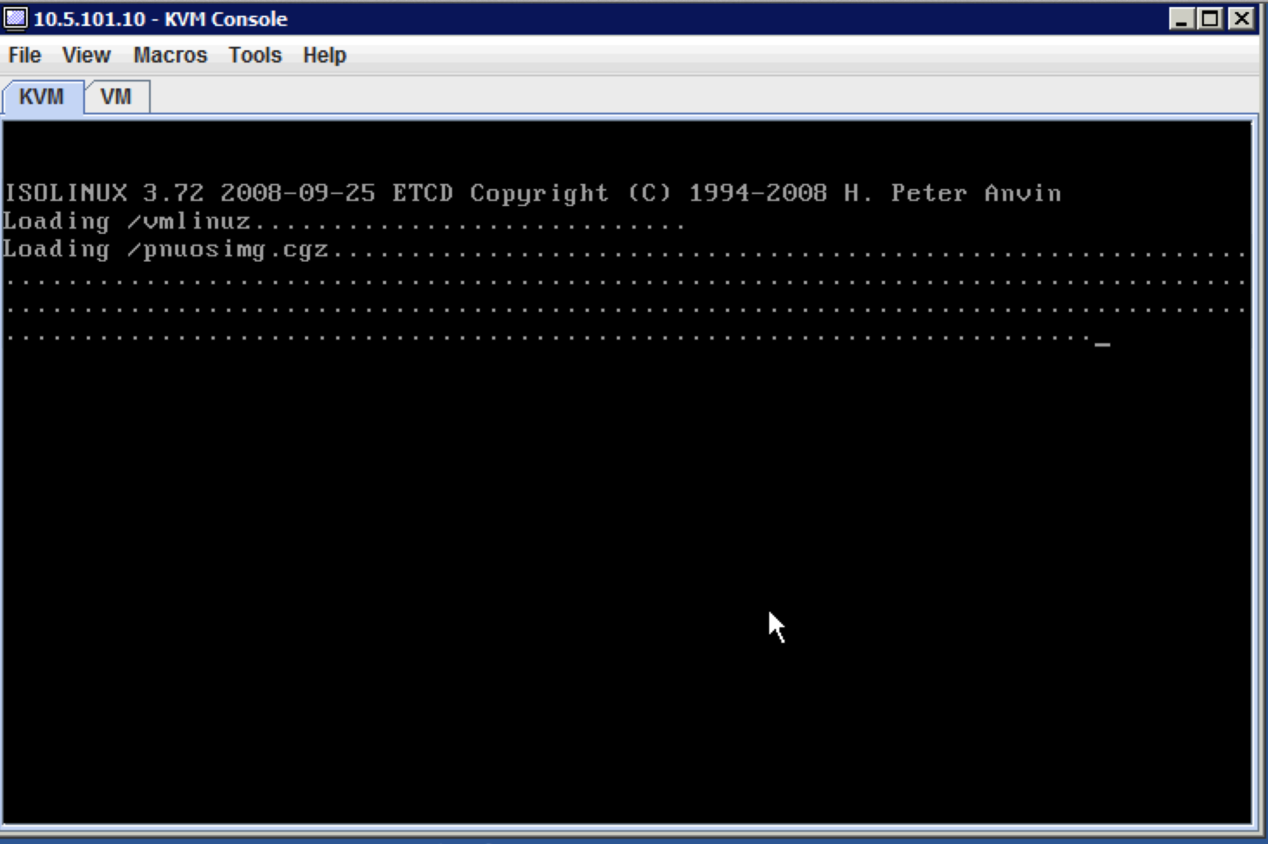
6. The server will be boot from iso image.
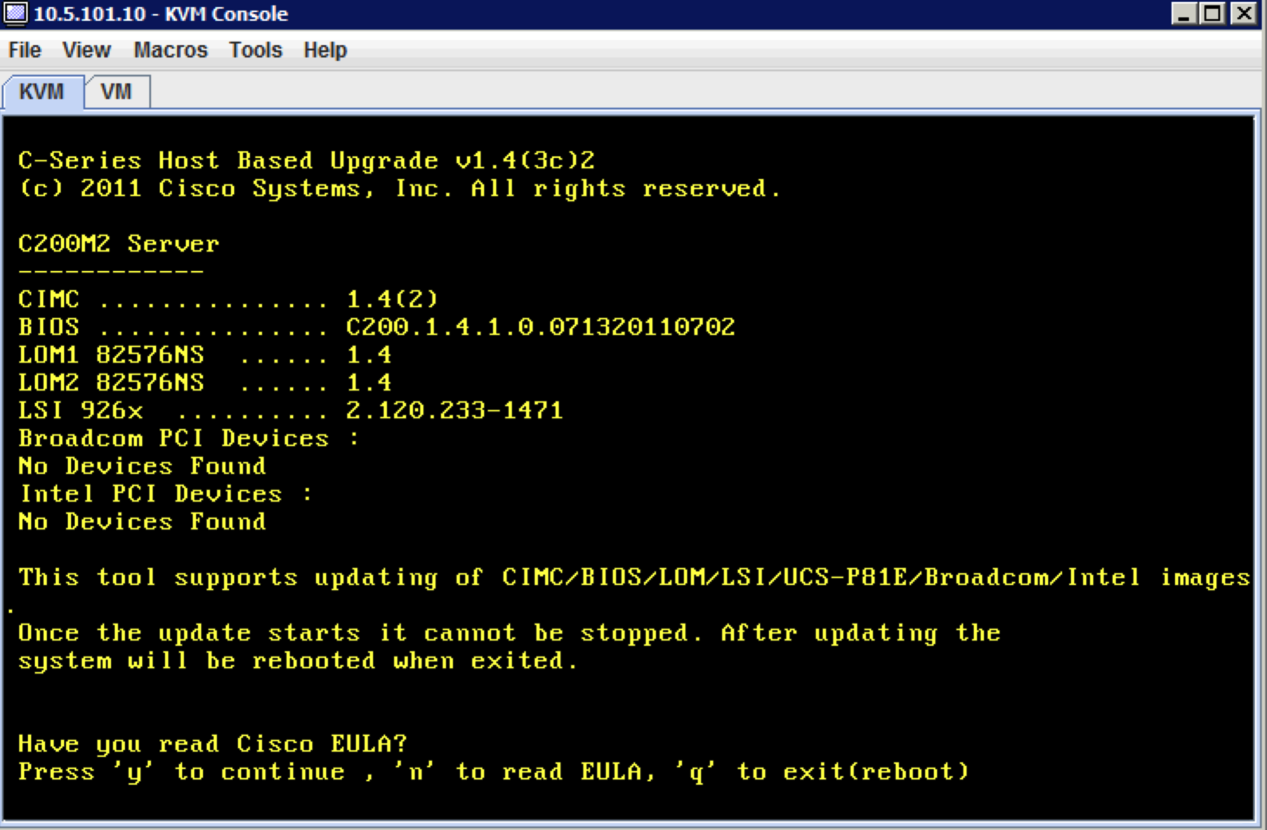
7. Server will detect all the existing firmware version and will ask you to accept the ELA.
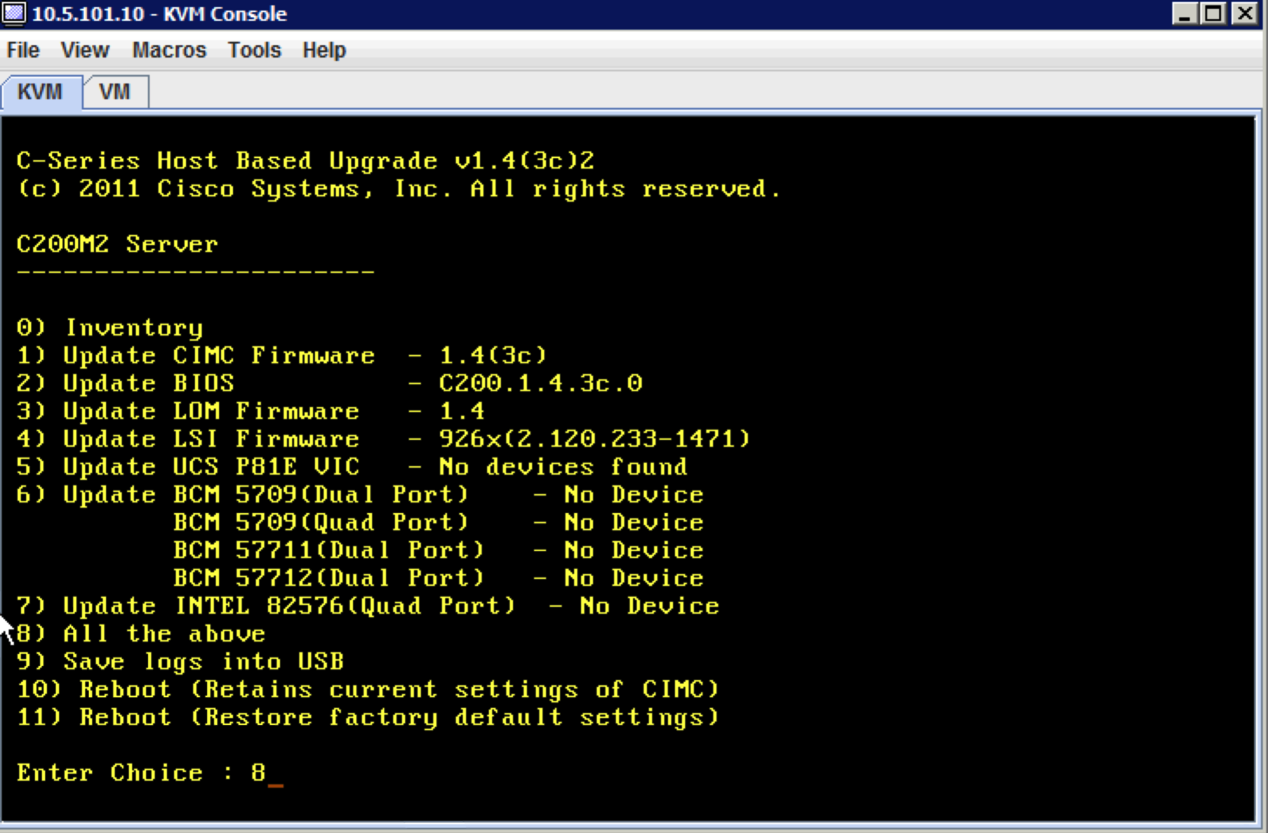
8. Select the option 8 to upgrade all the components in C200 Server.
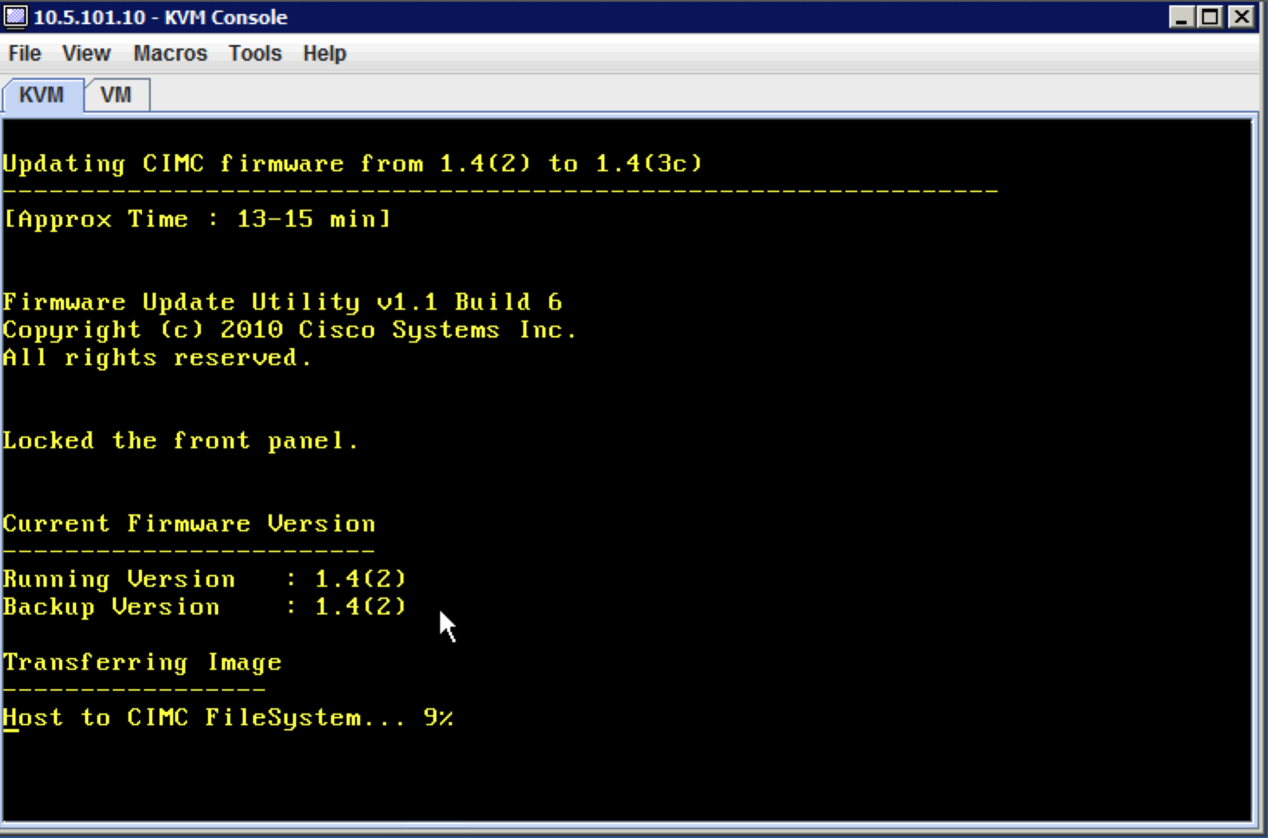
9. The firmware upgrade will start the progress
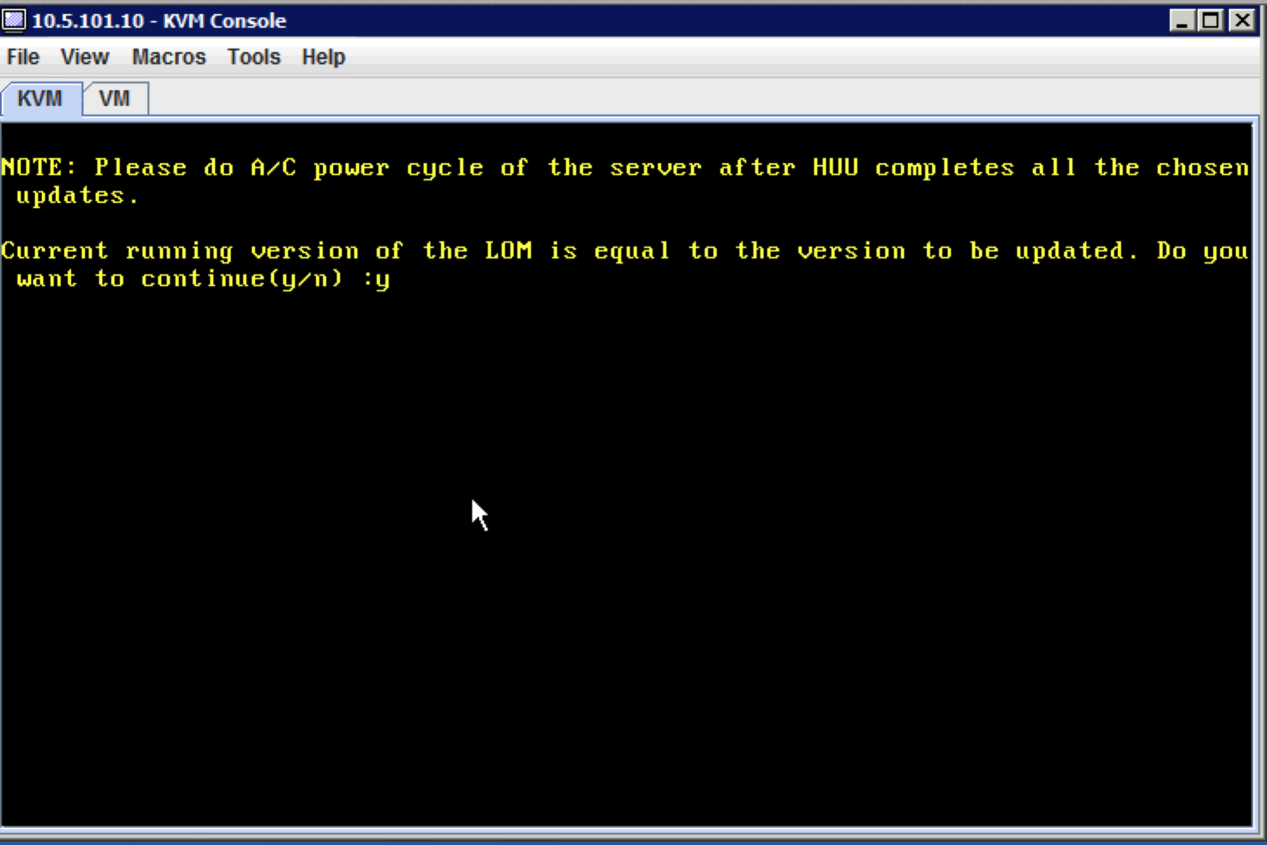
10. Press “y” in case of version is same on the device.
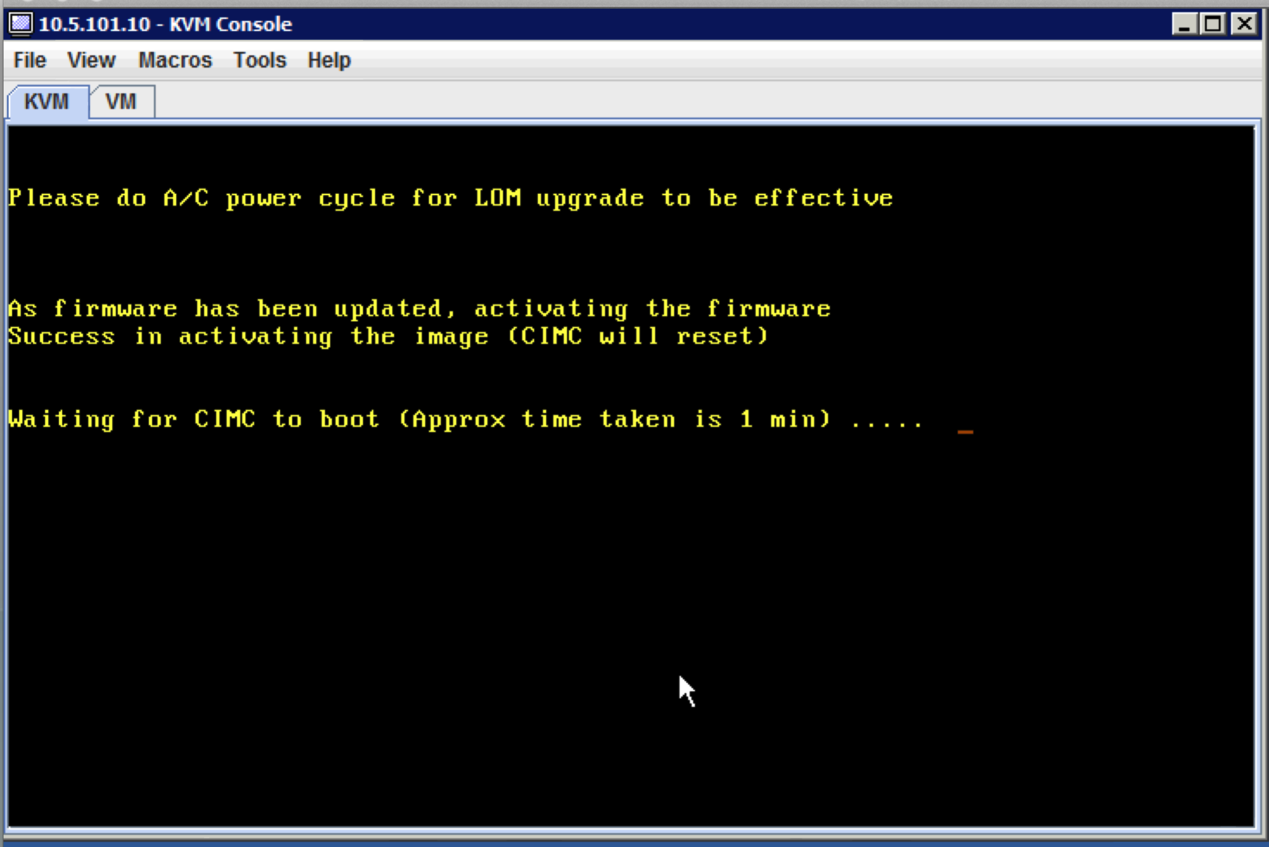
11. After firmware upgrade, type option 10 to reboot the server.

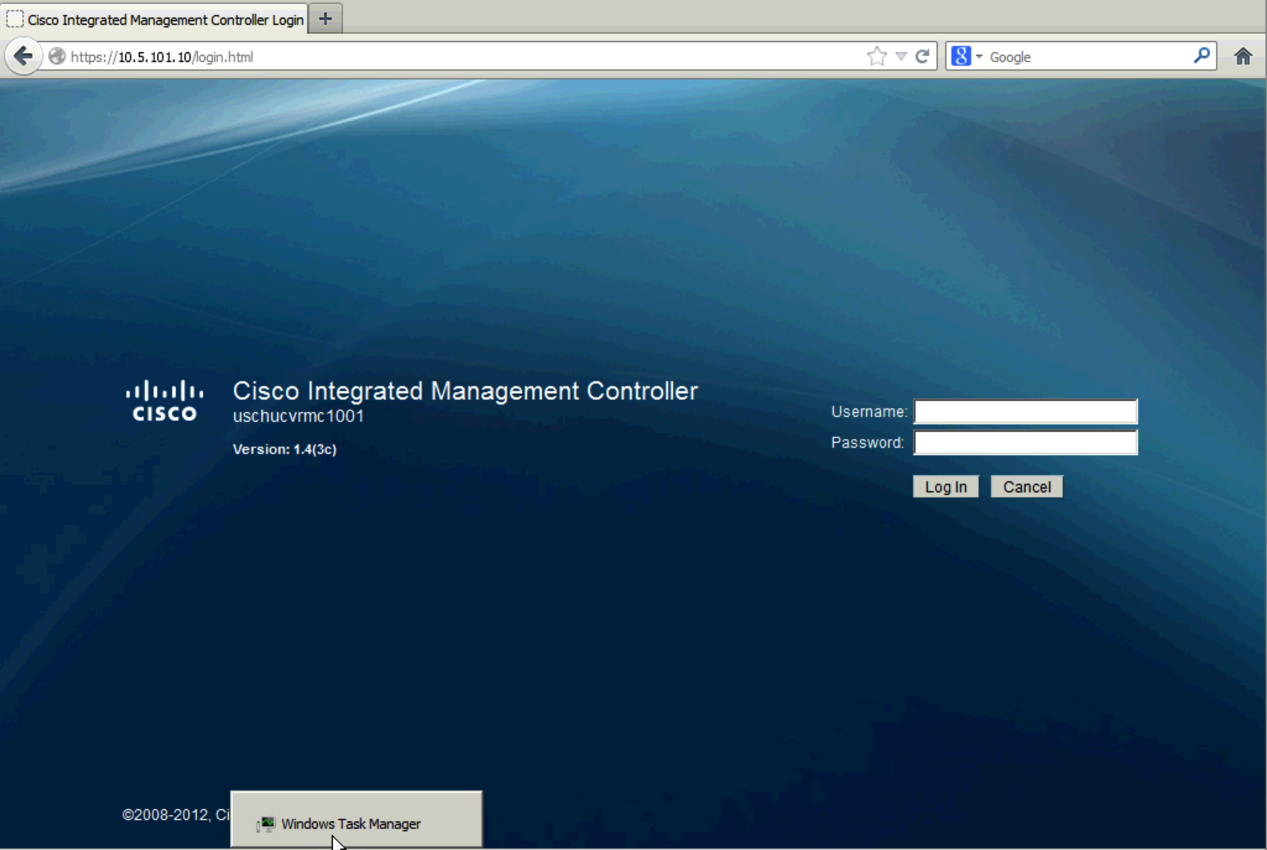
12. Login into CIMC Web UI to verify firmware upgrade is completed.
Related Information
Intregrating C-Series servers with UCS 1.4.1 and above
VMWare ESXi 4.0 Installation on UCS Blade Server with UCS Manager KVM
