 Previous ArticleNext Article
As a customer you will have to accept the deliverable documents created as part of your Cisco Advanced services engagement.
How to do this is explained in this article.
The minimum requirement you need to fulfill is to have a cisco.com profile as explained in previous chapters.
To first and easiest way to accept a deliverable document is using the acceptance invitation email. When a Cisco employee submits a deliverable document for you to accept, a invitation email is sent to you. The email will be sent to your primary email address defined in your cisco.com profile.
The email will have a subject line "You are invited to accept or reject a document. (automated Cisco DCP email)".
In the body of the email you will find an explanatory text with the title of the document that is made available for you to download as well as a sentence "Please click here to accept the content". 'Click here' is hyperlinked.
Click on it and this will open up your default web-browser, log you into DCP (using your cisco.com login and password) and pull the document's properties on the 'Approval' tab.
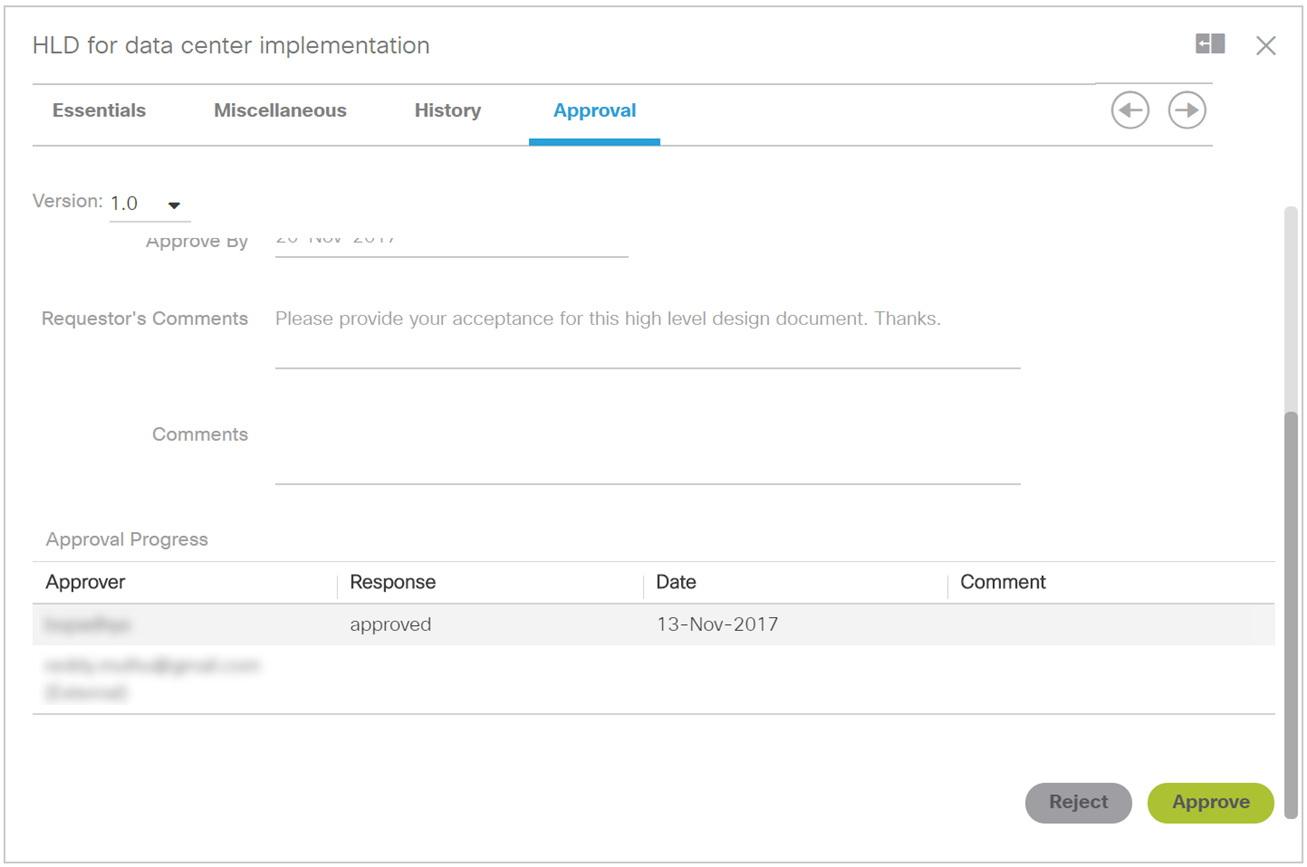
Scroll down the Approval tab to reveal the 'Approve' and 'Reject' buttons. Use the one or the other to accept or reject the document. A 'Comments' input field is provided for you to leave some optional comments.
The second way to accept a deliverable document is using one of the preset filters for the Content Management table: 'Content That Is Pending My Approval'.
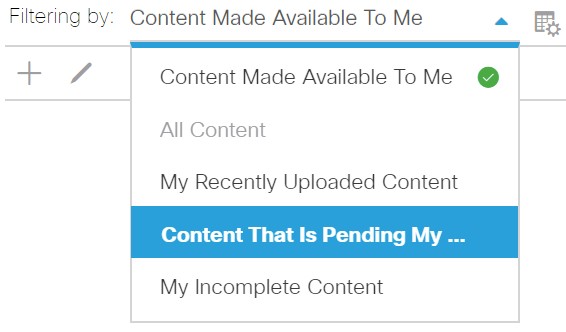
This will list all documents that have been made available for you to Accept or Reject. Click anywhere on the line representing the document you want to Accept or Reject (do not click on the hyperlinked Title as this will trigger the download of the document). Clicking the line once will open the properties pane of the document. Then click on the Approval tab (if necessary, click on the right/left arrows next to the tabs to reveal additional tabs). Once on the Approval tab, scroll down to reveal the 'Approve' and 'Reject' buttons. Use the one or the other to accept or reject the document. A 'Comments' input field is provided for you to leave some optional comments.
Finally, as for downloading a document, it is also possible to find back the appropriate action request from your Notification center. Find the proper action request (it will have a similar text as the text in the invitation email). Click on the hyperlinked text 'Please click here to accept the content', which will open the properties pane of the document on the approval tab. Scroll down to reveal the 'Approve' and 'Reject' buttons. Use the one or the other to accept or reject the document. A 'Comments' input field is provided for you to leave some optional comments.
Please note that others might be invited as well to Approve the document. Only when all invitees have provided a positive vote, will the document be in a 'Customer accepted' state.
Related articles:
Apply a Table Configuration
Notification Center & DCP Control
 Table of Content
 Previous ArticleNext Article