This blog post is going to be going over integration ISE 2.1 and Stealthwatch via pxGrid with self-signed certificates. I personally like using CA-Signed certificates for my deployment because if I ever need to rebuild an ISE instance or pxGrid client, it's extremely easy to get it up and running again with a CA-signed certificate but this isn't always the ideal situation for everyone. For those without a PKI infrastructure or for lab environments, it's pretty easy to set up pxGrid integration without an external PKI infrastructure.
I'm going to be using ISE 2.1 and StealthWatch 6.8 to demonstrate this and going through this very quickly. If you would like to read more details about pxGrid integration or various other methods of deployment, please go to the ISE Design Zone to view the ISE Guides here.
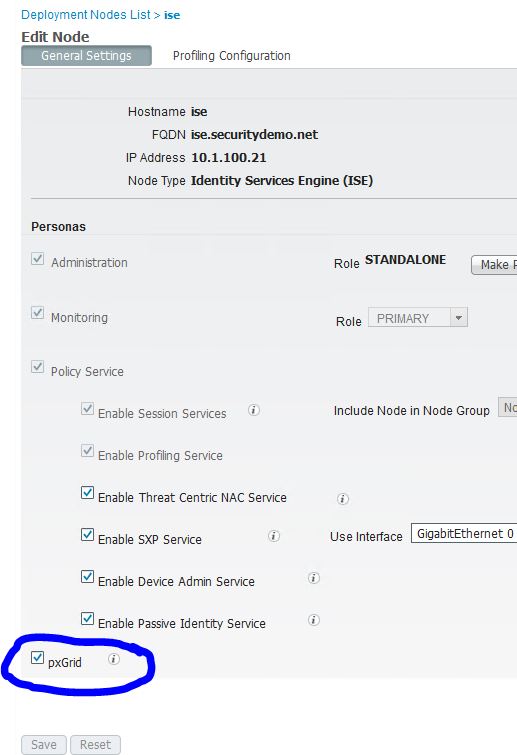
In ISE, navigate to Administration>System>Deployment and click on the name of the ISE node that you would like to be running your pxGrid services. In the Edit Node screen, make sure that the box next to pxGrid is checked and click Save.
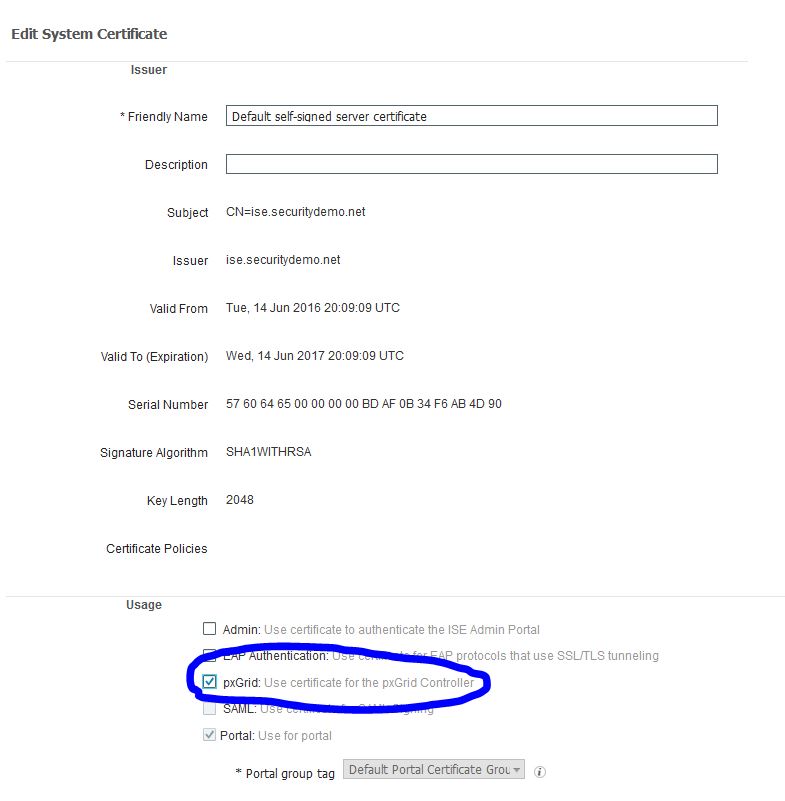
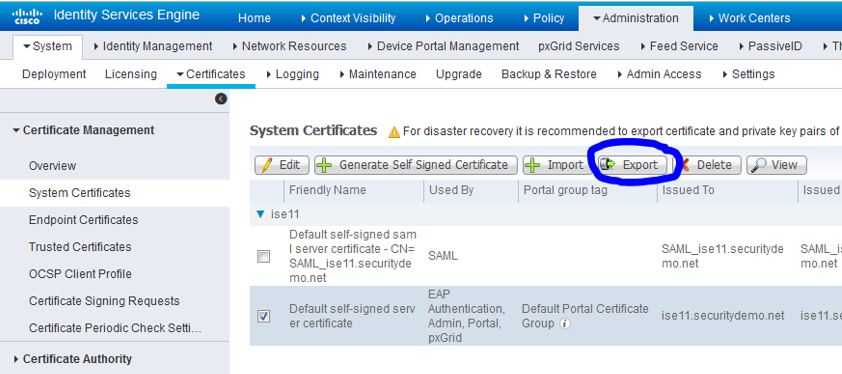
Navigate to Administration>System>Certificates>System Certificates and make sure the default self-signed certificate is enabled for pxGrid by checking the box next to it and clicking Edit:
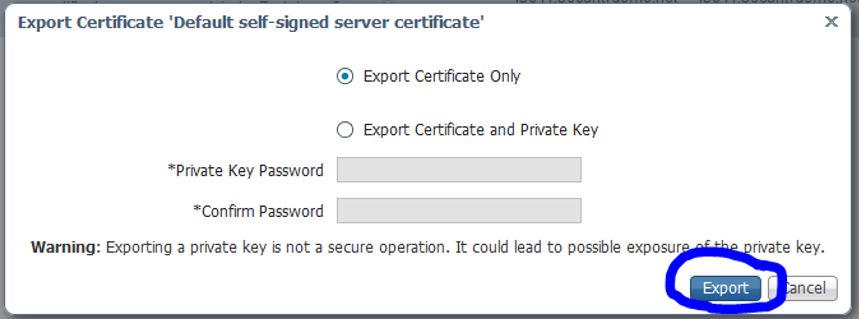
After making sure that pxGrid is enabled for this certificate, click the Export button to export the certificate. You should be only exporting the public certificate, not the private key.
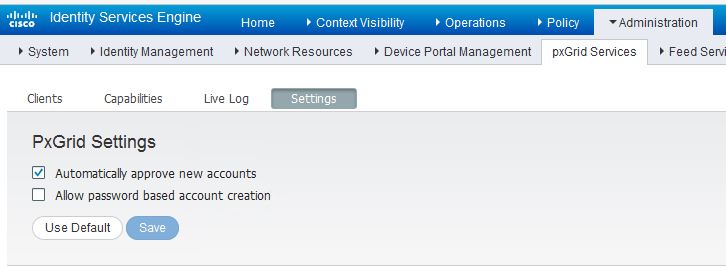
We want to make sure that ISE will accept requests from all pxGrid clients without additional approval while we're setting this up so navigate to Administration>pxGrid Services>Settings and check the box next to Automatically approve new accounts and click Save.
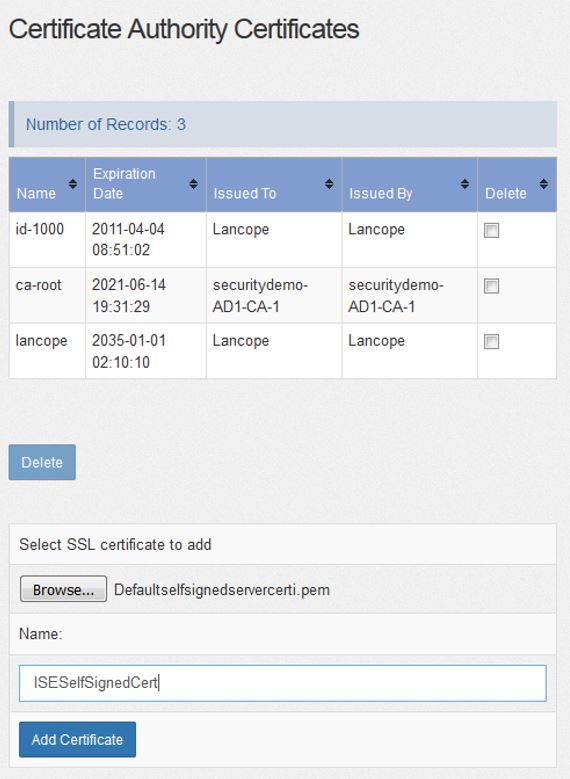
Switching over to Stealthwatch Management Center, click on Admin User>Administer Appliance and then navigate to Configuration>Certificate Authority Certificates. On this screen, upload the ISE self-signed certificate that you just exported.
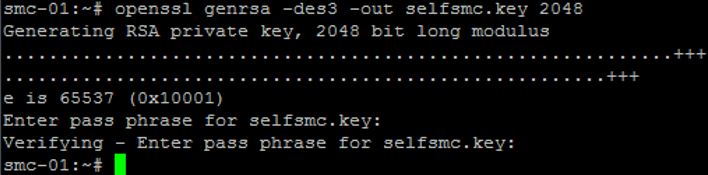
SSH to your StealthWatch Management Center using the root credentials and create a key with the following command:
openssl genrsa -des3 -out selfsmc.key 2048
It'll ask you to enter a passphrase. You can choose any one you wish. In this case, I just chose cisco123.
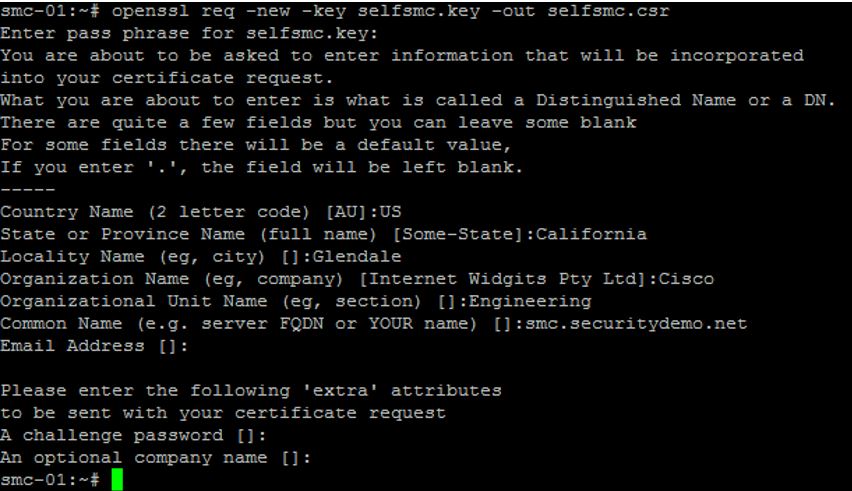
After the key is issued, we're going to create a Certificate Signing Request from it by issuing the following command:
openssl req -new -key selfsmc.key -out selfsmc.csr
The output will ask for the passphrase immediately (cisco123) and then you fill in some basic certificate parameters. One thing to note is that at the end, you can optionally pick a challenge password if you want to use it with this CSR. I did NOT use one:
Next we will create the self-signed SMC certificate by issuing the following command:
openssl x509 -req -days 365 -in selfsmc.csr -signkey selfsmc.key -out selfsmc.crt
It'll again ask you for the passphrase of the key (cisco123)

The next thing I'll do is decrypt the passphrase for the key file with the following commands:
cp selfsmc.key selfsmc.key.org
openssl rsa -in selfsmc.key.org -out selfsmc.key
It'll ask for the passphrase again (cisco123)

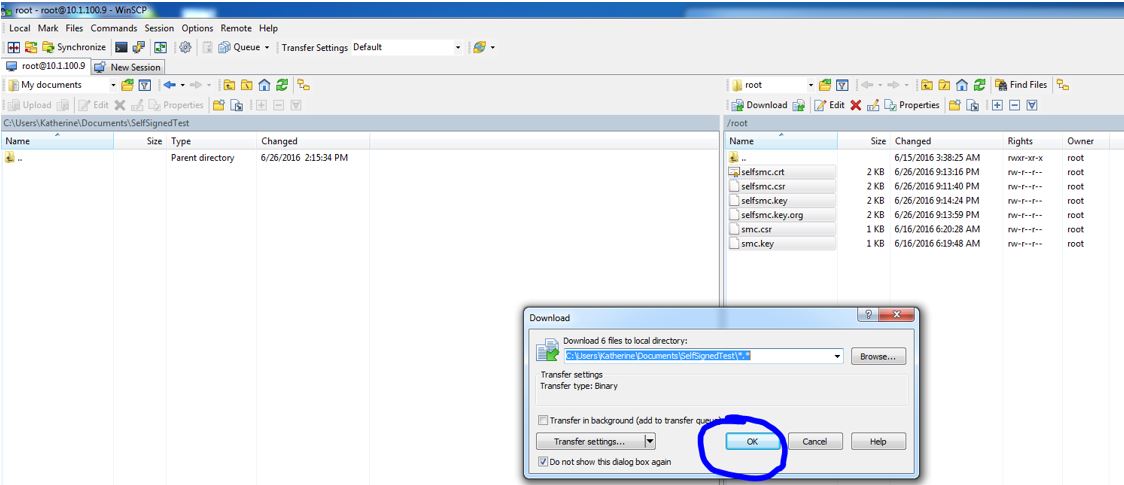
After this is completed, use WinSCP to connect to the StealthWatch Management Center using your root credentials and copy the files you just created over to you local disk:
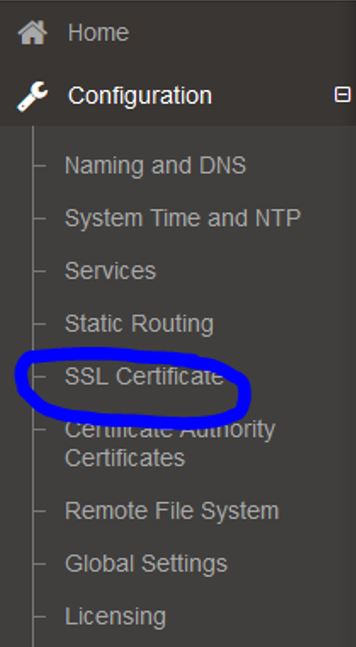
In the StealthWatch Management Center, navigate to Admin User>Administer Appliance and then navigate to Configuration>SSL Certificate.
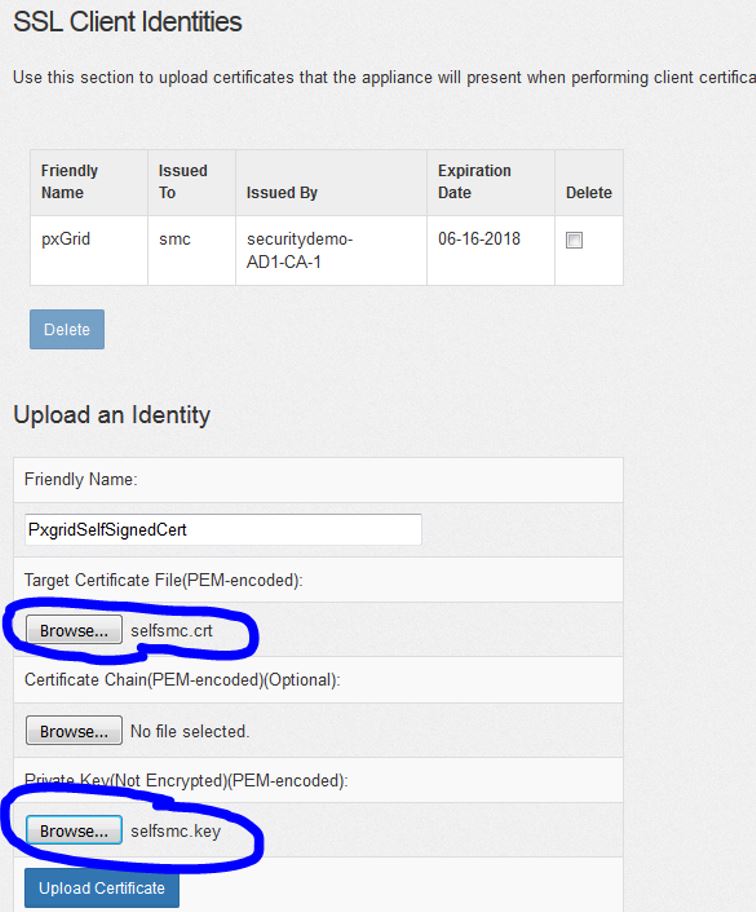
Scroll down to the SSL Identity Certificates at the bottom of the page and upload the self-signed .crt certificate you just created in the Target Certificate File field and the key file in the Private Key field. Click Upload to install the certificate as shown below:
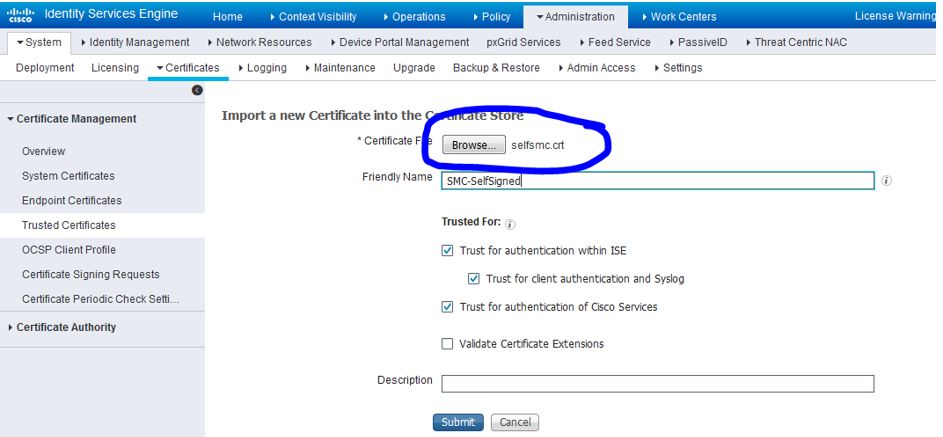
In ISE, navigate to Administration>System>Certificates>Trusted Certificates and click Import. Upload the SMC .crt file that we previously created and click Submit when done as shown below:
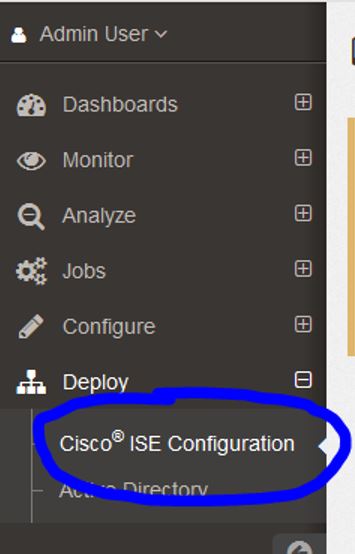
In StealthWatch Management Center, navigate to Deploy>Cisco ISE Configuration if you are version 6.8 or Tools>Cisco ISE Configuration in version 6.7.1:
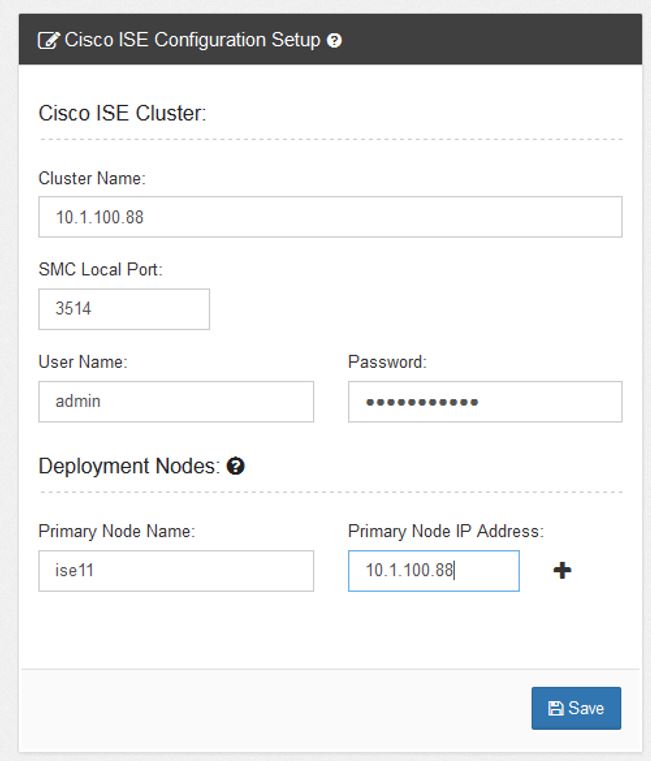
Add the IP address of your ISE node and the SMC Syslog port (if different than the default). Give StealthWatch the username/password for ISE as shown below. If you have one ISE node, this should be one node but if you have a distributed deployment, this would be the MnT and PSN nodes that might send syslog traffic to the SMC. Click Save when done:
You should get a pop-up stating that the Cisco ISE connection was successful. If you don't get that, check network connectivity between ISE and the SMC and any firewalls that might be blocking ports.
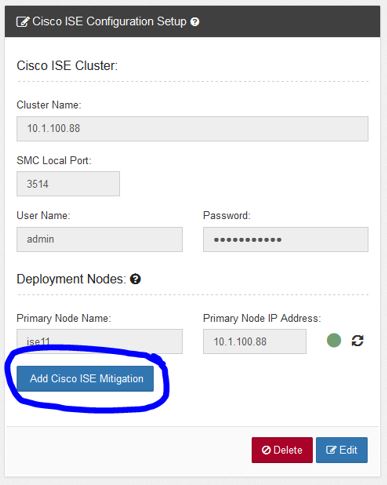
If all is configured correctly, you should get a green circle showing that communication with ISE is established and an Add Cisco ISE Mitigation button. Click on that button for the next step:
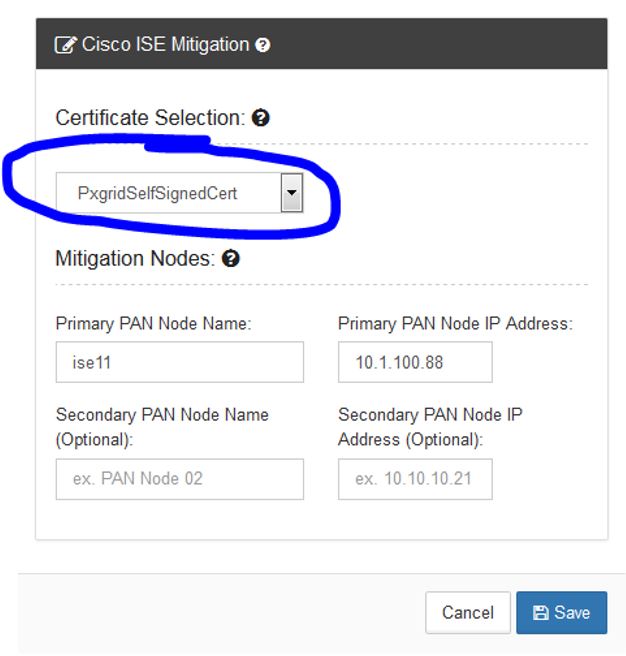
On the Cisco ISE Mitigation menu, pick the SMC self-signed identity certificate we previously installed from the drop-down menu and then add the name and IP address of the ISE primary Admin node and optionally the secondary Admin mode and then click Save:
You should get a pop-up showing that the connection to the ISE mitigation nodes were successful.
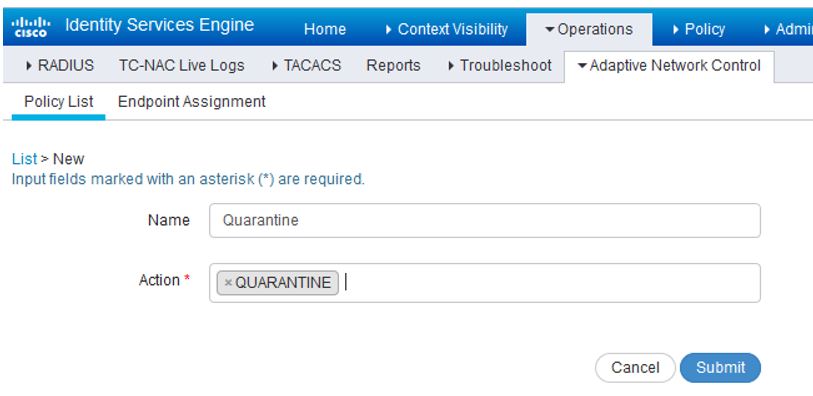
In ISE, navigate to Operations>Adaptive Network Control>Policy List. We are going to need to add an ANC policy before we can start quarantining devices. Click Add. Give the policy a name of Quarantine and choose the action of Quarantine:
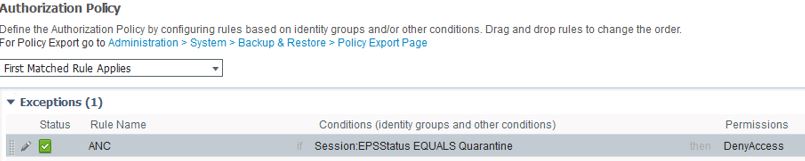
Next we'll need to create a global exception rule for quarantining. Go to your Exceptions for your Authorization policy and create the following rule:
Name: ANC (or whatever you want to call it)
Conditions: Session:EPSStatus EQUALS Quarantine
Then: DenyAccess (Or whatever level of access you want to give quarantined users)
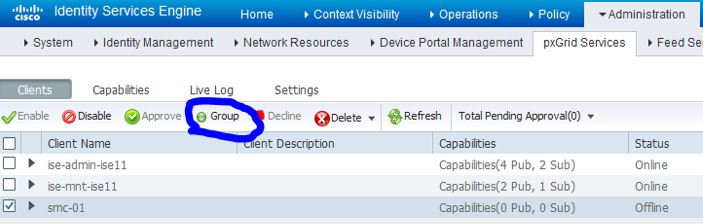
Navigate to Administration>pxGrid Services>Clients and you should see your SMC client. Check the box next to the SMC client and then click the Group button:
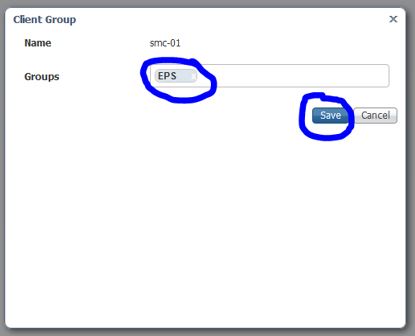
Under the Client Group, remove Basic and add EPS. Then click Save.
Your SMC client should now display as this:

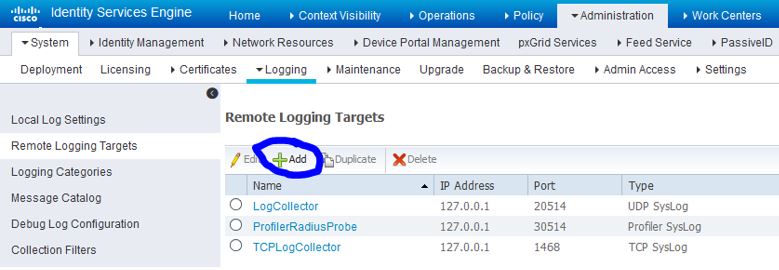
Next we will configure the Stealthwatch Management Center as a remote logging target. In ISE, navigate to Administration>System>Logging>Remote Logging Targets and click Add:
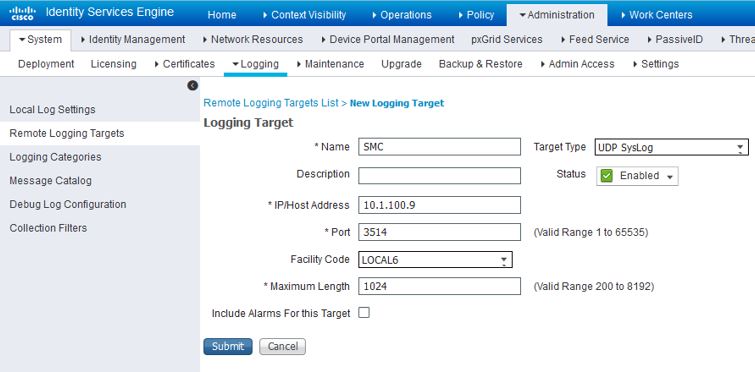
Name the remote target whatever you would like and make sure the IP address is pointed towards the Stealthwatch Management Center. For the port, choose the one defined previously in the ISE configuration over in the Stealthwatch Management Center (3514 is the default). When you are done, click Submit.
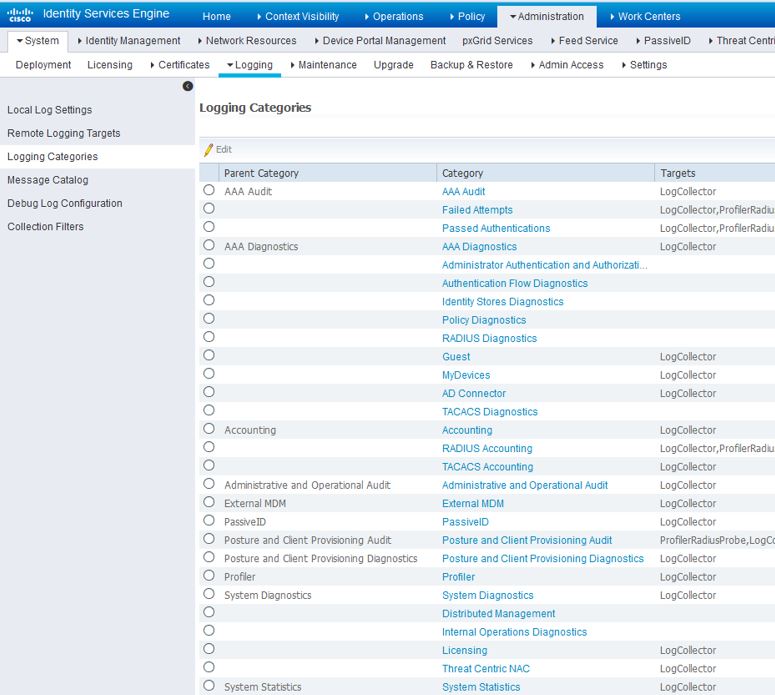
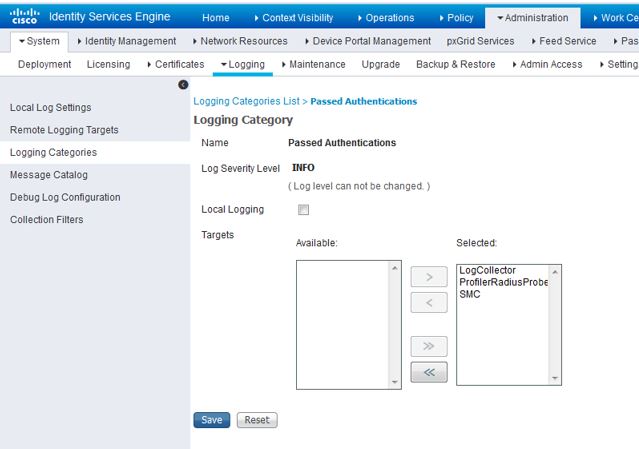
Navigate to Administration>System>Logging>Logging Categories and add your new remote logging target to the following:
- Passed Authentications
- RADIUS Accounting
- Administrative and Operational Audit
- Profiler
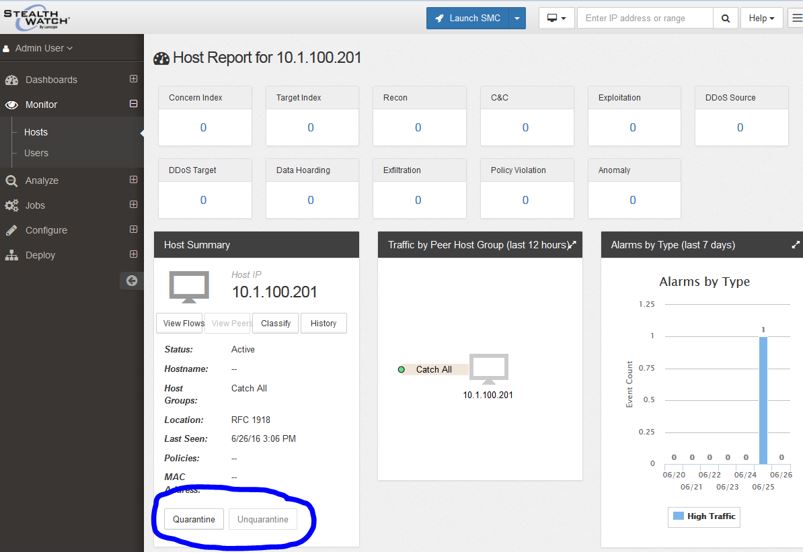
You're now done configuring ISE and StealthWatch's integration. You can pull up a Host Report in your StealthWatch Management Center and you should see a Quarantine and UnQuarantine button for that host. You should also see a history of which users have logged into that host and other contextual information provided by ISE via Syslog:
If you click on the Quarantine button, it should trigger your Exception policy over in ISE and quarantine the endpoint. By clicking UnQuarantine, it will remove that endpoint from it's EPS status.