You can use a combination of a Linux Live image along with Cisco’s UCScfg to help facilitate server deployment. This gives users the opportunity to build custom images catered to their specific configuration needs. The image uses a live CentOS CD, and then fires off the desired UCScfg commands once booted – all of this happens automatically.
The image posted below was created to adjust the optiomROM settings and boot order on C220 and C40 M4 servers. The live image will do the following:
1. Change the PCIe Option Settings to the below values:
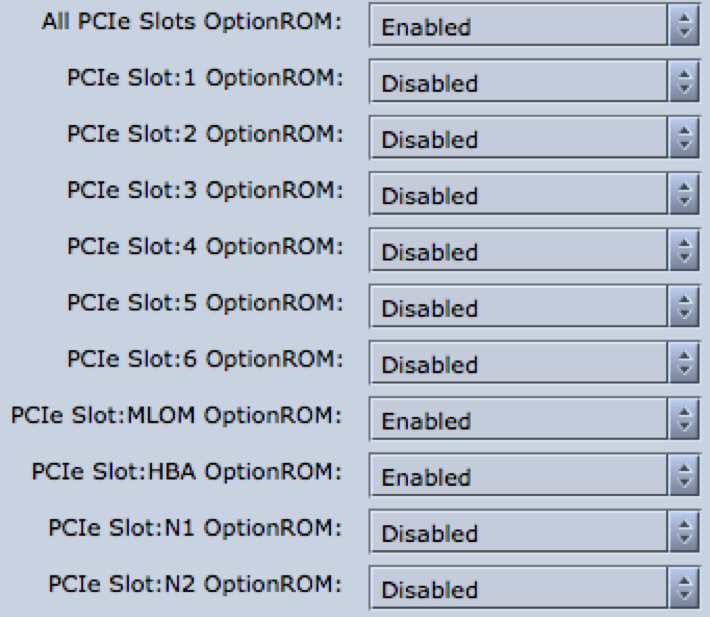
With the above settings, optionROMs are enabled for the HBA slot and the MLOM. All other PCIe slot optionROMs are disabled: Note: For C220M4, you will only have 2 PCIe slots (C240 M4 has 6 as shown above) – both of which will also be disabled.
2. Set Port 0 of the MLOM as the first desired boot device.
This image was created to correct the optionROM settings on several C220 and C240 M4 servers that left the factory with improper configuration. Users who are unable to boot from devices like the RAID controller, MLOM, and other slot based PCIe cards may find the image useful. Additional details will be provided in a future update to this post, specifically the procedure used to create the .ISO and the bootable USB.
UCScfg is a very flexible utility and can be used to completely customize IMC and BIOS configuration on a server. For customers who do not have their IMCs on the network, and have limited physical connectivity to the servers, a live USB is a great option. Users will be able to build custom .iso images specific to their environment.
Procedure to Create Bootable USB (using Universal USB Installer for Windows 7):
- Download the attached .iso at the bottom of the page.
- Download Universal USB Installer here: http://www.pendrivelinux.com/universal-usb-installer-easy-as-1-2-3/
- Launch UUI, and select CentOS as the desired Linux Distribution
- Point UUI to the .iso downloaded in step 1.
- Select desired USB drive to install to, and then click “Create”. Wait for the process to complete, then USB is ready to use.
- Plug in USB to affected server and select it as the desired boot device.
NOTE: The server will power off on its own with the below image, once the process has completed.
