- Cisco Community
- Technology and Support
- Small Business Support Community
- Voice Systems and Accessories - Small Business
- UC 540 can not be configured after failture during uptate
- Subscribe to RSS Feed
- Mark Topic as New
- Mark Topic as Read
- Float this Topic for Current User
- Bookmark
- Subscribe
- Mute
- Printer Friendly Page
UC 540 can not be configured after failture during uptate
- Mark as New
- Bookmark
- Subscribe
- Mute
- Subscribe to RSS Feed
- Permalink
- Report Inappropriate Content
03-10-2013 07:07 AM - edited 03-21-2019 07:05 AM
Hi
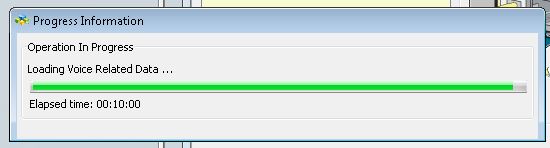
I tried to update my UC 540 to the newest version (8.6.1). During the update I recieved an error message telling that the Voice Mail is corrupted. Repair of voice mail failed. Since that failture all clicks to config items take very long. Whenever voice related date is loaded, the process takes forever and the progress bar reaches 98% then jumps back to 94% or so and that takes forever.
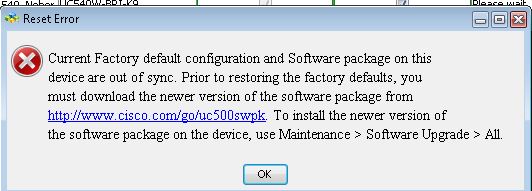
So I devided to make a factory reset. Here the system complains that there is a version mismatch
Finally I tried to make the factory reset with a console session according a youtube video. The suggested commands are:
- service in0/0 session
- offline
- restore factory default
When I try to login after the service in0/0 session i receive a kernel panic and the session is rebooting for ever with no result
Here the trace
login as: admin
Cisco Configuration Assistant. Version: 3.2 (2). Tue Nov 13 21:27:11 CET 2012Using keyboard-interactive authentication.
Password:
UC_540_Neher>enable
Password:
UC_540_Neher#
UC_540_Neher#service in0/0 sess
Trying 10.1.10.2, 2002 ... Open
Cisco Configuration Assistant. Version: 3.2 (2). Tue Nov 13 21:27:11 CET 2012
User Access Verification
Username:
Username: admin
Password:
Resetting devices ....Done.
mac address for internal ethernet 30:e4:db:6e:df:fe
Please enter '***' to change boot configuration:
ServicesEngine Bootloader Version : 1.0.3
kern_sz: 1128765
bl_boot_cf_cmd root=/dev/hda1 install_root=ide ro plat=freddo
## Booting image at 04000000 ...
Image Name: Linux-2.6.22-cisco-freddo
Image Type: PowerPC Linux Kernel Image (gzip compressed)
Data Size: 1128701 Bytes = 1.1 MB
Load Address: 00000000
Entry Point: 00000000
Verifying Checksum ... OK
Uncompressing Kernel Image ... OK
Linux version 2.6.22.10-vs2.2.0.5-cisco-freddo (drodrig@fndn-bld-system10) (gcc version 4.2.2) #1 Wed May 30 11:44:17 PDT 2012
Zone PFN ranges:
DMA 0 -> 131072
Normal 131072 -> 131072
early_node_map[1] active PFN ranges
0: 0 -> 131072
Built 1 zonelists. Total pages: 130048
Kernel command line: root=/dev/hda1 install_root=ide ro plat=freddo
Platform: ise
IPIC (128 IRQ sources, 8 External IRQs) at fe000700
PID hash table entries: 2048 (order: 11, 8192 bytes)
Dentry cache hash table entries: 65536 (order: 6, 262144 bytes)
Inode-cache hash table entries: 32768 (order: 5, 131072 bytes)
Memory: 515840k available (1756k kernel code, 516k data, 92k init, 0k highmem)
in atrace_init
log_head: h: 0, t: 0, l: 0, w: 0, s: 1047488
Using existing trace log
log_head: h: 0, t: 0, l: 0, w: 0, s: 1047488
Mount-cache hash table entries: 512
NET: Registered protocol family 16
Generic PHY: Registered new driver
SCSI subsystem initialized
NET: Registered protocol family 2
IP route cache hash table entries: 16384 (order: 4, 65536 bytes)
TCP established hash table entries: 65536 (order: 7, 524288 bytes)
TCP bind hash table entries: 65536 (order: 6, 262144 bytes)
TCP: Hash tables configured (established 65536 bind 65536)
TCP reno registered
io scheduler noop registered
io scheduler anticipatory registered
io scheduler deadline registered
io scheduler cfq registered (default)
Cisco ContentEngine Flash Driver Version 0.03
Serial: 8250/16550 driver $Revision: 1.90 $ 4 ports, IRQ sharing disabled
serial8250.0: ttyS0 at MMIO 0xe0004500 (irq = 9) is a 16550A
serial8250.0: ttyS1 at MMIO 0xe0004600 (irq = 10) is a 16550A
RAMDISK driver initialized: 16 RAM disks of 32768K size 1024 blocksize
Gianfar MII Bus: probed
eth0: Gianfar Ethernet Controller Version 1.2, 30:e4:db:6e:df:fe
eth0: Running with NAPI enabled
eth0: 256/256 RX/TX BD ring size
eth1: Gianfar Ethernet Controller Version 1.2, 30:e4:db:6e:df:ff
eth1: Running with NAPI enabled
eth1: 256/256 RX/TX BD ring size
Uniform Multi-Platform E-IDE driver Revision: 7.00alpha2
ide: Assuming 50MHz system bus speed for PIO modes; override with idebus=xx
hda: probing with STATUS(0x50) instead of ALTSTATUS(0x0a)
hda: UNIGEN FLASH, ATA DISK drive
ide0 at 0xe1000000-0xe1000007,0xe100280d on irq 17
hda: max request size: 128KiB
hda: 4096512 sectors (2097 MB) w/1KiB Cache, CHS=4064/16/63
hda: set_multmode: status=0x51 { DriveReady SeekComplete Error }
hda: set_multmode: error=0x04 { DriveStatusError }
ide: failed opcode was: 0xef
hda: cache flushes supported
hda: hda1 hda2
i2c /dev entries driver
NET: Registered protocol family 26
TCP cubic registered
NET: Registered protocol family 1
NET: Registered protocol family 17
ReiserFS: hda1: found reiserfs format "3.6" with standard journal
ReiserFS: hda1: using ordered data mode
ReiserFS: hda1: journal params: device hda1, size 8192, journal first block 18, max trans len 1024, max batch 900, max commit age 30, max trans age 30
ReiserFS: hda1: checking transaction log (hda1)
ReiserFS: hda1: Using r5 hash to sort names
VFS: Mounted root (reiserfs filesystem) readonly.
Freeing unused kernel memory: 92k init
Warning: unable to open an initial console.
Kernel panic - not syncing: No init found.
Rebooting in 180 seconds..
Any suggestions to rebuild the system in order to update and configure it as expexted??
Regards
Lorenz
- Labels:
-
Voice Systems
- Mark as New
- Bookmark
- Subscribe
- Mute
- Subscribe to RSS Feed
- Permalink
- Report Inappropriate Content
03-10-2013 07:35 AM
Update manually.
- Mark as New
- Bookmark
- Subscribe
- Mute
- Subscribe to RSS Feed
- Permalink
- Report Inappropriate Content
03-10-2013 02:40 PM
Thanks
The System Runs but I can Not change any configuration and can Not Update and can Not initiale a Factory Reste. So what is Your Suggestion to bring the System back to a normal Status?
Thanks for a Suggestion.
Regards Lorenz
- Mark as New
- Bookmark
- Subscribe
- Mute
- Subscribe to RSS Feed
- Permalink
- Report Inappropriate Content
03-10-2013 04:54 PM
Sorry,since it seems you are using CCA, I can't give you advice.
- Mark as New
- Bookmark
- Subscribe
- Mute
- Subscribe to RSS Feed
- Permalink
- Report Inappropriate Content
03-10-2013 08:29 PM
when you go into service session, you will see
Please enter '***' to change boot configuration:
do exactly, that and follow through.
then you should be able to continue upgrade using CCA
- Mark as New
- Bookmark
- Subscribe
- Mute
- Subscribe to RSS Feed
- Permalink
- Report Inappropriate Content
03-11-2013 02:11 PM
Hi Yasien
I did what you suggested. However, I am somehow lost what exactly I should change. Here what the config is and what the options are
UC_540_Neher#service in0/0 sess
Trying 10.1.10.2, 2002 ... Open
Cisco Configuration Assistant. Version: 3.2 (2). Tue Nov 13 21:27:11 CET 2012
User Access Verification
Username: admin
Password:
Cisco BootMon Version: 1.0.3
(Jul 27 2007 - 10:41:10) MPC83XX
Bootmon starts
Bootmon: cold reset.
System now booting.
Bootmon: reading primary bootloader image
Bootmon: calling bootloader
Cisco ServiceEngine Bootloader Version: 1.0.3
(Jul 6 2007 - 10:15:37) MPC83XX
Resetting devices ....Done.
mac address for internal ethernet 30:e4:db:6e:df:fe
Please enter '***' to change boot configuration: ***
ServicesEngine Bootloader Version : 1.0.3
ServicesEngine boot-loader>
ServicesEngine boot-loader> help
? - alias for 'help'
boot - boot from specified src
config - configure various params
help - print online help
ping - send ICMP ECHO_REQUEST to network host
reboot - Perform RESET of the CPU
show - show config, trace or version
verify - verify software versions
ServicesEngine boot-loader> show
Usage:
show
show config - display config
show trace - display trace buffer
show version - display boot-loader version
ServicesEngine boot-loader> show config
IP Address: 10.1.10.1
Subnet Mask: 255.255.255.252
TFTP Server: 192.168.10.13
Gateway: 10.1.10.2
Default Helper-file: cue-installer.uc500.8.6.5
Ethernet Interface: internal
Default Boot: disk
Default Bootloader: primary
Bootloader Version: 1.0.3
So what should I change in the config? Default Helper file? Default Boot ? Default boot loader ?
Thanks for a suggestion what exactly I should change
Regards
Lorenz
- Mark as New
- Bookmark
- Subscribe
- Mute
- Subscribe to RSS Feed
- Permalink
- Report Inappropriate Content
03-11-2013 03:24 PM
If you have your software pack zip file, extract all the folders, to another folder.
The following should help you get back on track.
CUE Clean Install
One you have installed IOS and CME, CUE can be reinstalled. Provided that CUE is in a steady state, you will be able to install directly from FTP. If the CUE application has failed for some reason, it may be necessary to install using the bootloader.
Reinstall from Steady State
- From your PC, ensure that there is a path to the CUE module: Ping 10.1.10.1
- Assuming that this is ok, access the CUE console via the UC500 CLI: service-module integrated-Service-Engine 0/0 session
- Log in if necessary, or just press enter on a new system to get the UC500-CUE prompt.
- Start the clean install process: software install clean url ftp://192.168.10.11/cue-vm.ise.3.0.3.pkg username
password - Confirm that you wish to continue.
- At the Language Installation menu, press 8 for UK English, then x to continue the install.
- Once the install has completed, the module will restart.
- If required, the CUE module can also be reinitialised at this point. To do this, first go Offline and confirm
- Then restore factory default and confirm.
- Press Enter to reload.
Reinstall using the CUE Module Bootloader
If the CUE module is non-responsive, it may be necessary to reinstall from the bootloader. For more information see the CUE Install Guide
- From IOS CLI reload the CUE module: service-module integrated-Service-Engine 0/0 reload and confirm.
- Immediately open the CUE Module console service-module integrated-Service-Engine 0/0 session and note that the module restarts.
- When you see the bootloader prompt type ***
- Type config to configure the module with the following settings
- IP Address: 10.1.10.1
- Subnet Mask: 255.255.255.252
- TFTP Server: 192.168.10.11
- Gateway: 10.1.10.2
- Default Helper File: cue-installer.ise.3.0.3
- Ethernet interface: Internal
- Default Boot: Disk
- Default Bootloader: Primary
- Once the flash has erased, start the install process by typing boot helper.
- At the Service Engine Helper Menu, select option 1 to install software and use the following configuration:
- Package name: cue-vm.ise.3.0.3.pkg
- Server URL: ftp://192.168.10.11
- Username:
- Password:
- Confirm disk clearing.
- At the Language Installation menu, press 8 for UK English, then x to continue the install.
- Once the install has completed, the module will restart. At this point CUE will be ready in its factory default state, ready for initialisation using CCA.
- Mark as New
- Bookmark
- Subscribe
- Mute
- Subscribe to RSS Feed
- Permalink
- Report Inappropriate Content
04-06-2013 08:04 AM
Hi again
I took me some time to do what you suggested. I got real frustrated because I struggled after step one.
So what I did is pressing the "***" and changed the configuration in order to configure an external TFTP server. I setup the server and extracted the 8.6.1 pack including the language package.
The file you indicated is wrong! So I took the file "cue-installer.uc500.8.6.5" and booted from the TFTP by using the command "boot helper". So far it worked. Than I package install did not work. The indicated package does not exist so I tried all possible files with a **.pkg files but non worked.
So I tried again with the CCA GUI and finally succeded to make a clean installation of 8.6.1 SW. Now I am installing the language pack and try to restore the old config. Unfortuanatly I was not able to restore one of my backups.
I keep on trying
However, I sometimes wish I did not change my orld Alcatel PABX. Thiswone really worked fine even after 15 years!
Lorenz
Find answers to your questions by entering keywords or phrases in the Search bar above. New here? Use these resources to familiarize yourself with the community: