- Cisco Community
- Technology and Support
- Collaboration
- Collaboration Knowledge Base
- External TFTP server for Cisco IP phones
- Subscribe to RSS Feed
- Mark as New
- Mark as Read
- Bookmark
- Subscribe
- Printer Friendly Page
- Report Inappropriate Content
- Subscribe to RSS Feed
- Mark as New
- Mark as Read
- Bookmark
- Subscribe
- Printer Friendly Page
- Report Inappropriate Content
01-12-2011 06:31 AM - edited 03-12-2019 09:35 AM
External TFTP server for Cisco IP phones
In Cisco Unified Communications Manager, often times werequire to upgrade or downgrade the firmware of a high number of IP Phones, onbusy systems where the TFTP server it is being used to provide firmware to theIP phones, sometimes will not be possible to just change the default firmwareload on your TFTP.
To solve this problem we can create an external TFTP serverwith the firmware we need and point the IP phones to use that server.
Here are the steps to configure the external TFTP using anopen source TFTP.
1. Installthe TFTP server.
2. Download the firmware files.
3. Configurethe TFTP server.
4. Configure the DHCP server.
5. Configure the XMLDefault.cnf.xml
6. Perform afactory reset or point the IP phones to the correct TFTP.
1. Install TFTP server:
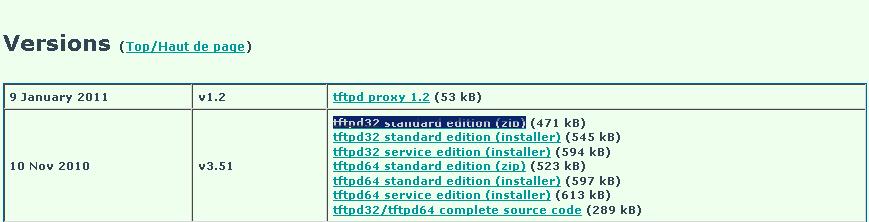
From the following site: http://tftpd32.jounin.net/
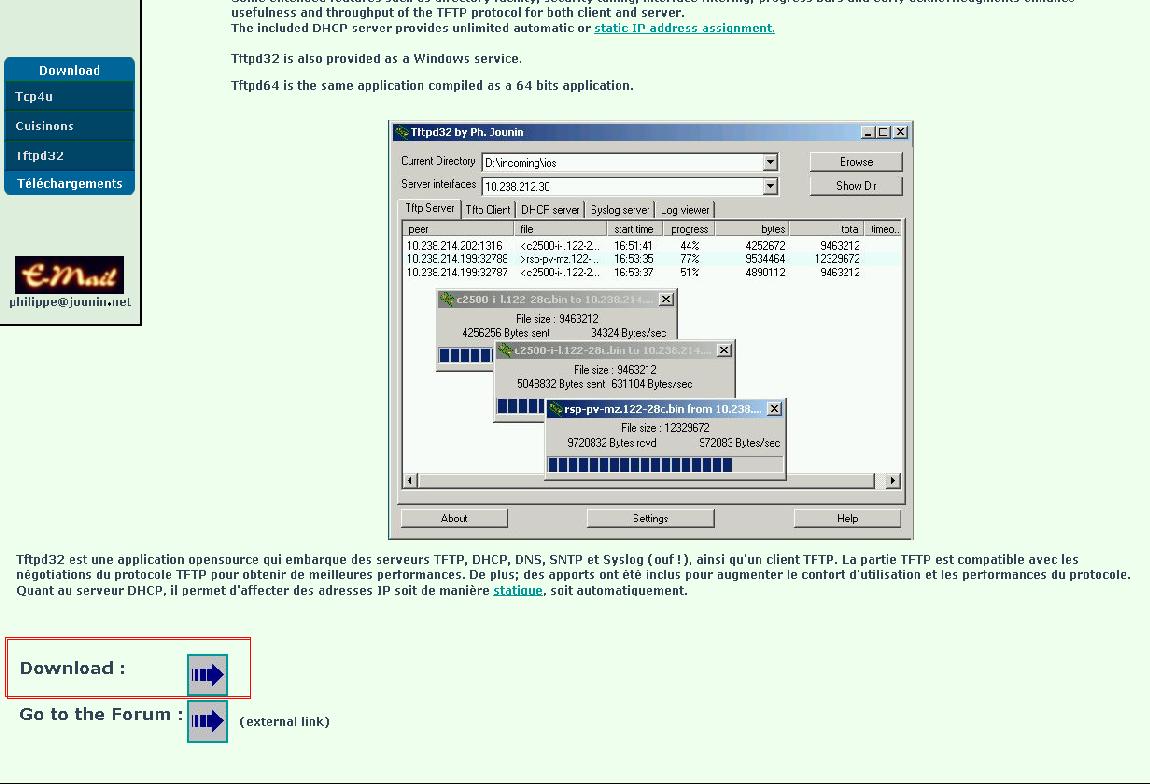
When you click the arrow it will forward you to a new webpage where you have multiple options I used: tftpd32 standard edition (zip)
That zip file will contain tftpd32.exe that you need to double click to start the TFTP server.
2. Download the Firmware files:
Go to www.cisco.com and select the support --> download software:
And follow this path based on the firmware you would like to download.
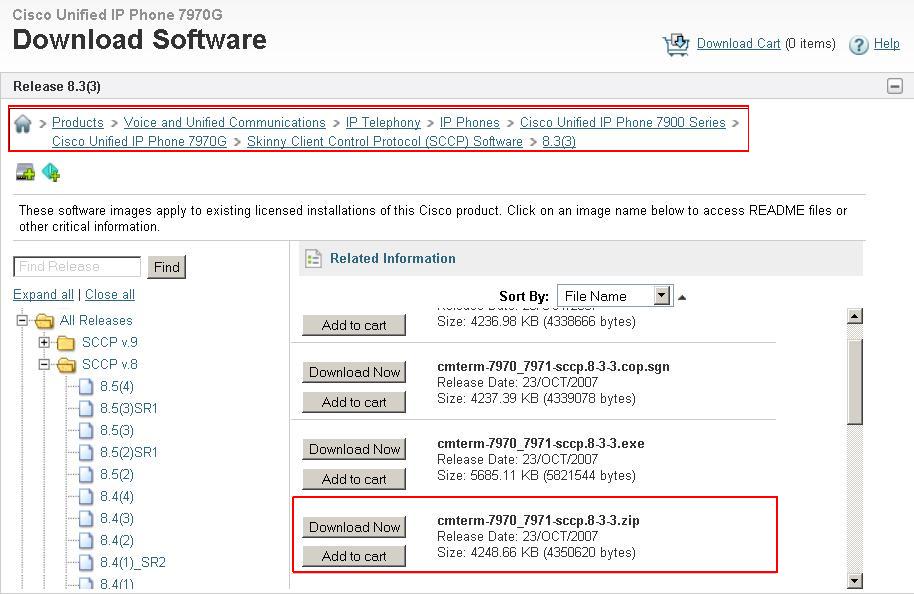
To do this you will need to use the one that ends with .zip, since will contain all the files that the phone need.
3. Configure the TFTP
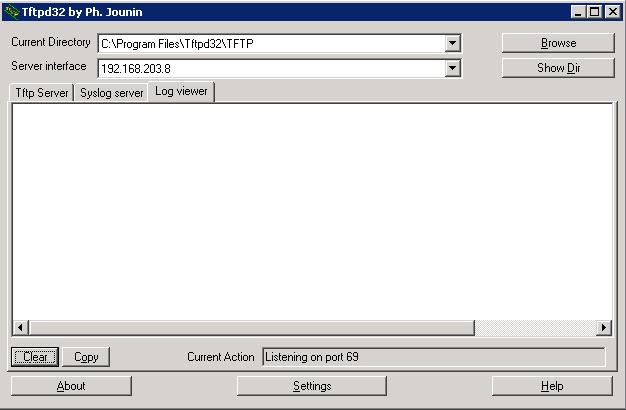
You do not need to configure anything on the TFTP server, only change the working directory to reflect the one you are using.
4. Configure the DHCP server.
Change the option 150 of your DHCP server to point the computer you are using.
5. Configure the XMLDefault.cnf.xml
Modify the file depending on the firmware you are going to use and the phone model you are working with.
Example:
# <loadInformation30006 model="Cisco 7970">SCCP70.8-3-3S</loadInformation30006> #
I changed this one to use 8.3.3 since it is a requirement to upgrade to 9.x versions.
Open your notepad and copy this:
# <Default> #
# </members> #
# </callManagerGroup> #
# <loadInformation30006 model="Cisco 7970">SCCP70.8-3-3S</loadInformation30006> #
# </Default> #
Save the file with this name XMLDefault.cnf.xml on the working directory of the TFTP server.
6. Perform afactory reset or point the IP phones to the correct TFTP.
To perform the factory reset you just need to reboot the IP phone, and press the # when the phones starts a sequence of lights you will need to press this :
1, 2, 3, 4, 5, 6, 7, 8, 9, *, 0, #
or you can go just change the TFTP information on the phone:
Press the Settings button
Select the Network configuration
Select the TFTP server and change the IP address.
If your settings are locked just press this **# and it will unlock your phone.
I hope this information will be helpful.
- Mark as Read
- Mark as New
- Bookmark
- Permalink
- Report Inappropriate Content
Excellent, but can sombody fix the pictures?
- Mark as Read
- Mark as New
- Bookmark
- Permalink
- Report Inappropriate Content
Hai
It seems to be great, but please fix the picutres..
- Mark as Read
- Mark as New
- Bookmark
- Permalink
- Report Inappropriate Content
Hello,
I know this is an old post, but I am trying to get this working for DX80s that are out in the field.
Do you really need the following lines?
# </members> #
# </callManagerGroup> #
Thanks,
Justin
Find answers to your questions by entering keywords or phrases in the Search bar above. New here? Use these resources to familiarize yourself with the community: