- Cisco Community
- Technology and Support
- Collaboration
- Collaboration Knowledge Base
- Implementing Phone Background Images for Cisco IP Phones
- Subscribe to RSS Feed
- Mark as New
- Mark as Read
- Bookmark
- Subscribe
- Printer Friendly Page
- Report Inappropriate Content
- Subscribe to RSS Feed
- Mark as New
- Mark as Read
- Bookmark
- Subscribe
- Printer Friendly Page
- Report Inappropriate Content
09-28-2011 08:08 AM - edited 03-12-2019 09:40 AM
- Introduction
- Scenario
- Solution
- 1. Obtaining and preparing the required files
- 2. Uploading List.xml and background images
- 3. Verifying our uploads
- 4. Restart TFTP service
- 5. Test, Test, Test!
- 6. Additional information
- How to modify/change the background image of an IP Phone (new)
Introduction
This document will provide a sample configuration for implementing background images for each Cisco IP Phone model on Cisco Unified Communications Manager.
Scenario
The following scenario uses Cisco Unified Communications Manager version 8.5, however the configurations shown here apply to any currently supported version of Cisco Unified Communications Manager. We will walk through adding several background images to 7975 and 7942 phones, but the steps for any other phone model can be adapted based on the image sizes and directory location paths noted in the table in the Additional Information section.
This document assumes no previous image uploads have occurred.
Solution
PLEASE NOTE: CUCM runs in a Linux environment, everything is CASE SENSITIVE! As such the "Directory" option MUST be consistent when uploading files for each phone type. E.G. The path /Desktops/320x216x16 and /desktops/320x216x16 are considered separate paths. Additionally make sure your xml file is "List.xml" NOT "list.xml" and any capitals in your image names are properly refleced in the List.xml file or unexpected behavior will occur!
In the steps below we will be setting background images for all 7975s and 7942s in our cluster.
1. Obtaining and preparing the required files
Obtaining the image files
The images you wish to provide as phone backgrounds can be anything which you have permission to use, for example, your companies logo. Do not use images which you do not have explicit permission to re-distribute or use.
Preparing the image files
For the images, the following restrictions apply:
- They must be in .PNG format.
- Each background must have a full size and corresponding thumbnail image file.
- The thumbnail file must be 25% the size of the full-size image.
- See table in Additional Information for the corresponding pixel dimensions for your specific phone type.
- If the images do not match the dimensions in the table below or are not in .PNG format, you can use a program like Microsoft Paint or comparable photo editing software to adjust the images to match the required dimensions and format.
Preparing the List.xml files
List.xml files also have a specific format, but it is relatively simple. Be aware that any mistakes will result in parsing errors on the phones and your background images will not show up! DO NOT create these files in a word processor, create them in a plain-text editor to prevent invalid characters from being added to the xml file.
Overall Format:
<CiscoIPPhoneImageList>
<ImageItem Image="TFTP:Desktops/PhoneImagePath/ThumbnailFileName.png" URL="TFTP:Desktops/PhoneImagePath/FullSizeImage.png"/> </CiscoIPPhoneImageList>
For each List.xml your file opens with a <CiscoIPPhoneImageList> tag and ends with a </CiscoIPPhoneImageList> tag.
For every image you want to offer you will need an <ImageItem ... /> line. The "Image" property defines the path to the thumbnail image and the "URL" property is used to define the path the the fullsize image.
Below are the the List.xml files for the 7975 and the 7942, respectively which we will be using:
Note that the Desktop directory is dependent on the type of phone you are creating a background for, see Additional Information section at the bottom of this document.
List.xml for 7975s:
<CiscoIPPhoneImageList>
<ImageItem Image="TFTP:Desktops/320x216x16/7975BackgroundTN.png" URL="TFTP:Desktops/320x216x16/7975Background.png"/>
<ImageItem Image="TFTP:Desktops/320x216x16/7975BackgroundTN2.png" URL="TFTP:Desktops/320x216x16/7975Background2.png"/>
</CiscoIPPhoneImageList>
List.xml for 7942s:
<CiscoIPPhoneImageList>
<ImageItem Image="TFTP:Desktops/320x196x4/7942BackgroundTN.png" URL="TFTP:Desktops/320x196x4/7942Background.png"/>
<ImageItem Image="TFTP:Desktops/320x196x4/7942BackgroundTN2.png" URL="TFTP:Desktops/320x196x4/7942Background2.png"/>
<ImageItem Image="TFTP:Desktops/320x196x4/7942BackgroundTN3.png" URL="TFTP:Desktops/320x196x4/7942Background3.png"/>
</CiscoIPPhoneImageList>
So as you can see, we have two image options for the 7975 and three image options for the 7942s. Now we need to upload everything to the proper locations on the TFTP server(s).
**the 7985 phone does not display thumbnails so set the "Image" value to the path of the fullsize image as well as the "URL" value.
Downloading the List.xml files to Desktop from CUCM 8.x
The List.xml file is located in the Desktops/640x480x24 folder. Assuming you do not have a NACL, Firewall etc. blocking access, you can certainly use a TFTP client from your desktop to retrieve the files. You may also use the webinterface of the TFTP service using the (http://<pub>:6970/Desktops/640x480x24/List.xml) url. You can ssh to the CUCM server and use the file dump command to dump the file to the screen. Use the scroll back buffer to retreive the content of List.xml. You can also use file get to download the file to a SFTP server running in your network or on your desktop.
2. Uploading List.xml and background images
Here we are going to upload the files. As stated at the beginning of the document, everything is case sensitive, watch your use of CAPS!
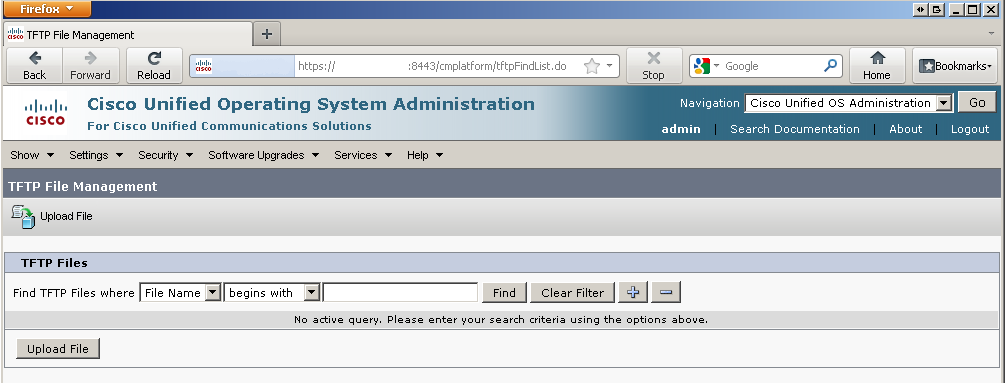
1. Log into the Cisco Unified Operating System Administration page and select Software Upgrades -> TFTP File Management

2. Under TFTP File Management, click "Upload File":
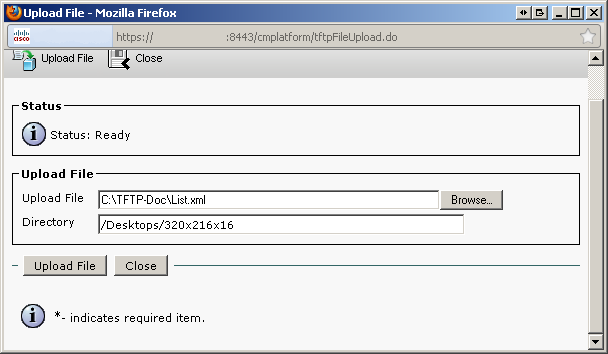
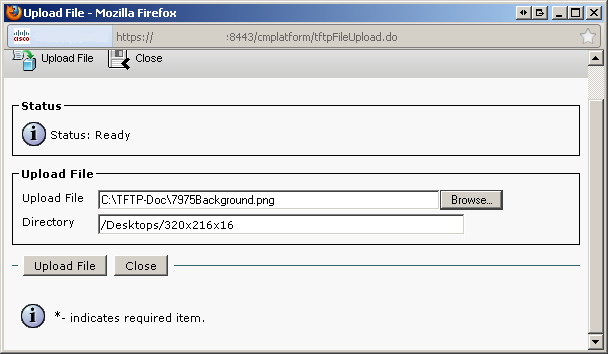
3. Upload each file to the correct directory path. I have only shown the uploads for the 7975 since the uploads for the 7942 is the same process, just a slightly adjusted "Directory" field.
List.xml (for 7975) file upload:
Thumbnail image upload (7975):

Full size image upload (7975):
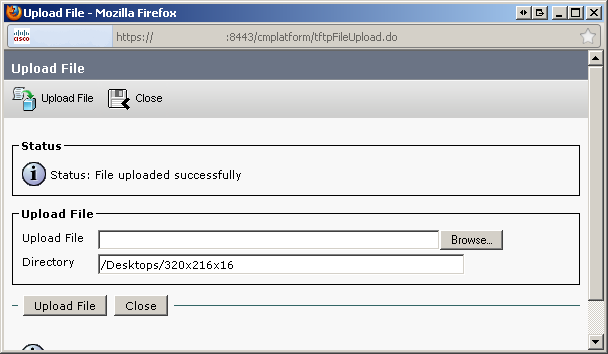
After each sucessful upload you should be presented with the following screen:
4. We repeat the above steps for the other 7975 Background image and thumbnail file.
5. We then follow the same steps for the 7942 List.xml and background images/thumbnails, making sure the Directory path for those uploads is always /Desktops/320x196x4 You will notice that this is different than the directory for the 7975 phones.
6. Repeat steps 1 through 5 for EACH node in your cluster running the TFTP service.
3. Verifying our uploads
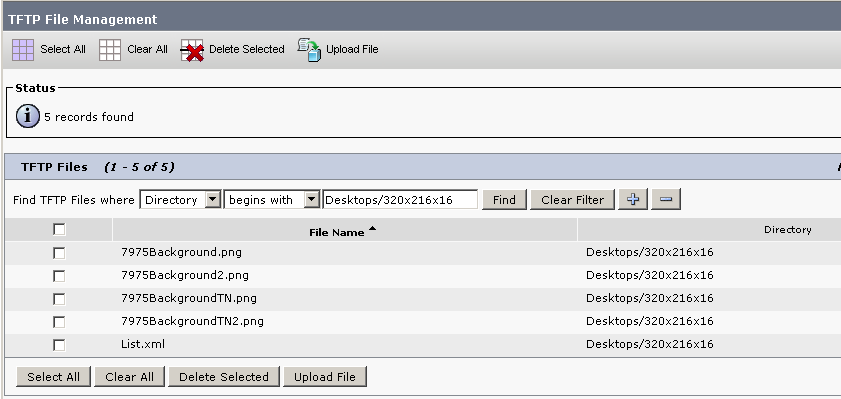
Now that all our files should be in place, it is always best practice to look for them in the expected directory path to make sure all files have been uploaded correctly. I have shown my TFTP File Management Search results after uploading ALL of the files mentioned above.
7975 directory search:
7942 directory search:
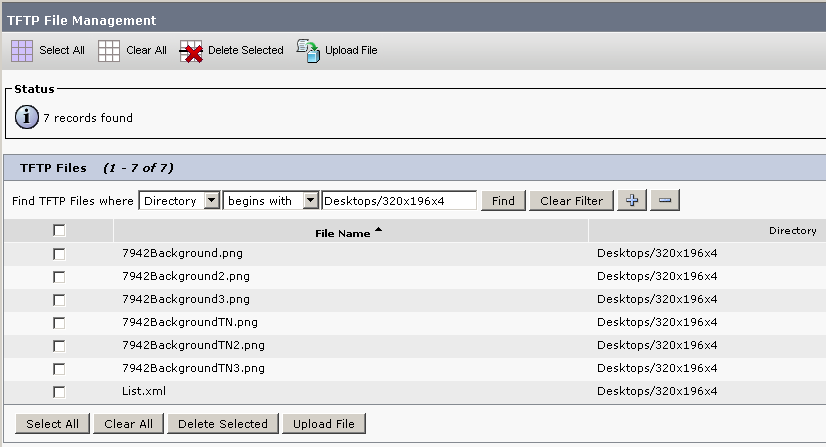
Now that we have verified all the files uploaded successfully we can move to the next step.
4. Restart TFTP service
Now we need to restart the TFTP service on each node in the cluster which runs it.
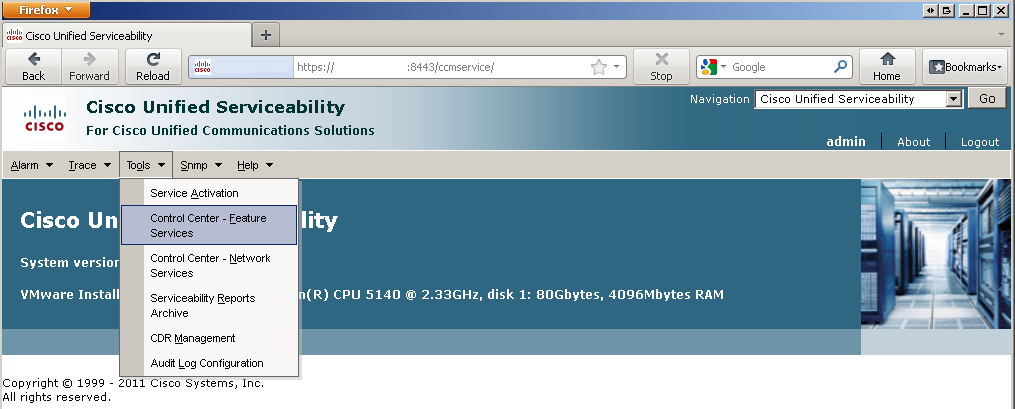
1. Log into the Cisco Unified Serviceability page and select Tools -> Control Center - Feature Services.
2. Select the node running TFTP from the drop down and click Go.
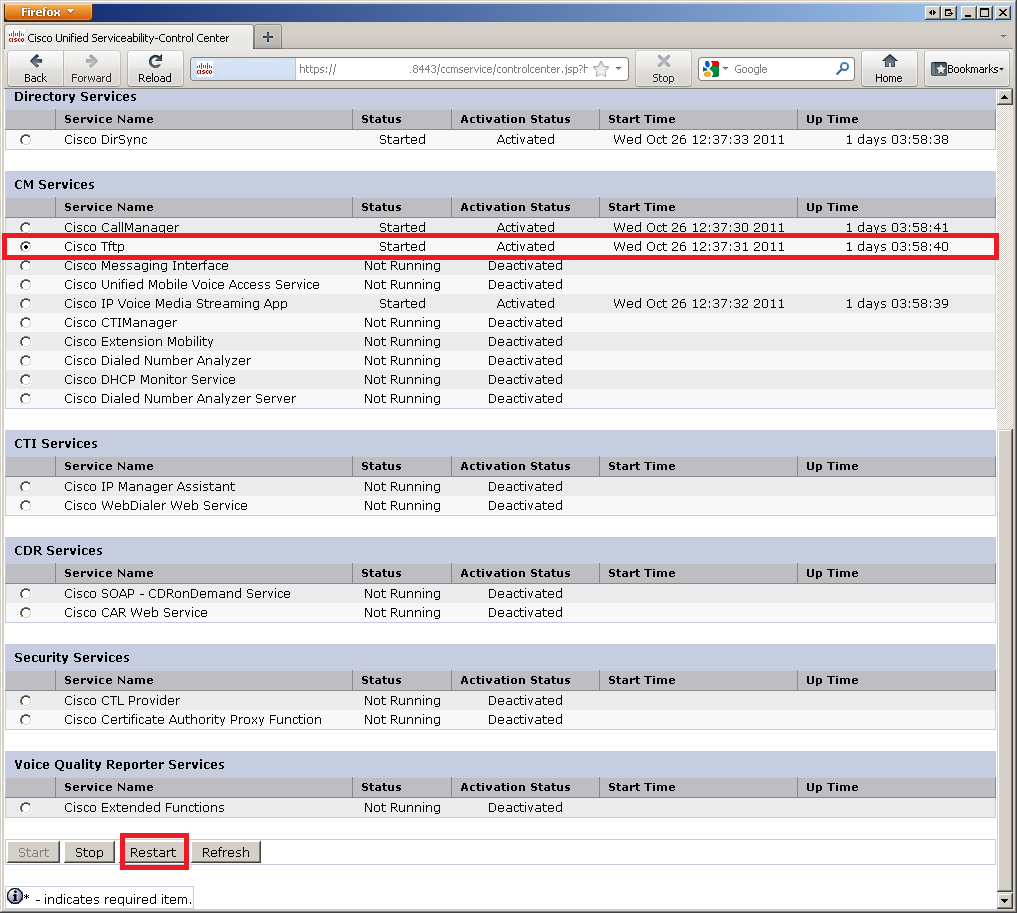
3. Check the Cisco TFTP bubble and press Restart.
Feature Services Screen:
4. Repeat Steps 2 and 3 for each node in your cluster running the TFTP service.
5. Test, Test, Test!
Now that everything should be in place on the CUCM side of things, you should go to a couple 7975s and a couple 7942s and try to look up background images, please see the following document on setting a background image on your phone. The phone should reach out to the server to try and get the list of available background images.
6. Additional information
Below is a table which describes the image dimensions (in pixels) for both thumbnails and full size background images, along with their exact upload paths for each phone type.
Phone Model
Width x Height (pixels) for full image
Width x Height (pixels) for thumbnail imageExact Directory
Path
| 7906 / 7911 | 95x34 | 23x8 | /Desktops/95x34x1 |
| 7941 / 7961 | 320x196 | 80x49 | /Desktops/320x196x4 |
| 7942 / 7962 | 320x196 | 80x49 | /Desktops/320x196x4 |
| 7945 / 7965 | 320x212 | 80x53 | /Desktops/320x212x16 |
| 7970 / 7971 | 320x212 | 80x53 | /Desktops/320x212x12 |
| 7975 | 320x216 | 80x54 | /Desktops/320x216x16 |
| 7985 | 800x600 | 800x600** | /Desktops/800x600x16 |
| 8961 / 9951 / 9971 | 640x480 | 123x111 | /Desktops/640x480x24 |
**This phone will not provide a thumbnail preview so use the full size image for thumbnail as well.
Related Information
/Desktops/800x600x16 |
- Mark as Read
- Mark as New
- Bookmark
- Permalink
- Report Inappropriate Content
you might want to add this missing step it is explained here!
//Moe
Be good at what you do!
Find answers to your questions by entering keywords or phrases in the Search bar above. New here? Use these resources to familiarize yourself with the community: