- Cisco Community
- Technology and Support
- Collaboration
- Collaboration Knowledge Base
- pesima aplicacion
- Subscribe to RSS Feed
- Mark as New
- Mark as Read
- Bookmark
- Subscribe
- Printer Friendly Page
- Report Inappropriate Content
- Subscribe to RSS Feed
- Mark as New
- Mark as Read
- Bookmark
- Subscribe
- Printer Friendly Page
- Report Inappropriate Content
06-02-2010 05:28 PM - edited 03-12-2019 09:28 AM
In this procedure I'm going to start from scratch with an image and go step by step on how to tailor it to size an 7965/7945's IP Phone display.
Components for this specific howto:
- 7965/7945 IP Phone
- CallManager Linux-based (5.x/6.x/7.x/8.x)
- The Gimp editing software
- (Linux: Installed by default in Ubuntu / Windows: http://www.gimp.org/windows/)
- (Linux: Installed by default in Ubuntu / Windows: http://www.gimp.org/windows/)
- A picture file of your preference
Prerequisites:
- Read the official guide: http://tools.cisco.com/squish/4441e
- CallManager Administrator and OS Administrator access
Steps:
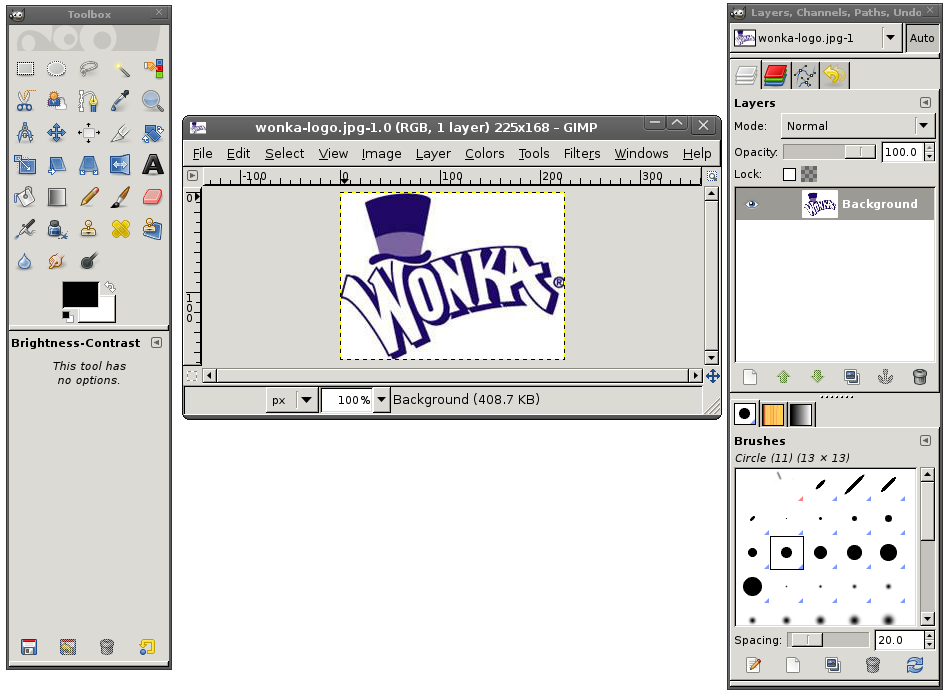
Open the picture with The Gimp
- In my case, the image I selected is 225x168px, so it doesn't meet the size requirements (see Prerequisites).
- Go to Image > Canvas Size (If your image is bigger than the specified size, go to Image > Scale Image and follow next steps).
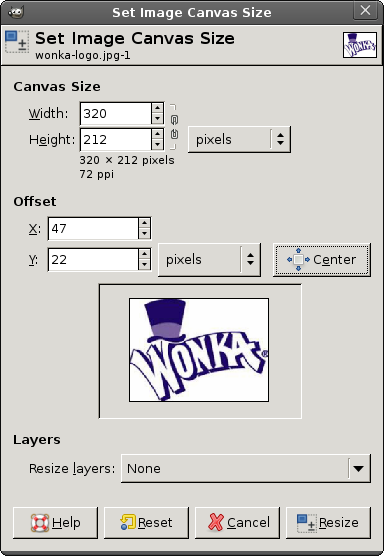
- Click the chain icon next to the pixels drop-down menu, and change the canvas size (or image size if you are scaling it) to Width:320 / Height:212
- Click the "Center" button so that the image stays centered on the new space, or drag the preview thumbnail to a corner of your choice within the canvas' space (if you are scaling the image the "Center" button and the drag option are not there)
- Click Resize
- Note the changes
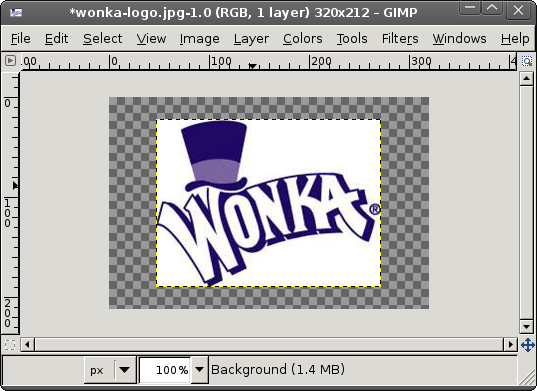
- Now we need to put a white background.
- Right click the image layer on the layer window
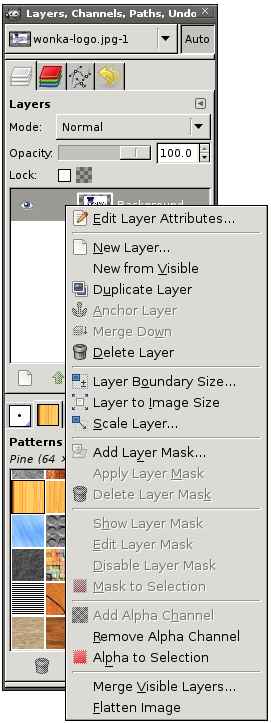
- Click Flatten Image at the very bottom.
- Now we need to make sure there are no more colors than the phone can accept.
- Go to Colors > Posterize.
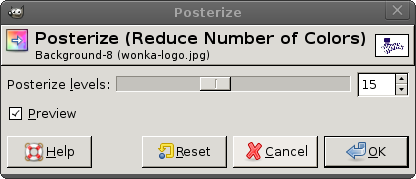 This tools works with powers of 2. An IP Phone cannot display more than 65535 colors, so in the increase or decrease the posterize levels to no more than 15, as 15 is the closest power of 2 to 65535.
 - Click ok
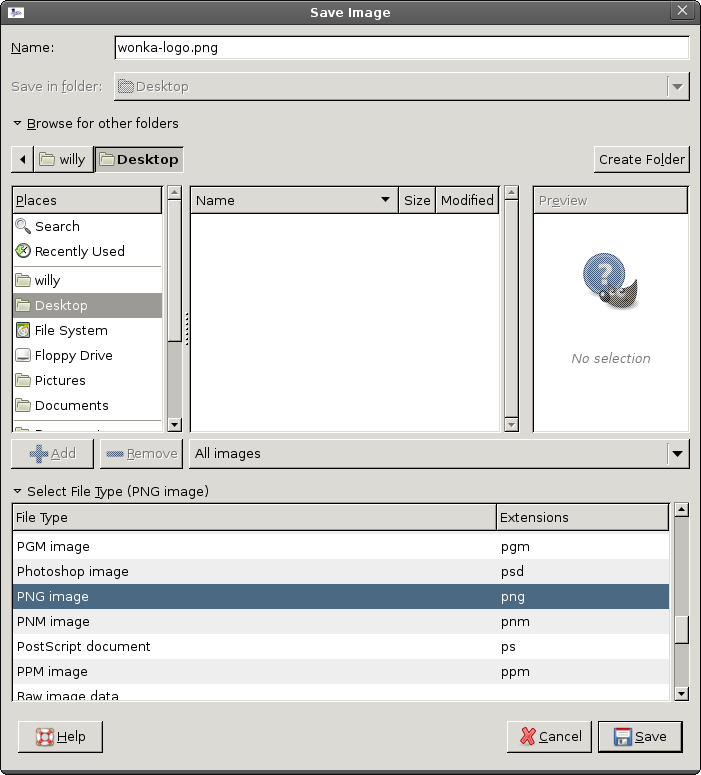
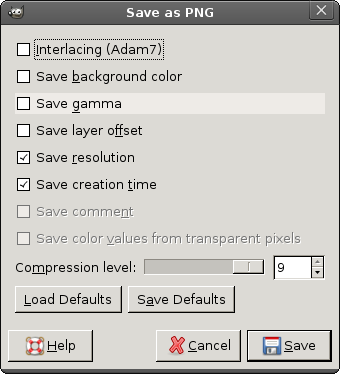
- Go to File > Save as > choose PNG as the file type
- Now lets fabricate the thumbnail
- Go to Image > Scale Image and type 80 in the Width field
- The Height field should automatically populate to 53
- Save the image in PNG type just as we did before
- Try to keep simple, short names like img.png and img-tmb.png
- Now we will tailor the XML file that lists the available images
- Copy this content to a regular text file, and save it as a .xml archive:
- <CiscoIPPhoneImageList>
<ImageItem Image="TFTP:Desktops/320x212x16/IMAGE.png"
URL="TFTP:Desktops/320x212x16/IMAGE-THUMB.png"/>
</CiscoIPPhoneImageList>
- <CiscoIPPhoneImageList>
- Replace IMAGE.png in this code with the name chosen for your full size image. Don't forget/remove the double quotes at the end.
- Replace the IMAGE-THUMB.png wih the name chosen for your preview size image. Don't forget/remove the double quotes at the end.
- Save the file so that it reads: List.xml (case sensitive)
- Copy this content to a regular text file, and save it as a .xml archive:
- Time to upload all 3 files to the TFTP server
- Go to Cisco OS Administration > Software Upgrades > TFTP File Management

- Click on Upload File
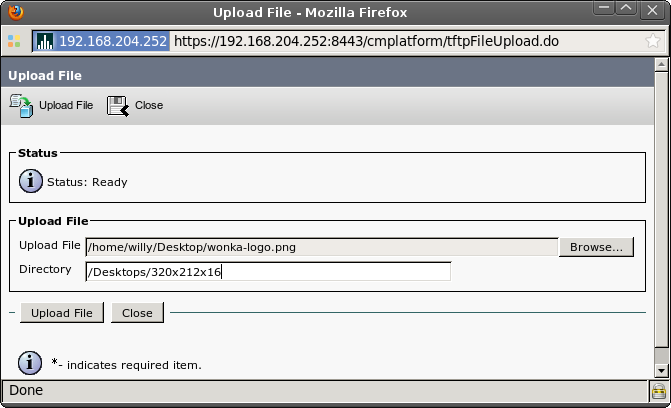
- In the Upload File field enter the path where your full size image, thumbnail image and List.xml files are
- In the Directory field, enter: /Desktops/320x212x16 (include the forward slashes and delete any white space at the end)
- Hit the Upload file button for each individual file you are transferring
- Back at the TFTP File Management window, type the name of your files and click Find to verify they are there.
- On the IP Phone, go to Settings > User Preferences > Background Images, and choose the thumbnail that you want to apply.
Troubleshooting:
* Problem: you go to Phone settings, and there you can see other background options, but can't really see the picture
* Solution: it is most likely because of the color depth issue. Change the levels as mentioned in step 1-11
* Problem: you go to Phone settings, and there are no options to change the image
* Solution 1: After saving the file with some text editors, eventhough you specify an .xml extension, the program might add a .txt at the end. Erase it.
* Solution 2: open an SSH session to the CallManager node where the XML and PNG files were uploaded. run this command, make sure the files were correctly uploaded:
o file list activelog cm/tftpdata/Desktops/320x212x16
* If not, then you uploaded them to another node, or there is something wrong with the TFTP transaction
* Solution 3: open the List.xml file with a browser. If it shows a syntax error, then there is a quote, bracket or other mistake in the XML syntax. No files will be shown in the phone. Should look like this:
* Problem: You can see the thumbnail just fine, but when you select it, it shows "FILE NOT FOUND" error message.
* Solution 1: At this point we are sure the XML file is ok, because the thumbnail is there, but not the path or the name of the full-size image. Open the list and make sure the image extension is PNG and not GIF, JPG or other format, and that the name is correct.
* Solution 2: see solution 2 from previous Problem
* Solution 3: it has happened that the TFTP transaction flow is affected somehow, so you might correct the XML file, save it, but when you go to the upload step you are actually uploading an old version of it, still pointing to a JPG image. In order to verify the contents of the file you just uploaded, run this command from an SSH Session, and check if the syntax is ok and pointing to the correct file:
o file view activelog cm/tftpdata/Desktops/320x212x16/List.xml
Image specifications for other models:
7970/7971/IP Communicator: http://www.cisco.com/en/US/partner/docs/voice_ip_comm/cuipph/7970g_7971g-ge/english/5_1/sip/english/adminstraton/guide/7970cst.html#wp1088046
Find answers to your questions by entering keywords or phrases in the Search bar above. New here? Use these resources to familiarize yourself with the community: