pxGrid Integration with Cisco StealthWatch using Microsoft CA
Objective
This blog will help the readers to configure their Cisco StealthWatch (7.X) and Cisco ISE appliance over pxGrid.
What is pxGrid?
Cisco pxGrid provides a unified framework that enables ecosystem partners to integrate to pxGrid once, and then share context bidirectionally with many platforms without the need to adopt platform-specific APIs. Using pxGrid, we can integrate the Cisco ISE and Cisco StealthWatch, which can allow ISE to enrich information captured by Cisco StealthWatch with information captured by Cisco ISE over the network.
Topology

Step 1: Setup CA Server
- Setup the Group policy for Auto Enrolment for both Computer Configuration and User Configuration

Strongly recommend to contact Cisco TAC to verify below steps on windows Server
- Open the Windows CA Server
- Right-Click and Duplicate User template->Select Windows 2003 Enterprise->OK
- Enter name of certificate template, uncheck “Publish certificate in Active Directory”, and provide validity period and renewal period.
Note: Change which template is being duplicated. Must be changed to a template that does not allow Domain Users or Domain Computers the Enroll right by default (i.e. not the User or Computer template).

- Click Extensions->Add->Server Authentication->Ok->Apply

- Click Subject Name, Enable Supply in the request

- Click Extensions->Issuance Policies->Edit->All Issuance Policies


- Download the CA Root Cert in Base 64 format. We later need to install this certificate into both ISE and StealthWatch.

- Install Root Certificate into ISE: Trusted Certificates

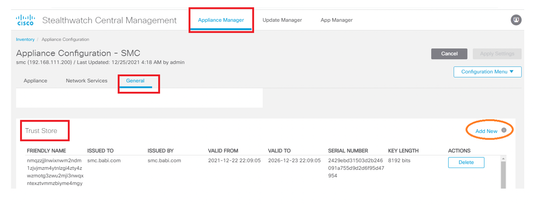
- Install the root certificate into the Stealthwatch
Landing page > Central Management > SMC > Action > Edit Appliance configuration > General > Trust Store

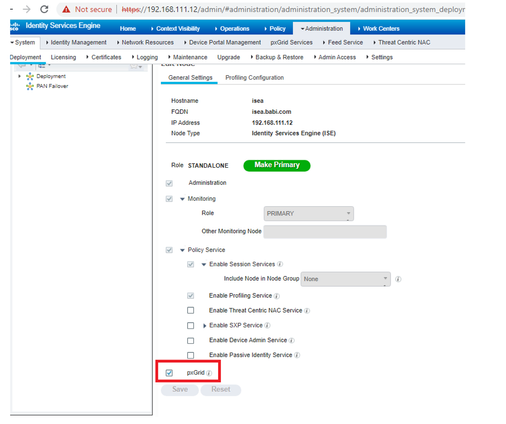
Step 2: Setup Cisco ISE
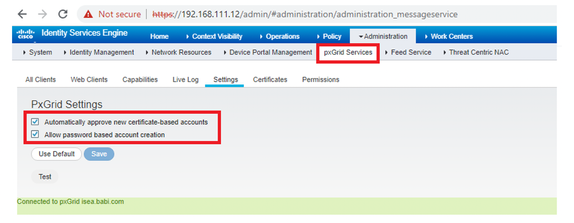
- Make sure that the ISE node will automatically approve new accounts by navigating to Administration>pxGrid Services>Settings
Note: Enable "Allow Password based account creation" is not required.
- Request for a Certificate for PXGRID and generate the CSR.
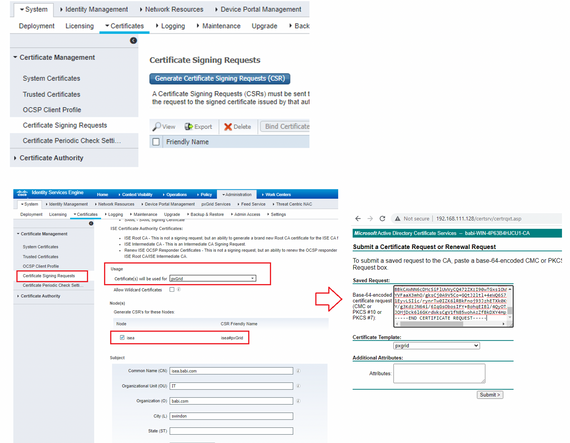
- Bind the downloaded certificate
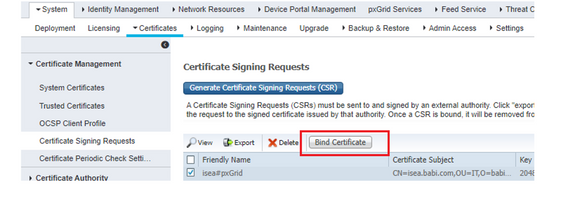
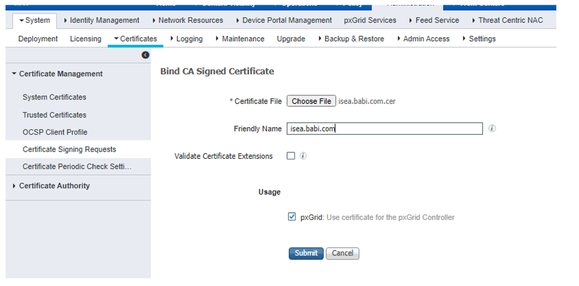
- Verify the certificates are installed.
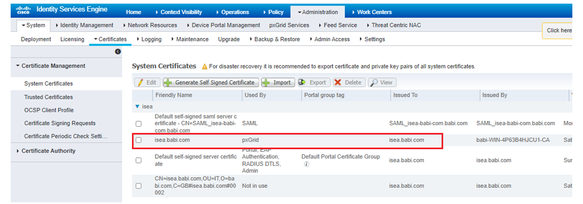
Step 3: Setup StealthWatch
- Request for the certificate used to authenticate Stealthwatch SMC and ISE.
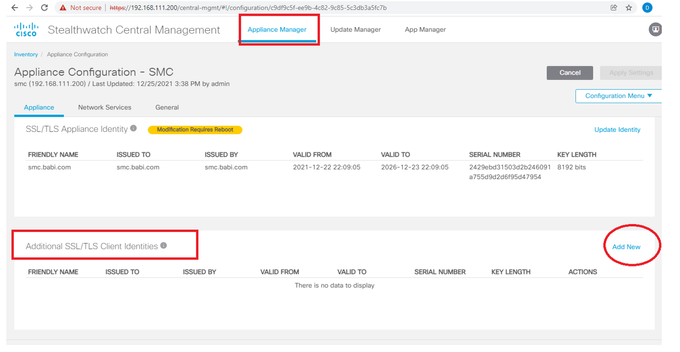
- Make sure that the ISE node will automatically approve new accounts by navigating to Administration>pxGrid Services>Settings
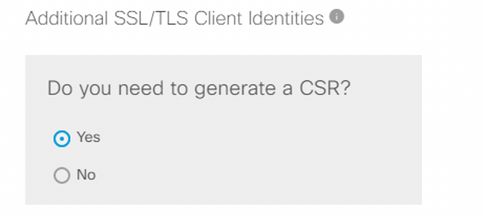
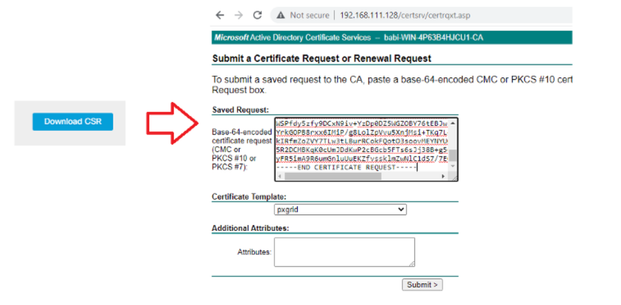
- Download the CSR and get a new certificate from the CA authority.
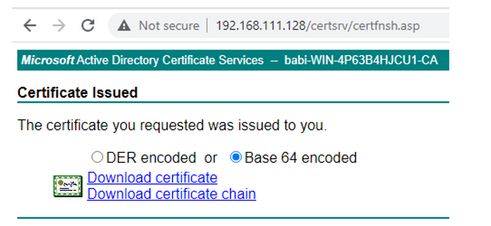
- Download base 64 encoded certificate
- Upload the certificate & apply changes.

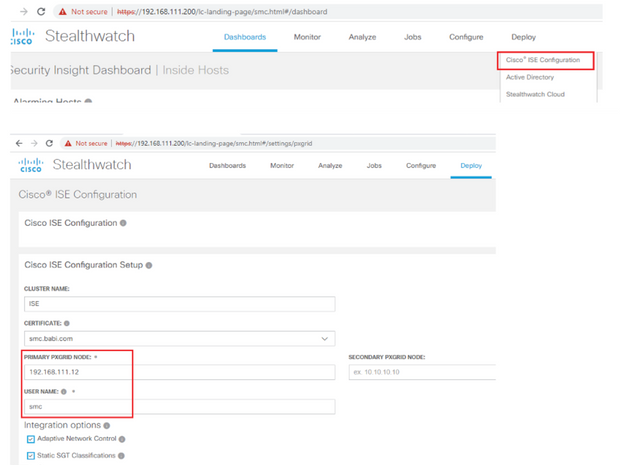
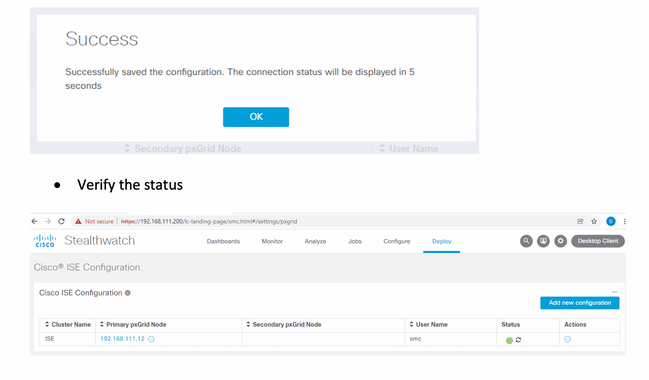
- Configure ISE integration
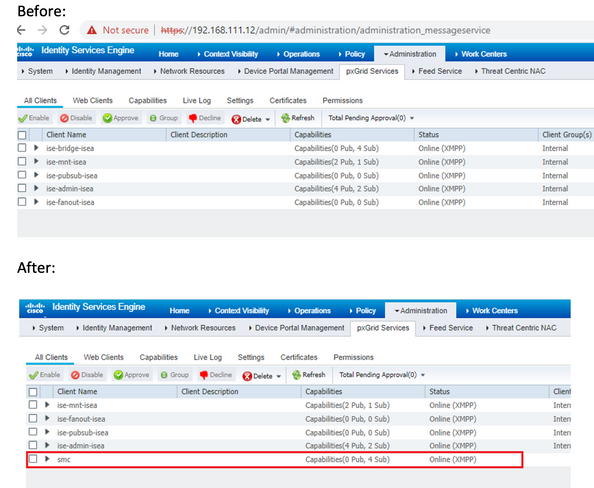
Verification on ISE
