- Cisco Community
- Technology and Support
- Data Center and Cloud
- UCS Director
- UCS Director Knowledge Base
- Generating JSON Data Within UCS Director Custom Workflow Tasks
- Subscribe to RSS Feed
- Mark as New
- Mark as Read
- Bookmark
- Subscribe
- Printer Friendly Page
- Report Inappropriate Content
- Subscribe to RSS Feed
- Mark as New
- Mark as Read
- Bookmark
- Subscribe
- Printer Friendly Page
- Report Inappropriate Content
05-09-2015 05:39 PM - edited 03-01-2019 06:34 AM
Should you ever require to create JSON formatted variables within a custom workflow task (When making RESTful requests to external systems for example), then the following steps will allow you to achieve this.
By the end of this exercise, we will use UCS Director to create a variable that contains the following reasonably complex JSON string:
{
"pool":"test-http-pool",
"description":"My test virtual server",
"name":"test-http-virtual",
"mask":"255.255.255.255",
"profiles":[
{
"name":"http",
"kind":"ltm:virtual:profile"
},
{
"name":"tcp",
"kind":"ltm:virtual:profile"
}
],
"ipProtocol":"tcp",
"sourceAddressTranslation":{"type":"automap"},
"kind":"tm:ltm:virtual:virtualstate",
"destination":"1.1.1.3:80"
}
If needs be, a short JSON refresher can be found here:
https://communities.cisco.com/docs/DOC-57426
So, let’s get started.
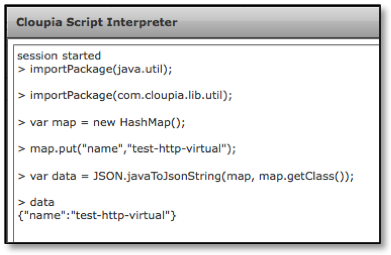
Firstly, we are going to store our keys and values in a Java HashMap. Therefore, we need to start our CloupiaScript with the following:
importPackage(java.util);
Whilst we are here, let’s also import the following package which contains the class to convert a Java HashMap to a JSON string:
importPackage(com.cloupia.lib.util);
We can now go ahead and create a HashMap to store our key/value pairs:
var map = new HashMap();
Let’s start slow and build a variable that contains a single JSON element.
map.put("name","test-http-virtual");
Notice that the delimeter for the HashMap is a comma (Not a colon as is normal for JSON). For this very simple example, let’s create a new variable that contains the JSON formatted data for this HashMap:
var data = JSON.javaToJsonString(map, map.getClass());
This operation can be verified within UCS Director's CloupiaScript interpreter, which can be found under Policies -> Orchestration -> Custom Workflow Tasks.

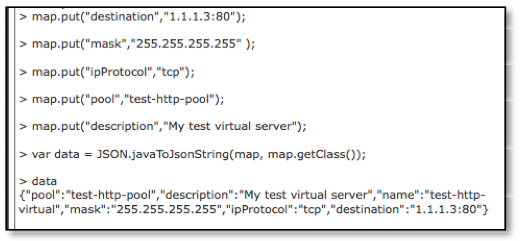
The other simple key/value pairs can now be added to our HashMap like so:
map.put("kind","tm:ltm:virtual:virtualstate");
map.put("destination","1.1.1.3:80");
map.put("mask","255.255.255.255" );
map.put("ipProtocol","tcp");
map.put("pool","test-http-pool");
map.put("description","My test virtual server");
var data = JSON.javaToJsonString(map, map.getClass());

Variable ‘data’ now looks like so:
{
"pool":"test-http-pool",
"description":"My test virtual server",
"name":"test-http-virtual",
"mask":"255.255.255.255",
"ipProtocol":"tcp",
"kind":"tm:ltm:virtual:virtualstate",
"destination":"1.1.1.3:80"
}
In all of the previous examples, the ‘value’ has always be a single entry (In this case, a string). However, it is possible for the value to be another JSON element. Like so:
"sourceAddressTranslation":{"type":"automap"}
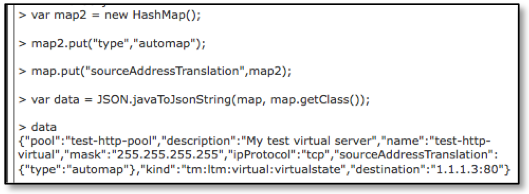
In this case, we need to create a second HashMap that will contain the key/value pair of “type” and “automap”. This new HashMap is then supplied as a value to the original HashMap. Like so:
var map2 = new HashMap();
map2.put("type","automap");
map.put("sourceAddressTranslation",map2);

The variable ‘data’ now looks like so:
{
"pool":"test-http-pool",
"description":"My test virtual server",
"name":"test-http-virtual",
"mask":"255.255.255.255",
"ipProtocol":"tcp",
"sourceAddressTranslation":{"type":"automap"},
"kind":"tm:ltm:virtual:virtualstate",
"destination":"1.1.1.3:80"
}
Finally, we need to look at the most complex JSON element in our example:
"profiles":[
{
"name":"http",
"kind":"ltm:virtual:profile"
},
{
"name":"tcp",
"kind":"ltm:virtual:profile"
}
],
In this case, the value of key “profiles” contains an array of JSON elements. To accomplish this, we first add the key “profiles” to our HashMap, but declare its value as an empty array:
map.put("profiles",new ArrayList());
To convert this to a JSON string now would look like so:
{
profiles":[]
}
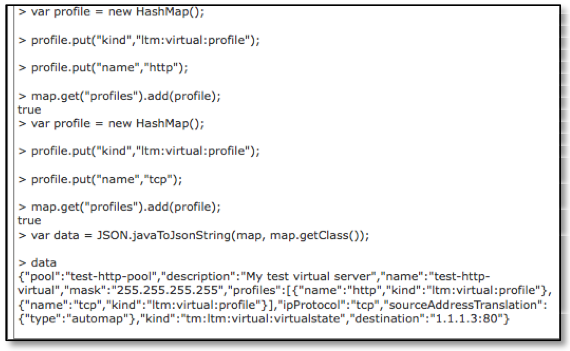
We now want to add our JSON elements to the array created for the “profiles” key. We accomplish this like so:
var profile = new HashMap();
profile.put("kind","ltm:virtual:profile");
profile.put("name","http");
map.get("profiles").add(profile);
var profile = new HashMap();
profile.put("kind","ltm:virtual:profile");
profile.put("name","tcp");
map.get("profiles").add(profile);
This gives us the final version of our desired JSON content:

Finally, our variable ‘data’ looks like so:
{
"pool":"test-http-pool",
"description":"My test virtual server",
"name":"test-http-virtual",
"mask":"255.255.255.255",
"profiles":[
{
"name":"http",
"kind":"ltm:virtual:profile"
},
{
"name":"tcp",
"kind":"ltm:virtual:profile"
}
],
"ipProtocol":"tcp",
"sourceAddressTranslation":{"type":"automap"},
"kind":"tm:ltm:virtual:virtualstate",
"destination":"1.1.1.3:80"
}
- Mark as Read
- Mark as New
- Bookmark
- Permalink
- Report Inappropriate Content
Hello
I need to generate a very large JSON object in UCSD and send the content as JSON-String to an ACI-APIC. In Cloupia Script Interpreter I can create an object and and translate it to a json string with the NativeJSON.stringify method. However, if I run the exact same method in a custom workflow script I always get an error (see below). Does anybody know this issue?
!========================================================
! Cloupia Script Interpreter --> WORKS FINE
!========================================================
session started
> var testObj = {"key":"value"};
> testObj;
[object Object]
> var jsonString = NativeJSON.stringify(testObj);
> jsonString;
{"key":"value"}
> typeof(jsonString);
string
!========================================================
! Custom Workflow Task (Script) --> ERROR (see below)
!========================================================
function objToString(obj)
{
return NativeJSON.stringify(obj);
}
var testObj = {"key":"value"};
var jsonString = objToString(testObj);
logger.addInfo(jsonString);
!========================================================
! Workflow Output --> ERROR
!========================================================
<...>
Sep 12, 2016 17:53:20 UTC Error occured at line # 3
Sep 12, 2016 17:53:20 UTC [Line#3] return NativeJSON.stringify(obj);
Sep 12, 2016 17:53:20 UTC Task: testJson (custom_mzeTestJson) failed with error - TypeError: [JavaClass com.cloupia.lib.util.JSON] has no such function 'stringify' in <eval> at line number 3, selectedContext=<None>
<...>
Sep 12, 2016 17:53:20 UTC Completed workflow item number 1, with status Failed
- Mark as Read
- Mark as New
- Bookmark
- Permalink
- Report Inappropriate Content
If you are trying to convert ACI APIC JSON content to a UCSD workflow task, then take a look here:
APIC_API_Inspector_2_UCSD_WF_wRollback_v3_5.4.0.0_plus.js - Box
apic_baseline_template.wfdx - Box
APIC_JSON_to_UCSD_JS.mp4 - Box
Regards
Russ.
Find answers to your questions by entering keywords or phrases in the Search bar above. New here? Use these resources to familiarize yourself with the community:
