| Task Name | Simultaneous Multi VM Deployment, Infoblox Supplied IPs |
| Description | Simultaneous Multi VM Deployment, Infoblox Supplied IPs |
| Prerequisites | - Tested on 5.2.0.2
|
| Category | Workflow tasks and video |
| Components | Create multiple VMs simultaneously with hostnames and IP addresses. IP addresses are retrieved from Infoblox Grid Manager and hostnames are registered also.
|
- Log in to UCS Director as a user that has "system-admin" privileges.
- Navigate to "Policies-->Orchestration" and click on "Import".
- Click "Browse" and navigate to the location on your computer where the .wfdx file resides. Choose the .wfdx file and click "Open".
- Click "Upload" and then "OK" once the file upload is completed. Then click "Next".
- Click the "Select" button next to "Import Workflows". Click the "Check All" button to check all checkboxes and then the "Select" button.
- Click "Submit".
- A new folder should appear in "Policies-->Orchestration" that contains the imported workflow.
The workflow tasks in this post build on the awesome effort managed by Orf Gelbrich with his deploy VM with IP inputs.
I have created a 16 minute video detailing exactly how these workflow tasks can be assembled to provide a multi tier VM deployment, with standardised hostnames and IP addresses supplied by Infoblox Grid Manager. Rollback is also included. The instructional video (521MB) can be accessed here:
Multi_VM_Deployment_w_Infoblox.mp4 - Box
In summary though, the workflow tasks create the following:
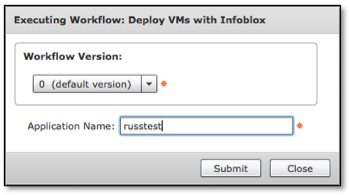
The end user simply supplies an Application name.
The workflow tasks then formulate the application name into a list of web and app server names. These names are then registered into Infoblox Grid Manager (Once the next available IP addresses have been requested).
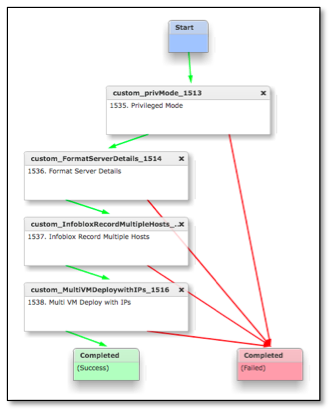
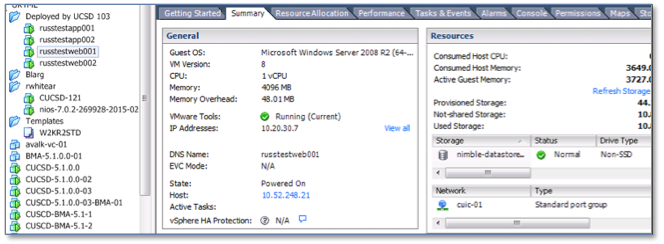
Once the IPs and hostnames are allocated, UCS Director provisions the required number of VMs simultaneously.
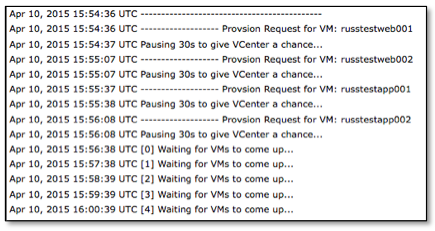

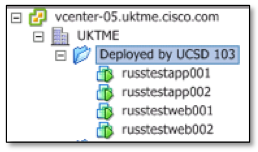
Once complete, the new VMs are running with their allocated IP addresses, netmask and default gateways configured and having the correct fully qualified domain name.
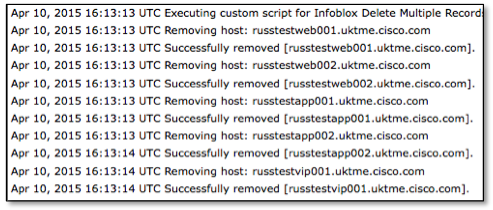
Finally, rollback is also integrated for removing the Infoblox address records:

Workflow tasks are attached.
