Contents
Introduction
Welcome to Cisco Community. You Community Profile is where you can find all your contributions, the number of helpful votes and accepted solutions you've received from your peers as all as have access to your drafted content and all the badges you've earned in the community. You can update your profile to let others know things about you, like your bio, share your social media channels, and display your certification badges. This document explains the how to update and manage your profile.
How to Access your Profile
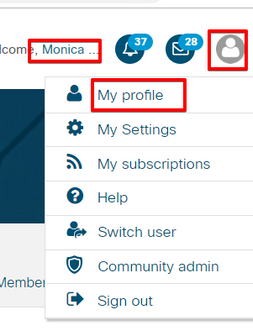
You can access your community profile by clicking on your username located in the top right. You cal also see it when you click on your avatar and select my profile.
Steps:
1. Login into Cisco Community by clicking on the Login link in the top right corner

2. Click your name or alternatively, click on your avatar to open the menu and select "My Profile"

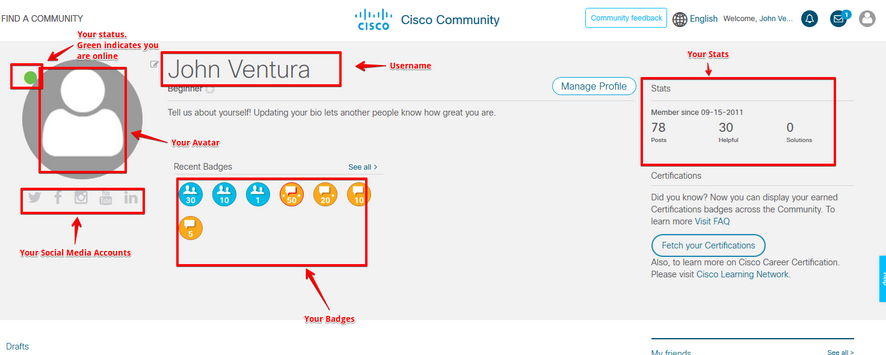
These are the different fields on your profile:

Users can also look at other member's profiles.
How do I add a bio, title, occupation, personal web page and signature to my Profile?
As community members it is great to let others know who you are, what are your areas of expertise, where do you work, etc. You can change it to add all of this information in your bio. To add or update your bio follow these steps:
Steps:
1. Login into Cisco Community by clicking on the Login link in the top right corner

2. Go to your profile and click on "Manage Setting" button or click on your avatar to open the menu and select "My Settings"
Select Personal and Personal Information Tab. Enter the text

3. Once you enter the information, click the "Save" button
How do I add an Avatar to my Profile?
All community members have a default avatar. You can change it to add your photo or other image. To change or update your avatar follow these steps:
Steps:
1. Login into Cisco Community by clicking on the Login link in the top right corner

2. Go to your profile and click on "Manage Setting" button or click on your avatar to open the menu and select "My Settings"
You will see a page where you can manage many settings and your subscriptions.

3. Select the AVATARS tab and click on "Upload an Avatar" link

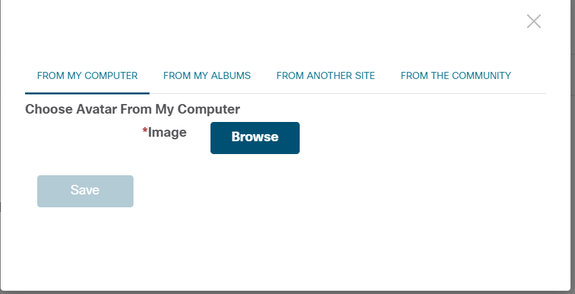
4. Select the correct location from where you will get the image for your avatar. The example below shows getting the image "FROM MY COMPUTER", but you can have the image on another side or somewhere already in the community. Once you make the selection click on "Browse" button. Once you uploaded, the "Save" button will be activated. Click the "Save" Button.

5. You might need to crop your photo. After you do that, Click the "Save and Continue" button.

How do I add my social media accounts to my Profile?
As community members it is a good practice to share your social media accounts, To add your social media accounts follow these steps:
Steps:
1. Login into Cisco Community by clicking on the Login link in the top right corner

2. Go to your profile and click on "Manage Setting" button or click on your avatar to open the menu and select "My Settings"
Select "Personal" and then "Social Accounts" Tab. Enter the text
