

Turn on suggestions
Auto-suggest helps you quickly narrow down your search results by suggesting possible matches as you type.
Showing results for
- Cisco Community
- Technology and Support
- DevNet
- General DevNet Topics
- DevNet General Blogs
- Introducing Python and Guest Shell on IOS-XE 16.5
44531
Views
36
Helpful
32
Comments
Options
- Subscribe to RSS Feed
- Mark as New
- Mark as Read
- Bookmark
- Subscribe
- Printer Friendly Page
- Report Inappropriate Content
04-17-2017
08:15 AM
Introduction
I’ve been long waiting for the latest version of IOS-XE to ship, and on April 13th IOS-XE 16.5 “Everest” posted to https://cisco.com/go/software for the ISR, ASR, and CSR routing platforms (still to come are the Catalyst Switching lines). The “Everest" release of IOS-XE is jam packed with new programmability features that I think everyone will agree are excellent additions as network programmability is becoming a mainstream topic for us all. Some of the highlights of this release include
- A modular approach to YANG Data Models for Cisco IOS-XE Features (ISR, CSR, ASR)
- Support for Zero Touch Provisioning (ZTP) for Day 0 infrastructure setup (ISR)
- New Application Hosting capabilities provided by a Linux Guest Shell (ISR)
- Ability to develop and execute Python scripts On-Box (ISR)
Note: Not all IOS-XE platforms support all features in release 16.5. Future software releases will extend features to other platforms.
In future blog posts I’ll dive deeper into all of these features, but today we’re going to look at the new Python execution capabilities.
Python and GuestShell
The ability to execute Python code directly on an end device is a part of the Application Hosting capabilities provided by GuestShell. We’ll go deeper into GuestShell on another day, but for now it is important to understand just some of the basics. GuestShell is a containerized Linux runtime that can be enabled on your IOS-XE device. On the ISR 4000 platforms, Guest Shell provides a CentOS 7 environment in which you can install and run applications, such as Python scripts. From within Guest Shell you and your applications have access to the networks of the host platform, bootflash, and IOS CLI. Guest Shell is isolated from the underlying host software to prevent interference of the core network functions of the device.
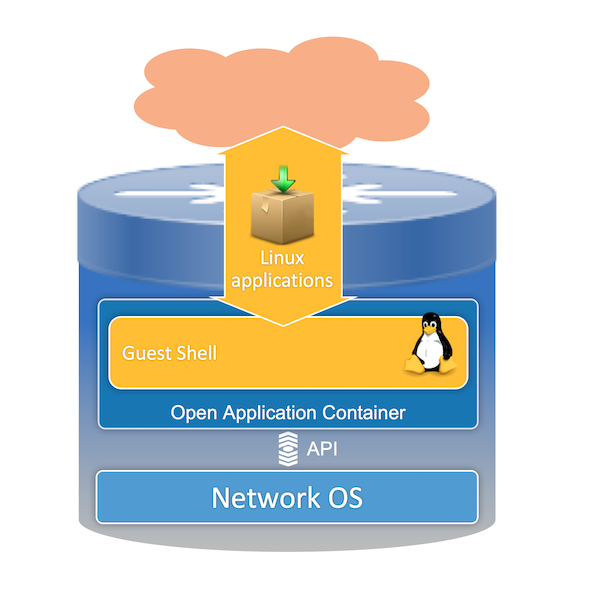
And I can’t go any further without mentioning that though a new feature to IOS-XE, Open NX-OS has offered Guest Shell and Python for awhile now. In fact the feature within IOS-XE is modeled after how it works within NX-OS so much of what we’ll look at here applies to NX-OS as well!
Guest Shell Quick Start
Enough talk… let’s get into some config and code! For this blog post I am using an ISR 4431 running 16.5.1b. The router was recently upgraded to 16.5 and has little other configuration in place. Before we can jump into doing something interesting with Python, we need to get Guest Shell up and running.
Step 1: Enable IOX
IOX is the manager that handles guest shell and other 3rd party applications in IOS-XE.
dev4431-1#conf t
Enter configuration commands, one per line. End with CNTL/Z.
dev4431-1(config)#iox
dev4431-1#show iox
Virtual Service Global State and Virtualization Limits:
Infrastructure version : 1.7
Total virtual services installed : 0
Total virtual services activated : 0
Machine types supported : KVM, LXC
Machine types disabled : none
Maximum VCPUs per virtual service : 2
Resource virtualization limits:
Name Quota Committed Available
--------------------------------------------------------------
system CPU (%) 75 0 75
memory (MB) 512 0 512
bootflash (MB) 1000 0 1000
IOx Infrastructure Summary:
---------------------------
IOx service (CAF) : Running
IOx service (HA) : Not Running
IOx service (IOxman) : Running
Libvirtd : Running
It should take only a few minutes for IOX start up. The HA service may not start on all platforms.
Step 2: Enable Guest Shell
From enable mode, you can now start the Guest Shell. It will take a few minutes to finish the startup procedure.
dev4431-1#guestshell enable
Management Interface will be selected if configured
Please wait for completion
dev4431-1#show app-hosting list
App id State
------------------------------------------------------
guestshell RUNNING
dev4431-1#
Step 3: Setup Guest Shell for Network Access - DNS
To do anything of real interest, you need to tell Guest Shell what DNS servers to use. We do this by setting them within “/etc/resolv.conf” just like a typical Linux OS.
! Log into Guest Shell from the router
dev4431-1#guestshell run bash
[guestshell@guestshell ~]$
# Use echo to add your DNS Server to the file. Here I use Open DNS.
[guestshell@guestshell ~]$ echo "nameserver 208.67.222.222" | sudo tee --append /etc/resolv.conf
nameserver 208.67.222.222
[guestshell@guestshell ~]$ cat /etc/resolv.conf
nameserver 208.67.222.222
# Test to see if things are working by using pip to install “requests”
[guestshell@guestshell ~]$ sudo -E pip install requests
Collecting requests
Downloading requests-2.13.0-py2.py3-none-any.whl (584kB)
100% |################################| 593kB 610kB/s
Installing collected packages: requests
Successfully installed requests-2.13.0
Note… if your environment requires Proxy Servers to access the internet, you will need to configure them within Guest Shell as well as DNS.
Success!
Alright, we are all set and ready for some Python Magic!
Quick Exploration of Python on IOS-XE
As Guest Shell is based on Cent OS 7, it comes with Python 2.7.5 pre-installed.
[guestshell@guestshell ~]$ python --version
Python 2.7.5
Along with Guest Shell, a few Python libraries are included for interacting with the underlying IOS platform. Below I give a show how we can use them send commands to IOS and process the results.
[guestshell@guestshell ~]$ python
Python 2.7.5 (default, Jun 17 2014, 18:11:42)
[GCC 4.8.2 20140120 (Red Hat 4.8.2-16)] on linux2
Type "help", "copyright", "credits" or "license" for more information.
>>> from cli import *
>>>
>>> ios_version = cli("show version")
>>> print(ios_version)
Cisco IOS XE Software, Version 16.05.01b
>>> ip_interfaces = cli("show ip int bri")
>>> print(ip_interfaces)
Interface IP-Address OK? Method Status Protocol
GigabitEthernet0/0/0 10.192.81.2 YES DHCP up up
GigabitEthernet0/0/1 unassigned YES NVRAM down down
GigabitEthernet0/0/2 unassigned YES NVRAM down down
GigabitEthernet0/0/3 unassigned YES NVRAM down down
GigabitEthernet0 10.192.81.91 YES DHCP up up
VirtualPortGroup0 192.168.35.1 YES manual up up
>>> # Now I’ll configure the description on an interface
>>> conf_snippet = '''interface GigabitEthernet0/0/2
... desc Configured by Python'''
>>> config_result = configure(conf_snippet)
>>> config_result
[ConfigResult(success=True, command='interface GigabitEthernet0/0/2', line=1, output='', notes=None), ConfigResult(success=True, command=' desc Configured by Python', line=2, output='', notes=None)]
>>> # The clip function runs a command and prints the results
>>> clip("show run int GigabitEthernet0/0/2")
Building configuration...
Current configuration : 132 bytes
!
interface GigabitEthernet0/0/2
description Configured by Python
no ip address
shutdown
media-type rj45
negotiation auto
end
>>> exit()
If you prefer Python 3, you can install it like you would on any Cent OS 7 device.
[guestshell@guestshell ~]$sudo -E yum -y install https://centos7.iuscommunity.org/ius-release.rpm
[guestshell@guestshell ~]$sudo -E yum -y install python35u-3.5.3
[guestshell@guestshell ~]$python3.5 --version
Python 3.5.3
Let’s do something interesting
Okay, running live Python commands on a router is interesting, but not very powerful all by itself. Let’s take a look at how we can combine this new feature with EEM for new and interesting options. With the addition of Python and Guest Shell, you can now have EEM execute a Python Script as an action. This provides the power of Python, with the event driven actions of EEM… Awesome! For this example we’ll take a step into “Chat Ops” and our Router send a Spark message every time the configuration is changed.
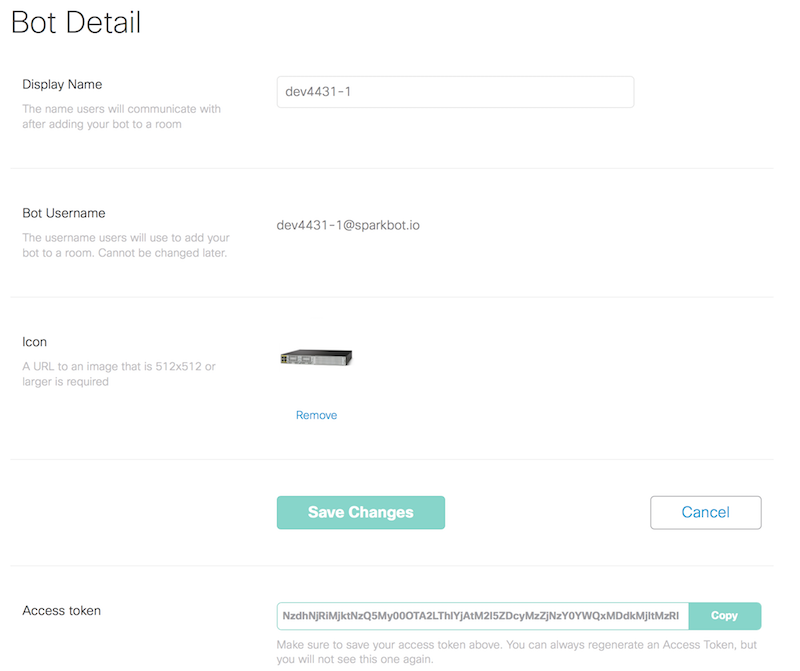
Step 1: Create a Spark Bot Account for our Router
In order to send a message with Spark, our router will need an account to use. Rather than create a full account for every device, I’ll just create a Bot under my own Spark Account for this router. From https://developer.ciscospark.com, I create a new bot account. I grab the Authentication Token because I’ll need that for my script.
Step 2: The Python Code
For this demo, I created a very simple Python Script that can be used to send a message to someone. Here is the script.
from ciscosparkapi import CiscoSparkAPI

if __name__=='__main__':
    # Use ArgParse to retrieve command line parameters.
    from argparse import ArgumentParser
    parser = ArgumentParser("Spark Check In")
    # Retrieve the Spark Token and Destination Email
    parser.add_argument(
        "-t", "--token", help="Spark Authentication Token", required=True
    )
    # Retrieve the Spark Token and Destination Email
    parser.add_argument(
        "-e", "--email", help="Email to Send to", required=True
    )
    args = parser.parse_args()
    token = args.token
    email = args.email
    message = "**Alert:** Config Changed"
    api = CiscoSparkAPI(access_token=token)
    api.messages.create(toPersonEmail=email, markdown=message)
I am using the very handy CiscoSparkAPI Python module to send the message, so we’ll need to pip install that first.
[guestshell@guestshell ~]$ sudo -E pip install ciscosparkapi
Now I create “scripts” folder in the bootflash to store this and other future scripts.
[guestshell@guestshell ~]$ mkdir /bootflash/scripts
Because this directory is on bootflash, I could create the script from my local machine and upload it using any available method to get it onto the box. For now, I’m just going to use “vi” from within Guest Shell to create the script.
[guestshell@guestshell ~]$ cat /bootflash/scripts/spark_checkin.py
from ciscosparkapi import CiscoSparkAPI
if __name__=='__main__':
# Use ArgParse to retrieve command line parameters.
from argparse import ArgumentParser
parser = ArgumentParser("Spark Check In")
# Retrieve the Spark Token and Destination Email
parser.add_argument(
"-t", "--token", help="Spark Authentication Token", required=True
)
# Retrieve the Spark Token and Destination Email
parser.add_argument(
"-e", "--email", help="Email to Send to", required=True
)
args = parser.parse_args()
token = args.token
email = args.email
message = "**Alert:** Config Changed"
api = CiscoSparkAPI(access_token=token)
api.messages.create(toPersonEmail=email, markdown=message)
Before I tie it into EEM, let’s test it real quick to make sure it works. The script uses the common “argparse” module for Python to take in command line arguments for the token, email to send to, and message to send.
[guestshell@guestshell ~]$ python /bootflash/scripts/spark_checkin.py -t OTJjNGM1MGItZjUUyZjM0Y2ViYzc5Mjg3MGUzNTQtYTM0 -e hapresto@cisco.com
And I do indeed get the message in Spark!

Step 3: Connecting to EEM
First I drop out of guest shell and get back into IOS.
[guestshell@guestshell ~]$ exit
exit
dev4431-1#
Next I configure the EEM Applet to use the script.
dev4431-1#config t
dev4431-1(config)#event manager applet GUESTSHELL-CONFIG-CHANGE-TO-SPARK
dev4431-1(config-applet)#event syslog pattern "%SYS-5-CONFIG_I: Configured from"
dev4431-1(config-applet)#action 0.0 cli command "en"
dev4431-1(config-applet)#action 1.0 cli command "guestshell run python /bootflash/scripts/spark_checkin.py -t OTJjNGM1MGItZjUUyZjM0Y2ViYzc5Mjg3MGUzNTQtYTM0 -e hapresto@cisco.com"
dev4431-1(config-applet)#exit
dev4431-1(config)#exit
Now each time I make a configuration change, I receive the notification in Cisco Spark. This is a very basic implementation of the “Chat Ops” idea, but highlights how quick and easy this type of thing can be leveraged with very little time, or programming skill needed.
With the power of Python, I could use ncclient and NETCONF to leverage the model drive programmability options under the hood as an alternative to the CLI options we looked at earlier this post.
Summing Up!
Wow... I hope you found this article enjoyable and got you thinking about how you might leverage this new capability of IOS-XE. If you’d like to test out the spark_checkin.py code a little closer you can find it, along with many other Python samples posted in on GitHub in the https://github.com/CiscoDevNet/python_code_samples_network repository.
If this kind of thing has you interested, be sure to join us at Cisco Live 2017 in Vegas. We've several sessions in DEVNET discussing the new programmability features of IOS-XE and all our platforms. A few suggestions to take a look at include:
DEVNET-1694 - Supercharge the Network with Python On IOS-XE
DEVNET-2556 - DevNet Workshop - Dive into Leveraging Python on IOS-XE
DEVNET-1695 - Application Hosting in IOS-XE
DEVNET-2557 - DevNet Workshop - Hand On - Application Hosting in IOS-XE
DEVNET-2589 - DevNet Workshop - Hands-On - Solving Problems with Application Hosting and Guestshell
DEVNET-2102 - DevNet Workshop - Network Programmability with NXOS Using Guest Shell
Also, we've got new Learning Labs and Sandboxes planned to provide more great hands on options and info for you at anytime.
What will you use this new feature for? Leave a note in the comments, or tweet me @hfpreston
Labels:
32 Comments
You must be a registered user to add a comment. If you've already registered, sign in. Otherwise, register and sign in.
Getting Started
Find answers to your questions by entering keywords or phrases in the Search bar above. New here? Use these resources to familiarize yourself with the community:

Customers Also Viewed These Support Documents