- Cisco Community
- Technology and Support
- Security
- Security Knowledge Base
- Re-imaging the CSC-SSM
- Subscribe to RSS Feed
- Mark as New
- Mark as Read
- Bookmark
- Subscribe
- Printer Friendly Page
- Report Inappropriate Content
- Subscribe to RSS Feed
- Mark as New
- Mark as Read
- Bookmark
- Subscribe
- Printer Friendly Page
- Report Inappropriate Content
06-10-2009 05:00 AM - edited 03-08-2019 05:59 PM
- Overview
- Different upgrade methods
- Precautions
- Step 1: Download the latest CSC Image File
- Step 2: Setting up a TFTP Server
- Step 3: Backing-up the current CSC configuration and Licenses
- Step 4: Re-imaging the CSC module
- Step 5: Re-initializing the CSC module
- Step 6: Restoring CSC configuration
Overview
This guide steps through the basics of re-imaging the Cisco ASA Content Security and Control (CSC) Security Services Module with the latest image file. This process takes roughly 30 minutes to complete (not including the downloading of the upgrade files from cisco.com) and it leaves the CSC module with a fresh installation of code.
Different upgrade methods
There are two types of upgrade files available for the CSC module: BIN files and PKG files.
BIN files - BIN files are used to re-image the module. The files include the full installation of code present on the module. The BIN files will bring the module to a certain maintenance version such as 6.3.1172.0 or 6.6.1125.0.
PKG files - PKG files contain incremental bug fixes beyond the main release version available in BIN files. For example the csc6.3.1172.4.pkg will bring the module from 6.3.1172.0 up to 6.3.1172.4. PKG files contain just bug fixes and minor changes. You should read the PKG release notes to determine what is the minimum version of code the PKG can be installed on. Some package upgrades have very specific versions that must be installed prior to upgrade, the realease notes will outline that in detail:
Precautions
This process will bring the CSC module down during the re-image process. If you have your CSC scanning policy configured with 'fail-close'. The traffic matching that policy will be blocked until the re-image process is completed and the module is back on-line. More information about the difference between 'fail-close' and its opposite, 'fail-open', can be found here:
Diverting Traffic to the CSC SSM
Step 1: Download the latest CSC Image File
- Go to http://tools.cisco.com/squish/44211
- On this page download the correct BIN file and optional PKG files. In this case “csc6.6.1125.0.bin”
- Once the download completes proceed to Step 2: Setting up a TFTP Server
Step 2: Setting up a TFTP Server
NOTE: If you already have a TFTP server available skip this step.
- If you do not have a TFTP server, download a free version from the Internet.
- For this example we reccomend TFTPD32, available at http://tftpd32.jounin.net/
- Download and extract TFTPD32 to a folder on your hard-drive. For this example we will use c:\tftp.
- Please the CSC image file, csc6.6.1125.0.bin, in this folder as well. (image below shows old image files, but you get the idea)
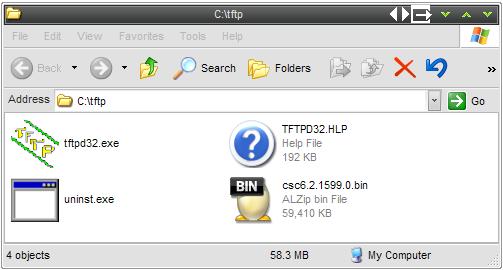
- Start the TFTP Server (tftpd32.exe) and note the IP address it binds to. In this example it is 192.168.1.50.

Step 3: Backing-up the current CSC configuration and Licenses
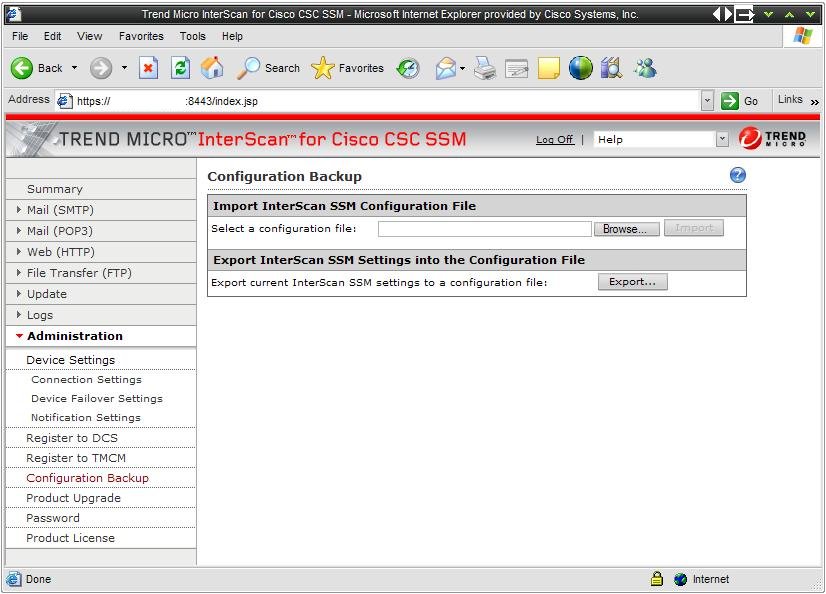
- Log into the CSC module by going to https://CSC-module-IP:8443
- On the left select “Administration” -> “Configuration Backup”
- Proceed to Export the config.tgz file and save it to your Computer
- Click on “Administration” -> “Product License” can copy down the two Activation codes (PX-...)
Step 4: Re-imaging the CSC module
- Log into ASA’s command line by Telnet or SSH
- Enter ‘enable’ mode
- Enter the command hw-module module 1 recover config to begin the re-imaging setup.
- It will ask for the following info (filled in for this example)
- Please note that the "Port IP Address" value is the ip address of the CSC module itself:
ciscoasa(config)# hw-module module 1 recover config
Image URL [tftp://0.0.0.0/]: tftp://192.168.1.50/csc6.6.1125.0.bin -
Port IP Address [0.0.0.0]: 192.168.1.250
VLAN ID [0]:
Gateway IP Address [0.0.0.0]:
ciscoasa(config)#
NOTE: Leave the gateway as 0.0.0.0 if the TFTP and CSC port are on the same Layer-3 subnet. If they are on different subnets, set the gateway to the next-hop router between the subnets.
- When you are prepared to start the re-image process, enter the command hw-module module 1 recover boot:
ciscoasa(config)# hw-module module 1 recover boot
The module in slot 1 will be recovered. This may
erase all configuration and all data on that device and
attempt to download a new image for it.
Recover module in slot 1? [confirm]
ciscoasa(config)#
Recover issued for module in slot 1 - Issue the command debug module in order to watch the re-image progress:
Slot-1 000> Platform SSM-CSC20
Slot-1 001> GigabitEthernet0/0
Slot-1 002> Link is UP
Slot-1 003> MAC Address: 000b.fcf8.0134
Slot-1 004> ROMMON Variable Settings:
Slot-1 005>   ADDRESS=192.168.1.250
Slot-1 006>   SERVER=192.168.1.50
Slot-1 007>   GATEWAY=0.0.0.0
Slot-1 008>   PORT=GigabitEthernet0/0
Slot-1 009>   VLAN=untagged
Slot-1 010>   IMAGE= csc6.6.1125.0.bin
Slot-1 011>   CONFIG=
Slot-1 012> tftp csc6.6.1125.0.bin@192.168.1.50
Slot-1 013> !!!!!!!!!!!!!!!!!!!!!!!!!!!!!!!!!!!!!!!!!!!!!!!!!!!!!!!!!!!!!!!!!!!!!!!!!!
Slot-1 014> !!!!!!!!!!!!!!!!!!!!!!!!!!!!!!!!!!!!!!!!!!!!!!!!!!!!!!!!!!!!!!!!!!!!!!!!!! - The process will take roughly 10 minutes to complete. When the re-image is done, the following debug lines will be shown. If you see Launching BootLoader... then it is just about finished:
Slot-1 204>!!!!!!!!!!!!!!!!!!!!!!!!!!!!!!!!!!!!!!!!!!!!!!!!!!!!!!!!!!!!!!!!!!!!!!!!!!!
Slot-1 205> Received 57985402 bytes
Slot-1 206> Launching TFTP Image...
Slot-1 207> Cisco Systems ROMMON Version (1.0(8)1) #0: Thu Jan 20 20:28:49 PST 2005
Slot-1 208> Platform SSM-CSC20
Slot-1 209> GigabitEthernet0/0
Slot-1 210> Link is UP
Slot-1 211> MAC Address: 000b.fcf8.0134
Slot-1 212> Launching BootLoader...
Step 5: Re-initializing the CSC module
- Session into the module with the command ‘session 1’ on the ASA.
- Use the username/password combination of ‘cisco’ and ‘cisco’
- You will be asked to change the password, follow that prompt.
- The wizard will walk you through prompts to re-configure the base settings of the CSC module such as network settings, domain names, license codes.
- After this process is done, it will instruct you to log into the CSC module via the Web GUI.
Step 6: Restoring CSC configuration
- Log into the CSC module by going to https://CSC-module-IP:8443
- On the left select “Administration” -> “Configuration Backup” and re-import the configuration file

Reference URL for Cisco.com----
| http://www.cisco.com/en/US/docs/security/csc/csc6.1.1569.0/administration/guide/cscappa.pdf |
Find answers to your questions by entering keywords or phrases in the Search bar above. New here? Use these resources to familiarize yourself with the community: