- Cisco Community
- Technology and Support
- Service Providers
- Service Providers Knowledge Base
- Running IOS XRv on ESXi and QEMU/KVM
- Subscribe to RSS Feed
- Mark as New
- Mark as Read
- Bookmark
- Subscribe
- Printer Friendly Page
- Report Inappropriate Content
- Subscribe to RSS Feed
- Mark as New
- Mark as Read
- Bookmark
- Subscribe
- Printer Friendly Page
- Report Inappropriate Content
on 02-05-2014 10:21 PM
Big Thanks to Lim Fung for this collaborative effort.
Important: This document is intended as a quick start guide and is NOT an official document for what is officially supported. The demo version of IOS XRv is offered without support and can be run on top of any hypervisor. For information regarding supported hypervisor for simulation/production deployment, please refer to the official Release Notes.
- Running Cisco IOS XRv on QEMU/KVM 1.0
- Running Cisco IOS XRv on ESXi 5.x
- Section 1: Uploading the IOS XRv VMDK file to the ESXi Datastore
- Section 2: Creating a new VM and using the IOS XRv VMDK as the existing virtual disk
- Section 3: Adding Serial Ports to the VM for Console and (optional) AUX ports
- Section 4: Modifying Firewall Settings to allow connection to Serial Ports
- Section 5: Accessing the IOS XRv VM
- Sample Output of the bootup process
- Quick Start Lab Guide: Introduction to Cisco IOS XR Technical Workbook
- See also:
Running Cisco IOS XRv on QEMU/KVM 1.0
Minimal steps to install QEMU/KVM 1.0 on Linux Ubuntu Server 12.04.LTS (x86_64)
- Perform a minimal install of Ubuntu Server 12.04.LTS (x86_64)
- Install essential software components
- apt-get install qemu-kvm; modprobe kvm;
- apt-get install uml-utilities (required for tap interface for bridge to physical interface)
- Ensure that VT-x flag (or equivalent) is exposed to operating system.
- egrep -c '(vmx|svm)' /proc/cpuinfo
- Ensure that current user is added to 'kvm' group
- sudo addgroup `id -un` kvm (re-login for group changes to take effect)
Assuming you already have a working QEMU/KVM environment, spinning up a VM with Cisco IOS XRv on QEMU/KVM is simple and straightforward.
- Download IOS XRv VMDK file from Cisco.com. (e.g. iosxrv-demo-5.1.1.vmdk)
- Make a copy of the VMDK file for each IOS XRv VM, either
- cp iosxrv-demo-5.1.1.vmdk xrv-1.vmdk; cp iosxrv-demo-5.1.1.vmdk xrv-2.vmdk
- qemu-img create -f qcow2 -b iosxrv-demo-5.1.1.vmdk xrvr-1.qcow2; qemu-img create -f qcow2 -b iosxrv-demo-5.1.1.vmdk xrvr-2.qcow2*
- In the example below, we are using xrv-1.vmdk and xrv-2.vmdk
- Determine what memory you want to allocate to each VM (min 3GB - max 8GB). Configure it using the -m flag.
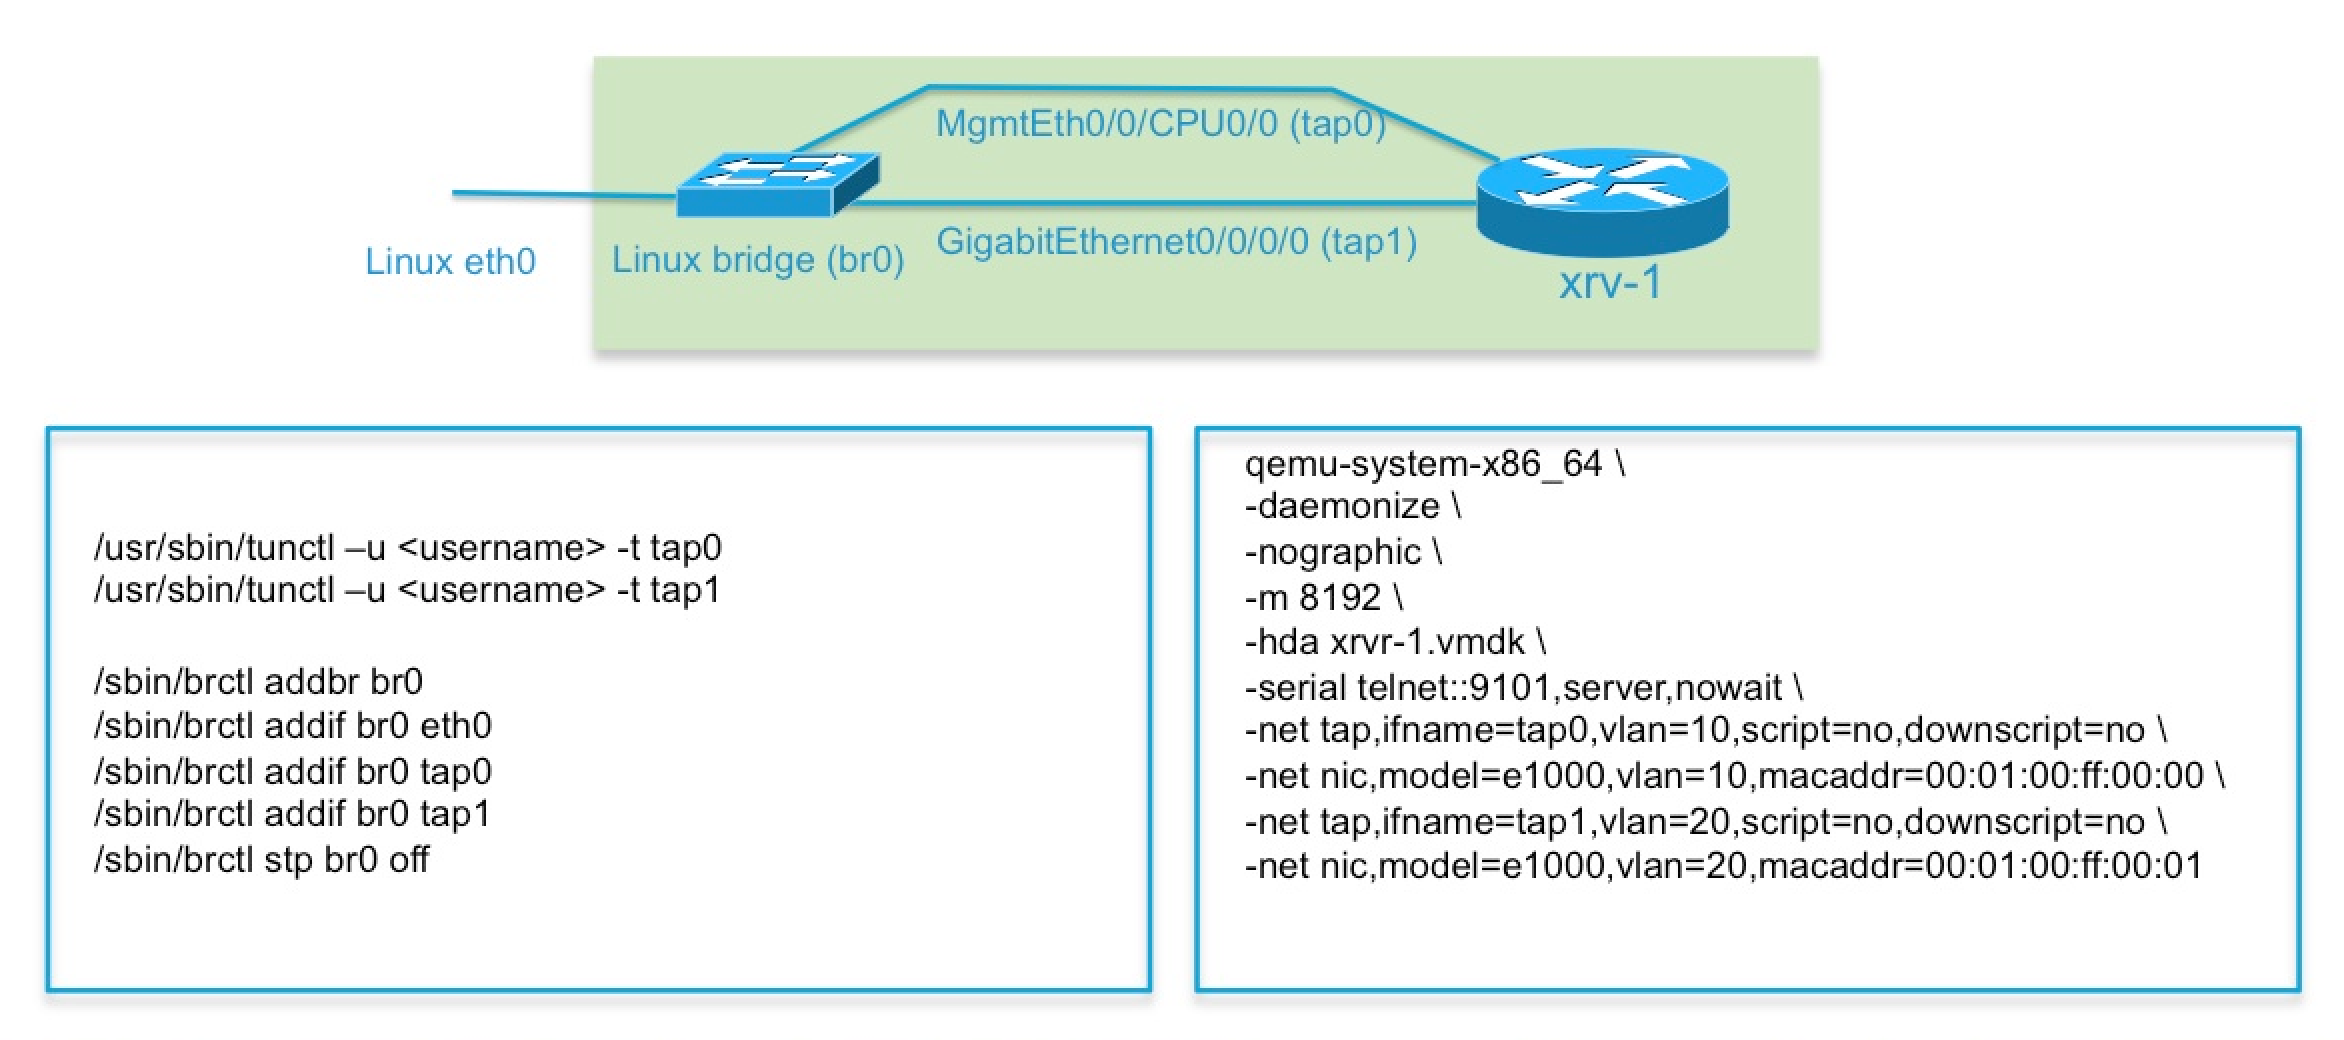
- Configure the connections between the two IOS XRv VM using the -net flag. Make sure one side is set to ‘listen’ and the other is set to ‘connect’.(Note: The first NIC will show up as MgmtEth0/0/CPU0 and the succeeding NICs will show us as GigabitEthernet0/0/0/0, GigabitEthernet0/0/0/1 and so on)
- Access the IOS XRv VMs by using telnet to the port specified in the configuration. (e.g. telnet localhost 9101)
- Wait for the IOS XRv to boot up.
- Login and start configuring! (Scroll down below for link to Introduction to Cisco IOS XR Technical Workbook)
*This allows you to leverage on the QEMU Copy-On-Write (COW) feature.
As an illustration, two Cisco IOS XRv VMs are created and connected back-to-back.
- First VM uses 3GB of memory and xrv-1.vmdk for the disk.
- Second VM uses 3GB of memory and xrv-2.vmdk for the disk.

Connecting IOS XRv to External Devices
Using more than 8 NICs in QEMU/KVM 1.0
QEMU/KVM 1.0 by default does not allow more than 8 NICs to be attached to a virtual machine. In order to remove this limitation, editing the header files and compiling the package from source is required. Below are the steps that are required to achieve this.
1. apt-get source qemu-kvm
2. cd qemu-kvm-1.0+noroms
3. edit net.h using your favourite editor (vi) and look for the line that says
/* NIC info */
#define MAX_NICS 8
4. Change the value of MAX_NICS to something larger, e.g. 16.
5. Save changes and quit editor.
6. Prepare your build environment, i.e.
- apt-get install build-essential
- apt-get --no-install-recommends -y build-dep qemu-kvm
- dpkg-buildpackage -us -uc -nc
7. After the build completes you will have qemu-kvm_1.0+noroms-0ubuntu14.13_amd64.deb in the parent directory.
8. If you already have kvm installed, remove it.
- apt-get --purge remove qemu-kvm
9. To install and use the newly compile qemu-kvm package, do (in the parent directory)
- dpkg -i qemu-kvm_1.0+noroms-0ubuntu14.13_amd64.deb
Running Cisco IOS XRv on ESXi 5.x
This installation guide is broken down into 5 sections:
- Uploading the IOS XRv VMDK file to the ESXi Datastore
- Creating a new VM and using the IOS XRv VMDK as the existing virtual disk
- Adding Serial Ports to the VM for Console and (optional) AUX ports
- Modifying Firewall Settings to allow connection to Serial Ports
- Accessing the IOS XRv VM
Section 1: Uploading the IOS XRv VMDK file to the ESXi Datastore
- Download IOS XRv VMDK file from Cisco.com. (e.g. iosxrv-demo-5.1.1.vmdk)
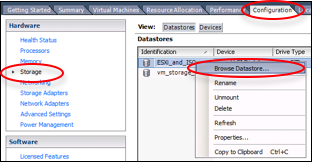
- Upload the IOS XRv VMDK file to the ESXi Datastore. (Click on the ESXi Host -> Configuration -> Storage -> [Right-Click] Browse Datastore)
3. Create a directory for the VMDK file.. (Tip: Use the same name that you would use for the VM)
4. Click the Upload button and browse for the VMDK file.
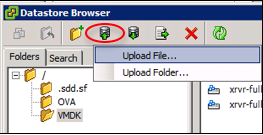
5. Close the dialog box when upload is done.
Section 2: Creating a new VM and using the IOS XRv VMDK as the existing virtual disk
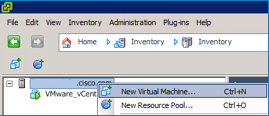


- Create a new virtual machine. ([Right-Click] on ESXi Host) or (File -> New -> Virtual Machine)
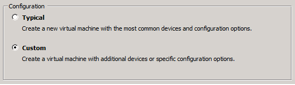
- Select Custom for Configuration Type. This will give you the option to configure CPU, Memory, etc upfront. Click Next.
- Type in the name you want for this VM. Click Next.
- Select the datastore you would want this VM to use. Click Next.
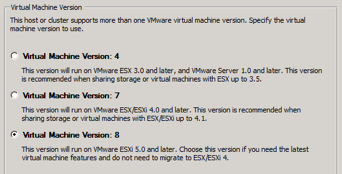
- For Virtual Machine version, select Version 8. Click Next.
- For Guest Operating System, select Other and specifically “Other (32-bit)” from the drag down option. Click Next.
- Configure the vCPU. (min 1 core)
- Configure memory size or vRAM. (min 3GB and max 8GB)
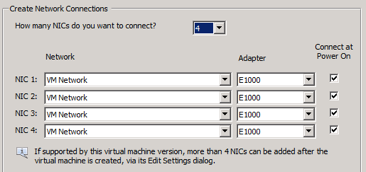
- You can select up to 4 NICs on this step. You can add more NICs later. Make sure to change the adapter type to E1000 for ALL NICs. Click Next.
(Note: The first NIC will show up as MgmtEth0/0/CPU0 and the succeeding NICs will show us as GigabitEthernet0/0/0/0, GigabitEthernet0/0/0/1 and so on) - Use default value for SCSI Controller Settings. Click Next.
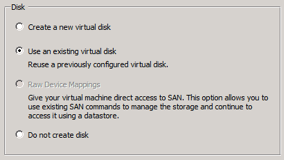
- For the Disk Option, select the option “Use an existing virtual disk”. Click Next
- Browse for the IOS XRv VMDK File. Click Next.
- Leave the options as default. Click Next.
- Summary Page. Click Finish.
Section 3: Adding Serial Ports to the VM for Console and (optional) AUX ports
(Note: VMware may require license to add serial ports)
- On the left navigation pane, right-click on the newly created IOS XRv VM and select “Edit Settings”. This will bring up the VM Properties dialog box.
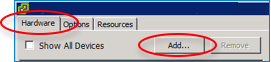
- Under the Hardware tab, click Add.
- Select Serial Port. Click Next.
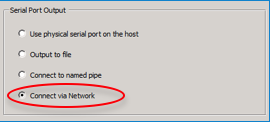
- Select “Connect via Network” for Serial Port Output. Click Next.
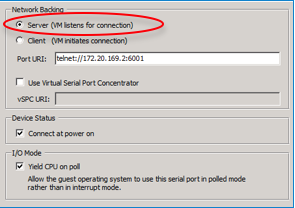
- Under Network Backing, select “Server” instead of “Client”. Type in “telnet://<esxi_host_ip>:<port_number>” under Port URI. Leave the other options as is. Click Next.
- Click Finish.
- (OPTIONAL) Repeat the procedure to add a second serial port.
Note: The first serial port added to the VM will be the Console port and the second serial port will be for the Aux port.
Section 4: Modifying Firewall Settings to allow connection to Serial Ports
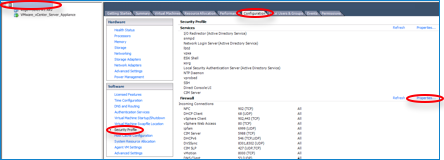
- On the left navigation pane, click on the ESXi Host. Click on the Configuration Tab. Under Software, click Security Profile.
- Under Firewall, Click on Properties.
- Scroll through the list and search for “VM serial port connected over network”. Enable it by clicking on the checkbox. Click OK.

Section 5: Accessing the IOS XRv VM
- Telnet (from any telnet client) to the IOS XRv VM with the telnet URL created in Section 3. (e.g. telnet 172.20.169.2 6001)
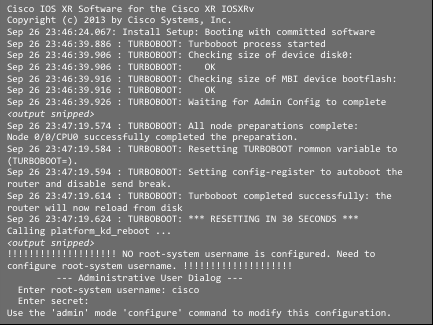
- It will go through the TURBOBOOT process the first time it boots up and will reload once TURBOBOOT is complete. This only happens once, only during the first bootup.
- Create Username and Password when prompted.
- Login and start configuring! (Scroll down below for link to Introduction to Cisco IOS XR Technical Workbook)
Sample Output of the bootup process
Quick Start Lab Guide: Introduction to Cisco IOS XR Technical Workbook
New to Cisco IOS XR? Follow the link below to get started!
https://supportforums.cisco.com/docs/DOC-39962
See also:
Running IOS XRv on VMware Fusion/Workstation
- Mark as Read
- Mark as New
- Bookmark
- Permalink
- Report Inappropriate Content
Hello,
Have you enabled the FW to allow the serial ports over the network? It could also be that there is another connection already using the port. Or you are connecting with wrong IP? It should be the IP address of the ESXi.
- Mark as Read
- Mark as New
- Bookmark
- Permalink
- Report Inappropriate Content
Hello Kego,
Is there any other way to create console to the xrv in vmware apart from the option mentioned in section 3.
Since we have installed the vmware standard license which does not include the remote serial license feature in it, we are unable to create serial connection to the router. Able to connect only in evaluation license.
Warm Regards,
Thiyagarajan B
- « Previous
-
- 1
- 2
- Next »
Find answers to your questions by entering keywords or phrases in the Search bar above. New here? Use these resources to familiarize yourself with the community: