- Cisco Community
- Technology and Support
- Data Center and Cloud
- UCS Director
- UCS Director Knowledge Base
- UCSD - UCS Central Inventory Refresh / Any System Task Inventory
- Subscribe to RSS Feed
- Mark as New
- Mark as Read
- Bookmark
- Subscribe
- Printer Friendly Page
- Report Inappropriate Content
- Subscribe to RSS Feed
- Mark as New
- Mark as Read
- Bookmark
- Subscribe
- Printer Friendly Page
- Report Inappropriate Content
04-20-2016 05:09 AM - edited 03-01-2019 06:41 AM
| Task Name | UCS Central inventory refresh |
| Description | |
| Prerequisites |
|
| Category | Workflow |
| Components | vSphere 5.x |
| User Inputs | e-mail address |
| Output | e-mail with counter |
Instructions for Regular Workflow Use:
- Download the attached .ZIP file below to your computer. *Remember the location of the saved file on your computer.
- Unzip the file on your computer. Should end up with a .WFD file.
- Log in to UCS Director as a user that has "system-admin" privileges.
- Navigate to "Policies-->Orchestration" and click on "Import".
- Click "Browse" and navigate to the location on your computer where the .WFDX file resides. Choose the .WFDX file and click "Open".
- Click "Upload" and then "OK" once the file upload is completed. Then click "Next".
- Click the "Select" button next to "Import Workflows". Click the "Check All" button to check all checkboxes and then the "Select" button.
- Click "Submit".
- A new folder should appear in "Policies-->Orchestration" that contains the imported workflow. You will now need to update the included tasks with information about the specific environment
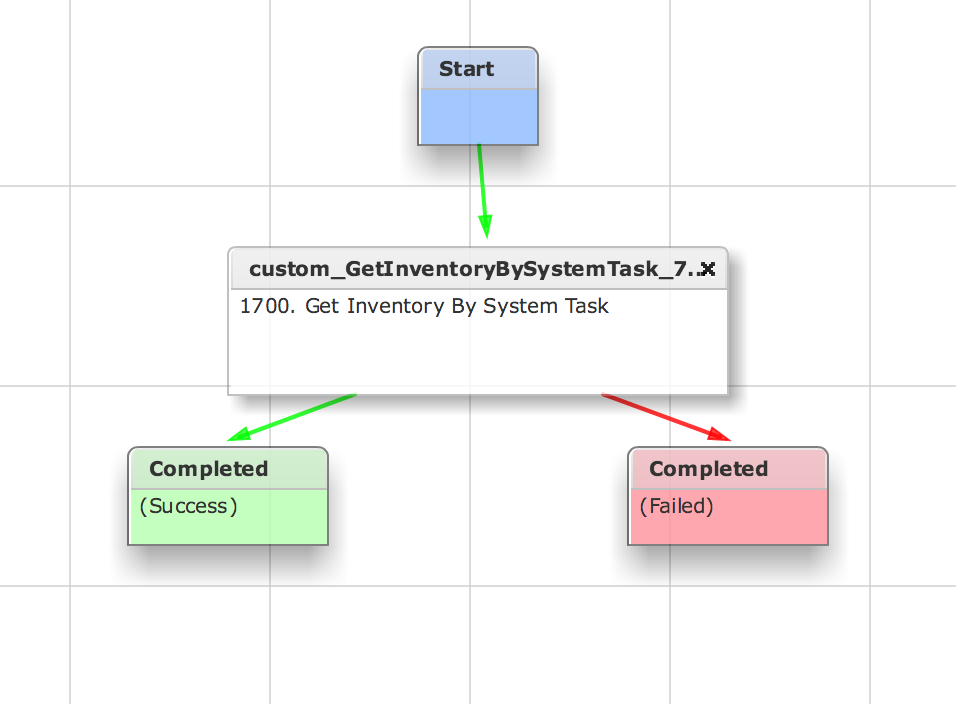
Start any system task in UCSD by providing the name of that system task just as it is seen under :
“Administration—>System—>System Task”.
Every account, when added to UCSD gets a specific system task created for inventory collection.
All is needed is the system task name of UCS Central inventory system task into this custom task, and it will kick off the inventory.
For example, here is a system task name for my UCS Manager account in an environment From the “label” column feed that name for your UCS Central inventory system task into the custom task provided


Task may have an error:
- var task = SystemScheduler.getInstance().getTaskByName(system_task_name;
+ var task = SystemScheduler.getInstance().getTaskByName(system_task_name);
- Mark as Read
- Mark as New
- Bookmark
- Permalink
- Report Inappropriate Content
Is there a means to remove a single VM from inventory if it was removed by another director, using the same VCenter? Instead of issuing a re-scan of the entire inventory. Where the situation is you have one Vcenter being used by two different environments.
- Mark as Read
- Mark as New
- Bookmark
- Permalink
- Report Inappropriate Content
Yes you can…
In the GUI
and there is an API call
- Mark as Read
- Mark as New
- Bookmark
- Permalink
- Report Inappropriate Content
Try this thing here…
https://communities.cisco.com/docs/DOC-56419
number 392 on the community site.
- Mark as Read
- Mark as New
- Bookmark
- Permalink
- Report Inappropriate Content
Super thank you ogelbric
Find answers to your questions by entering keywords or phrases in the Search bar above. New here? Use these resources to familiarize yourself with the community:
