- Cisco Community
- Technology and Support
- Data Center and Cloud
- Data Center and Cloud Knowledge Base
- Migrating Brownfield Applications from Private Cloud to Public Cloud
- Subscribe to RSS Feed
- Mark as New
- Mark as Read
- Bookmark
- Subscribe
- Printer Friendly Page
- Report Inappropriate Content
- Subscribe to RSS Feed
- Mark as New
- Mark as Read
- Bookmark
- Subscribe
- Printer Friendly Page
- Report Inappropriate Content
on 12-15-2017 09:54 AM
Summary:
This article focuses on how we can make use of CloudCenter to migrate existing applications to Cloud by navigating through different stages of migration like Application Discovery, Performance Baselining and Migration Service. CloudCenter interacts with different functions at different stages to migrate the application.
Product Versions Validated:
Product | Version |
Cisco CloudCenter | 4.8.0 |
AppDynamics APM | SaaS |
iQuate | SaaS |
CloudEndure | SaaS |
Details:
Moving applications to cloud can be overwhelming, customers want to move to cloud with near zero downtime. Users wants to move applications instead of individual VMs. Typical moves to cloud focuses on moving individual VMs. Usually the applications are group of VMs (1 or more). Moving one VM in the application may break the application or create an orphaned state for an application. It is critical that whole application moves (which may be 1 or more VMs). It has been a challenge to find application components that interact with each other for existing applications (aka brownfield). With the help of Application Discovery tools, application dependency can be derived and grouping of VMs can be done in an environment. Once the application discovery is done then the application move can be planned.
Following diagram depicts different stages for application migration using CloudCenter.
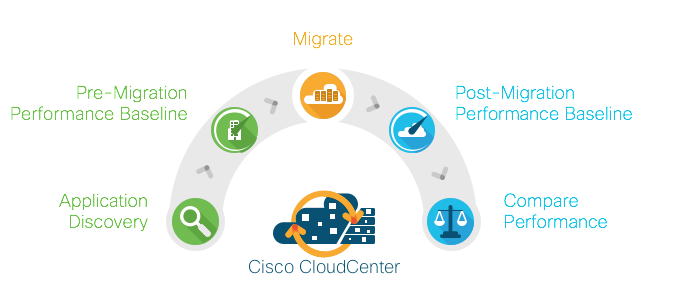
Figure 1 - Application Migration Flow
Application Discovery is the first step in identifying the application and its components. Making sure application performance is same or better in the public cloud requires that you have performance baselines established while the application is running in private cloud. Application is then migrated using lift and shift type migration tools. Performance baseline is again done with the application running in public cloud and comparing performance of application in pre-migration and post-migration phase gives you visibility into technical metrics and business metrics.
CloudCenter lets you navigate through different stages by interacting with various tools at various stages of the application migration cycle. There are different tools available for each of the stages and with CloudCenter’s extensible architecture you can plug-in various tools based on your environment, management and application needs.
Following is one way this can be achieved:
- Using iQuate’s iQCloud, application discovery can be performed in an existing environment.
- CloudCenter enables AppD agents on application VMs for performance monitoring.
- AppDynamics captures the performance of the application in the private cloud before migration.
- CloudCenter using CloudEndure moves application virtual machines to different clouds like AWS, Azure, Google.
- AppDynamics helps you compare performance of application in public cloud to its performance in private cloud.
Action library feature in CloudCenter enhances the brownfield import feature by enabling day N operations on Brownfield and Greenfield deployments. Using Action library, CloudCenter can trigger AppDynamics Agent installs and application moves using application discovery data from iQuate. CloudCenter can call CloudEndure SaaS to do the migration. CloudEndure starts replicating the data to cloud and subsequently cutover can be planned.
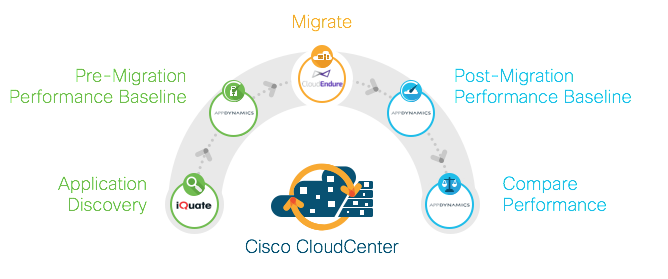
Figure 2 - Example of Application Migration Flow
General flow for moving applications from VMWare vCenter to AWS
- Enable iQuate application discovery for existing vCenter environment
- Export application discovery data from iQuate
- Setup AppD access and dashboard metrics
- Import applications and enable them for AppD monitoring at CloudCenter
- Build Pre-Migration performance baseline at AppD Controller
- Migrate application VMs to AWS from CloudCenter using CloudEndure
- Import VMs to CloudCenter after they get migrated to AWS
- Build Post-Migration performance baseline at AppD Controller
- Compare Pre and Post migration performance
Enable iQuate application discovery for existing vCenter environment
- Setup account with cloud.iquate.com
- Install iQuate appliance in vCenter environment
- Configure iQuate appliance with credentials of virtual machines that needs to be monitored to perform application discovery
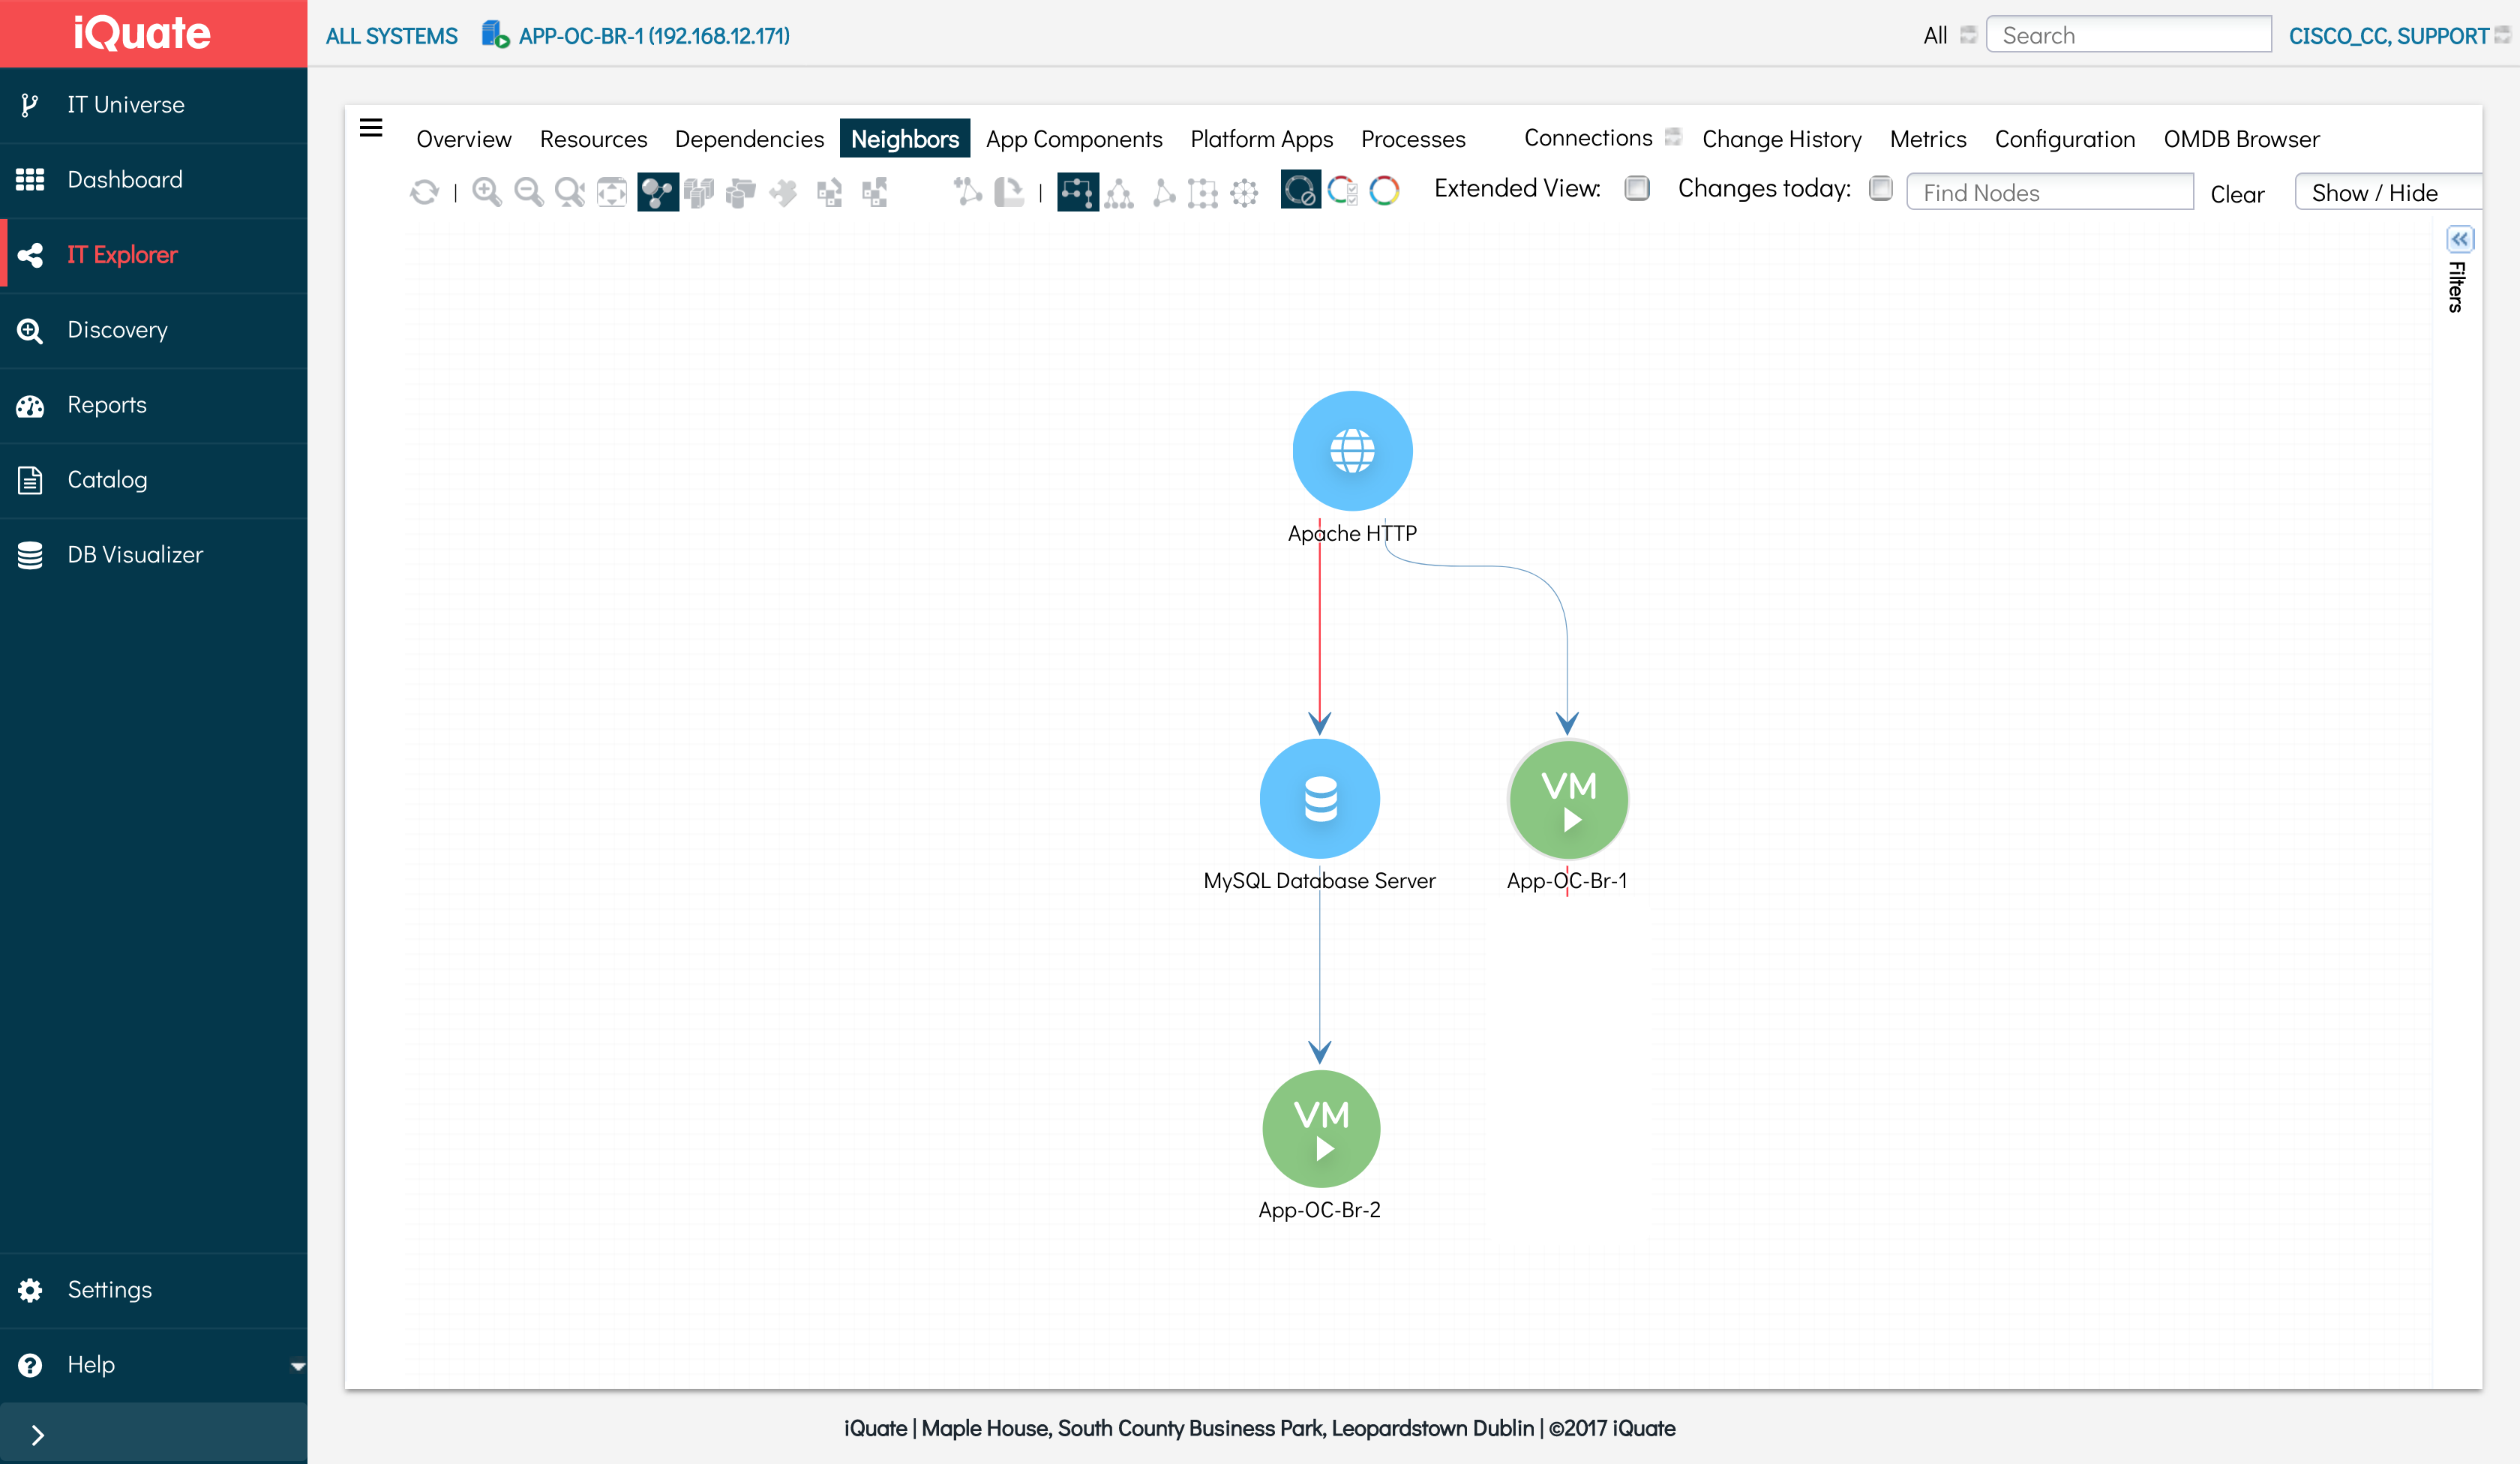
Figure 3 – View of discovered application in iQuate
Export application discovery data from iQuate
- Login to iQuate portal
- Export the developed application discovery data for applications in the vCenter environment
Setup AppD access and dashboard metrics
- Setup AppD SaaS account or On-Premise Controller
- Define dashboard and metrics to monitor for the application like application transactions response time
Import application VMs and enable them for AppD monitoring at CloudCenter
- Login to CloudCenter and browse to Virtual Machines > “Unmanaged” tab
- Import Application VMs based on discovery data from iQuate
- Install CloudCenter agent on the VMs
- Define “Install AppD Agent” action in Action library and install appropriate AppD Agent on the VMs
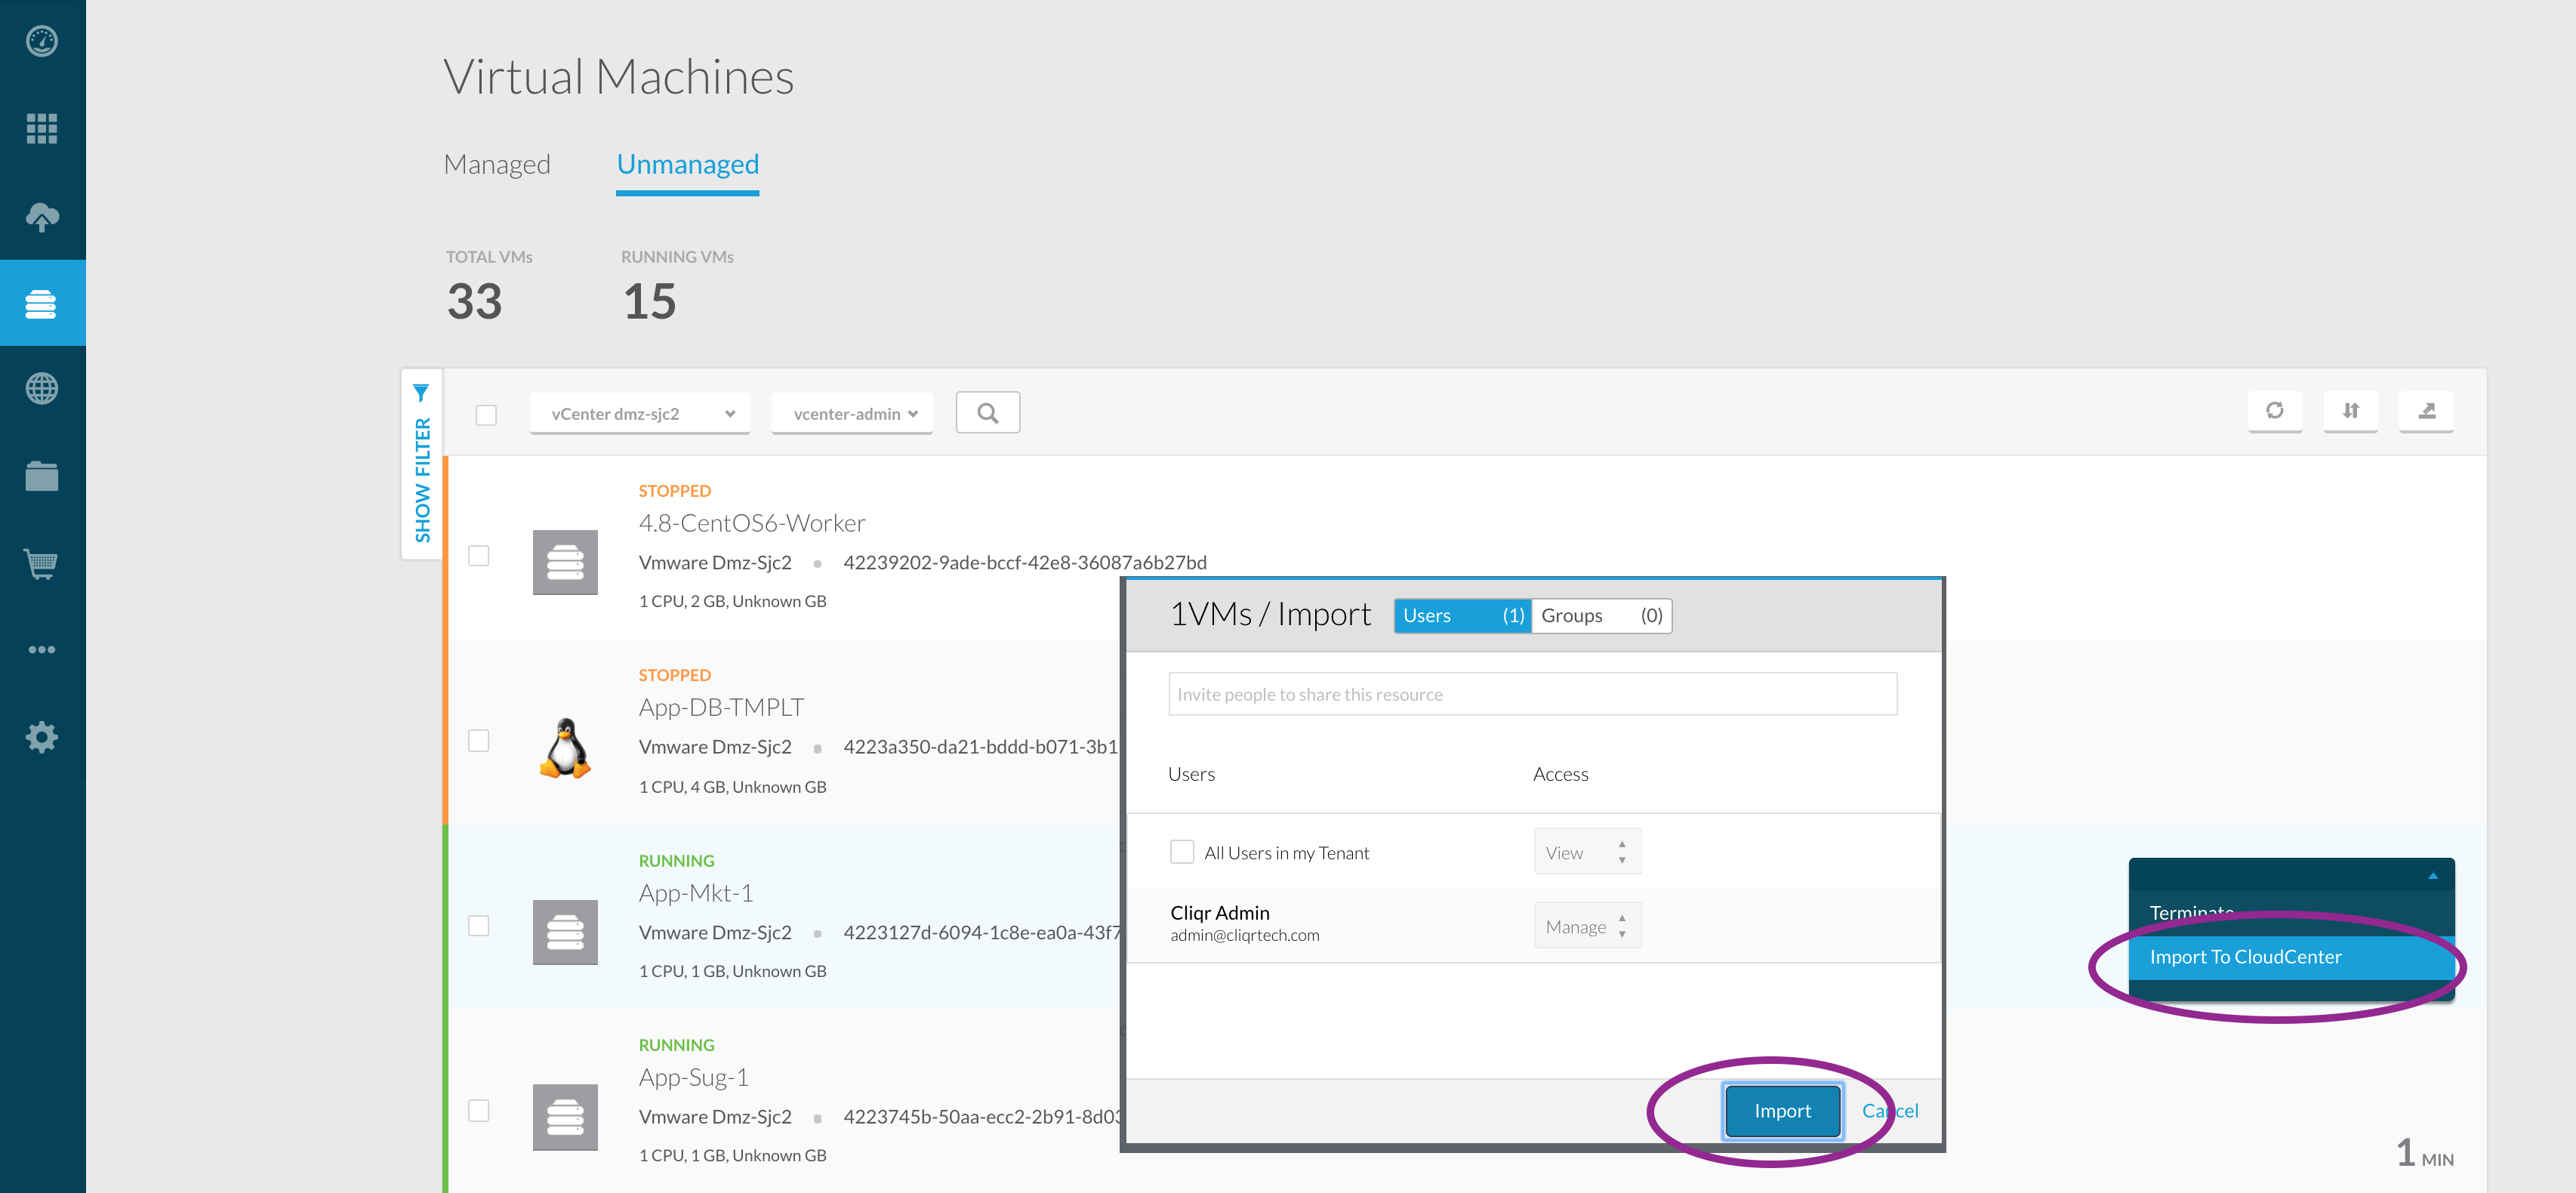
Figure 4 – Import VM view in CloudCenter
Build Pre-Migration performance baseline at AppD Controller
- Make sure traffic is hitting the application
- Login to AppD controller and browse to application flowmap.
- Define business transactions of interest
- Define/observe metrics in the application dashboard
Migrate Application VMs to AWS from CloudCenter using CloudEndure
- Setup Account in CloudEndure portal at www.cloudendure.com
- Define destination cloud like AWS and VPC/Subnet parameters to be used
- If required, setup VPN connectivity between AWS VPC and vCenter environment if VMs are not reachable over public IP
- Define “Migrate to AWS” action in the Action library at CloudCenter to call a script which internally calls CloudEndure Script to perform the migration and make sure to configure the object mapping to apply action for imported VMs
- Execute Migrate action against set of Application VMs
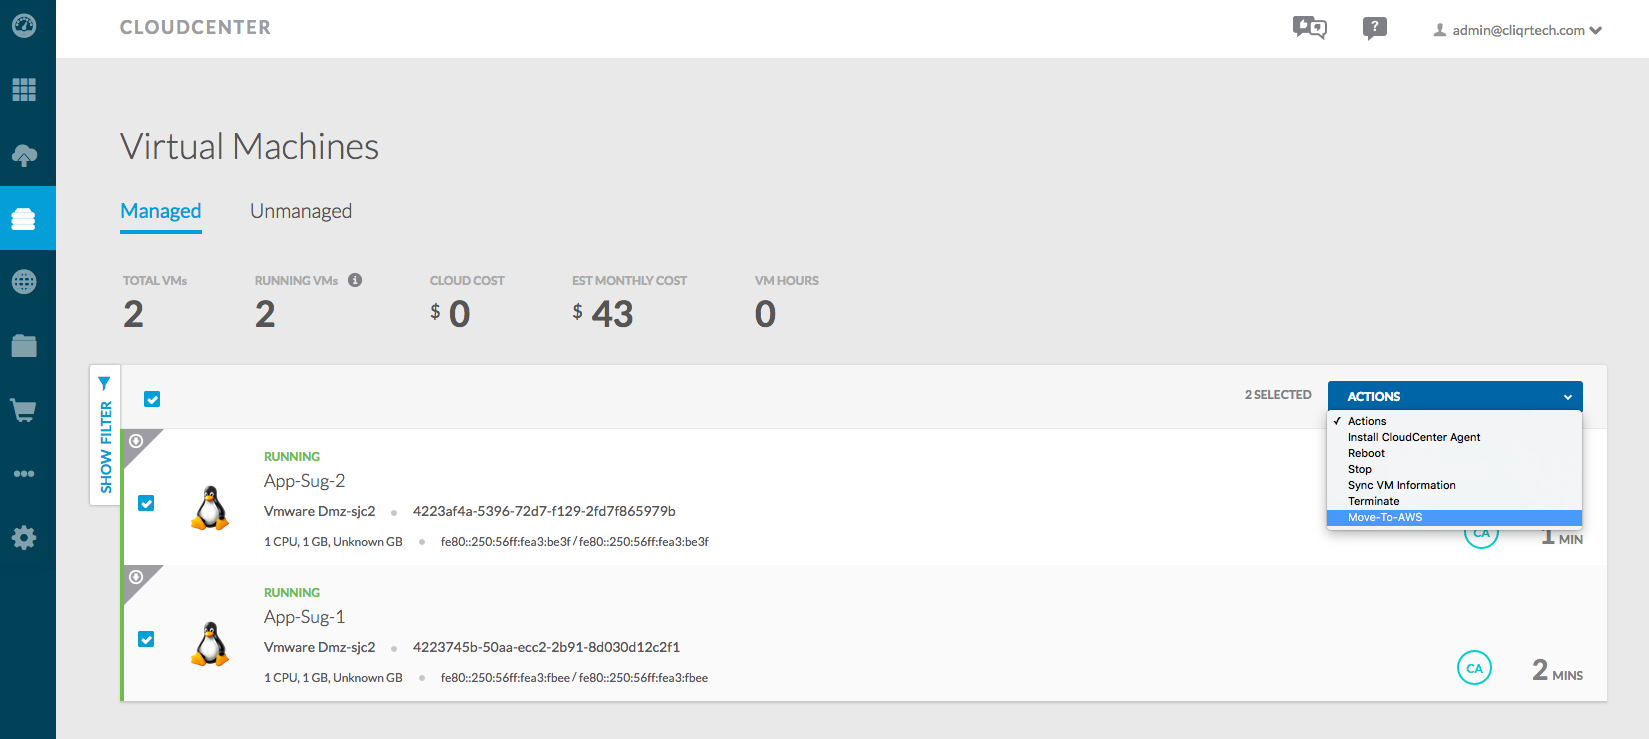
Figure 5 – Migrate Action view in CloudCenter
Import VMs to CloudCenter after they get migrated to AWS
- Login to CloudCenter UI > Virtual Machines
- Once Migration is completed, the application VMs will show up as “Unmanaged” in the AWS cloud at CloudCenter
- Import VMs to CloudCenter management
- Test and perform the cutover by performing DNS/Network changes
Build Post-Migration performance baseline at AppD Controller
- Make sure traffic is hitting the application after its cutover to AWS
- Login to AppD Controller
- Observe dashboard metrics and build performance baseline comparison
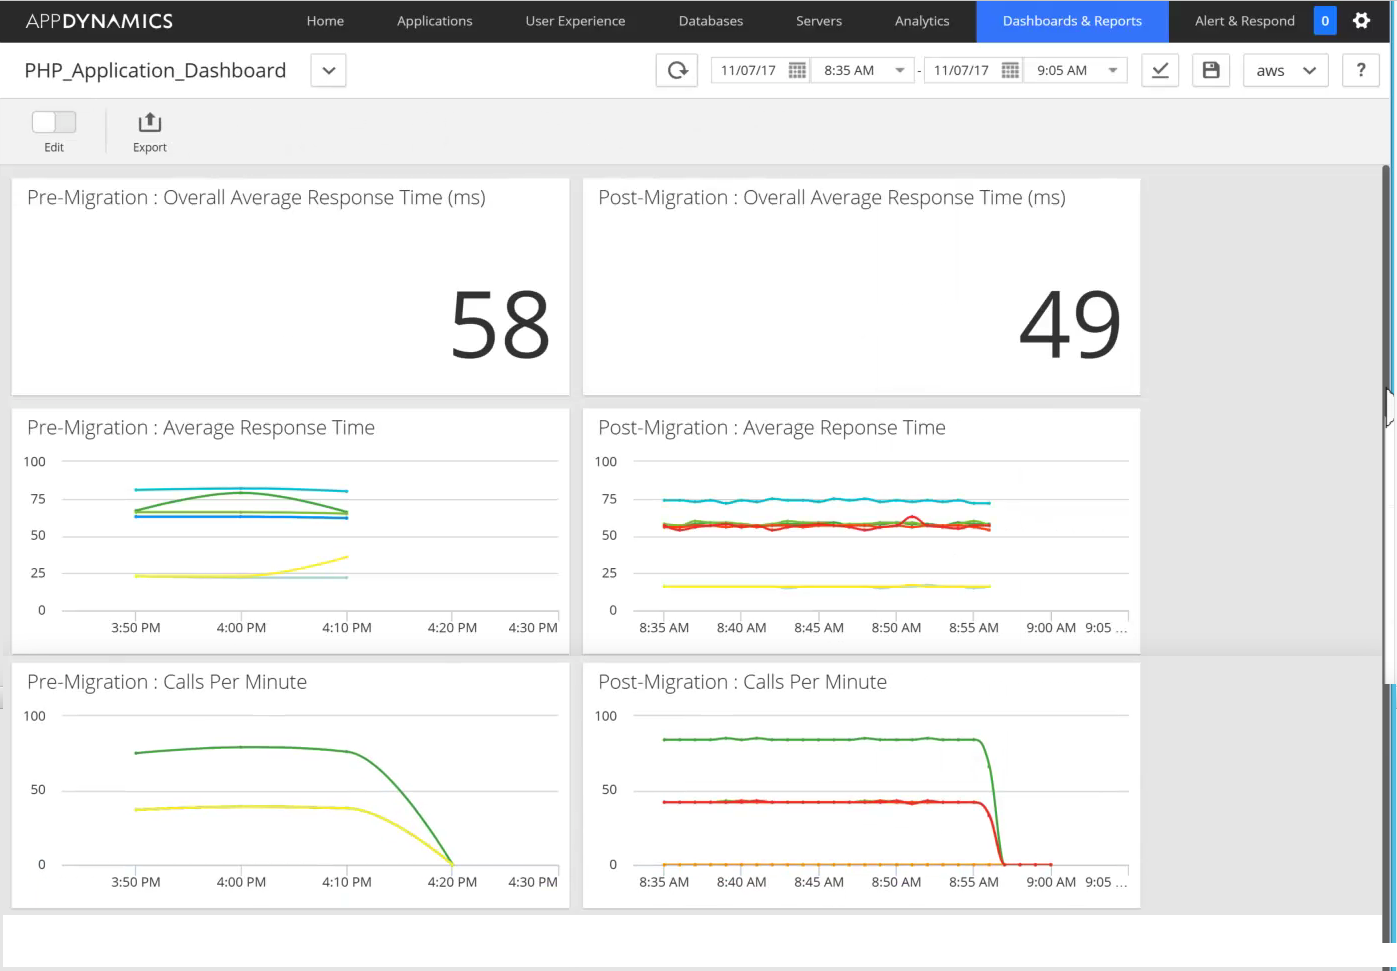
Figure 6 – Performance Comparison dashboard of Pre and Post Migration stages
The script that gets called as part of Migrate action in CloudCenter contacts the CloudEndure SaaS and performs the following steps:
- Installs CloudEndure Agent on the Source VM
- Triggers the replication destination cloud
- Creates a blueprint for replica configuration
- Instantiates the VM in the destination cloud
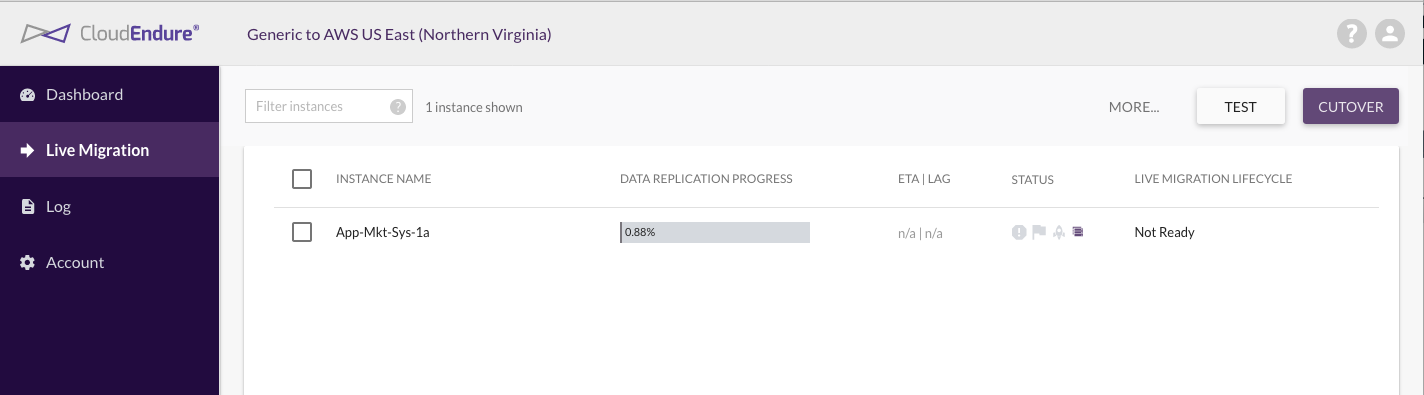
Figure 7 – View of Migration in CloudEndure SaaS
Script used in the validation is available at the following github location:
https://github.com/datacenter/c3-community/tree/master/Integrations/Migration/CloudEndure
- Move Wrapper Script for Action – init.sh
- Script for migration – CE_Cisco_integration.py
Demo of the migration of application is available at the following location:
Additional Information
CloudCenter – http://www.cisco.com/go/cloudcenter
CloudCenter Documentation – http://docs.cloudcenter.cisco.com/
Quate – http://www.iquate.com/
AppDynamics – http://www.appdynamics.com/
CloudEndure – http://www.cloudendure.com/
Find answers to your questions by entering keywords or phrases in the Search bar above. New here? Use these resources to familiarize yourself with the community:
