- Cisco Community
- Technology and Support
- Networking
- Networking Knowledge Base
- Easy Traffic Generator (Works with GNS3)
- Subscribe to RSS Feed
- Mark as New
- Mark as Read
- Bookmark
- Subscribe
- Printer Friendly Page
- Report Inappropriate Content
- Subscribe to RSS Feed
- Mark as New
- Mark as Read
- Bookmark
- Subscribe
- Printer Friendly Page
- Report Inappropriate Content
05-05-2016 01:06 PM - edited 03-01-2019 05:07 PM
Introduction
This document describes the use of OSTINATO, a powerful freeware open-source traffic generator in order to help engineers with lab recreations by generating triggers or study platform behaviors based in certain specific packet structures directly from their personal computers/workstations.
Components used
The information in this document is based on the Cisco Catalyst 3850 Series Switch that runs Cisco IOS-XE Versions 03.06.00 and later.
The information in this document was created from the devices in a specific lab environment. All of the devices used in this document started with a cleared (default) configuration. If your network is live, make sure that you understand the potential impact of any command.
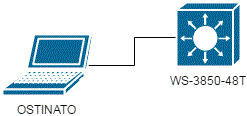
OSTINATO
OSTINATO is a powerful traffic generator and often referred as a “Reverse Wireshark” application. The advantage of it besides its user friendly GUI and flexibility is how traffic can be injected directly by user’s laptop NICs. So there is no need to wait for an available Pageant/IXIA device to generate traffic when there is no time to lose.
The application is available for WINDOWS, MAC OS and LINUX operative systems therefore there are no limitations in platform compatibility either.
The application is really helpful since it can generate/craft almost any header field of most used protocols in our daily cases such as ARP, ICMP, UDP, TCP, IPV4, IPV6, IGMP, 802.1Q among others and even provide an option for user defined experimental protocols.
The application is freeware, open source and it can be downloaded from http://www.ostinato.org.
Crafting packets using OSTINATO
After installing the application we will see a screen like this one:

By expanding the port group 0 we will see the current available NICs (or adapters) we are able to send traffic from, in this case, and for this test I will use my local Ethernet adapter which is referenced as Port 7: if7(intel(R)82579LM:

Now that port 7 is selected, a white window will be displayed at the right side of the Ports and Streams category. Here we will configure and manage our ‘traffic streams’.
In order to create a stream, a right click in the white window will display a menu with the options New Stream, Edit Stream, Duplicate Stream, Delete Stream, Open Streams and Save Streams.
After clicking in New Stream, a new object will appear in the white window. Double-Clicking in the gear icon or Right click + Edit Stream will open a new window like this:

I chose Ethernet as L2, IPv4 as L3 and UDP as L4 for this test. When we are done with this tab we can proceed to Protocol Data where we can define the header fields of our chosen protocols.
Here we can see some available protocols to start crafting our packet, however, be aware that the ‘Advance’ tab below contains even more protocols to choose.

For Media Access Control we can use the real MAC of our NIC or a different one, for destination we can send broadcasts, unicasts, multicasts, it can be whatever it is needed for the recreation.

The same goes for IPv4 and UDP headers. We can specify DF-Bit, Total Header Length, TTL, ToS, Source and destination addresses, Source Port, Destination Port, modifications to checksum among other possibilities.
For Payload data you can choose between Fixed and Random. I will leave it in Fixed which is a payload of all zeros.
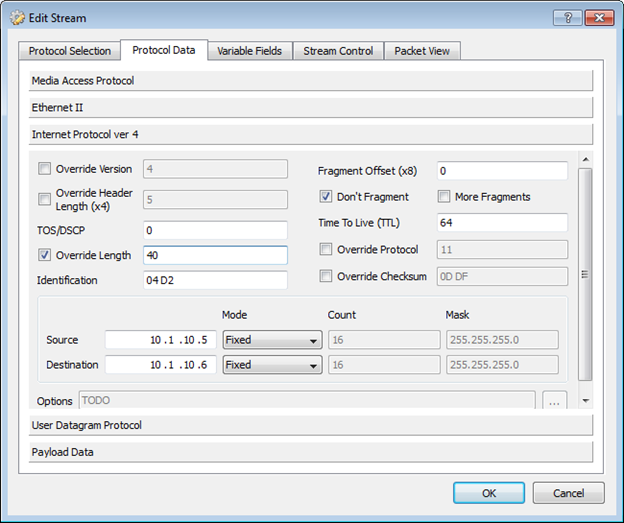
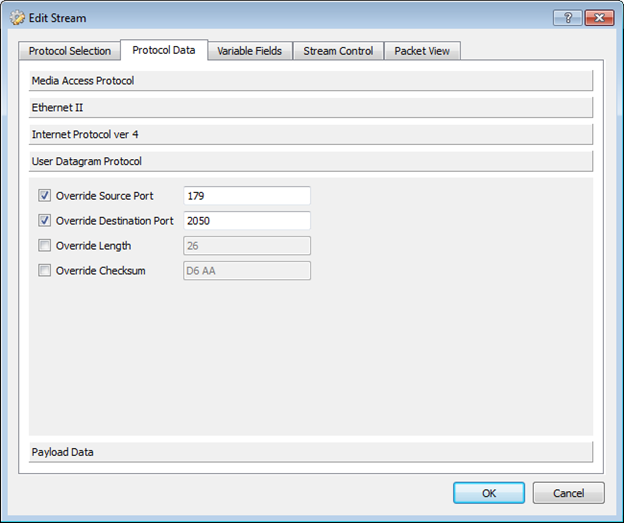
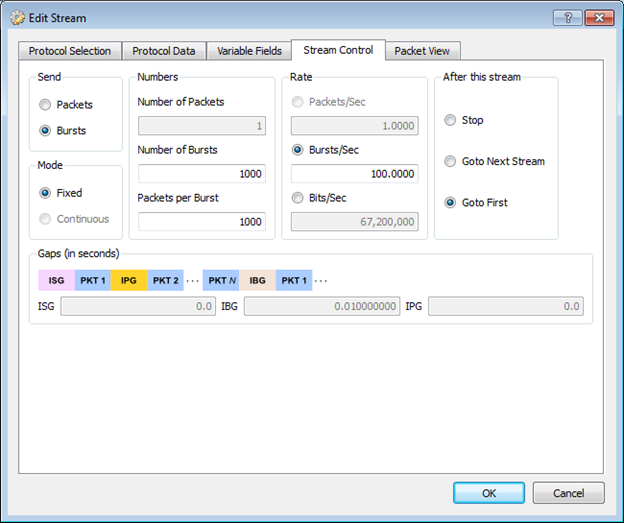
After configuring desired parameters in the protocols we can proceed to the Stream Control tab where we can choose between send packets in burst or a constant flow. After this decision, parameters of the burst or constant flow can be modified, for this test I will choose to send 10000 bursts of 10 packets each at a 1Mbps rate (As seen in the image, the Burst/Sec modifies dynamically based in the Bits/Sec parameter.
In the ‘After this stream’ field we can choose what the application should do after the burst/flow is finished. Choosing Stop will finish the transmission when the number of burst or number of packets get transmitted completely.
You can configure many streams with different parameters for transmission in the same NIC so choosing Goto Next Stream gives the possibility to continue with the next configured stream.
I chose Goto First since I will configure only one stream and I want the transmission to be non-stop until I pause it manually.
Finally, we are given the possibility of check how our crafted packet will look in the Packet View tab:
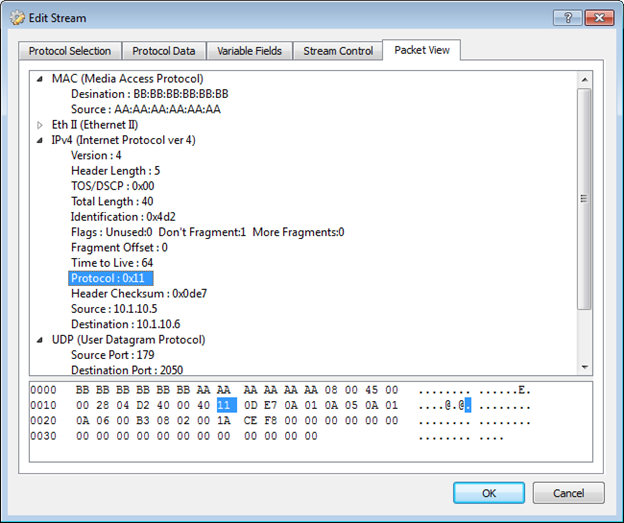
After the packet verification we can proceed to click in the OK button.
Now, clicking the Apply button in the highest right corner saves the parameters configured in the stream.
Generating traffic using OSTINATO
Now with the desired protocol and traffic parameters configured in the stream we can proceed to send traffic from our selected NIC to the switch.
Below the statistics field there is a small window with Stop, Pause buttons and some columns with name format Port 0-X. We have to click the column that matches the port number of the NIC where the streams were configured, in my case is Port 0-7 since my NIC is referenced by the application as Port 7 and click the Play button.
When clicked, the number of ‘Frames Sent’ in the selected column will start to increase meaning the traffic is being generated.
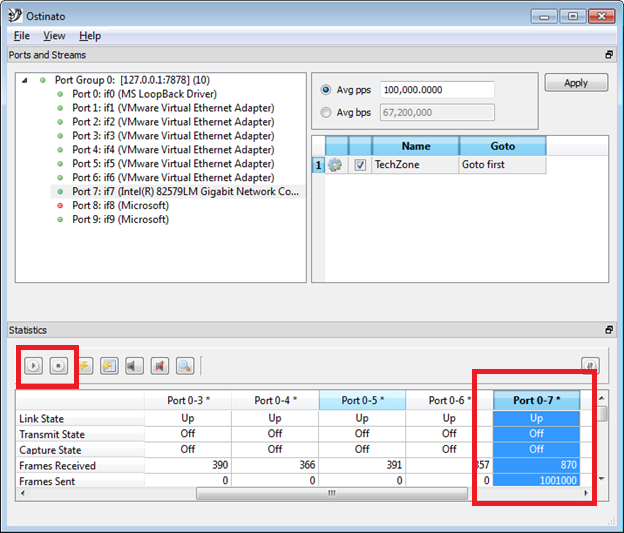
Of course, the traffic being send can be verified via Wireshark.
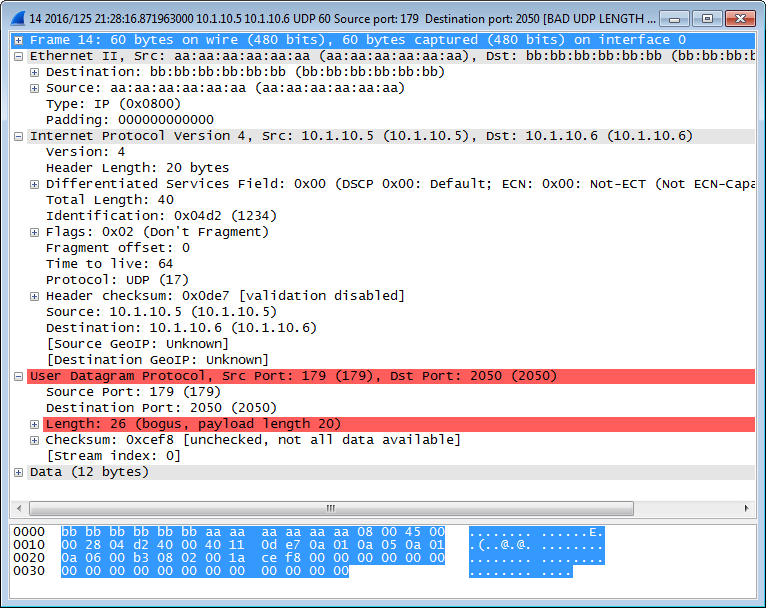
The protocol fields contain all parameters configured in OSTINATO and being sent at the desired rate. (Please be aware that in order to achieve high traffic rates depends completely in the PC running the application).
In the own words of the developers :
"Ostinato tries its best to send the stream at the rate you have requested
- but cannot guarantee it. The rates and accuracy achievable for a port
depends on the computer running the controller component (drone)"
I/O Graph of the burst.
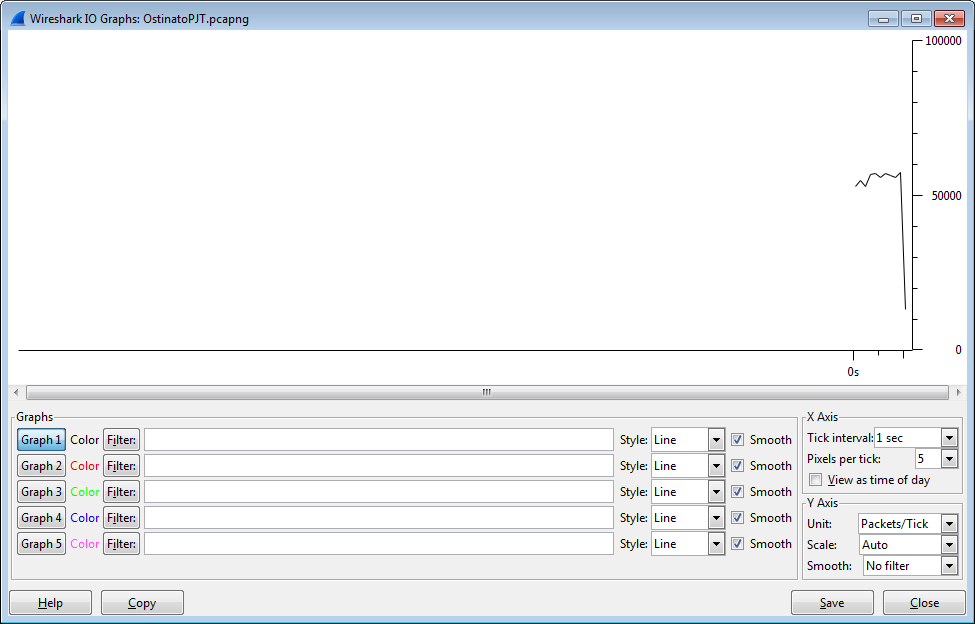
The potential for the application helping with quick issue reproductions is great from a generated High CPU to a specific trigger of unexpected behaviors.
Find answers to your questions by entering keywords or phrases in the Search bar above. New here? Use these resources to familiarize yourself with the community: