- Cisco Community
- Technology and Support
- Security
- Security Knowledge Base
- Configuring eduroam on Cisco Identity Services Engine (ISE)
- Subscribe to RSS Feed
- Mark as New
- Mark as Read
- Bookmark
- Subscribe
- Printer Friendly Page
- Report Inappropriate Content
- Subscribe to RSS Feed
- Mark as New
- Mark as Read
- Bookmark
- Subscribe
- Printer Friendly Page
- Report Inappropriate Content
on
09-06-2017
11:11 AM
- edited on
08-29-2024
05:50 PM
by
hslai
![]()
 |
Use this doc with ISE releases up to ISE 2.3. For ISE 2.3+, see Configuring ISE for eduroam authentication with a single policy set (ise-support) |
- Purpose
- Prerequisites
- eduroam
- Wireless LAN Controller
- Policy Sets
- Active Directory
- eduroam Configuration
- Add eduroam RADIUS servers
- Create the eduroam Policy Conditions
- Create the eduroam Policy Sets
- References
Purpose
This document details the steps for using ISE to authenticate eduroam users.
Three rules cover the authentication scenarios which will be encountered:
Rule 1: User is not a member of the home institution. Authentication will be proxied to eduroam RADIUS Servers.
Rule 2: User is a member of the home institution but is located at another institution. Authentication will be sourced from the eduroam RADIUS Servers.
Rule 3: User is a member of the home institution and the request will be sourced locally.
Regarding authorization, we are simply aiming for PermitAccess, but will break the Authorization rules down to give granularity to the reporting.
Prerequisites
eduroam
Register the IP Addresses of your Policy Service Nodes as AAA Servers with eduroam.
Wireless LAN Controller
On all Wireless LAN Controllers (WLC) configured to offer the SSID 'eduroam' to AP Groups, make sure that WLAN ID is the same on all WLCs and that all ISE Policy Service Nodes (PSN) are being used for authentication.
Policy Sets
This guide shows the configuration of eduroam with the use of Policy Sets. ISE 2.3 uses Policy Sets by default and they cannot be turned off. If you are currently not using them, the configuration can be done without the use of Policy Sets. If you would like to enable Policy Sets, navigate to Administration > System > Settings > Policy Sets. Select Enabled and Save.
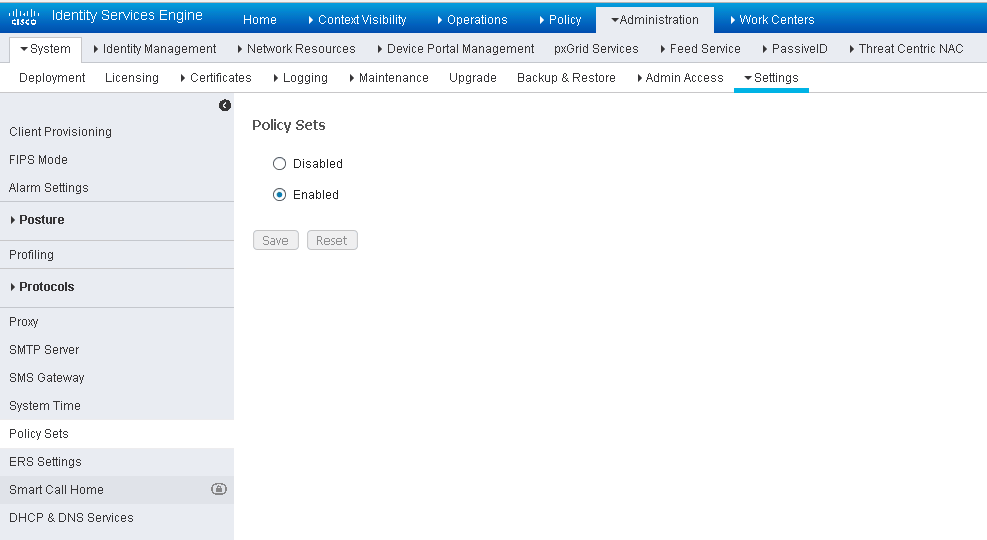
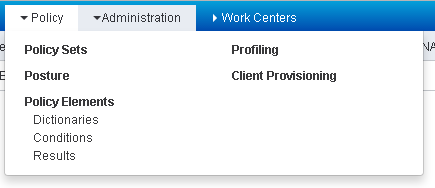
You will be logged out of ISE. Once you log back in, you will notice the Policy menu is different. There is an option for Policy Sets while the Authentication and Authorization entries are no longer there. Any policies you had already created are in the Default Policy Set.
Active Directory
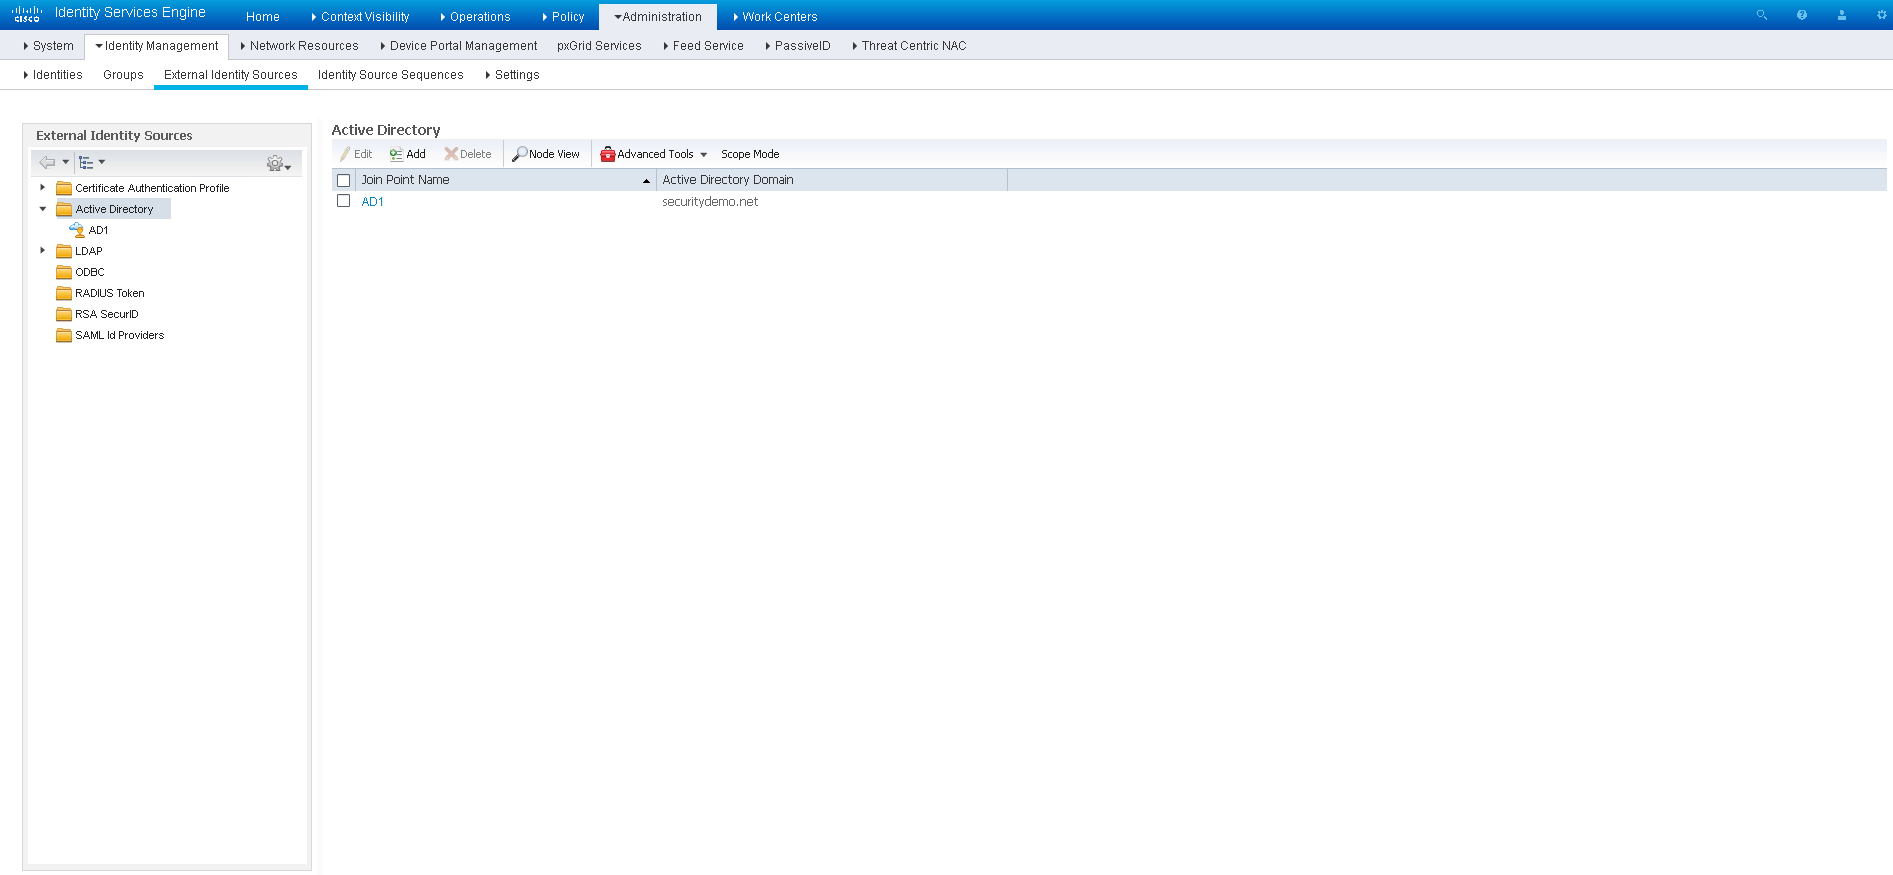
ISE needs to be joined to your Active Directory Domain to authenticate local users. Of course you can use any of the Identity Sources supported by ISE, but for this document we will focus on Active Directory (AD).
If you have not already joined ISE to you Active Directory Domain, do so now by navigating to Administration > Identity Management > External Identity Sources > Active Directory.
Create a service account in AD and use it to create a connection to your AD Domain.
eduroam Configuration
Add eduroam RADIUS servers
Eduroam External User Server Setup
In this step, we will configure the external eduraom RADIUS Servers to which ISE will authenticate users that are visiting the Home Institution. First, navigate to Administration > Network Resources > External RADIUS sources.
Configure each of the eduroam RADIUS Servers which will be used for authenticating users from external realms. The specific IP Address and Shared Secret will be provided to you by eduroam. You can name these entries however you would like.
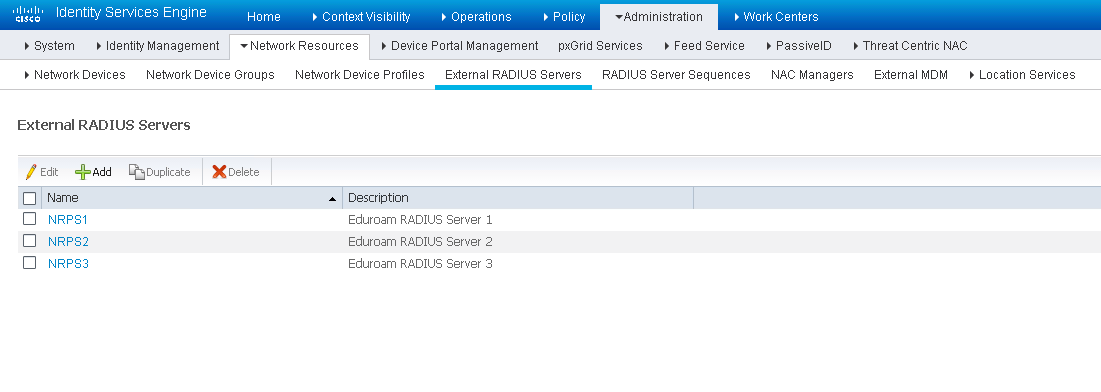
Then, navigate to Administration > Network Resources > Network Device List > RADIUS Server Sequences.
This is where you create a sequence which lists the access order of the external eduroam RADIUS servers.
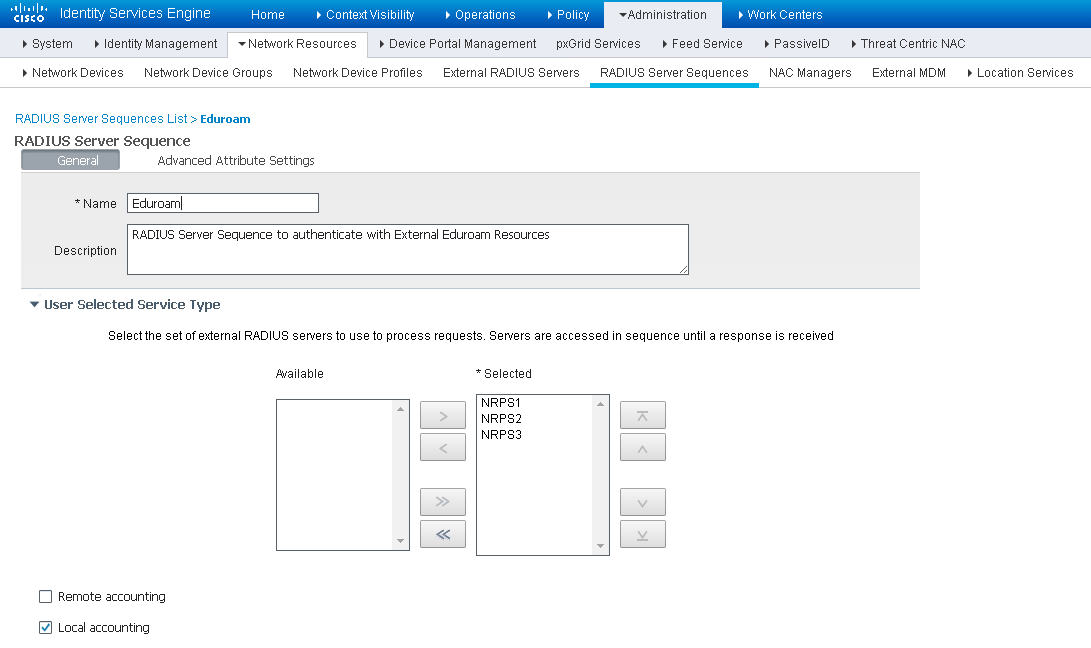
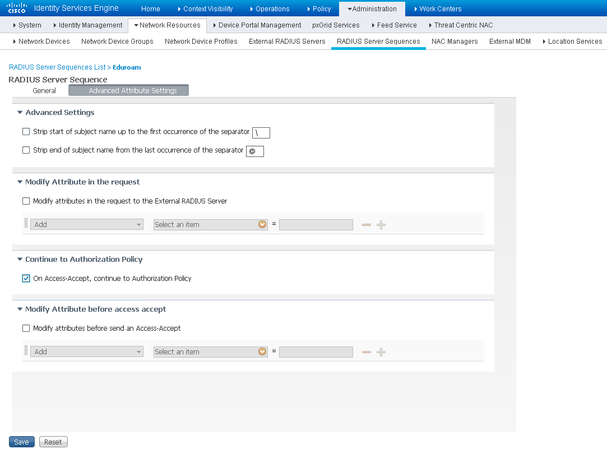
From here, select the Advanced Attribute Settings tab and enable the
Eduroam Internal User Server Setup
Now we will configure the access for internal users that are visiting a different eduroam member Institution. Navigate to Administration > Network Resources > Network Device Groups.
Under All Device Types, create a group for the eduroam RADIUS Servers and for your Wireless Controllers. In the figure below they are named 'eduroam' and 'WLC' accordingly.

The Network Device Groups page view in ISE 2.2 and below
The Network Device Groups page view in ISE 2.3 and above
Now that the groups are created, go to Administration > Network Resources > Network Devices to add the eduroam RADIUS Servers and Wireless Controllers to ISE.
Remember to ensure your WLCs are part of the group WLC, and the eduroam RADIUS Servers servers are part of the Eduroam group. This is done in the Network Device Group section.
Create the eduroam Policy Conditions
Authentication Conditions
This step will create the conditions used to authenticate through the eduroam system while keeping your Authentication Policy clean. Navigate to Policy > Policy Elements > Conditions > Library Conditions.
Create a new condition, eg: 'Eduroam_User_External', this will be used to identify RADIUS requests that need to be handed off to the eduroam RADIUS Servers. In the event of receiving just a username we want to be able to handle that. We will make the assumption that such a user belongs to our own AD. As such we need to ensure that a 'foreign' username does not contain our realm but does contain the '@' symbol which we will infer means an alternative domain is provided.
Configure the following attributes:
Radius: User-Name NOT ENDS WITH @<your_domain> AND
Radius: User-Name CONTAINS @ AND
Radius: Service-Type EQUALS Framed AND
Radius: NAS-Port-Type EQUALS Wireless – IEEE 802.11
Click Save and save it as Eduroam_User_External.
Create another condition 'Eduroam_User_Traveling' similar to the condition created above, but without the User-Name element. Since this condition will be used to identify eduroam traffic that must be sent to the eduroam RADIUS Servers, we will include a check for the WLAN-ID (this document uses WLAN ID of 6, please ensure you are using the WLAN ID that corresponds to your eduroam SSID):
Radius: Service-Type EQUALS Framed AND
Radius: NAS-Port-Type EQUALS Wireless – IEEE 802.11 AND
Airespace: Airespace-Wlan EQUALS 6
Authorization Condition
This step will create the conditions used to authorize local users at their Home Institution through the eduroam system while keeping your Authorization Policy clean. Stay at Policy > Policy Elements > Conditions > Library Conditions
Identify Authorization requests coming from the eduroam SSID and check the user names against AD. Name it 'Eduroam_User_Local':
Radius: Service-Type EQUALS Framed AND
Radius: NAS-Port-Type EQUALS Wireless – IEEE 802.11 AND
Airespace: Airespace-Wlan EQUALS 6
AD1:ExternalGroups EQUALS <your_domain>/Users/Domain Users
Create the eduroam Policy Sets
ISE introduced a new Policy Engine in version 2.3 and with that came changes to how RADIUS Proxy Sequences are used for authentication. Because of this change in behavior, this guide will break the Policy Sets section into sections detailing the configurations necessary for versions 2.2 and lower as well as 2.3 and above.
ISE Policy Sets in versions 2.2 and below
Navigate to Policy > Policy Sets and create a new Policy Set named 'Eduroam Wireless'
Set the Policy Set filter as:
Airespace:Airespace-Wlan-Id EQUALS 6 OR
Radius:Called-Station-ID ENDS WITH eduroam OR
DEVICE:Device Type EQUALS Device Type#All Device Types#Eduroam

Authentication Policy
Create three rules to handle the different authentication directions: inbound, outbound, and local.
|
Name |
If |
Allow Protocols |
Default |
|---|---|---|---|
|
Eduroam External User |
Eduroam_User_External |
Use Proxy Service: Eduroam |
|
|
Eduroam Traveling User |
DEVICE:Device Type EQUALS Device Type#All Device Types#Eduroam |
PEAP-Auth |
AD1 |
|
Eduroam Local User |
Airespace:Airespace-Wlan_Id EQUALS 6 OR Radius:Called-Station-ID ENDS WITH eduroam |
PEAP-Auth |
AD1 |

Authorization Policy
Create two rules to handle the different authorization methods: external and local.
|
Rule Name |
Conditions |
Permissions |
|---|---|---|
|
Eduroam External |
DEVICE:Device Type EQUALS All Device Types#Eduroam |
GUEST-ACCESS |
|
Eduroam Local |
Eduroam_User_Local |
GUEST-ACCESS |

ISE Policy Sets in versions 2.3 and newer
Eduroam External Users
Navigate to Policy > Policy Sets and create a new Policy Set named 'Eduroam External Users'
Set the Policy Set filter as:
Airespace:Airespace-Wlan-Id EQUALS 6 OR
Radius:Called-Station-ID ENDS WITH eduroam OR
DEVICE:Device Type EQUALS Device Type#All Device Types#Eduroam
The reason we need to create two separate Policy Sets is that in ISE 2.3 and above, the RADIUS Proxy Sequence is selected at the same top level filter as the Allowed Protocols. Since we are choosing the RADIUS Proxy Sequence, we cannot also choose an Allowed Protocol to be used by the same Policy Set.
Authentication Policy
The Eduroam External Users can use the Default Authentication Policy since this will be handled by the Proxy Sequence.
Authorization Policy
Create a rules to handle the external authorization.
|
Rule Name |
Conditions |
Permissions |
|---|---|---|
|
Eduroam External |
DEVICE:Device Type EQUALS All Device Types#Eduroam |
GUEST-ACCESS |
Eduroam Internal Users
Set the Policy Set filter as:
Airespace:Airespace-Wlan-Id EQUALS 6 OR
Radius:Called-Station-ID ENDS WITH eduroam OR
DEVICE:Device Type EQUALS Device Type#All Device Types#Eduroam
Authentication Policy
Create two rules to handle the different authentication directions: inbound, and local.
|
Name |
If |
Allow Protocols |
Default |
|---|---|---|---|
|
Eduroam Traveling User |
DEVICE:Device Type EQUALS Device Type#All Device Types#Eduroam |
PEAP-Auth |
AD1 |
|
Eduroam Local User |
Airespace:Airespace-Wlan_Id EQUALS 6 OR Radius:Called-Station-ID ENDS WITH eduroam |
PEAP-Auth |
AD1 |
Authorization Policy
Create two rules to handle the different authorization methods: external and local.
|
Rule Name |
Conditions |
Permissions |
|---|---|---|
|
Eduroam External |
DEVICE:Device Type EQUALS All Device Types#Eduroam |
GUEST-ACCESS |
|
Eduroam Local |
Eduroam_User_Local |
GUEST-ACCESS |
References
- Mark as Read
- Mark as New
- Bookmark
- Permalink
- Report Inappropriate Content
Hi, nice ![]() I have a few things to add...
I have a few things to add...
If you use multiple ISE PSNs, the eduroam website will, by default, give you a unique RADIUS Shared Secret for each PSN, which is not supported in ISE. To get round this you need to add all of your PSNs in the eduroam portal, then e-mail them via their website, http://support.eduroam.uk, and ask for them to use the same Shared Secret on all nodes.
When configuring the Proxy RADIUS settings in ISE, you need to include more Realm-Filtering than is shown in the example to remain compliant with eduroam's policies. The list of mandatory username attributes and realms to filter can be found here; https://community.jisc.ac.uk/library/janet-services-documentation/filtering-invalid-realms
You also need to manipulate your outbound requests to include an Operator-Name attribute which matches the realm you have registered with them. ISE doesn't support this RADIUS attribute by default so you have to add it yourself. This is done by updating RADIUS IETF attribute 126 in the ISE's RADIUS dictionary, then referencing the attribute in your ISE's outbound Proxy RADIUS settings so it adds Operator-Name = 'Your Realm' to all of the RADIUS traffic you send outbound to their Proxy RADIUS servers. In current versions of ISE and Firefox, there seems to be a bug with attribute picker so when you go to select your new Operator-Name attribute from the list, it's not there. The workaround is to type 'operator-name' in the text filter at the top, then you'll see it.
Also be aware of the potential for unwanted / unintended RADIUS attributes to break things. Depending on how you've built your policies in ISE, remember that you could be sending all sorts of RADIUS attributes out to other organisations, and likewise other people could be sending unexpected RADIUS attributes to you. These attributes can lead to unwanted consequences because a request could end up hitting the wrong rules in ISE. Be sure to build your ISE policies with this in mind and implement RADIUS attribute filtering to help avoid this.
---
Edited to add - 27/7/18
It's common for ISE's to not be hosted on Public IP addressing. When you register your ISE's with janet (to get the shared secret, etc...) make sure you register the Public IP(s) you are NAT-ing via and not the ISE's 'real' Private Addresses.
- Mark as Read
- Mark as New
- Bookmark
- Permalink
- Report Inappropriate Content
Authentication Policy
The Eduroam External Users can use the Default Authentication Policy since this will be handled by the Proxy Sequence.
Authorization Policy
Create a rules to handle the external authorization.
Where are you saying to create this AuthZ rule? In the default policy set? There is no where to create AuthC/Z rules in a policy set that uses a proxy sequence.
- Mark as Read
- Mark as New
- Bookmark
- Permalink
- Report Inappropriate Content
You can create Authorization Rules in the eduroam Policy Set that uses the RADIUS Proxy Sequence. Here is how my Policy Set looks:
- Mark as Read
- Mark as New
- Bookmark
- Permalink
- Report Inappropriate Content
So when you choose a RADIUS proxy sequence for your policy set, you can create AuthC & AuthZ rules under it? Nothing shows under the policy set condition for me and I've tried using FF and Chrome. What browser/version are you using?
- Mark as Read
- Mark as New
- Bookmark
- Permalink
- Report Inappropriate Content
I'm using Chrome.
You are clicking on the arrow in the far right column to enter the policy set, right?
- Mark as Read
- Mark as New
- Bookmark
- Permalink
- Report Inappropriate Content
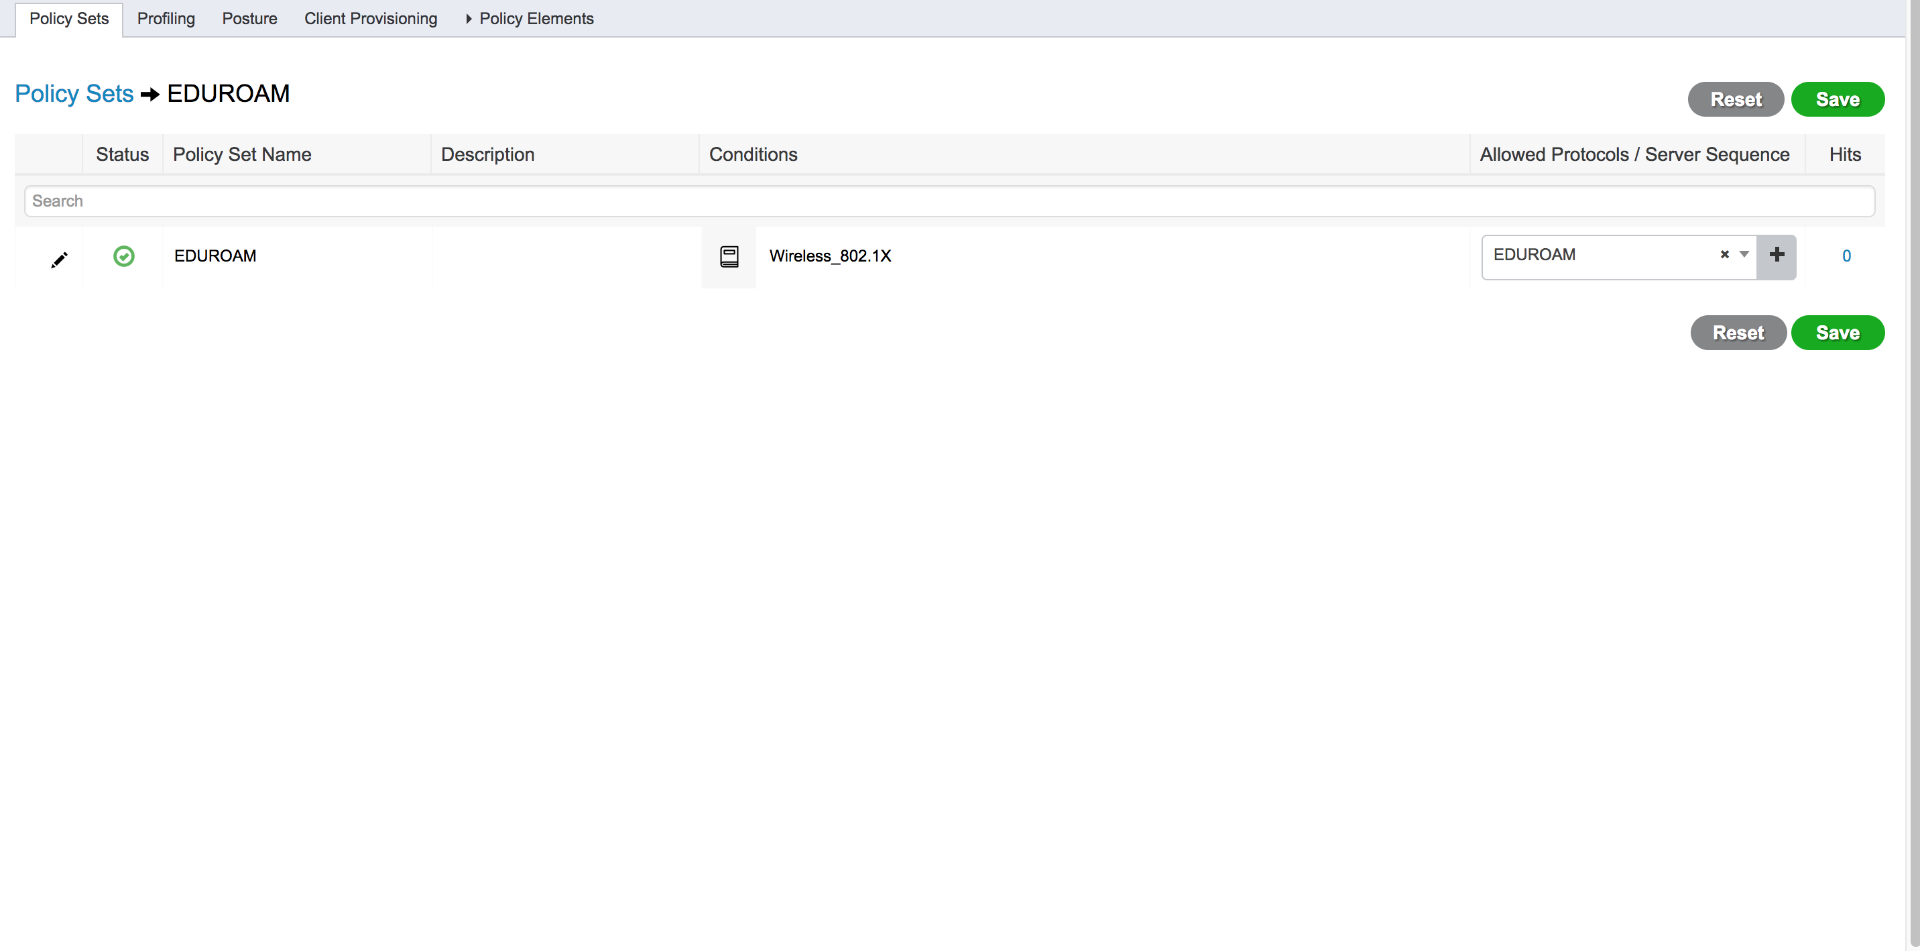
I know the condition isn't right, but here the policy set with RADIUS proxy sequence chosen. Funny thing is if I hit Save here, right before the 'saving pop-up window' closes and brings me back to this screen, I see the 2 AuthC and 2 AuthZ policy sections in the background for a brief second. Must be browser(s) issue.... ![]()
- Mark as Read
- Mark as New
- Bookmark
- Permalink
- Report Inappropriate Content
You're missing two columns on the right - Actions and View. Can you scroll to the right? If not, try to update your browser to the latest release. If that doesn't work, you may need to contact TAC.
- Mark as Read
- Mark as New
- Bookmark
- Permalink
- Report Inappropriate Content
It's busted with IE 11, Chrome 62 and FF 56 on Windows and Chome 62 and FF 56 on OS X. Tried on two 2.3 deployments. #AnotherTACCase
- Mark as Read
- Mark as New
- Bookmark
- Permalink
- Report Inappropriate Content
You did click the tick-box in the RADIUS Server Sequences bit that says “On Access-Accept, continue to Authorization Policy”, right?
- Mark as Read
- Mark as New
- Bookmark
- Permalink
- Report Inappropriate Content
yep
- Mark as Read
- Mark as New
- Bookmark
- Permalink
- Report Inappropriate Content
You are likely hitting Bug CSCvg03448 - ISE2.3 policy set not displayed correctly while using RADIUS server sequence.
I would suggest to open a TAC case and request for a hot patch if needed.
- Mark as Read
- Mark as New
- Bookmark
- Permalink
- Report Inappropriate Content
Thanks for the documentation, but steps were not working for me or not accurate. Perhaps I’m wrong, but:
- Too many conditions are present in the documentation, only a few are needed. You should add to the documentation that you need to match the best one for your institution. As an example, you don’t need to use the Airespace-Wlan ID, if you’re using the Called-Station-ID.
- For the traveling users conditions, you can’t add Service-Type and NAS-Port-Type. Because the remote server isn’t returning this information in a lot of cases.
- Operator-Name should be included in this documentation, because this is a recommended/mandatory configuration step.
- Mark as Read
- Mark as New
- Bookmark
- Permalink
- Report Inappropriate Content
I can't find the document recommending/mandating operator-name inclusion in RADIUS request sending for US SP/IdPs. Is that an eduroam UK mandate?
In fact, the US eduroam configuration tool includes a field for the Operator-Name that will be included in requests "if you don't provide one", implying that it's not really a necessary configuration on the connector's RADIUS servers. Is there a document for US based connectors that contradicts that?
- Mark as Read
- Mark as New
- Bookmark
- Permalink
- Report Inappropriate Content
Is enabling the Access-Accept for the Eduroam Proxies a requirement? Is it allow a policy to be applied to the Eduroam guests?
- Mark as Read
- Mark as New
- Bookmark
- Permalink
- Report Inappropriate Content
It's not a requirement, BUT the configured FTLR Eduroam server should include information to authorize the traffic and that's probably (not to say certainly) not the case. This check bock allows you to add a specific Authorization Policy for external Eduroam users arriving on your network. With this you can configure a specific vlan or send them to a guest network.
Documentation about this feature:
https://www.cisco.com/c/en/us/support/docs/security/identity-services-engine/213239-configure-external-radius-servers-on-ise.html
"Continue to Authorization Policy on Access-Accept: Provides an option to choose if ISE should just send the Access-Accept as it is or proceed to provide access based on the Authorization Policies configured on the ISE rather than the authorization provided by the external RADIUS server. Is this option is selected, the authorization provided by the external RADIUS server is overwritten with the authorization provided by ISE."
Find answers to your questions by entering keywords or phrases in the Search bar above. New here? Use these resources to familiarize yourself with the community:
