Introduction:- This document describes the process of how to Configure tacacs Authentication and Authorization for Admin and non-Admin users in ACS 5.1.
Configuration Steps:-
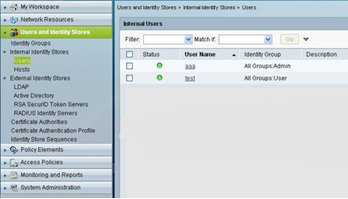
- Creating User account: - Under user and Identity Stores-->Internal Identity Stores-->Users, We have created two users in the database. “aaa” as admin user account and “test” as regular user account.
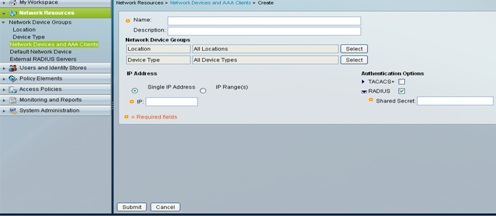
2. Adding AAA client: - Under Network Resources-->Network devices and AAA clients-->create.
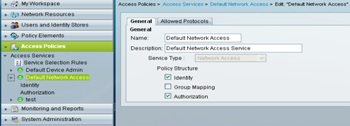
Under Access Policies -->Access Services -->Default Device Admin-->Edit “Default Network Access”.
"For Tacacs+ Authentication We will be using "Default Device Admin" Access Service".
Go to Access Policies-->Access Services-->Default Network Access-->Identity. Let Single result selection is selected.

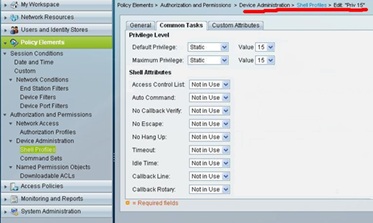
3. Configure Policy Element: - Go to Policy Elements --> Authorization and Permissions --> Device Administration-->Shell Profiles. For Admin and regular users (created in step 2), now we need to assign different privilege level. So privilege 15 will be given to “admin” user and privilege 1 will be given to “regular” user.
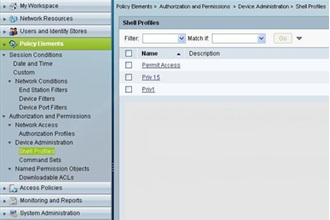
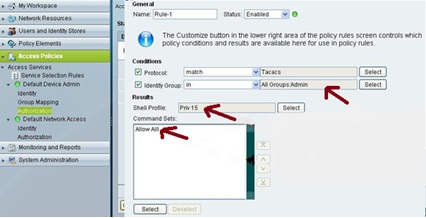
Under Shell Profiles, click on “Priv 15”, and select the default and Maximum privilege static value as 15 for admin privilege under common task tab.
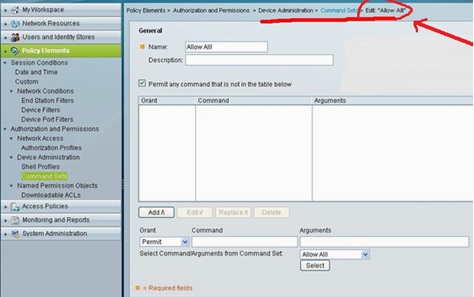
Under Command Sets area, for Admin user account we have to configure “Allow All”. Once we check the box “permit any command that is not in the table below” without adding anything in the command box, the admin user is allowed to execute any command i.e. Priv lvl 1 to lvl 15.
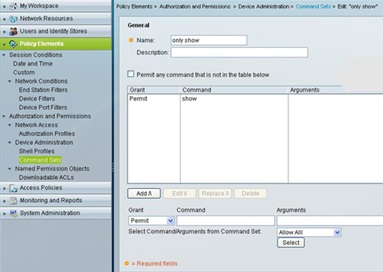
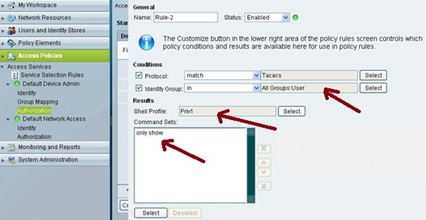
Similarly we need to add a command set for “regular user” account which allows only show commands privilege level. The Regualer user will not be able to run any other command except “Show command”.
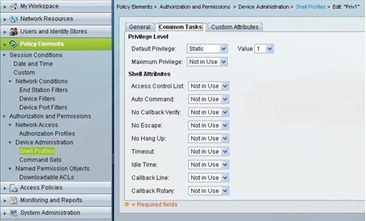
Shell profile for non-admin/regular user with Default Privilege level set as 1 under Common Task tab.
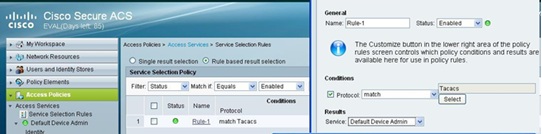
4. Configure Access Policies: - Now we need to create a Service Selection rule under Access Policies-->Access Services and Match protocol as tacacs and the access service is selected as “Default Network Access”.
Rule 1 for admin user. Set the condition based on group membership. If the user is a member of admin group then we have to map the specific shell profile and command set.
The next Rule i.e. Rule-2 is for regular users (non admin users). For regular user we need to allow only “show command” (Privilege 1) with enable password to run the show commands.
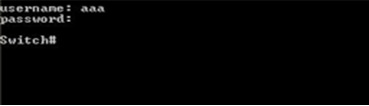
Verification:-

Few Reference Documents:-
Device Administration with Cisco Secure Access Control System 5.x:-
Cisco Secure Access Control Server for Windows:-
Cisco Secure Access Control System --Product Literature:-
User Guide for the Cisco Secure Access Control System 5.1:-
Cisco Secure Access Control System—Presentations:-
How to Assign Privilege Levels with TACACS+ and RADIUS:-