- Cisco Community
- Technology and Support
- Security
- Security Knowledge Base
- ISE 2.4 Posture using SNMP COA with extreme switches
- Subscribe to RSS Feed
- Mark as New
- Mark as Read
- Bookmark
- Subscribe
- Printer Friendly Page
- Report Inappropriate Content
- Subscribe to RSS Feed
- Mark as New
- Mark as Read
- Bookmark
- Subscribe
- Printer Friendly Page
- Report Inappropriate Content
on 03-07-2018 12:23 AM
ISE 2.4 Posture using SNMP COA with extreme switches
introduction:
This document describes the posture configuration with 3rd party switches (Extreme switch ).
Prerequisites
Cisco recommends that you have knowledge of these topics:
• Basic knowledge of SNMP Protocol
• Prior knowledge of regular expressions
• Prior knowledge of Cisco Identity Service Engine (ISE)
• Identity Service Engine 2.4.
• Anyconnect 4.5.03040.
• SNMP Supported Switches
• Extreme Switch.
Components Used
The information in this document is based on ISE Version 2.4 & extreme switch X440-48p version 16.2.
The information in this document was created from the devices in a specific lab environment. All of the devices
used in this document started with a cleared (default) configuration. If your network is live, ensure that you
understand the potential impact of any command.
Background Information
Two new feature had been used to get the posture work with extreme switches :
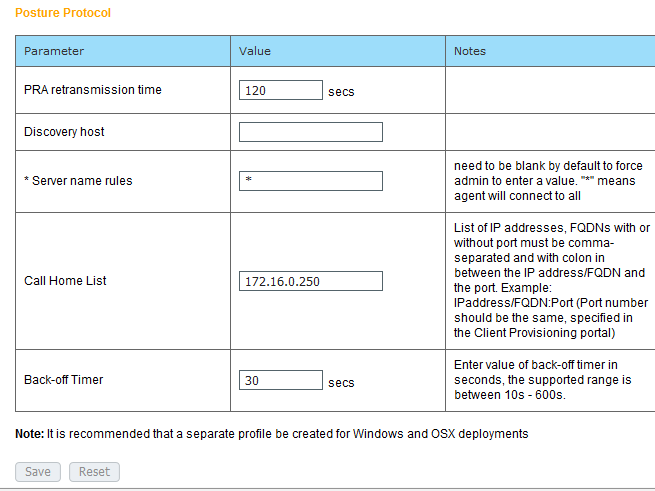
1. Call home list in ISE 2.2 and later :
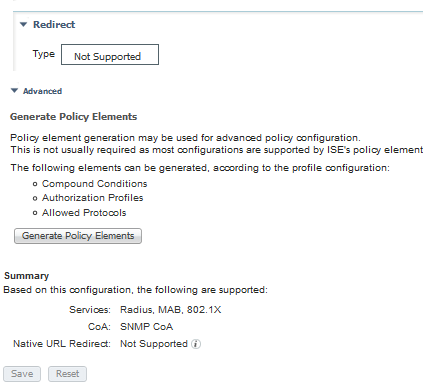
Extremes switches don't support the URL redirection , so we used this feature to allow AC posture to discover
the PSN and to make a connection with it.
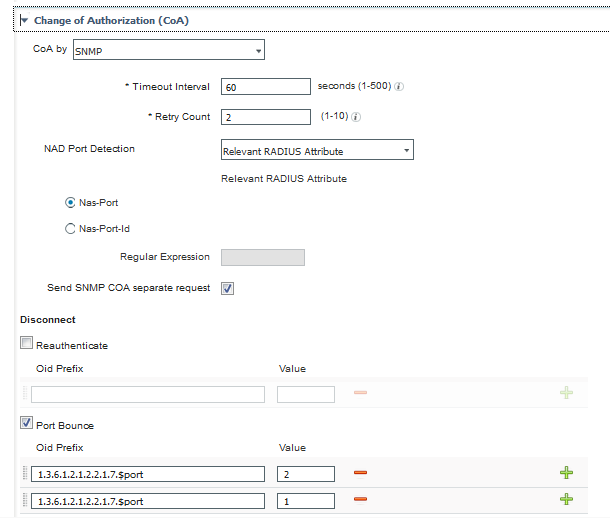
2. SNMP COA separate request in ISE 2.4 :
this feature has been developed in ISE version 2.4 to fix BUG CSCvd06733.
current SNMP CoA sends both values (disable/enable) in same request. The Extreme switch can not perform this request. it requests each value in different request, and this feature fix the compatibility issue with extreme switches.
Configure Switch:
Step.1 AAA & Dot1X configuration:
- configure radius netlogin primary server (PSN IP address) 1812 client-ip (Switch IP address) vr VR-Default
- configure radius netlogin primary shared-secret (plain text)
- enable radius netlogin
- configure netlogin vlan (VLAN name )
- enable netlogin dot1x
- configure netlogin dynamic-vlan enable
- configure netlogin dynamic-vlan uplink-ports 48
- enable netlogin ports 1-40 dot1x
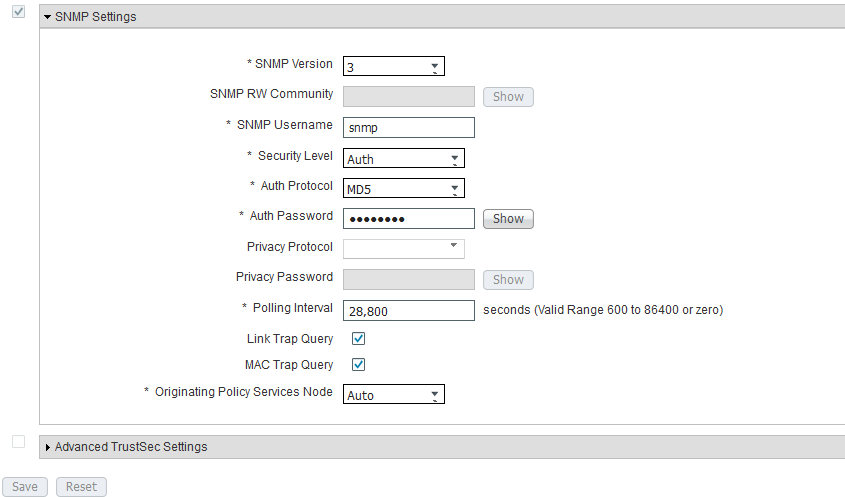
Step.2 SNMP configurations:
- configure snmpv3 add user snmp authentication md5 v3adminauth privacy des v3adminpriv
- configure snmpv3 add group v3group user snmp sec-model usm
- configure snmpv3 add access v3group sec-model usm sec-level priv read-view defaultAdminView write-view defaultAdminView notify-view defaultAdminView
- disable snmp access snmp-v1v2c
- disable snmpv3 default-user
- disable snmpv3 default-group
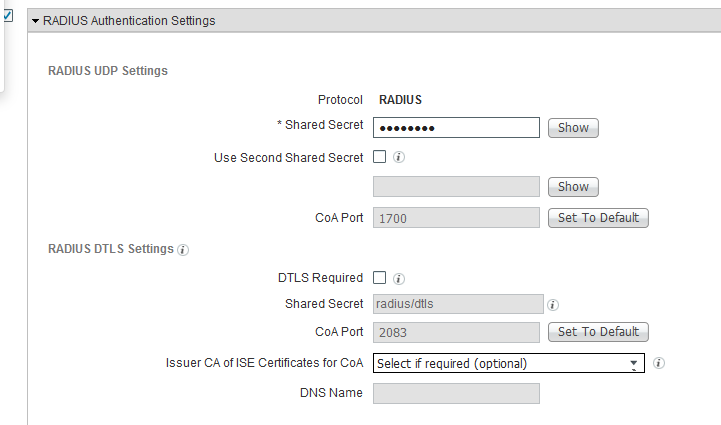
Configure ISE:
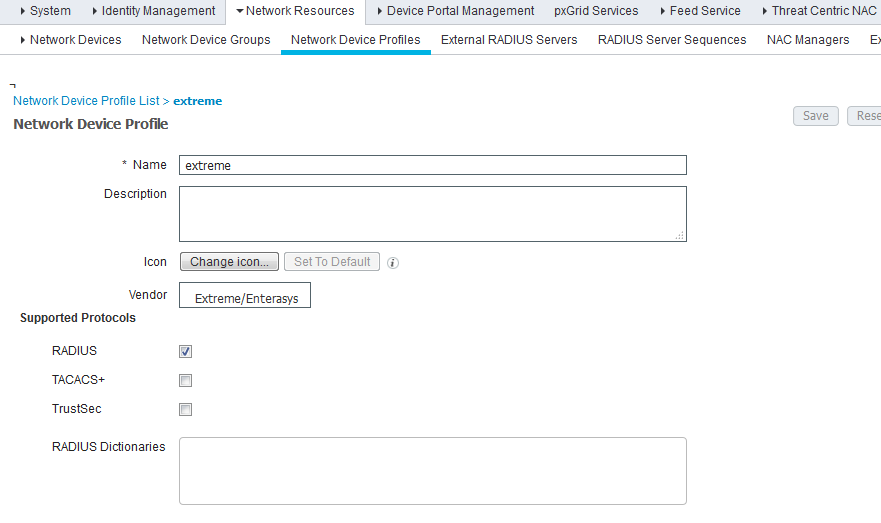
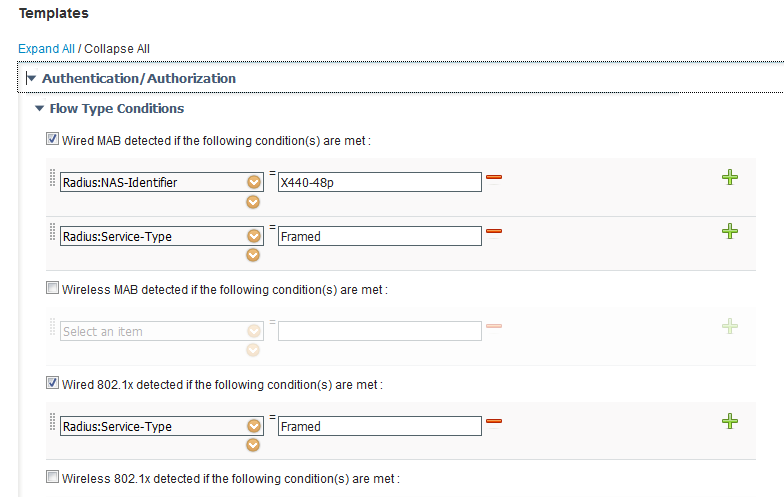
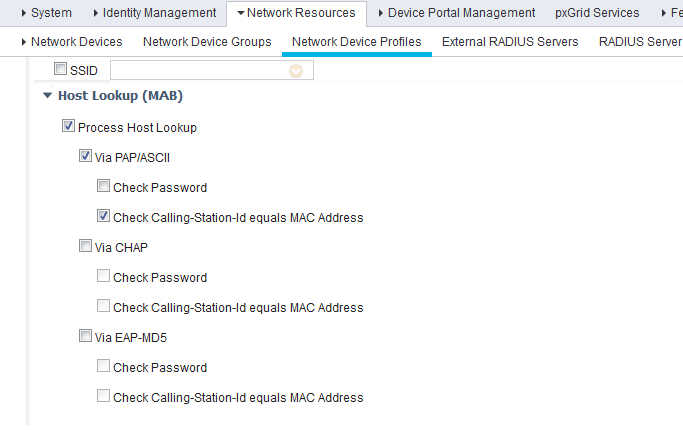
Step.1 add the device profile & enable SNMP separate request :
Administration > Network Resources > Network Device profile > Add
in the attachment a NAD profile for extreme switches has been attached 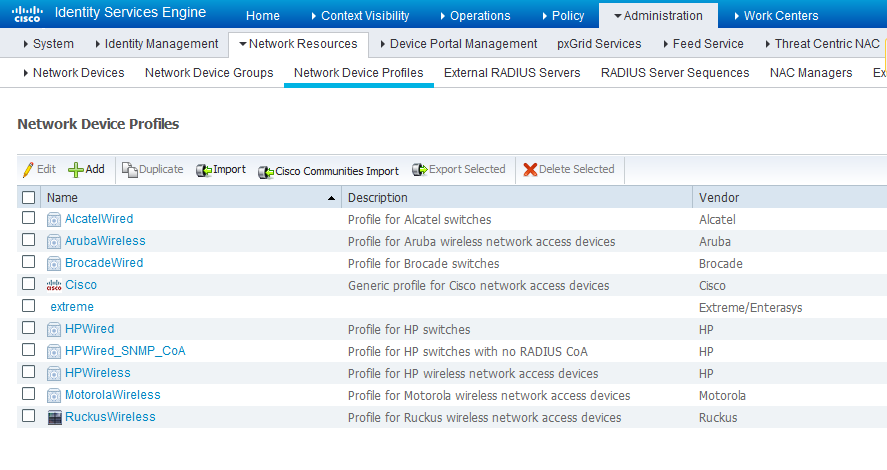
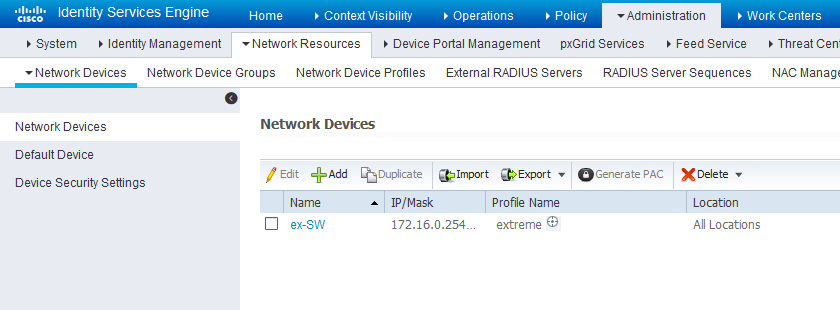
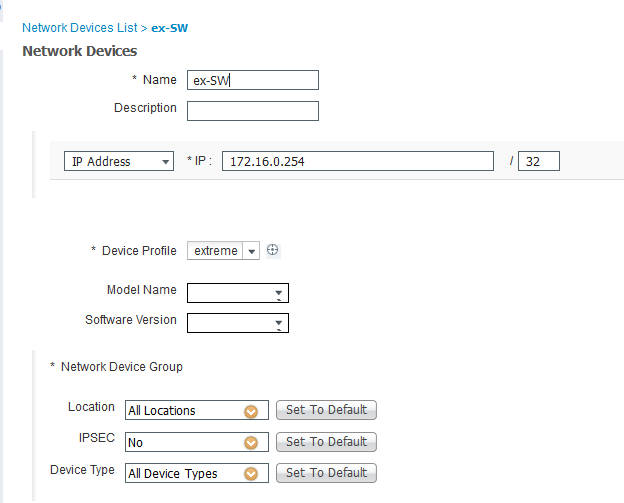
Step.2 add the network device and assign the device profile:
Administration > Network Resources > Add
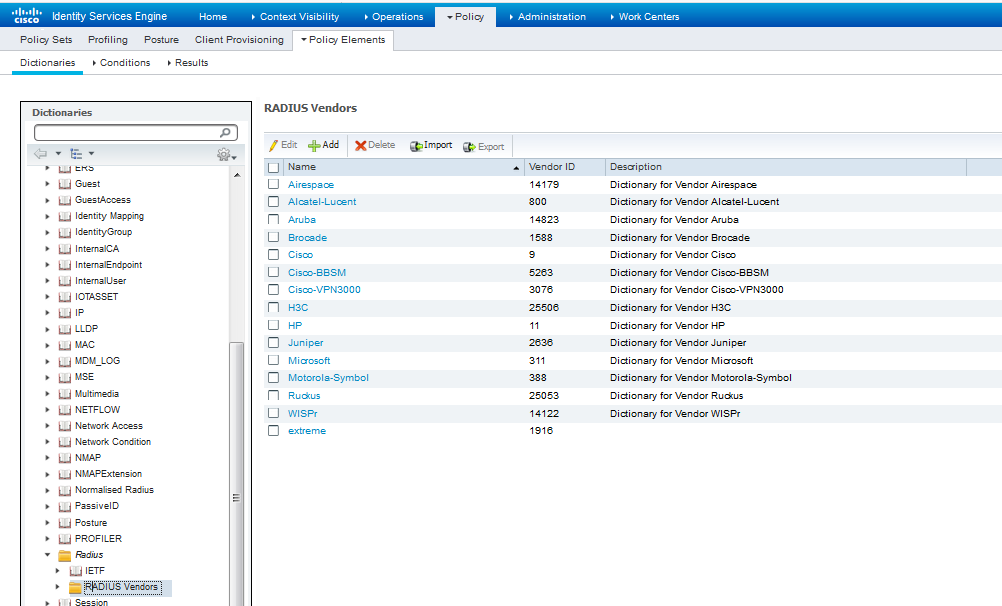
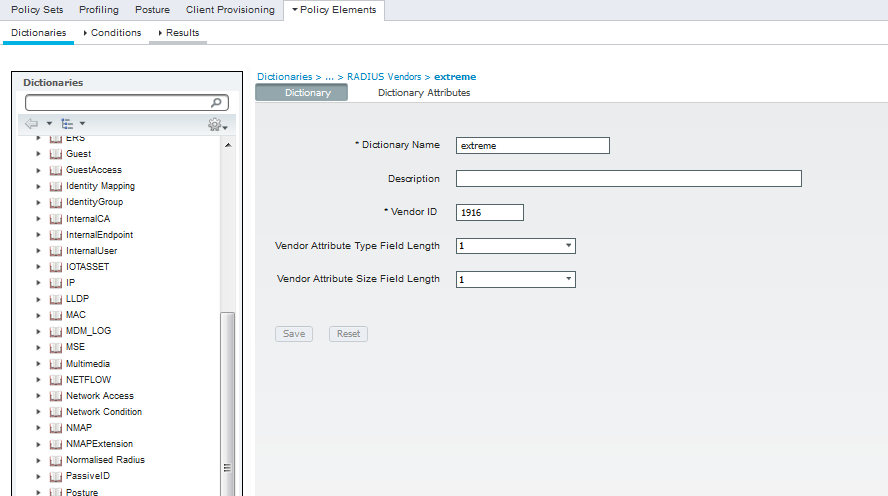
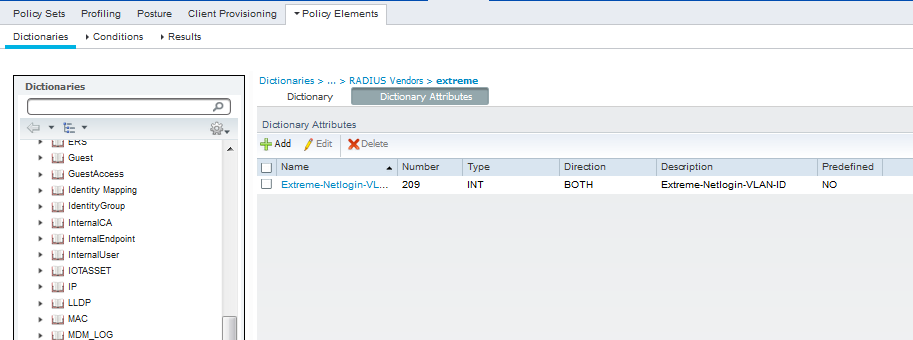
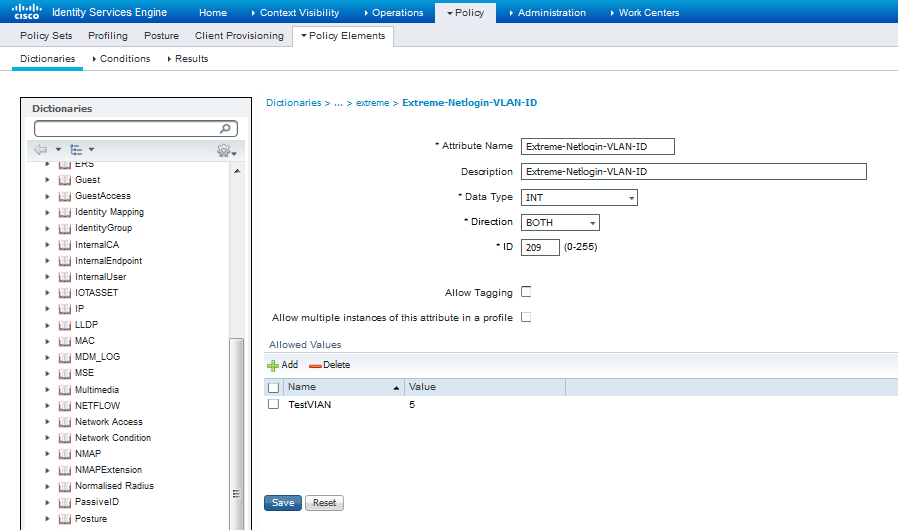
Step.3 Add Extreme attributes:
we added Extreme VLAN tag attribute and below all extreme attributes

Policy > Policy Elements > Dictionaries > System> Radius > Radius Vendor
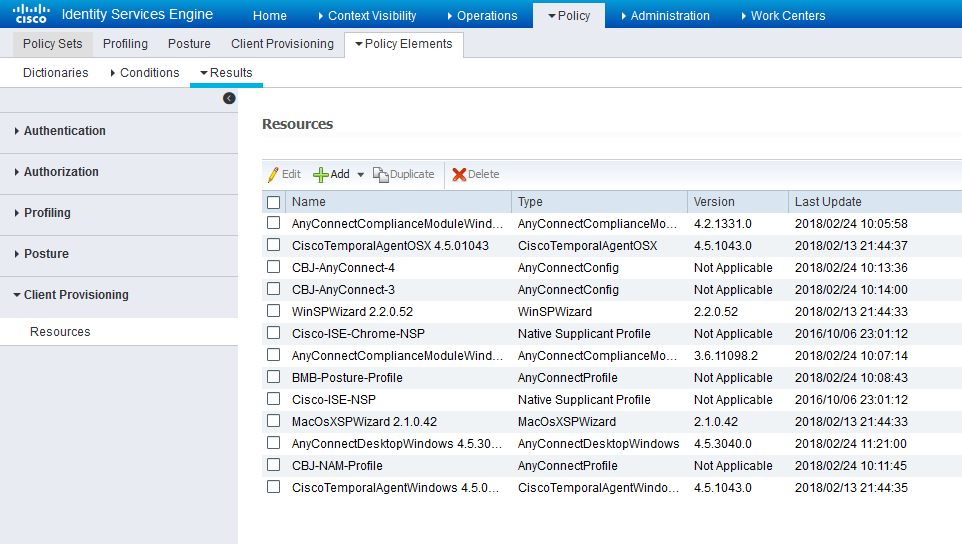
Step.4 Client Provisioning :
a. add AnyConnect PKG & and AnyConnect compliance module :
Policy> Result> Client Provisioning> Resources> Add>
b. Create & Upload NAM Profile :
we created the NAM profile using the NAM profile editor.
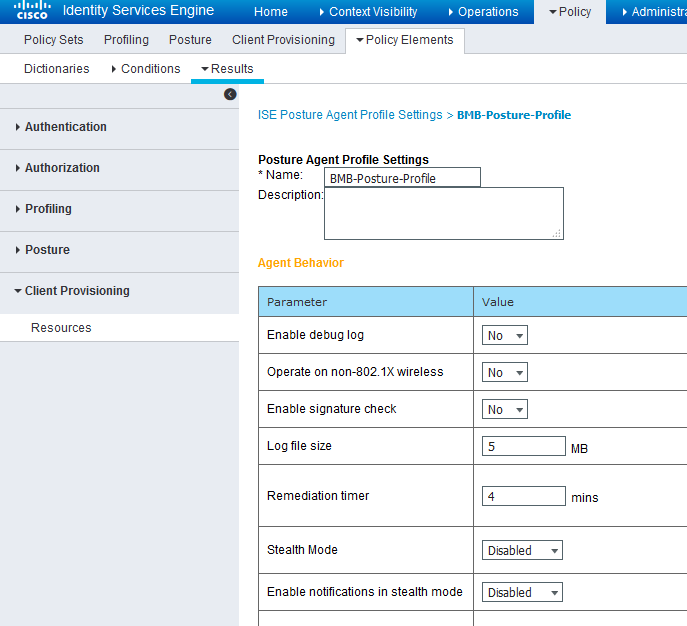
c. Create Posture Profile :
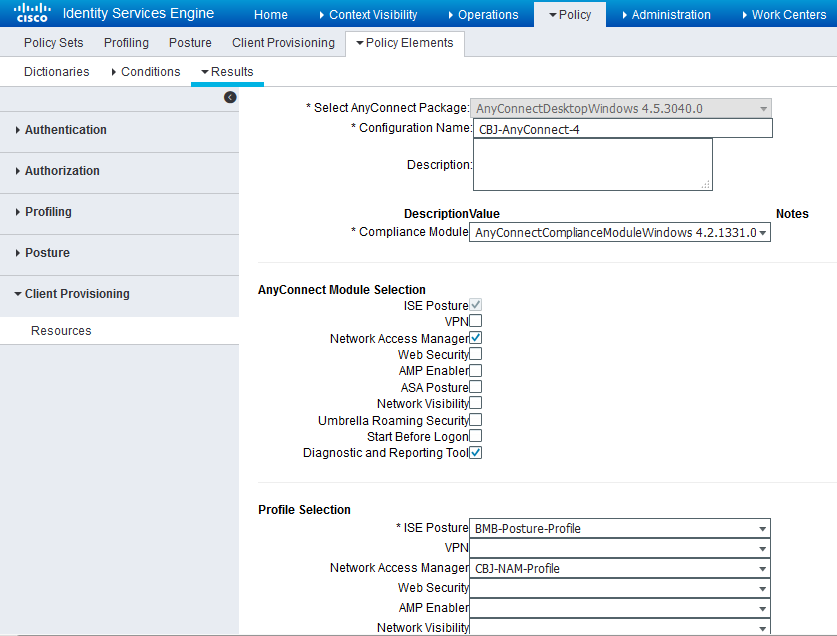
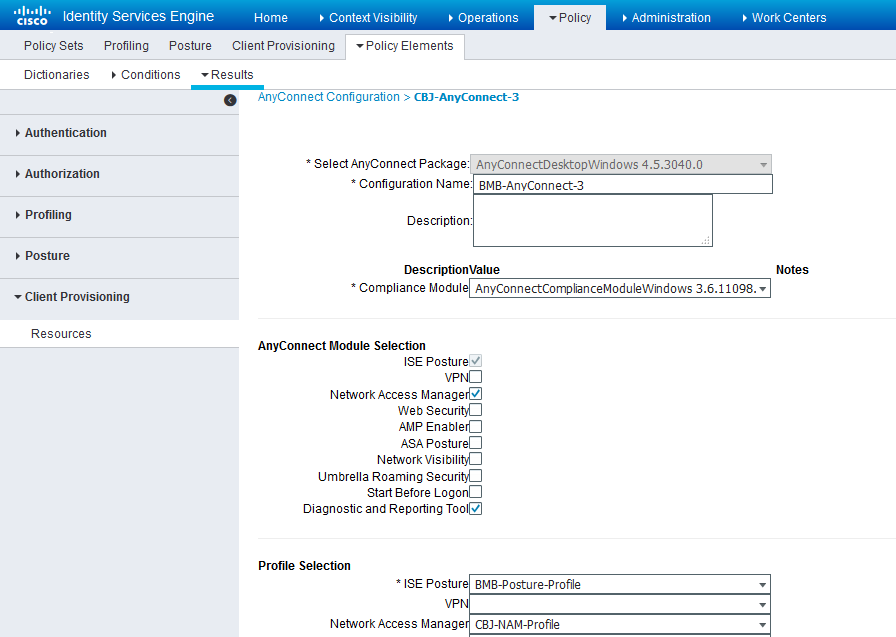
d. Create AnyConnect configuration:
we configured two profiles ( the first one based on AnyConnect compliance module 4.X & and the second one for version 3.X )
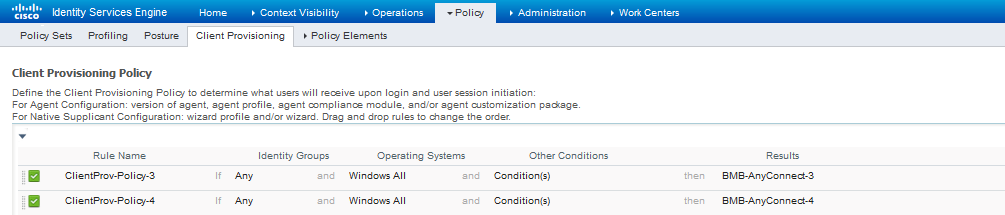
Step.5 Client Provisioning Policy:
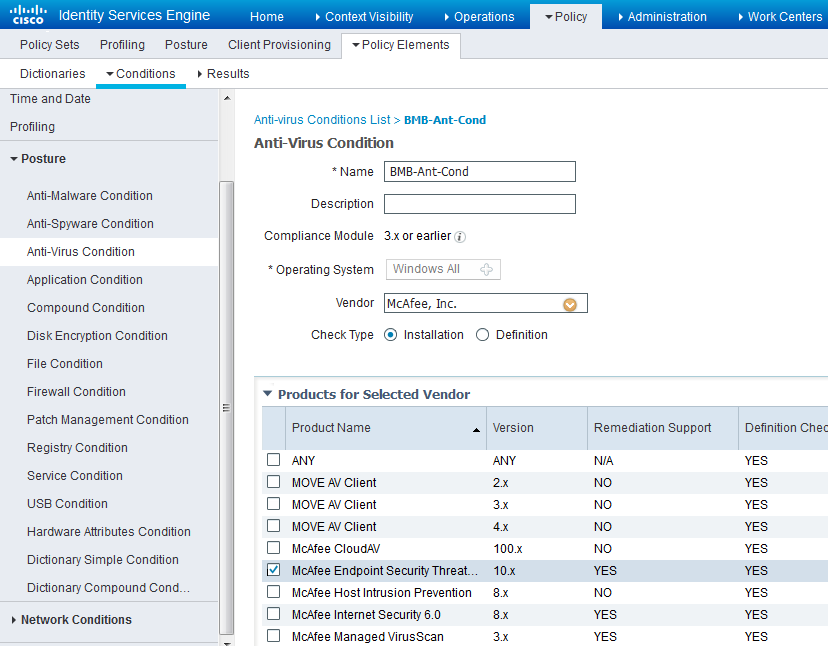
Step.6 Posture Conditions:
Anti-virus Condition has been tested.

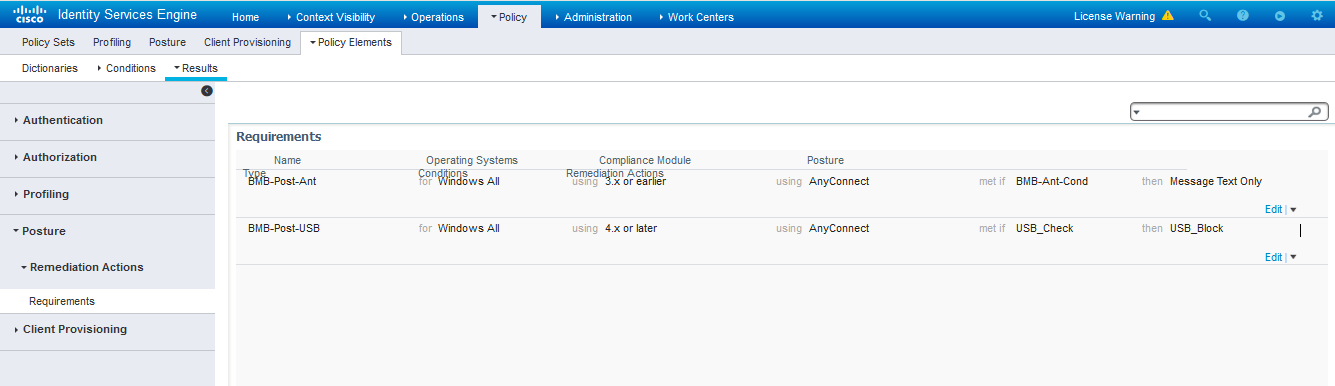
Step.7 Posture requirement:
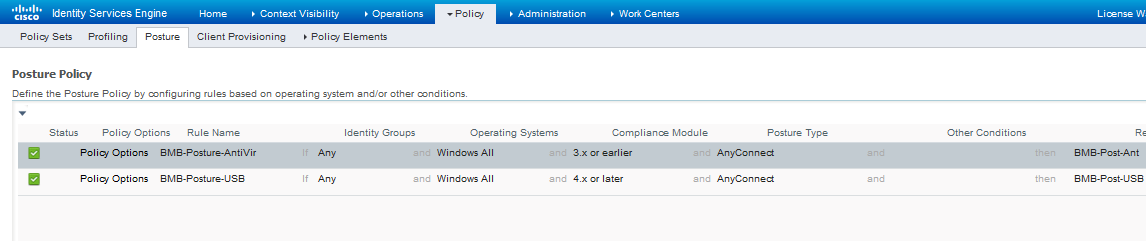
Step.8 Posture Policy:
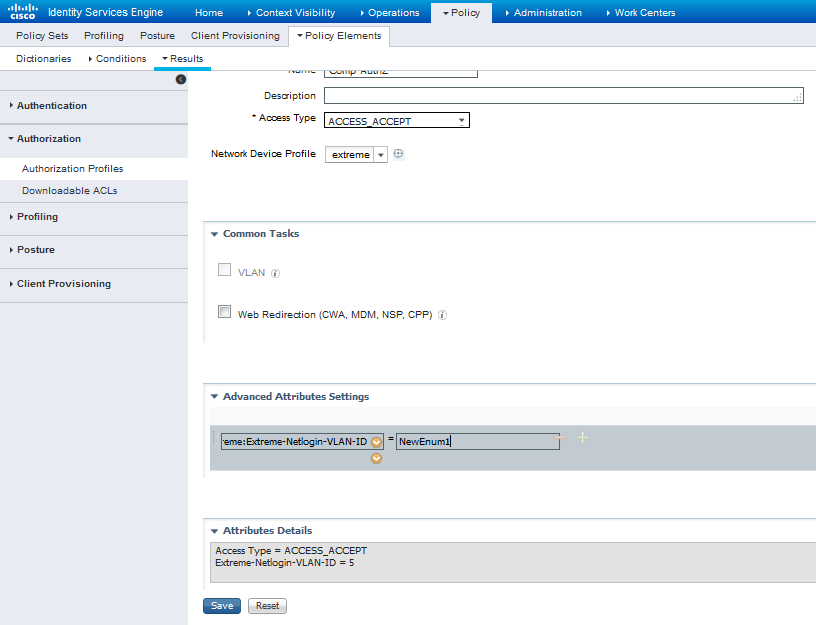
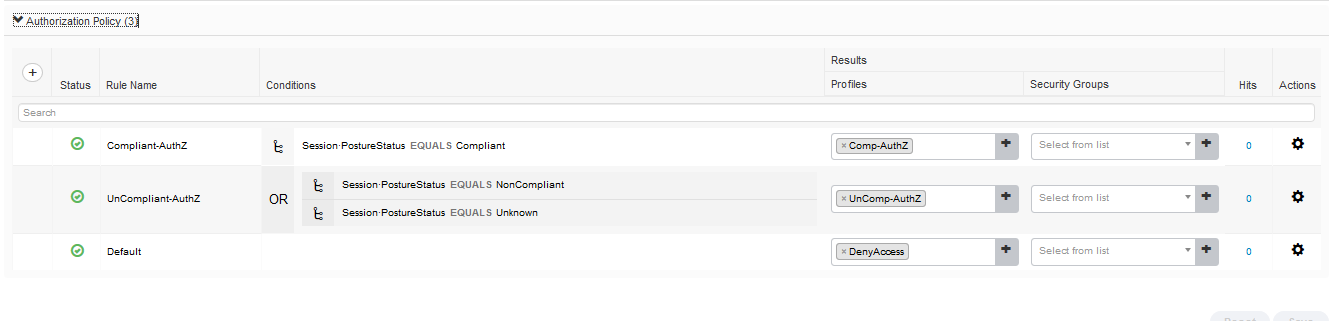
Step.9 Authorization profile:
Step.10 Policy Set :


Deploy NAM module:
the NAM module had been installed on windows 7 from Cisco AnyConnect pre-deploy file.
Created by Ahmad Al-Nahawi
System Engineer at BMBGroup
- Mark as Read
- Mark as New
- Bookmark
- Permalink
- Report Inappropriate Content
O had done the configuration 5 years back...
Not remember what exactly i did but it was working.
Let me check if I had saved it somewhere
")
")
- Mark as Read
- Mark as New
- Bookmark
- Permalink
- Report Inappropriate Content
Hi;
I would appreciate it
- Mark as Read
- Mark as New
- Bookmark
- Permalink
- Report Inappropriate Content
Hi;
can anyone else help with the configuration settings between Extreme X440 and Cisco ISE 3.1 so as to simultaneously authenticate end stations (it's already working for me) and Cisco phones using MAB? (this is currently not working)
Best regards
- « Previous
-
- 1
- 2
- Next »
Find answers to your questions by entering keywords or phrases in the Search bar above. New here? Use these resources to familiarize yourself with the community: