- Cisco Community
- Technology and Support
- Security
- Security Knowledge Base
- Terraform Provider Cisco ASA
- Subscribe to RSS Feed
- Mark as New
- Mark as Read
- Bookmark
- Subscribe
- Printer Friendly Page
- Report Inappropriate Content
- Subscribe to RSS Feed
- Mark as New
- Mark as Read
- Bookmark
- Subscribe
- Printer Friendly Page
- Report Inappropriate Content
07-01-2021 11:27 PM - edited 07-23-2021 12:18 PM
- Introduction
- Requirements
- Installation Steps
- 1. Install ASA (Hardware or ASAv)
- 2. Install Linux/MAC or Windows host or VM
- 3. Install Terraform and Required Components
- 4. Clone Terraform's GitHub repository
- 5. Create a provider file
- Supported Resources
Introduction
Terraform by Hashicorp is an open-source infrastructure as code (IaaS) software tool that enables you to provision infrastructure and configures it. This document will be demonstrating how to set up Terraform and how to use it to configure Cisco ASA via API. Terraform can also be used to provision ASAv on your choice of provider such as AWS, Azure, VMware, GCP. But for the scope of this document I am just going to use an existing deployed ASAv and configure it using Terraform templates.
Requirements
- Cisco ASA (Hardware or ASAv)
- Linux, MAC or Windows host
- Install Terraform and Required Components
- Clone Terraform's GitHub repository
Installation Steps
1. Install ASA (Hardware or ASAv)
Install ASA software of Cisco ASA hardware platform or ASAv. Please refer to Cisco's official documentation for ASA installation.
Terraforms can also be used to provision software ASA on various provider's platforms. Terraform's repository does have a script for that which can help us to provision devices but I am not going to demonstrate that in this document.
2. Install Linux/MAC or Windows host or VM
Install a supported Windows, MAC, or Linux host machine where terraform will be installed. If you are using a Linux distribution then use the following commands to install git, curl and golang packages after ubuntu machine is up and running.
sudo apt-get install git
sudo apt-get install curl
sudo apt-get install golang
3. Install Terraform and Required Components
The next step is to install terraform on your desired platform. You can refer to Hashicorp's Official documentation for installation guidelines. For this demonstration purpose, I used an Ubuntu Linux machine and installed terraform following the above documentation guidelines. I am going to list same commands in this document in case the above-mentioned URL changes or becomes inaccessible due to any reason:
- Ensure that your system is up to date, and you have the gnupg, software-properties-common, and curl packages installed. You will use these packages to verify HashiCorp's GPG signature and install HashiCorp's Debian package repository.
sudo apt-get update && sudo apt-get install -y gnupg software-properties-common curlcurl -fsSL https://apt.releases.hashicorp.com/gpg | sudo apt-key add -
- Add the HashiCorp GPG key.
sudo apt-add-repository "deb [arch=amd64] https://apt.releases.hashicorp.com $(lsb_release -cs) main"
- Add the official HashiCorp Linux repository.
sudo apt-add-repository "deb [arch=amd64] https://apt.releases.hashicorp.com $(lsb_release -cs) main"
- Update to add the repository, and install the Terraform CLI.
sudo apt-get update && sudo apt-get install terraform
4. Clone Terraform's GitHub repository
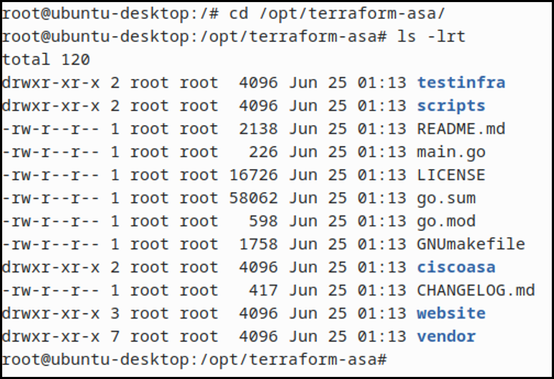
Clone Hashicorp's Terraform's Cisco ASA provider Github repository using the following command.
git clone https://github.com/hashicorp/terraform-provider-ciscoasa /opt/terraform-asa
- All the contents of the repository will be copied to /opt/terraform-asa directory.
5. Create a provider file
The Cisco ASA provider is used to interact with Cisco ASA hardware devices or the Cisco ASAv virtual appliance. The provider needs to be configured with the proper credentials before it can be used.
- Create a "provider.tf" within /opt/terraform-asa directory and paste the following content into it. This contains your ASA's management IP address, username, and password.
provider "ciscoasa" {
  api_url       = "https://10.0.0.5"
  username      = "admin"
  password      = "cisco"
  ssl_no_verify = false
}
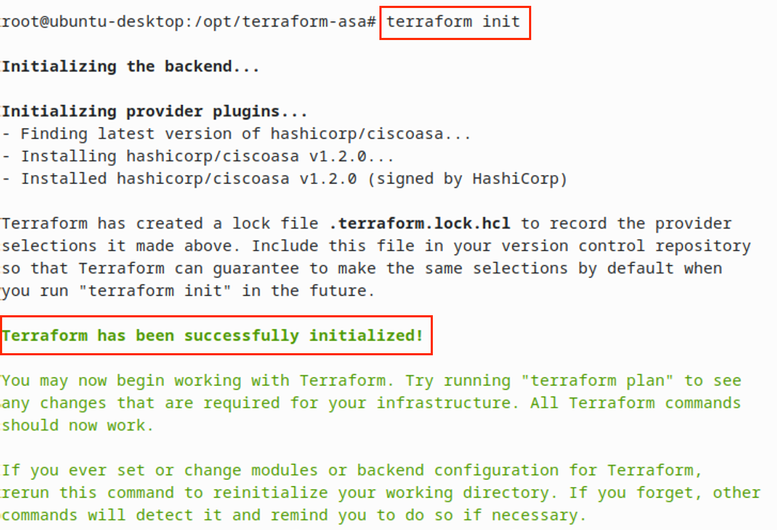
- Run the "terraform init"command to initialize it.
Next is to create a terraform config file with config resource you would like to push to ASA. List of all available resources can be found here:
https://registry.terraform.io/providers/hashicorp/ciscoasa/latest/docs
Example: Configuring Network Objects on ASA
Create and save a file asa_network_object.tf configure you network objects in the following format.
resource "ciscoasa_network_object" "ipv4host" {
  name  = "ipv4_host"
  value = "192.168.10.5"
}
resource "ciscoasa_network_object" "ipv4range" {
  name  = "ipv4_range"
  value = "192.168.10.5-192.168.10.15"
}
resource "ciscoasa_network_object" "ipv4_subnet" {
  name  = "ipv4_subnet"
  value = "192.168.10.128/25"
}
Before you apply the config, you can always use the command "terraform apply" to validate the config:
Push the config with the command "terraform apply"
- Config will be pushed to ASA:
- Similarly, you can add another terraform resource file and apply that as well. For example "ASA-Routes.tf" containing static routes.
- If you try to re-apply previously applied config, terraform does detect notify if there are no changes that need to be applied.
Supported Resources
Terraform only support the following ASA configuration components:
- Ingress ACL
- Egress ACL
- General ACL
- Network Object
- Network Object Group
- Network Service Group
- Static Route
- Mark as Read
- Mark as New
- Bookmark
- Permalink
- Report Inappropriate Content
Hi!
Help me please. I want configuration any cisco asa devices with terraform.
How I can configure terraform for connect any devices?
If I copy block with 2 or more ip api_url - I got error. Thanks!
provider "ciscoasa" {
  api_url       = "https://10.0.0.5"
  username      = "admin"
  password      = "cisco"
  ssl_no_verify = false
}
Find answers to your questions by entering keywords or phrases in the Search bar above. New here? Use these resources to familiarize yourself with the community:


