- Cisco Community
- Technology and Support
- Data Center and Cloud
- UCS Director
- UCS Director Knowledge Base
- Building an alternative user interface to UCS Director in PHP using the REST API
- Subscribe to RSS Feed
- Mark as New
- Mark as Read
- Bookmark
- Subscribe
- Printer Friendly Page
- Report Inappropriate Content
- Subscribe to RSS Feed
- Mark as New
- Mark as Read
- Bookmark
- Subscribe
- Printer Friendly Page
- Report Inappropriate Content
on
05-14-2015
12:03 PM
- edited on
03-25-2019
01:28 PM
by
ciscomoderator
![]()
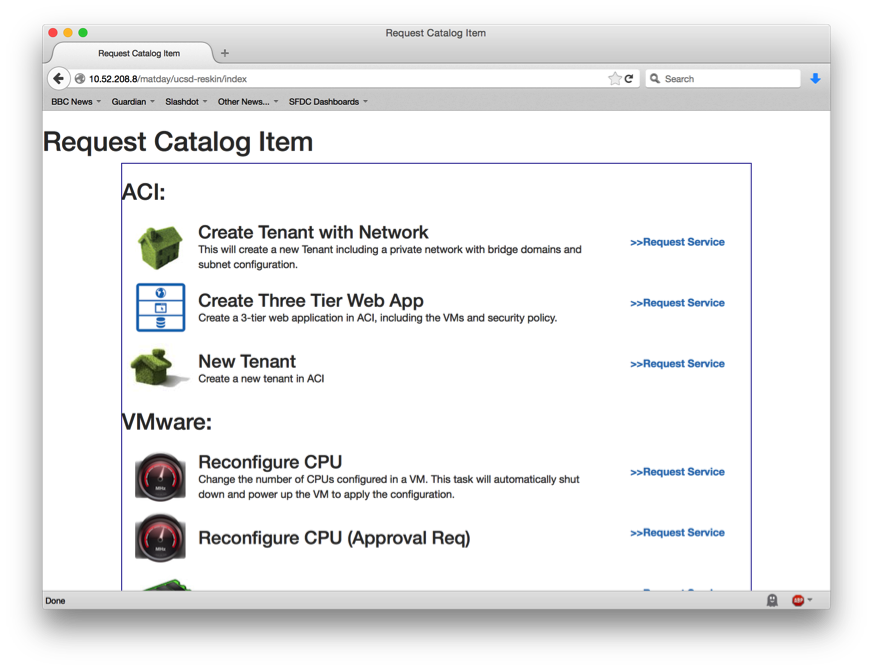
This document builds up an example of querying the UCS Director REST API to provide an entirely new user interface. Using the PHP programming language, this guide will show how various aspects of the API can be used. These examples could be modified to integrate in to existing enterprise systems.
This document assumes a general understanding of the UCS Director platform, as well as intermediate programming skills. Examples will be coded in PHP with the php-curl library. You can find the source code on our GitHub page.

UCS Director Catalog Items
User items within UCS Director are called Catalog Items. These provide all the information needed to provide a user with a service, such as a virtual machine or a more complex orchestration workflow.
Simple catalog items provide a virtual machine configuration, whilst advanced ones allow a fully custom workflow with complex inputs and outputs. For the UI to work as desired, this document will focus on the latter.
Complexities
By supporting advanced workflows, the new interface will have to support all the inputs required by UCS Director. For example, if a workflow requires selecting a VM or typing in text these must be supported by the application.
Accessing the UCS Director API
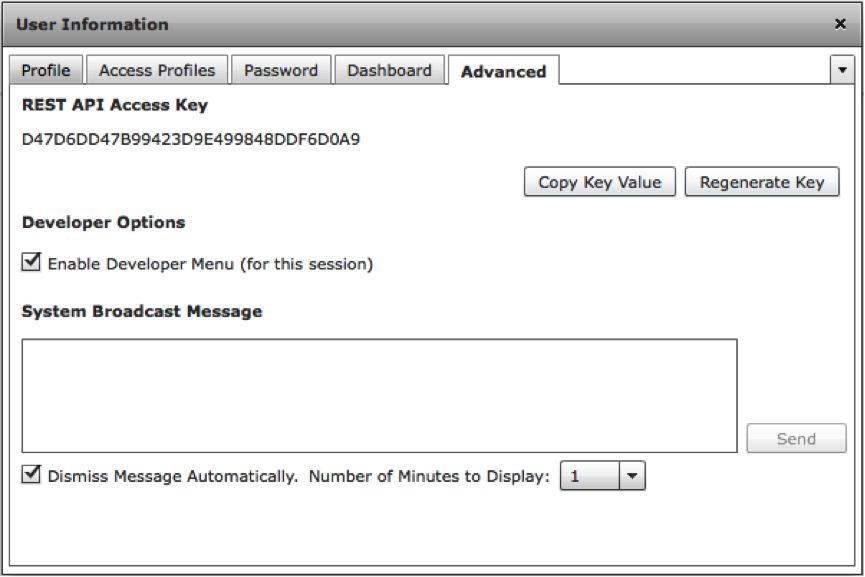
The UCS Director API is relatively straightforward and well-documented. In particular, most functions can be accessed directly from the user interface. In order to do this, log in with the intended user and click their name in the top-right:

On the advanced tab the option to enable developer menu (for this session) can be checked to allow easy access. The rest of this guide assumes this option is enabled. In addition, copy the REST API Access Key – you will need this later.

Using the REST API to get a list of Catalog Items
As a simple example, navigate to Virtual => Compute within the system and click the VM tab.
Provided the developer menu is enabled a button labelled Report Metadata is now available. Clicking it will provide further information, including a REST URL to call at the bottom.
In this case the URL is:
http://ipaddr/app/api/rest?opName=userAPIGetAllCatalogs&opData={}
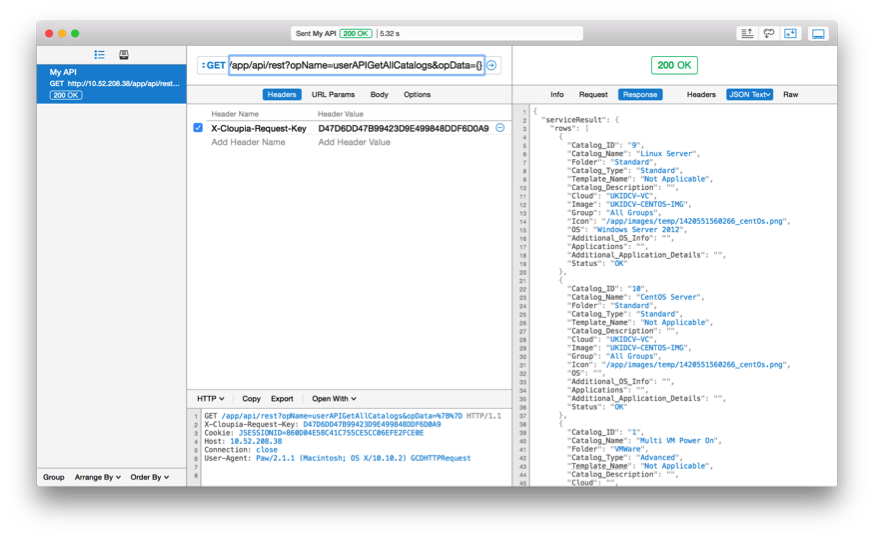
Taking this URL, your API Key and a REST client (such as Postman, Paw or even curl) you can get a JSON-formatted list of all VMs managed by UCS Director.
You will also need to add the API key from earlier as a header:
X-Cloupia-Request-Key = your-api-key
Sample REST call output:

With CURL:
curl -X "GET" "http://ipaddr/app/api/rest?opName=userAPIGetAllCatalogs&opData=%7B%7D" \
-H "X-Cloupia-Request-Key: your-api-key"
Building a Simple PHP Script
The above query can be built from PHP using the cURL library. This library allows for simple http requests to be made from within PHP and is simple to install on a per-project basis. With a Debian system, this can be installed via apt:
apt-get install php5-curl
The first step is to create an API file, ucsd_api.php from which all calls to UCS Director will be made. The key component here is the ucsd_api_call() function.
<?php
# Global variables:
$ucsd_ip = 'ipaddr';
$ucsd_api_key = 'your-api-key';
# Take two arguments – the opName and the opData each call requires:
function ucsd_api_call ($opName, $opData) {
$ch = curl_init();
# Construct URL from opName and opData
$url = 'http://'.$GLOBALS['ucsd_ip'].'/app/api/rest?opName='.
urlencode($opName).'&opData='.urlencode($opData);
# Pass some cURL options to return data and add the API header
curl_setopt($ch, CURLOPT_URL, $url);
curl_setopt($ch, CURLOPT_RETURNTRANSFER, 1);
curl_setopt($ch, CURLOPT_HTTPHEADER,
[ "X-Cloupia-Request-Key: ".$GLOBALS['ucsd_api_key'],]);
# Return as a JSON object
return json_decode(curl_exec($ch));
}
?>
This API when filled with appropriate values for IP address and API key can be used to query against UCS Director. For example, to perform the above query the following could be done:
<?php
include 'ucsd_api.php';
# Send the request:
$catalog_items = ucsd_api_call('userAPIGetAllCatalogs', '{}');
# Pull out the full catalog items from the rows onwards:
var_dump($catalog_items->{'serviceResult'}->{'rows'});
?>
This would output something like this (a single item shown for clarity, formatted as raw JSON):
{
"Catalog_ID": "5",
"Catalog_Name": "Reconfigure CPU",
"Folder": "VMWare",
"Catalog_Type": "Advanced",
"Template_Name": "Not Applicable",
"Catalog_Description": "Change the number of CPUs in a VM."
"Cloud": "",
"Image": "",
"Group": "All Groups",
"Icon": "/app/images/temp/1420550063874_MHz.png",
"OS": "",
"Additional_OS_Info": "",
"Applications": "",
"Additional_Application_Details": "",
"Status": "OK"
},
Inspecting the Result
Looking at the result of the above REST API call, there’s plenty of information about the catalog item (its name, icon etc) but nothing about its inputs or how to run it. To obtain that, we need to perform a second rest call. For this we need userAPIWorkflowInputDetails.
Modifying the above code to work only with Advanced catalog items and dump each ones details, the following code is obtained:
<?php
include 'ucsd_api.php';
# Send the request:
$catalog_items = ucsd_api_call('userAPIGetAllCatalogs', '{}');
# Iterate through each item:
foreach ($catalog_items->{'serviceResult'}->{'rows'} as $row) {
# Only inspect advanced catalog items
if ($row->{'Catalog_Type'} == 'Advanced') {
$detail = ucsd_api_call('userAPIWorkflowInputDetails',
'{param0:"'.$row->{'Catalog_Name'}.'"}');
# Dump out the details
var_dump($detail->{'serviceResult'});
}
}
?>
This will provide an array with detail on a catalog items’ input fields, expected labels and data types:
[
{
"name": "input_0_Select_VM200",
"label": "Select VM",
"description": "",
"type": "vm",
"catalogType": "Advanced",
"isOptional": false,
"inputFieldType": "popup-table",
"isMultiSelect": false,
"inputFieldValidator": null
},
{
"name": "input_1_Number_of_CPU's_for_VM655",
"label": "Number of CPU's for VM",
"description": "",
"type": "vCPUCount",
"catalogType": "Advanced",
"isOptional": false,
"inputFieldType": "embedded-lov",
"isMultiSelect": false,
"inputFieldValidator": null
}
]
Using this information a full list of catalog items can be created. Continuing with the example above, there are two input types: vm and vCPUCount. There’s also gen_text_input which is a common field.
Creating Input Fields
Using the rest API above, the following code will create a user input for the three choices (list of all VMs, virtual CPU count and a generic text input field). The first step is to create a function to check for each input. This will be included in ucsd_api.php
# Takes an input object and returns its field, or false if it's not supported
# the returning item should return an array of two items - the label and
# input field
function ucsd_input_supported($input) {
switch ($input->{'type'}) {
case 'gen_text_input':
return _ucsd_input_plain_text($input);
case 'vm':
return _ucsd_input_vm_picker($input);
case 'vCPUCount':
return _ucsd_input_vcpu_count($input);
default:
return false;
}
}
Each of these functions returns either false (it’s not possible to provide a user input) or an array containing the basic HTML needed to produce an input (element 0 for the label and element 1 for the form).
Taking gen_text_input as the first example, the returning function might look like this:
# Plain text input form
function _ucsd_input_plain_text ($input) {
$name = $input->{'name'};
$label = $input->{'label'};
$form[0] = '<label for="'.$name'">'.$label.'</label>'."\n";
$form[1] = '<input type="text" name="'.$name.'" id="'.$name.'" />'."\n";
return $form;
}
Likewise the vm picker, which will need to do an API call of its own, might go like this:
# VM picker:
function _ucsd_input_vm_picker ($input) {
$name = $input->{'name'};
$label = $input->{'label'};
$form[0] = '<label for="'.$name'">'.$label.'</label>'."\n";
# API call to get full VM list:
$response = ucsd_api_call('userAPIGetTabularReport',
'{param0:"0",param1:"All Clouds",param2:"VMS-T0"}');
$form[1] = '<select name="'.$name.'" id="'.$name.'">';
foreach ($response->{'serviceResult'}->{'rows'} as $row) {
$form[1] .= '<option value="'.$row->{'VM_ID'}.'">'.
$row->{'VM_Name'}.'</option>';
}
$form[1] .= '</select>';
return $form;
}
Finally, an API call to get a vCPU count could look like this:
function _ucsd_input_vcpu_count ($input) {
$name = $input->{'name'};
$label = $input->{'label'};
$form[0] = '<label for="'.$name'">'.$label.'</label>'."\n";
$form[1] = '<select name="'.$name.'" id="'.$name.'">';
for ($i = 1; $i <= 64; $i++) {
$form[1] .= '<option value="'.$i.'">'.$i.'</option>';
}
$form[1] .= '</select>';
return $form;
}
This can then be used as part of the above code:
<?php
include 'ucsd_api.php';
# Send the request:
$catalog_items = ucsd_api_call('userAPIGetAllCatalogs', '{}');
# Iterate through each item:
foreach ($catalog_items->{'serviceResult'}->{'rows'} as $row) {
# Only inspect advanced catalog items
if ($row->{'Catalog_Type'} == 'Advanced') {
# Create an output buffer:
$out = '<h1>'.$row->{'Catalog_Name'}.'</h1><p>';
# Add form elements:
$out .= '<form action="submit_api_request" method="post">';
# Get supported input details and iterate through them:
$detail = ucsd_api_call('userAPIWorkflowInputDetails',
'{param0:"'.$row->{'Catalog_Name'}.'"}');
foreach ($detail->{'serviceResult'}->{'details'} as $input) {
$form = ucsd_input_supported($input);
if ($form == false) {
# The input method isn’t supported, don’t show
# and skip to next catalog item:
continue(2);
}
else {
# Input is supported, add it to output buffer
# with html inline for now
$out .= '<br />'.$form[0].$form[1].'<br />';
}
}
$out .= '<input type="hidden" name="Catalog_Name" value="'.
$row->{'Catalog_Name'}.'" />';
$out .= '<input type="submit" value="Submit"></p></form>';
# Print the output buffer (will only happen if all fields are
# supported):
print $out;
}
}
?>
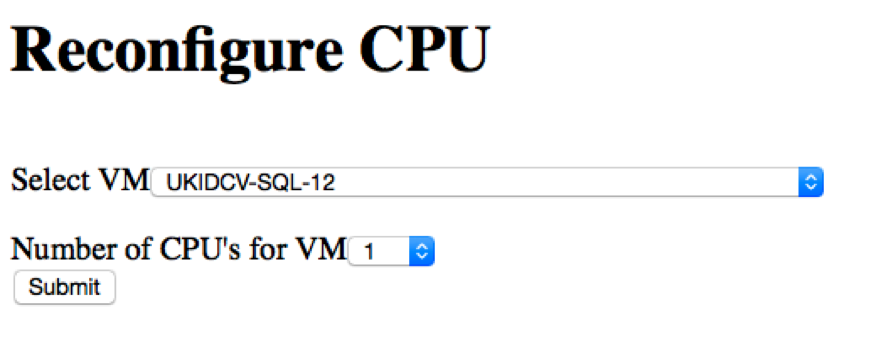
This will yield output such as the following:

All supported items should be shown as part of a catalog view with this code. Anything with unsupported inputs won’t be shown at all. It’s not pretty right now, but the goal is to make it functional.
Submitting Requests
Once a request such as the above is submitted, a handler will need to submit the inputs to UCS Director. In this case, it will be submit_api_request.php.
To request catalog items the userAPISubmitVAppServiceRequest REST API call is made. The opData for this is an array named ‘list’ of all the inputs desired. This can be easily constructed using the PHP json_encode parameter:
<?php
include 'ucsd_api.php';
# Construct request:
$request['param0'] = $_POST['Catalog_Name'];
# Loop through inputs:
$i = 0;
foreach (array_keys($_POST) as $post) {
# Regular expression matches only form input values
if (preg_match('/^input_/', $post)) {
$param[$i]['name'] = $post;
$param[$i]['value'] = $_POST[$post];
$i++;
}
}
# Build up an array which we'll convert to JSON:
$request['param1']['list'] = $param;
$request['param2'] = 1000;
$response = ucsd_api_call('userAPISubmitVAppServiceRequest', json_encode($request));
# Redirect to status page with new service number:
$newuri = preg_replace('/submit_api_request/', 'status', $_SERVER['REQUEST_URI']);
header('Location: http://'.$_SERVER['HTTP_HOST'].$newuri.'?id='.$response->{'serviceResult'});
?>
Status Page
The final element to complete a full user interface re-skin is to show a progress window. For this the userAPIGetServiceRequestWorkFlow API call is used to obtain a specific workflow’s information.
<?php
include "ucsd_api.php";
# UCS Director uses magic numbers for status information, so build it here:
$status[0] = "Not started"; $colour[0] = "black";
$status[1] = "In Progress"; $colour[1] = "blue; font-weight: bold;";
$status[2] = "Failed"; $colour[2] = "red";
$status[3] = "Completed"; $colour[3] = "green";
$status[4] = "Completed with Warning"; $colour[4] = "orange";
$status[5] = "Cancelled"; $colour[5] = "gray";
$status[6] = "Paused"; $colour[6] = "gray";
$status[7] = "Skipped"; $colour[7] = "gray";
if (!isset($_GET['id'])) {
# Show an error page message and exit
print 'Error - no ID provided';
exit;
}
print '<h1>Service Request #'.$_GET['id'].'</h1>';
$response = ucsd_api_call('userAPIGetServiceRequestWorkFlow',
'{param0:'.$_GET['id'].'}');
# Loop through sub-components:
foreach ($response->{'serviceResult'}->{'entries'} as $entry) {
$stat = $entry->{'executionStatus'};
print '<h3>Step '.$step++.': '.$entry->{'stepId'}.'</h3>';
print '<p style="color: '.$colour[$stat].
'">Status: '.$status[$stat].'</p>';
}
?>
The Next Steps
This document walked through crude examples with code to create a basic interface replacement. On Github a full implementation using the Smarty template engine is available, which makes use of this code base and implements error checking, themes and configuration management. It can be found here:
Find answers to your questions by entering keywords or phrases in the Search bar above. New here? Use these resources to familiarize yourself with the community:
