There are two ways of allowing users to select their storage during provisioning. I will cover the simple “VMWare Storage Policy” method first and then the more elaborate “Virtual Storage Catalog” method second. In both cases I will cover the configuration and then show what the result looks like to an end user.
VMWare Storage Policy method
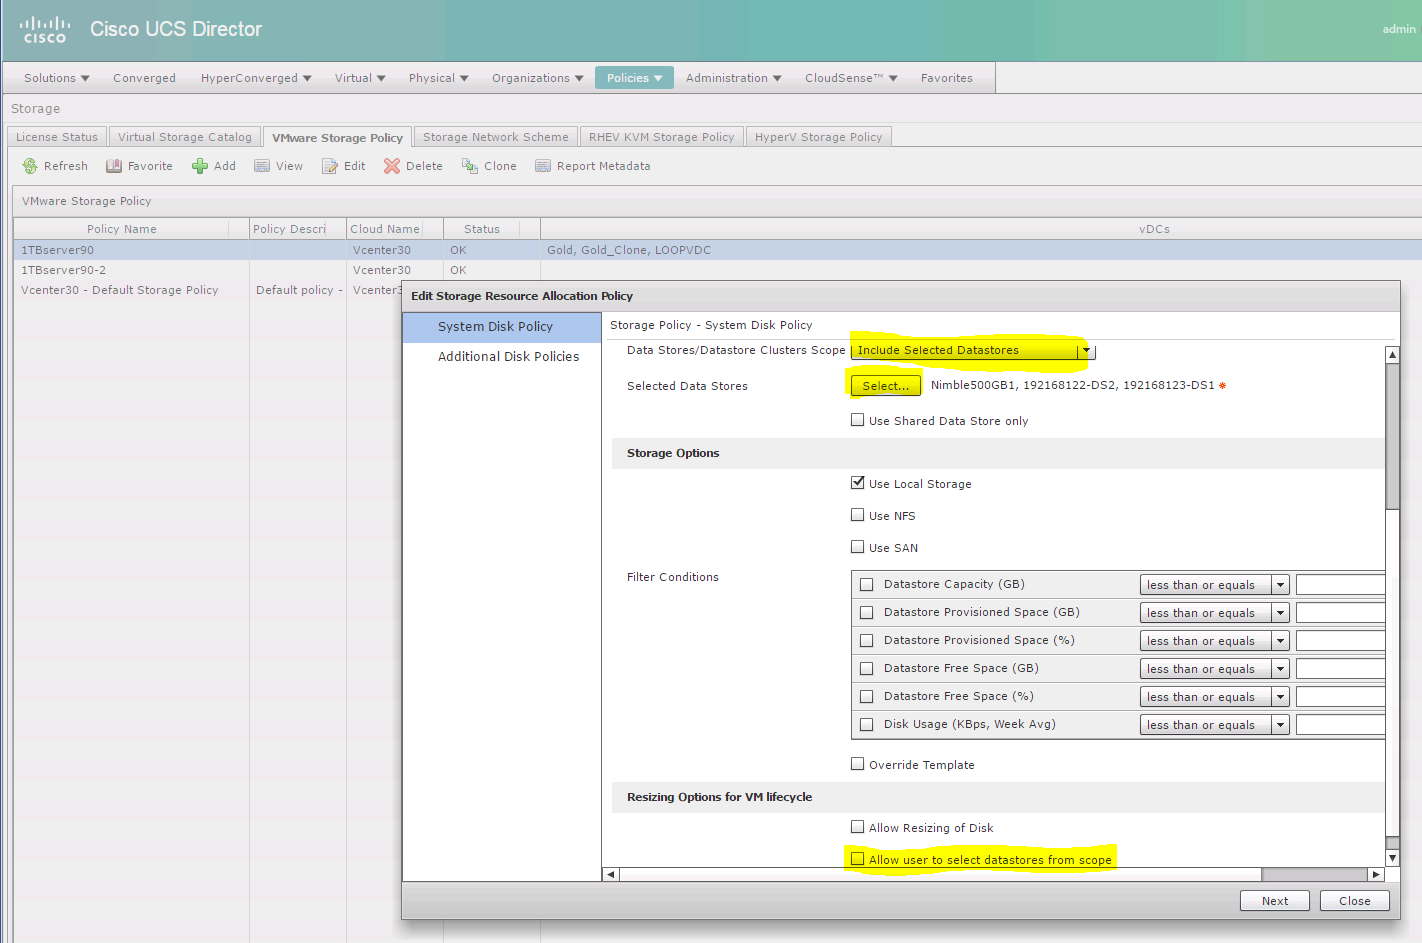
For the first method go to “Policies”, “Virtual/Hypervisor Policies”, “Storage” and select the “VMWare Storage Policy” tab. You can edit an existing storage policy and enable the “Allow user to select datastore from scope”. I recommend also limiting the number of datastores visible by limiting the scope of datastores. I show all of this in the screen shot below.

Here are the screen shot showing the end-user result when using a standard catalog item. Notice that the user is forced to select a Datastore based on the VMWare Datastore name. This is useful for technical users that understand the environment:


Virtual Storage Policy method
The second method is the utilisation of a “Virtual Storage Catalog”. It is more complex to setup but provides more flexibility. This second method is preferable when you desire to use storage tiering with an easy to understand prompt for end users. Firstly you need to have multiple storage policies, each policy should point to the desired subset of storage. As with the more the simpler method go to “Policies”, “Virtual/Hypervisor Policies”, “Storage” and select the “VMWare Storage Policy” tab. Create multiple Policies each pointing to a subset of Datastore or Datastore clusters. In this case the “Allow user to select datastore from scope” should remain unchecked. Here is a screen shot showing this:
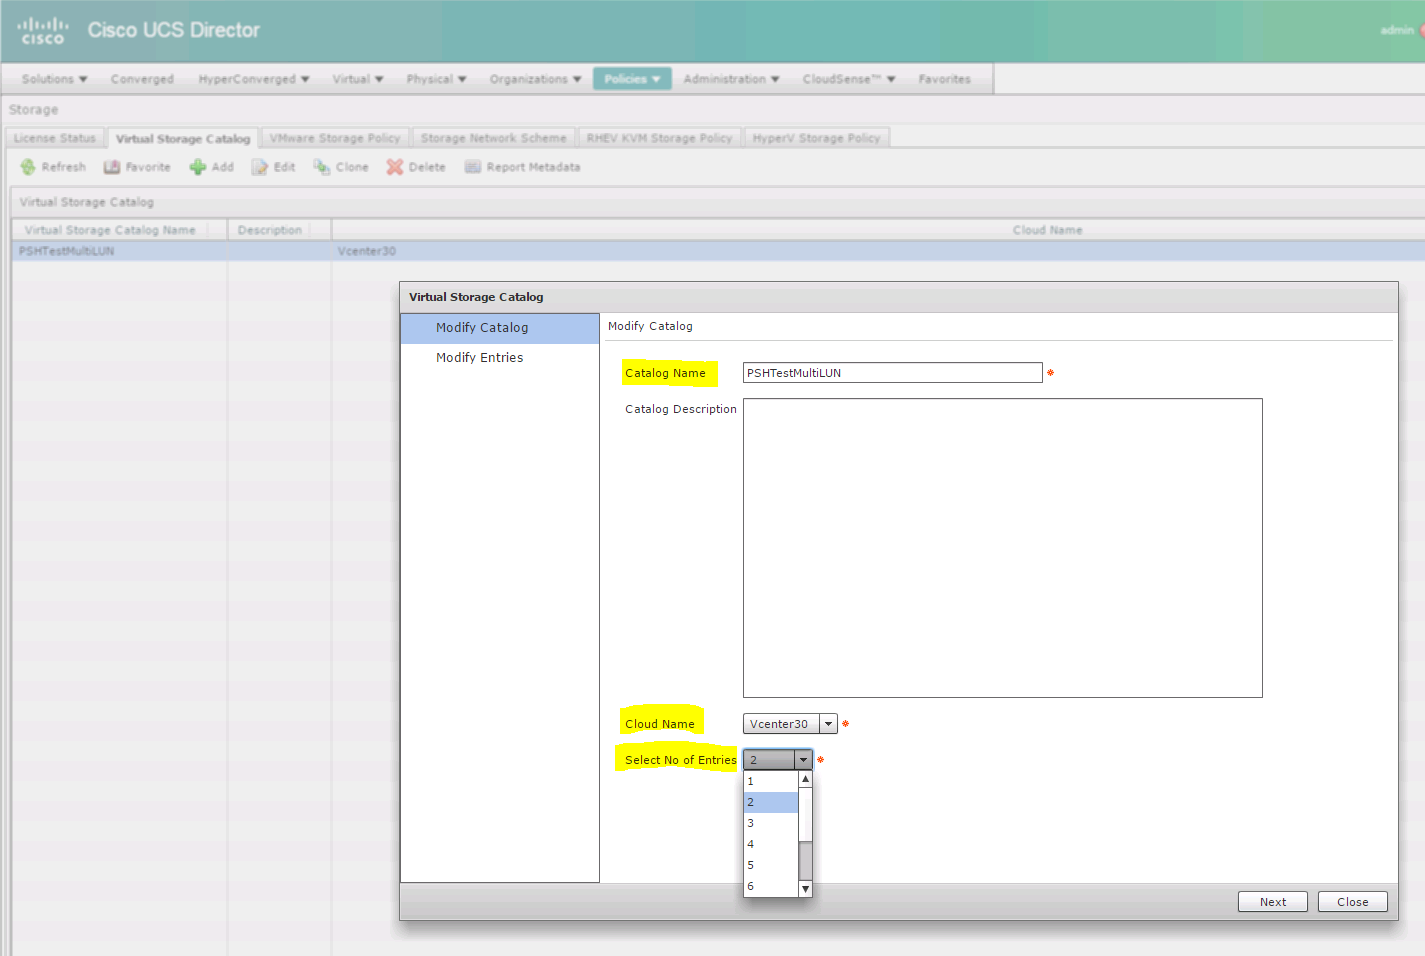
Once the multiple storage polices have been created switch to the “Virtual Storage Catalog” tab. Click the “Add” button. Give the “Virtual Storage Catalog” a meaningful name (not visible to the end-user), select the proper cloud name and chose the number of Storage entries you would like to have the end-user choose from. Here is a screen shot:
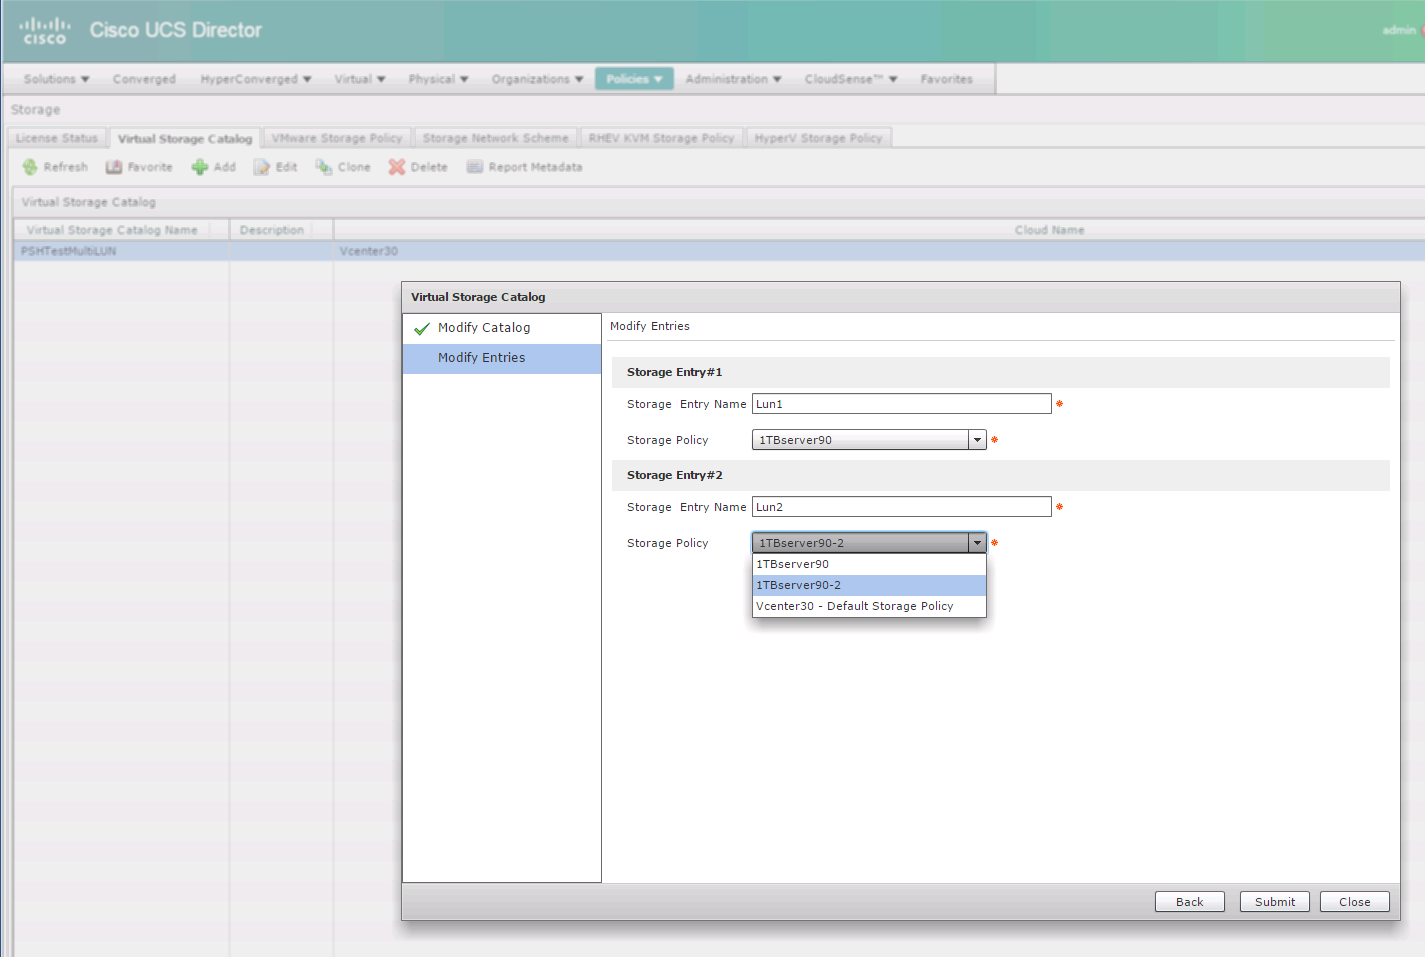
Once you have clicked “next” the second page will prompt you for the names for each catalog entry. Make sure to use names that the end-user would understand and then chose the appropriate “Storage Policy” for each name (created in the previous step):
Once you have clicked the “Submit” button to save the “Virtual Storage Catalog” go to “Policies”, “Catalogs” and edit the Standard VM catalog. Click “Next” three times until you reach the “Customization” section; at which point click the “Enable” check box under “Virtual Storage Catalog”. If you have created multiple “Virtual Storage Catalogs” you will need to select the correct one.

Here is what it looks like to the end-use when deploying a VM from a standard catalog. Notice that the user can select the desired storage based on a friendly name supplied by the UCS Director administrator. This is ideal when using Tiered storage.

