This video explains the process of using Monitor Diagnostics tool.
Display (no power)
- Check the power led status on the monitor. AC power supply button has a red led.

- No power, Connect the monitor to a known good power socket
- Swap the power cord
No Display (Power Good)
- Connect the HDMI cable from the camera directly to the HDMI 1 on the LCD
- Connect a known working monitor to the video output port on the codec
- Xstatus video output

**Still no video** this isolates that the problem is with the LCD
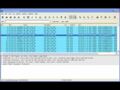
Use the monitor Diagnostic tool to further diagnose the issue
- Connect a serial cable from the “Com1” port on the monitor to a laptop
- Select your monitor model

- Press “Connect” button
- Current source, unit ID, signal status, firmware version will be reported


Default Setting
You need default setting on following condition.
- Image color is not natural.
- No image on screen and signal status is “No Signal”
- Input source is not HDMI1 after firmware update
In order to restore default setting of monitor, press “Default Setting” button.
It will takes about 5 seconds to finish.
- If there is no image even after default setting, then run Diagnostic mode.

Diagnostic Mode
In order to start the diagnostics, press the “Diagnostic mode” button.
- Monitor will show auto color pattern.


monitor_onsite_service_survey_2010_07_09_-_tm_control_v12_software_and_manual.zip