Introduction
DCNM-SAN Server is a platform for advanced MDS monitoring, troubleshooting, and configuration capabilities. DCNM-SAN Server provides centralized MDS management services and performance monitoring. SNMP operations are used to efficiently collect fabric information. Each computer configured as a Cisco DCNM-SAN Server can monitor multiple Fibre Channel SAN fabrics. Up to 16 clients (by default) can connect to a single Cisco DCNM-SAN Server concurrently. The Cisco DCNM-SAN Clients can also connect directly to an MDS switch in fabrics that are not monitored by a Cisco DCNM-SAN Server, which ensures that you can manage any of your MDS devices from a single console.
Cisco DCNM-SAN Server has the following features:
• Multiple fabric management— DCNM-SAN Server monitors multiple physical fabrics under the same user interface. This facilitates managing redundant fabrics.
• Continuous health monitoring—MDS health is monitored continuously, so any events that occurred since the last time you opened the DCNM-SAN Client are captured.
• Roaming user profiles—The licensed DCNM-SAN Server uses the roaming user profile feature to store your preferences and topology map layouts on the server, so that your user interface will be consistent regardless of what computer you use to manage your storage networks.
Install DCNM-SAN on Windows
Step 1: DCNM Installation – Start the installation

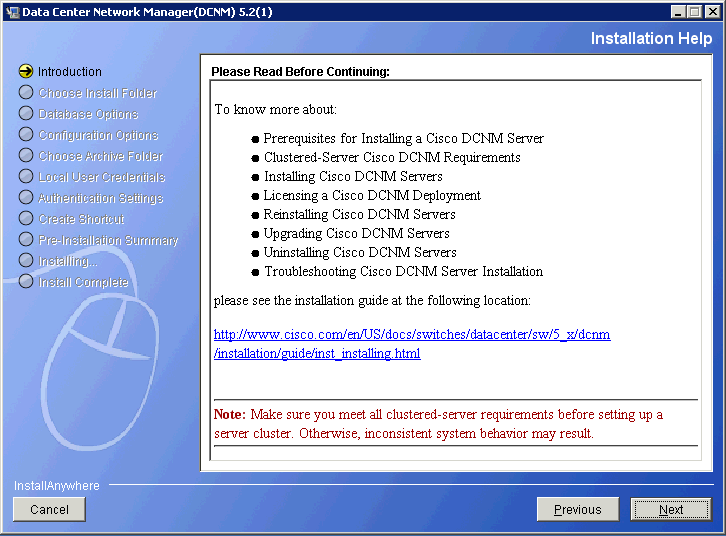
Step 2: At the Introduction window click next

Step 3: Read instructions before continuing

Step 4: Select DCNM SAN server. Note that DCNM-SAN Server required FMS licenses to be installed. Otherwise continue with standalone.
Step 5: In Database options select Install PostgreSQL and define users and passwords.

Step 6: In Coniguration options choose interface that has the route to MDS management interfaces.

Step 7: Define DCNM login User/password for local user credentials.

Step 8: Under Authentication settings define DCNM login User/password – leave local if no other authedication method is used.

Step 9: Select a location to create a shortcut for DCNM.

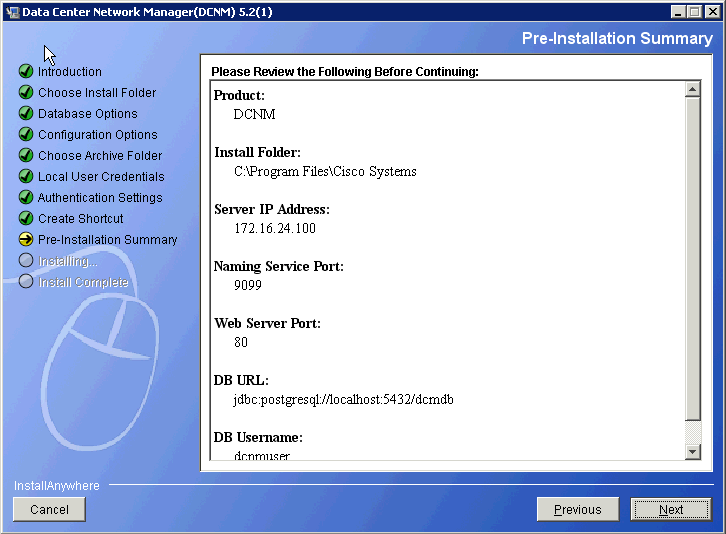
Step 10: Cross check the installation parameters in the Preinstallation summary page.

Step 11: Installation wizard will procedd to install DCNM SAN and PostgreSQL.

Step 12: Select Start DCNM SAN Service and click next.

Step 13: Installation completed succesfully.

Related Information
Cisco DCNM SAN: Creating and Managing VSANs
Cisco DCNM SAN: Collecting Troubleshooting Information for Technical Support
Cisco DCNM Fundamentals Guide
Fabric Configuration Guide, Cisco DCNM for SAN