Scenario
You have several Service Profiles that are associated to blades and running vSphere's ESX4. You have a new network VLAN to make available to vSphere so you need to do three things - all of which are NON-DISRUPTIVE CHANGES, which means NO REBOOTS!
- Modify the northbound LAN switches (e.g. a pair of Nexus 5Ks) to allow the new VLAN.
- Create the VLAN in UCS Manager and make it available to Service Profiles by modifying a vNIC template
- Create a new port group in the vSphere vSwitch to make the VLAN available to virtual machines
Notes
- This procedure relates to UCS 1.02(d) and ESX4.
- For this illustration, the new VLAN is "dmz_84".
- This procedure expects you to have two vNIC Templates called vmnic0 and vmnic1. These are Updating templates, and they are used by the ESX4 Service Profiles.
Procedure
On the Nexus5K
- Create the VLAN
- Modify the configuration of the ports that are connected to the UCS 6120s to allow the new VLAN.
On UCSM
- In LAN --> LAN Cloud --> VLANs, Create VLAN
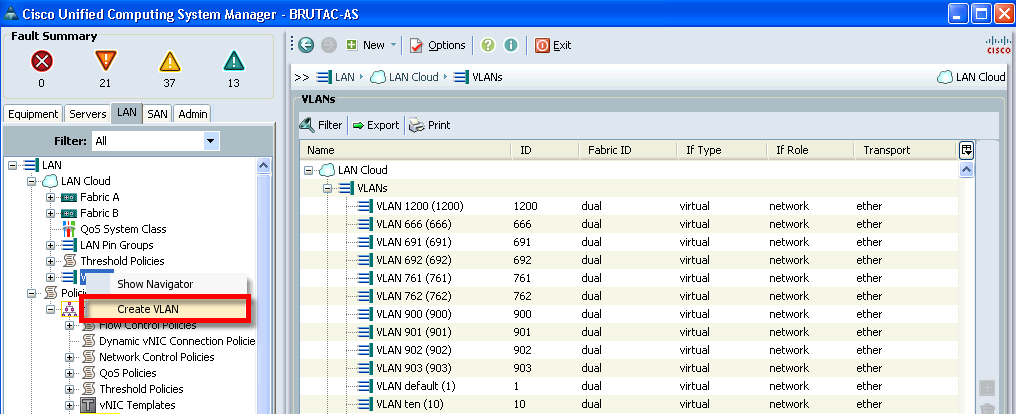
- Configure the new VLAN as "dmz_84" as a Global/Common VLAN with an VLAN ID of 84.

- Now the VLAN is available, we need to tell the Service Profiles to make this VLAN available to the blade vNICs. There are two ways to do this:
- First, we can hand edit all the Service Profiles to add the new VLAN to each vNIC, or
- Make Service Profiles use Updating vNIC Templates - now we make just one edit, and UCS will update all the Service Profiles for us!
Our ESX Service Profiles are using Updating vNIC Templates:
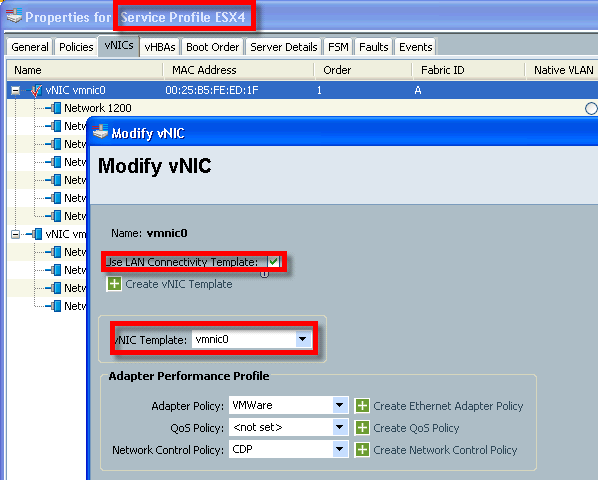
- So, we need to edit the vNIC Template vmnic0:

- Remember, because this is an Updating template, any changes will be automatically applied to all Service Profiles using this template. These VLAN changes do NOT require a reboot.

- All we need to do is click Modify VLANs and add our new VLAN, and Voila!

- All Service Profiles using the vmnic0 (and vmnic1 which we would also edit) template will automatically be able to see VLAN 84.
On vCenter
- If using normal vSwitches or dvSwitches, you just need to create a new port group with an ID of 84
- If using nxSwitch, then create a new port-profile.
- Configure your virtual machines' vnics to use the new Port Group with VLAN ID 84.
JOB DONE!
