- Cisco Community
- Technology and Support
- DevNet
- DevNet Networking
- Networking Blogs
- Five APIC-EM API to improve network engineer productivity – part 1
- Subscribe to RSS Feed
- Mark as New
- Mark as Read
- Bookmark
- Subscribe
- Printer Friendly Page
- Report Inappropriate Content
Five APIC-EM API to improve network engineer productivity – part 1.
I was talking to a co-worker the other day about the transition to software and API's. His comment was "I now get this API thing and how it is going to make the life of the network engineer more productive". He then asked a great question: "As a network engineer, what are the first five APIC-EM API I should know"?
I thought I would take a bit of time to answer his question and share it with you.
As you probably know, APIC-EM is Cisco's controller for the Campus and WAN. As a controller it treats the network as a system and abstracts the complexity of the network-devices and the connections as a set of REST API. The controller knows about every network-device (switch, router, Wireless), every interface, every host connected to the network.
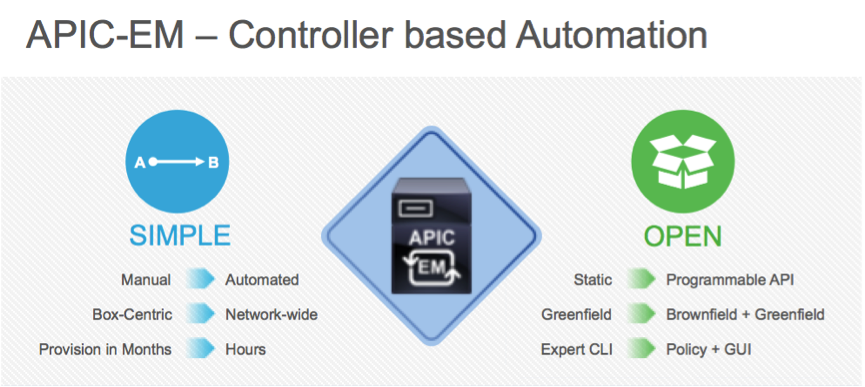
Everything on APIC-EM can be done via API. Provisioning an SD-WAN solution, end-to-end QoS, Network Plug and Play for on boarding network-devices. Before we get into the super powerful policy APIs, I thought I would start with the top 5 basic API that might help you be more productive.
- /network-device – all attributes of network-devices - This blog
- /interface/network-device – all interfaces (and hosts) on a network-device e.g. a switch - blog2
- /license-info/network-device – all licencing information for a network-device. blog3
- /host?hostIP and /host?hostMac – look up a host connected to the network by IP or MAC address blog4.
- /flow-analysis – a path trace between hosts on the network, now with stats on interfaces, devices etc
Each blog in this series will focus one of these five topics.
I appreciate that not everyone is a programmer or scripter and that is ok. All of the examples include a example of using a REST API client built into the controller called Swagger… no coding required.
First a bit about swagger
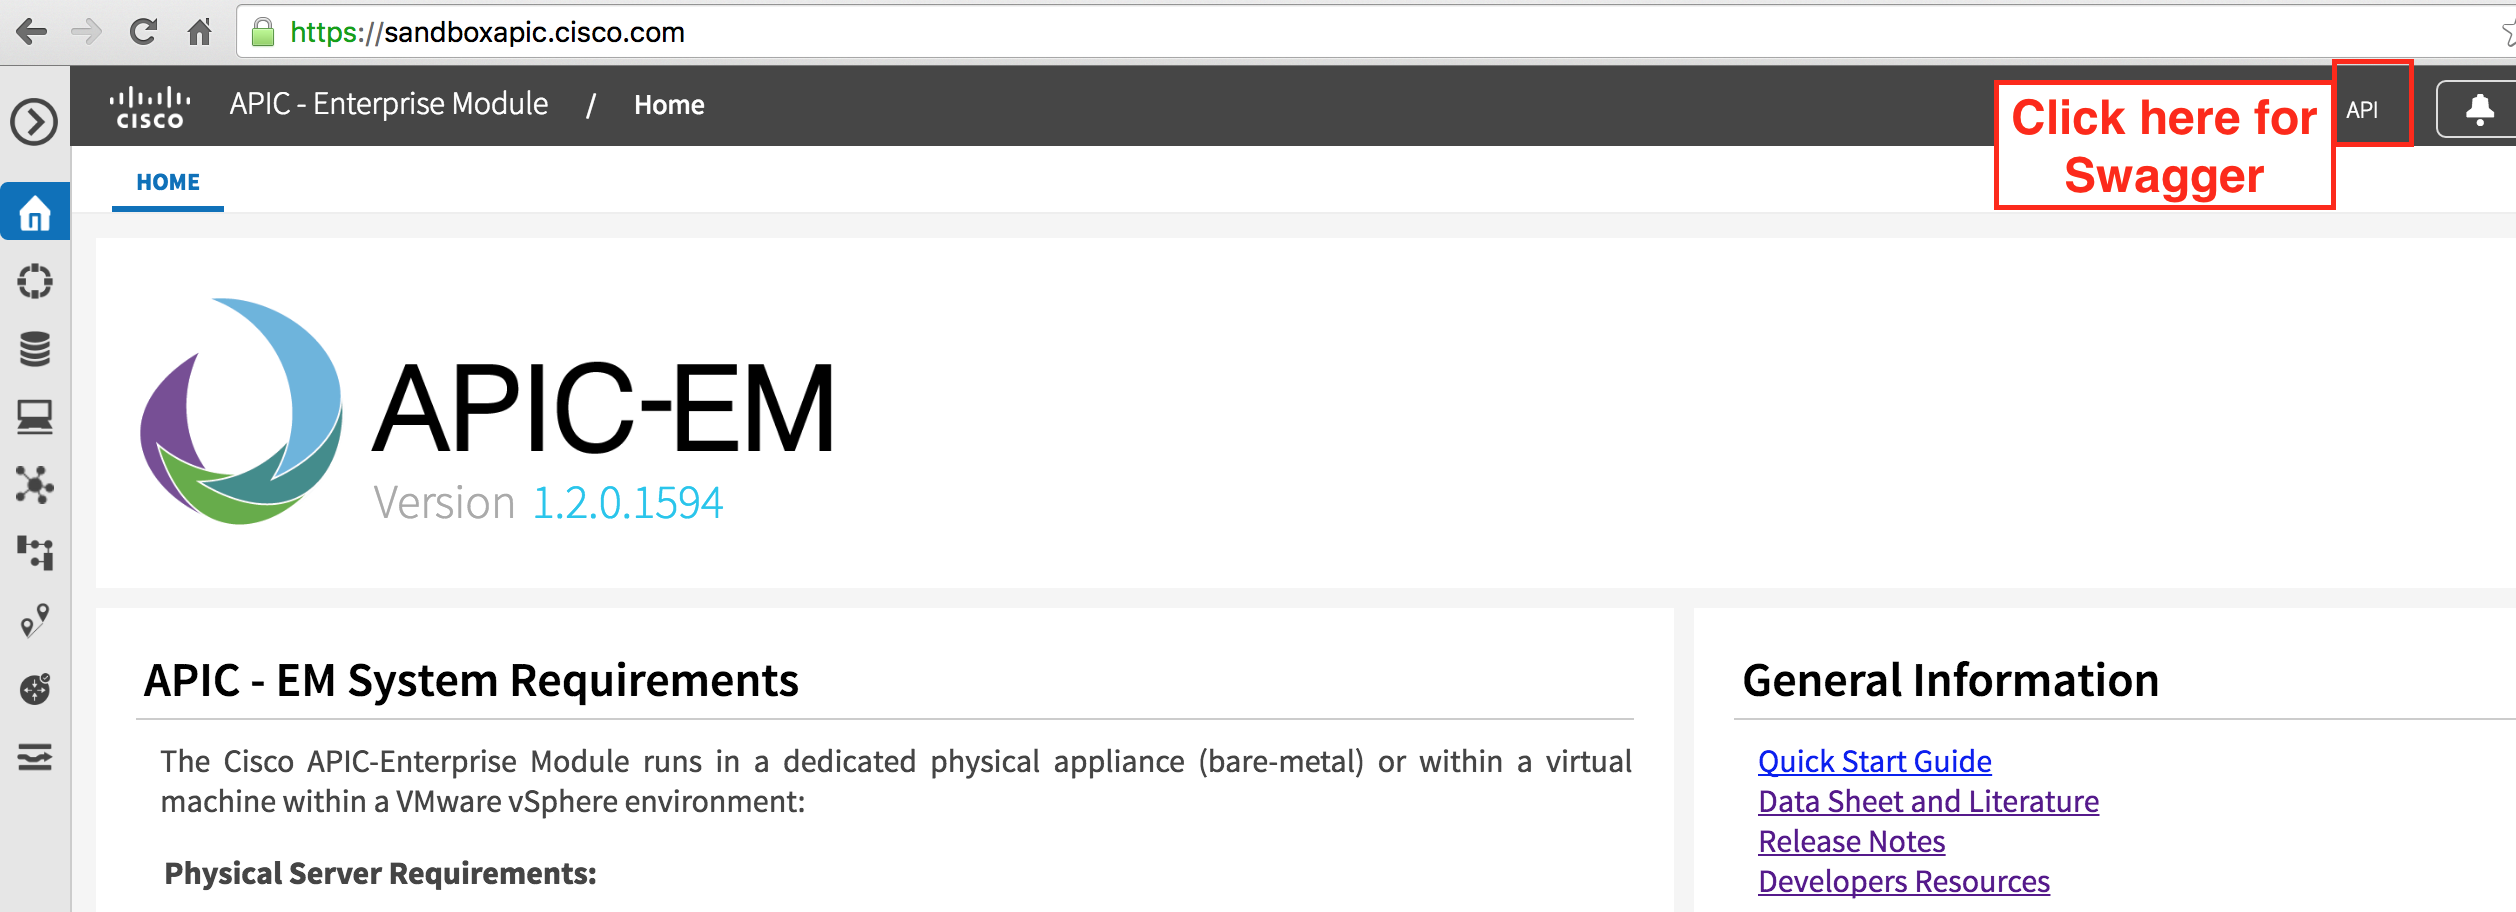
Swagger is an API documentation tool. The "API" button in the top right brings up the swagger pages. The great thing is you can click on the "try it out" button for an API and run the REST API call directly on the controller. You get to see that REST call that was made plus the full response. To access the always on sandbox at https://sandboxapic.cisco.com User: devnetuser, Password: Cisco123!
Downloading scripts from github
You will need to have a shell or command line to run the commands below. These should work on a MAC or Linux machine. You will also need to have the "requests" python library installed. For tips on getting your environment python enabled, see the DevNet Learning Lab setup
Here are the steps you need to take:
git clone https://github.com/CiscoDevNet/apic-em-samples-aradford.git
cd apic-em-samples-aradford/
cd sample_code/Top5/
Here is what the output should look like
$ git clone https://github.com/CiscoDevNet/apic-em-samples-aradford.git
Cloning into 'apic-em-samples-aradford'...
remote: Counting objects: 409, done.
remote: Total 409 (delta 0), reused 0 (delta 0), pack-reused 409
Receiving objects: 100% (409/409), 580.75 KiB | 523.00 KiB/s, done.
Resolving deltas: 100% (198/198), done.
Checking connectivity... done.
$ cd apic-em-samples-aradford/
$ cd sample_code/Top5/
$ ls
01_network_device.py 03_device_license.py 05_path_trace.py util.py
02_interface_device.py 04_find_host.py __init__.py
#1 network-device
This API provides a list of all of the network-devices the controller knows about and their attributes. Things like serial number, software version, uptime etc. You can either get all of the devices, or a subset.
Swagger
The first example uses swagger to make the API call. You can skip this step and go straight to the code if you like.
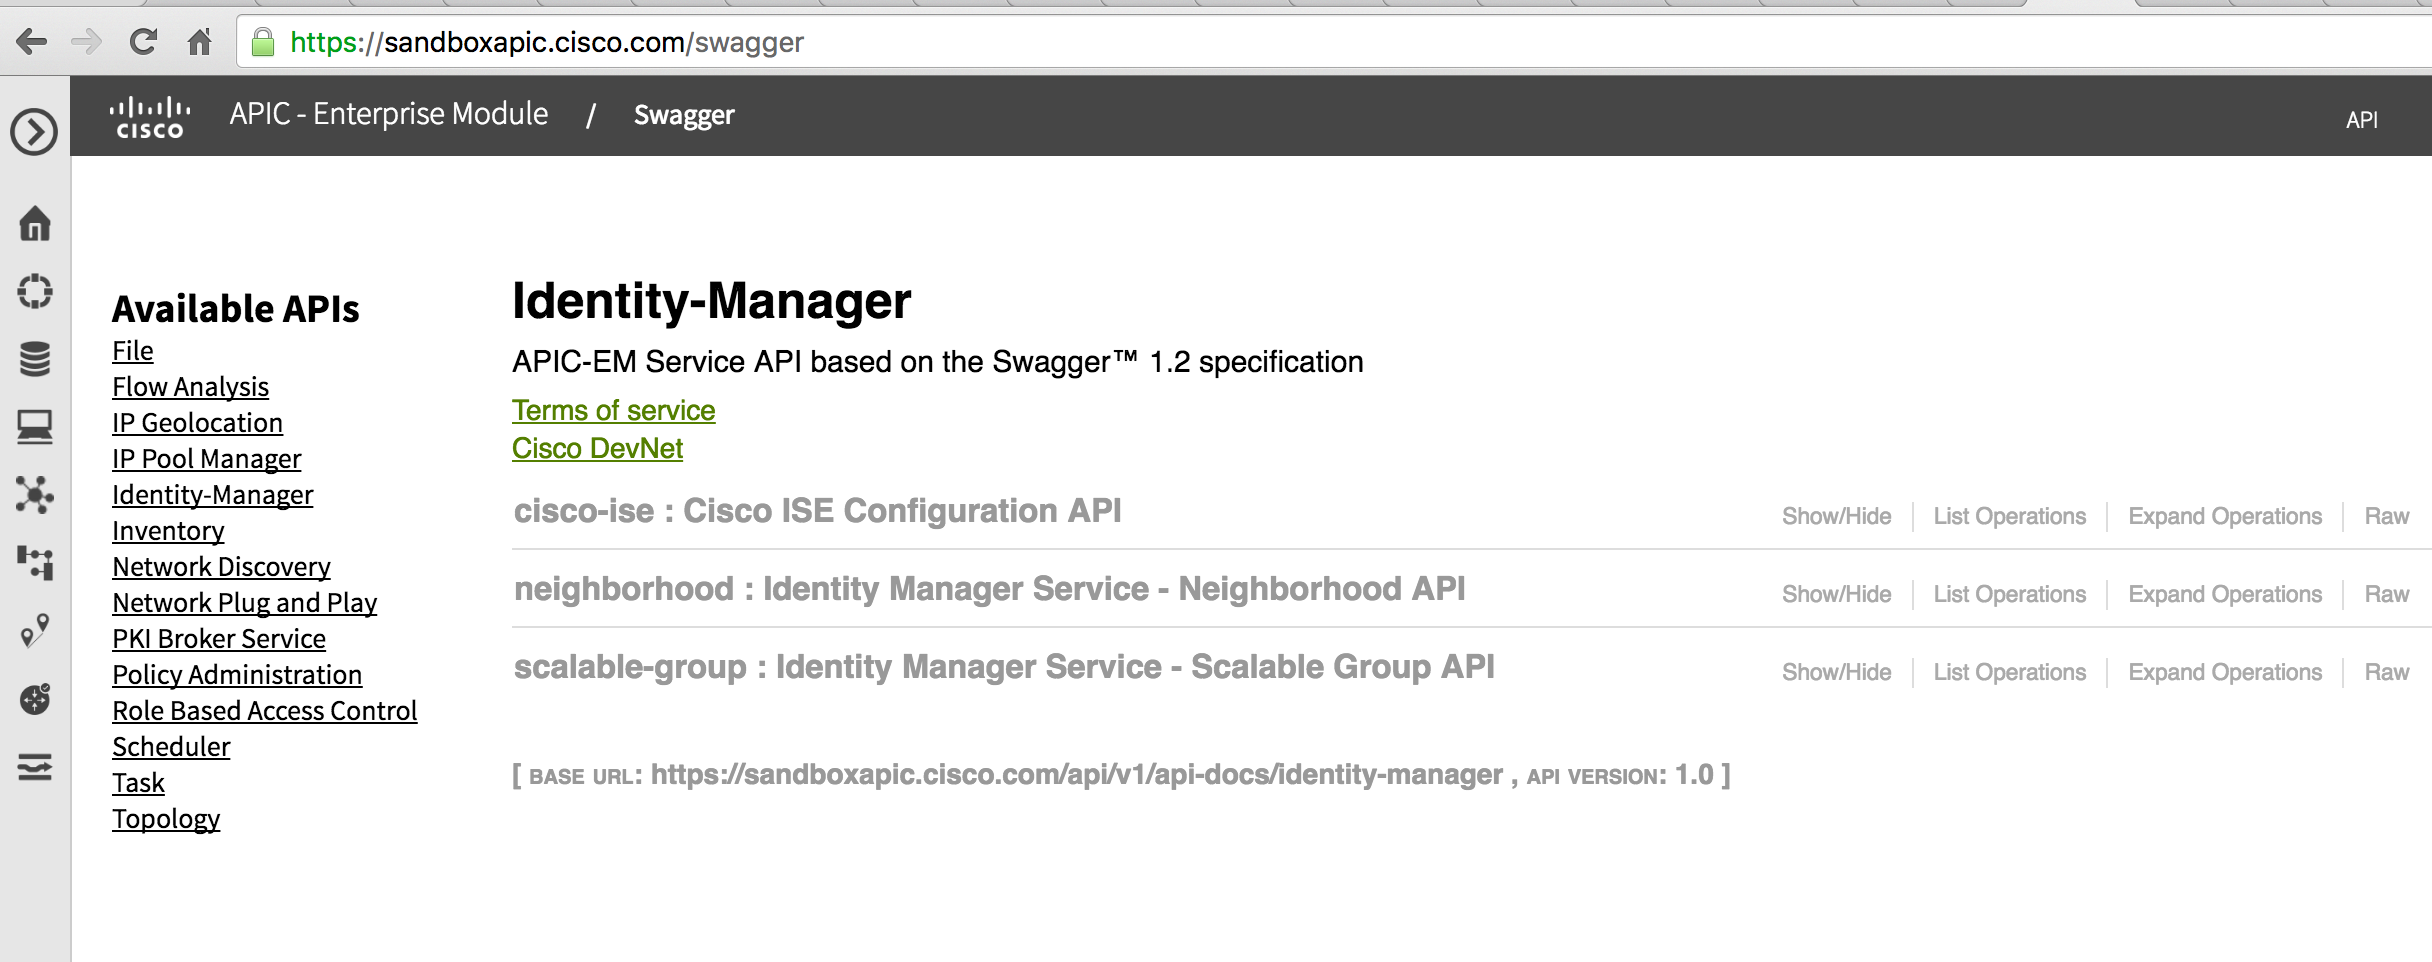
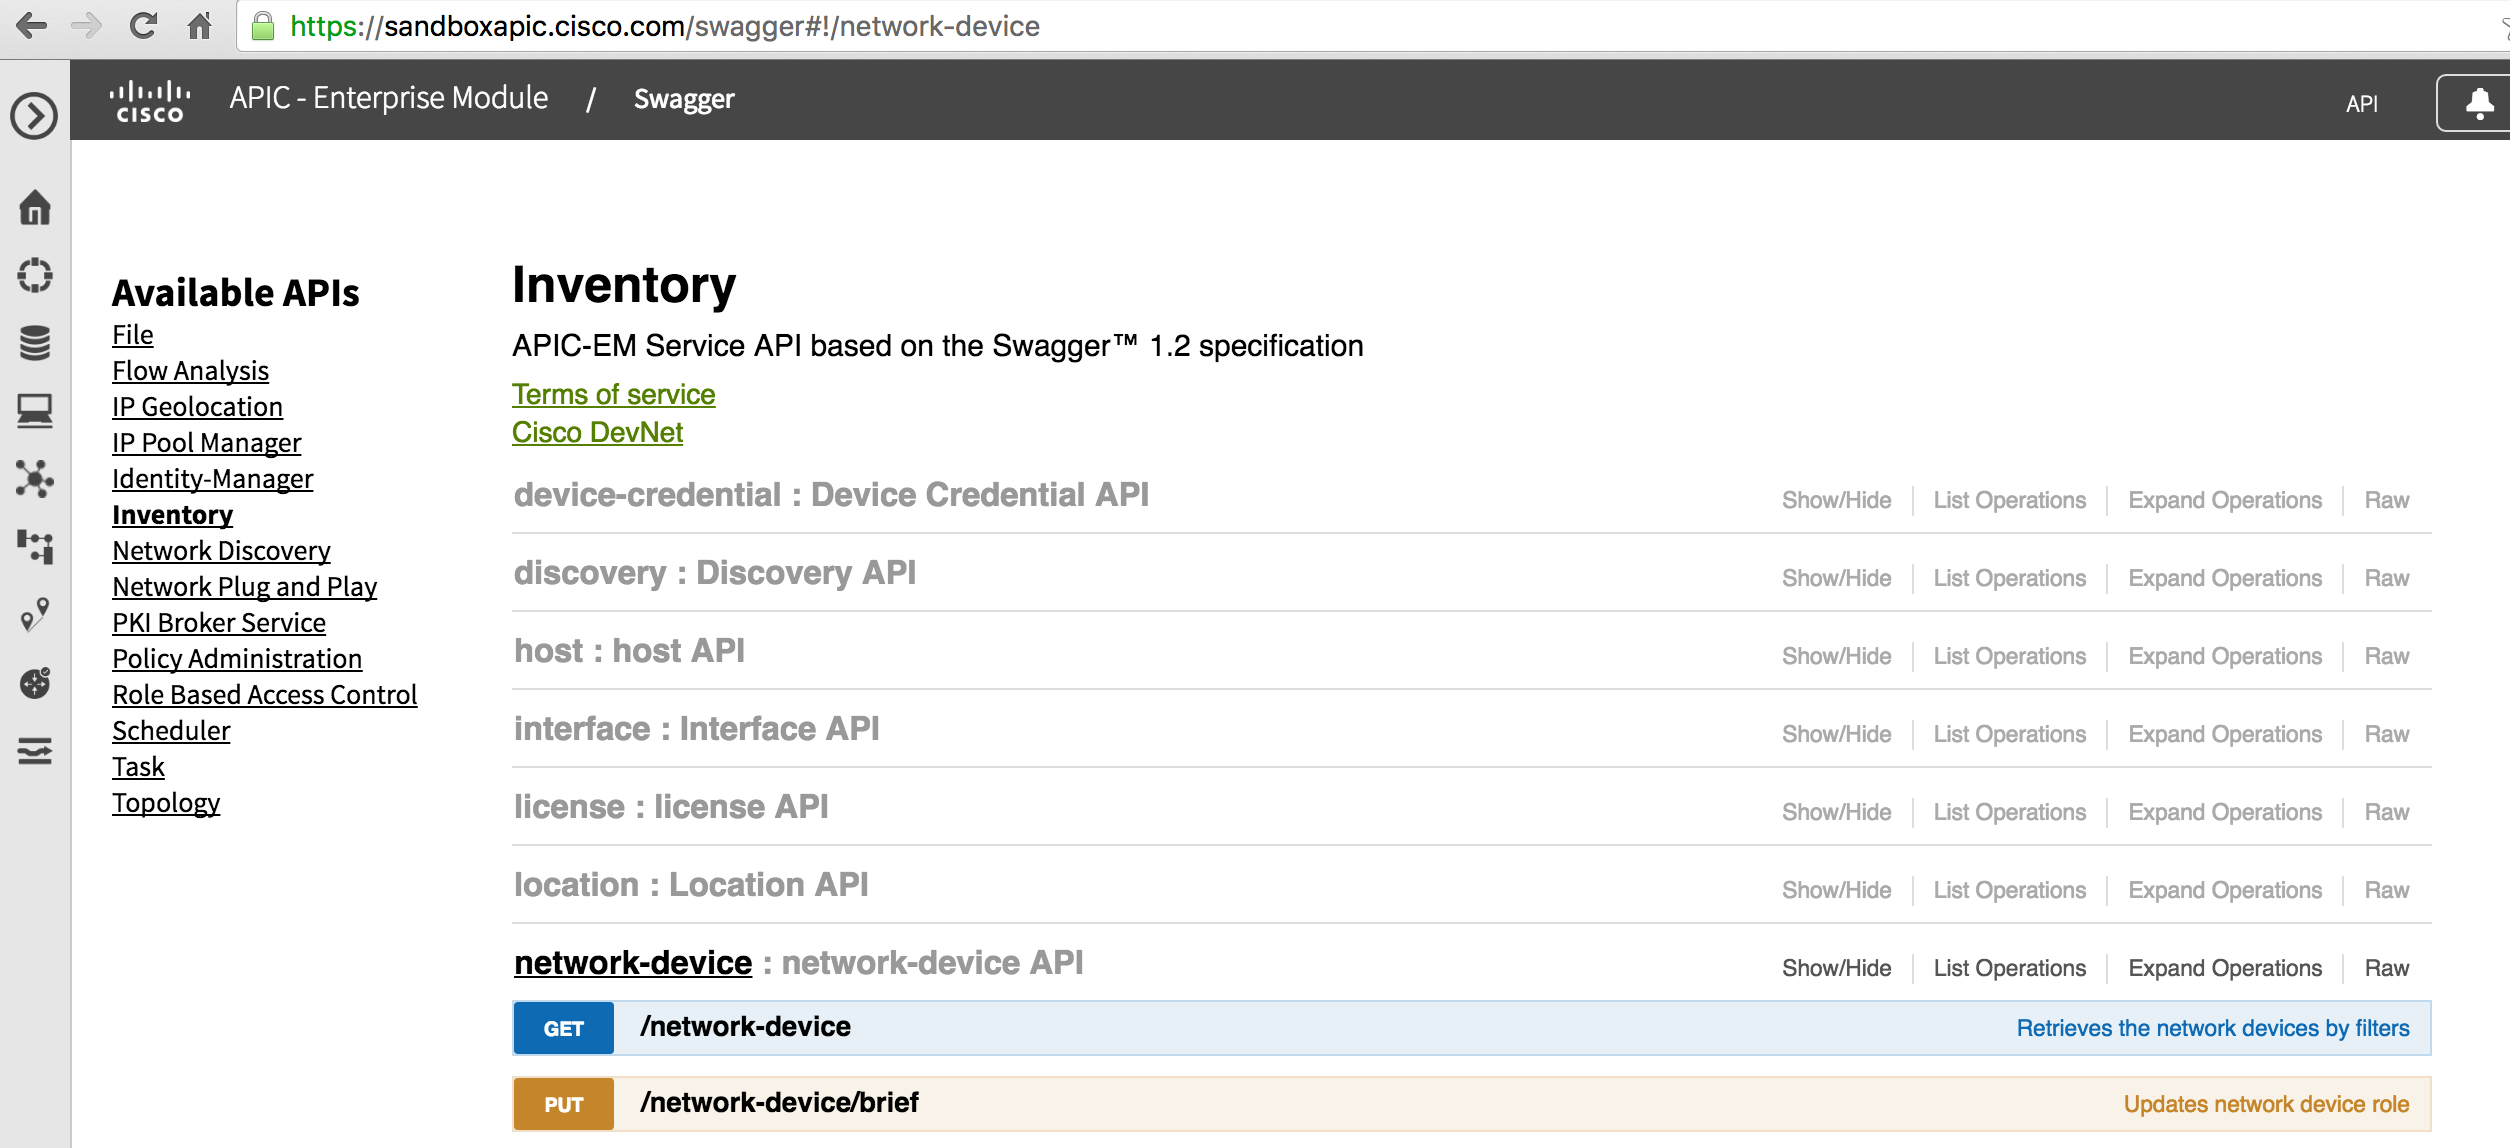
From the swagger main page, click on "Inventory -> Network-device", and select the first example highlighted below "/network-device"
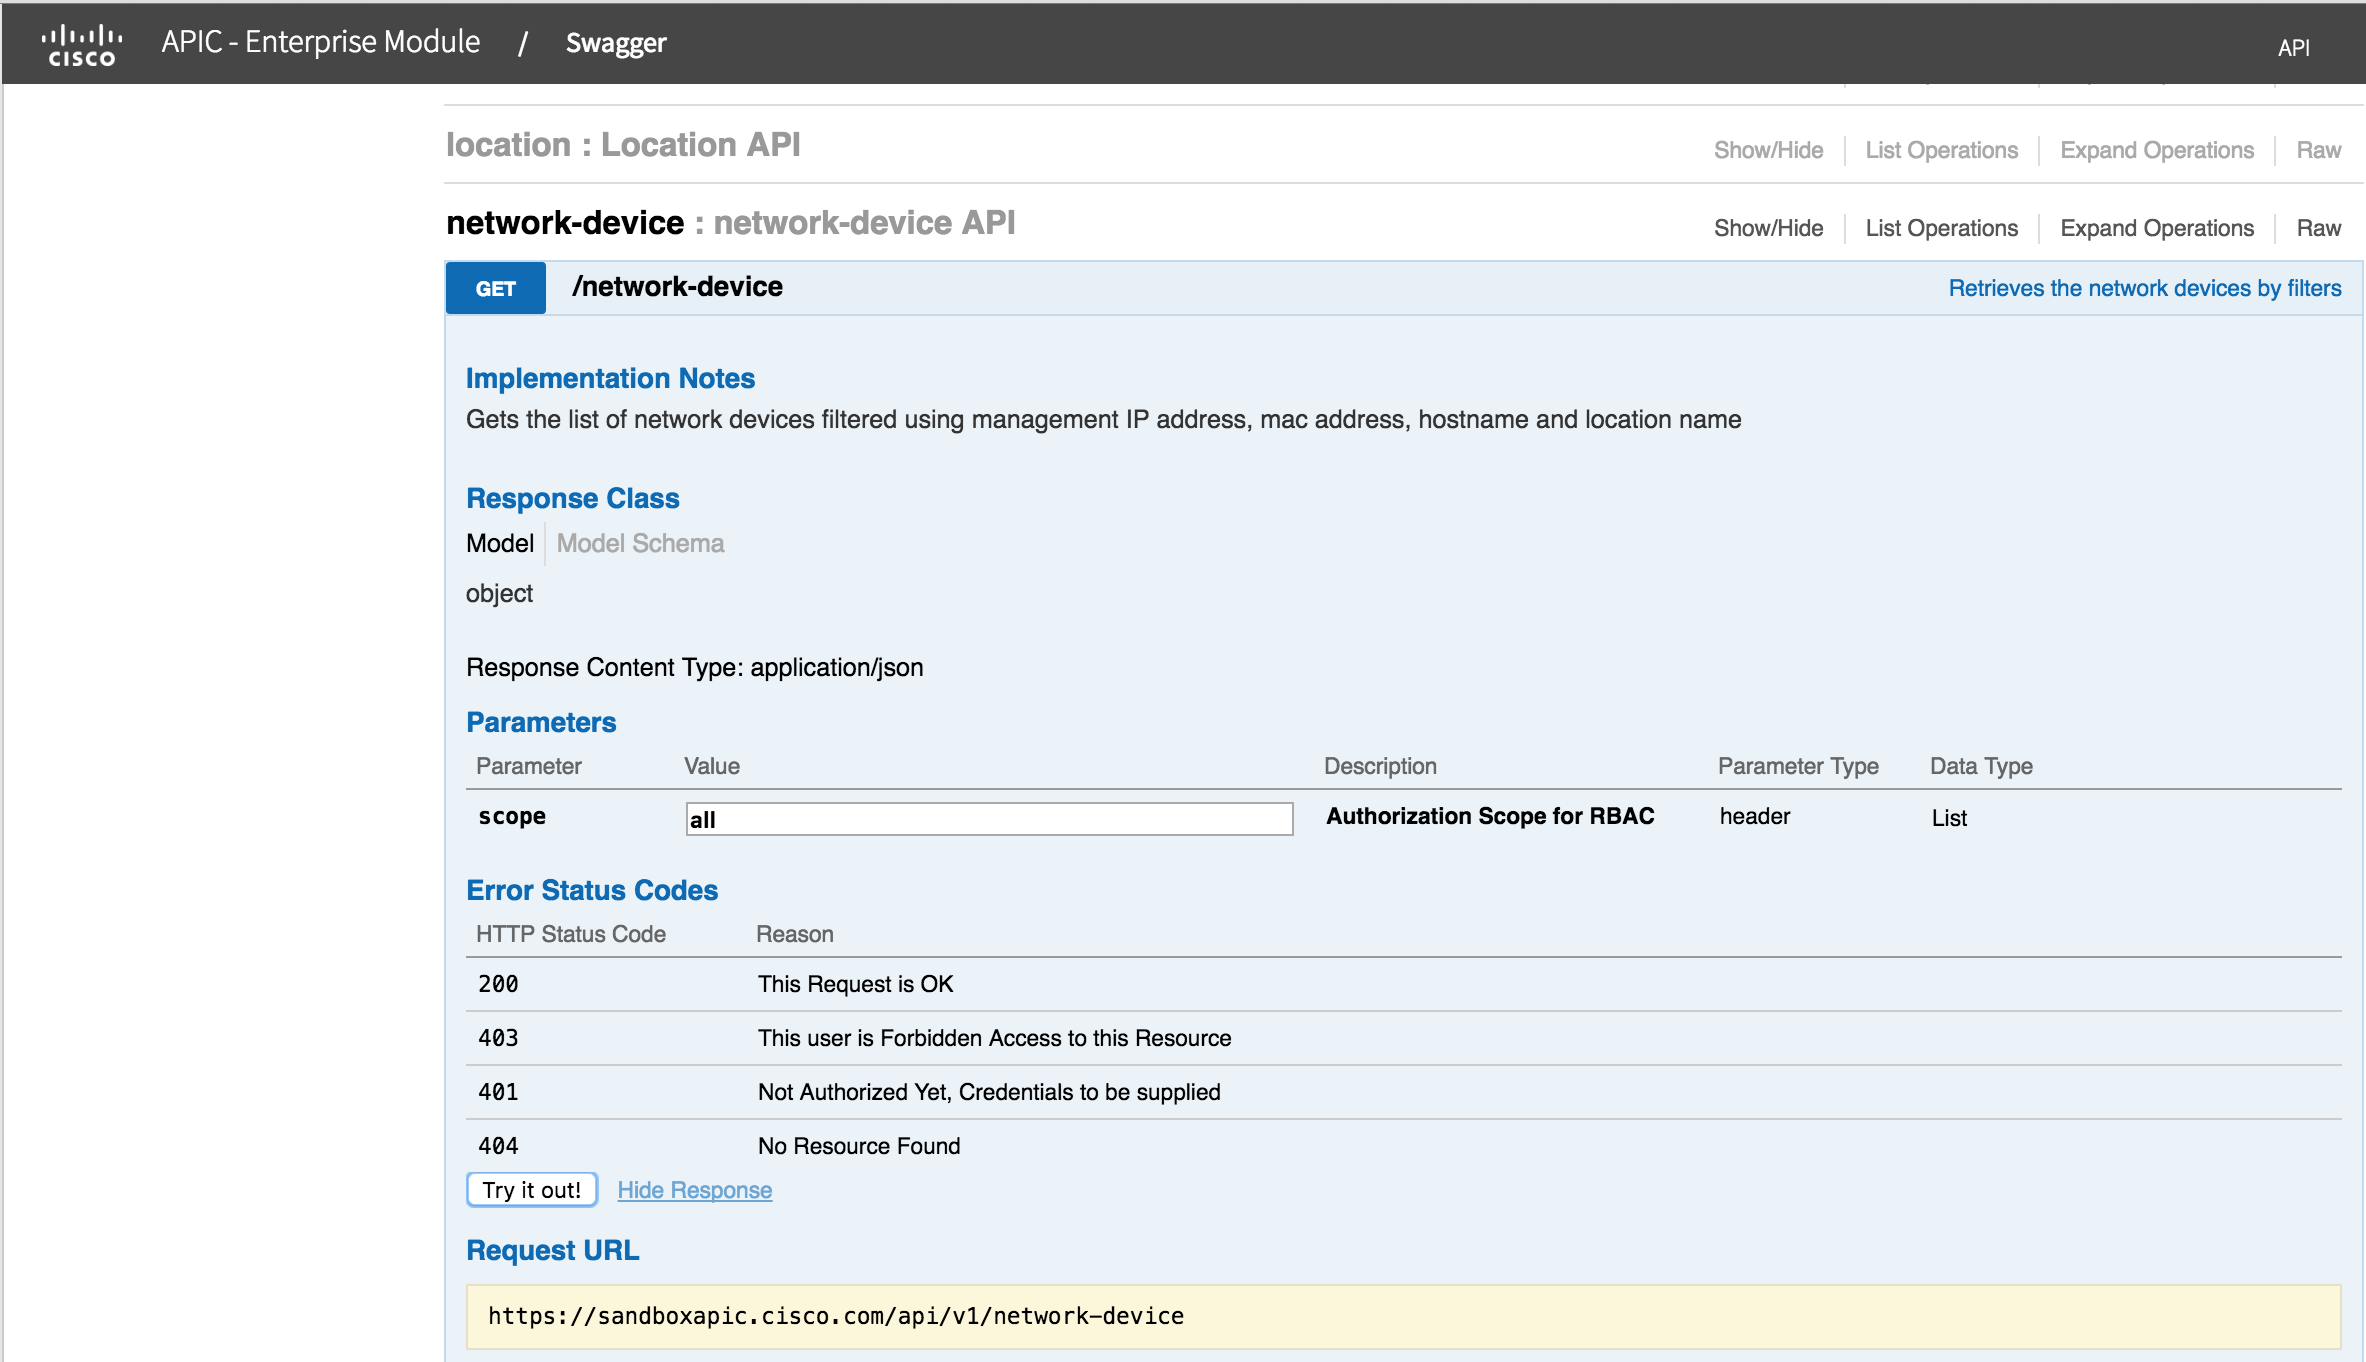
You should see the following, you need to fill in the scope (just put in "ALL"), then click on "Try it out"
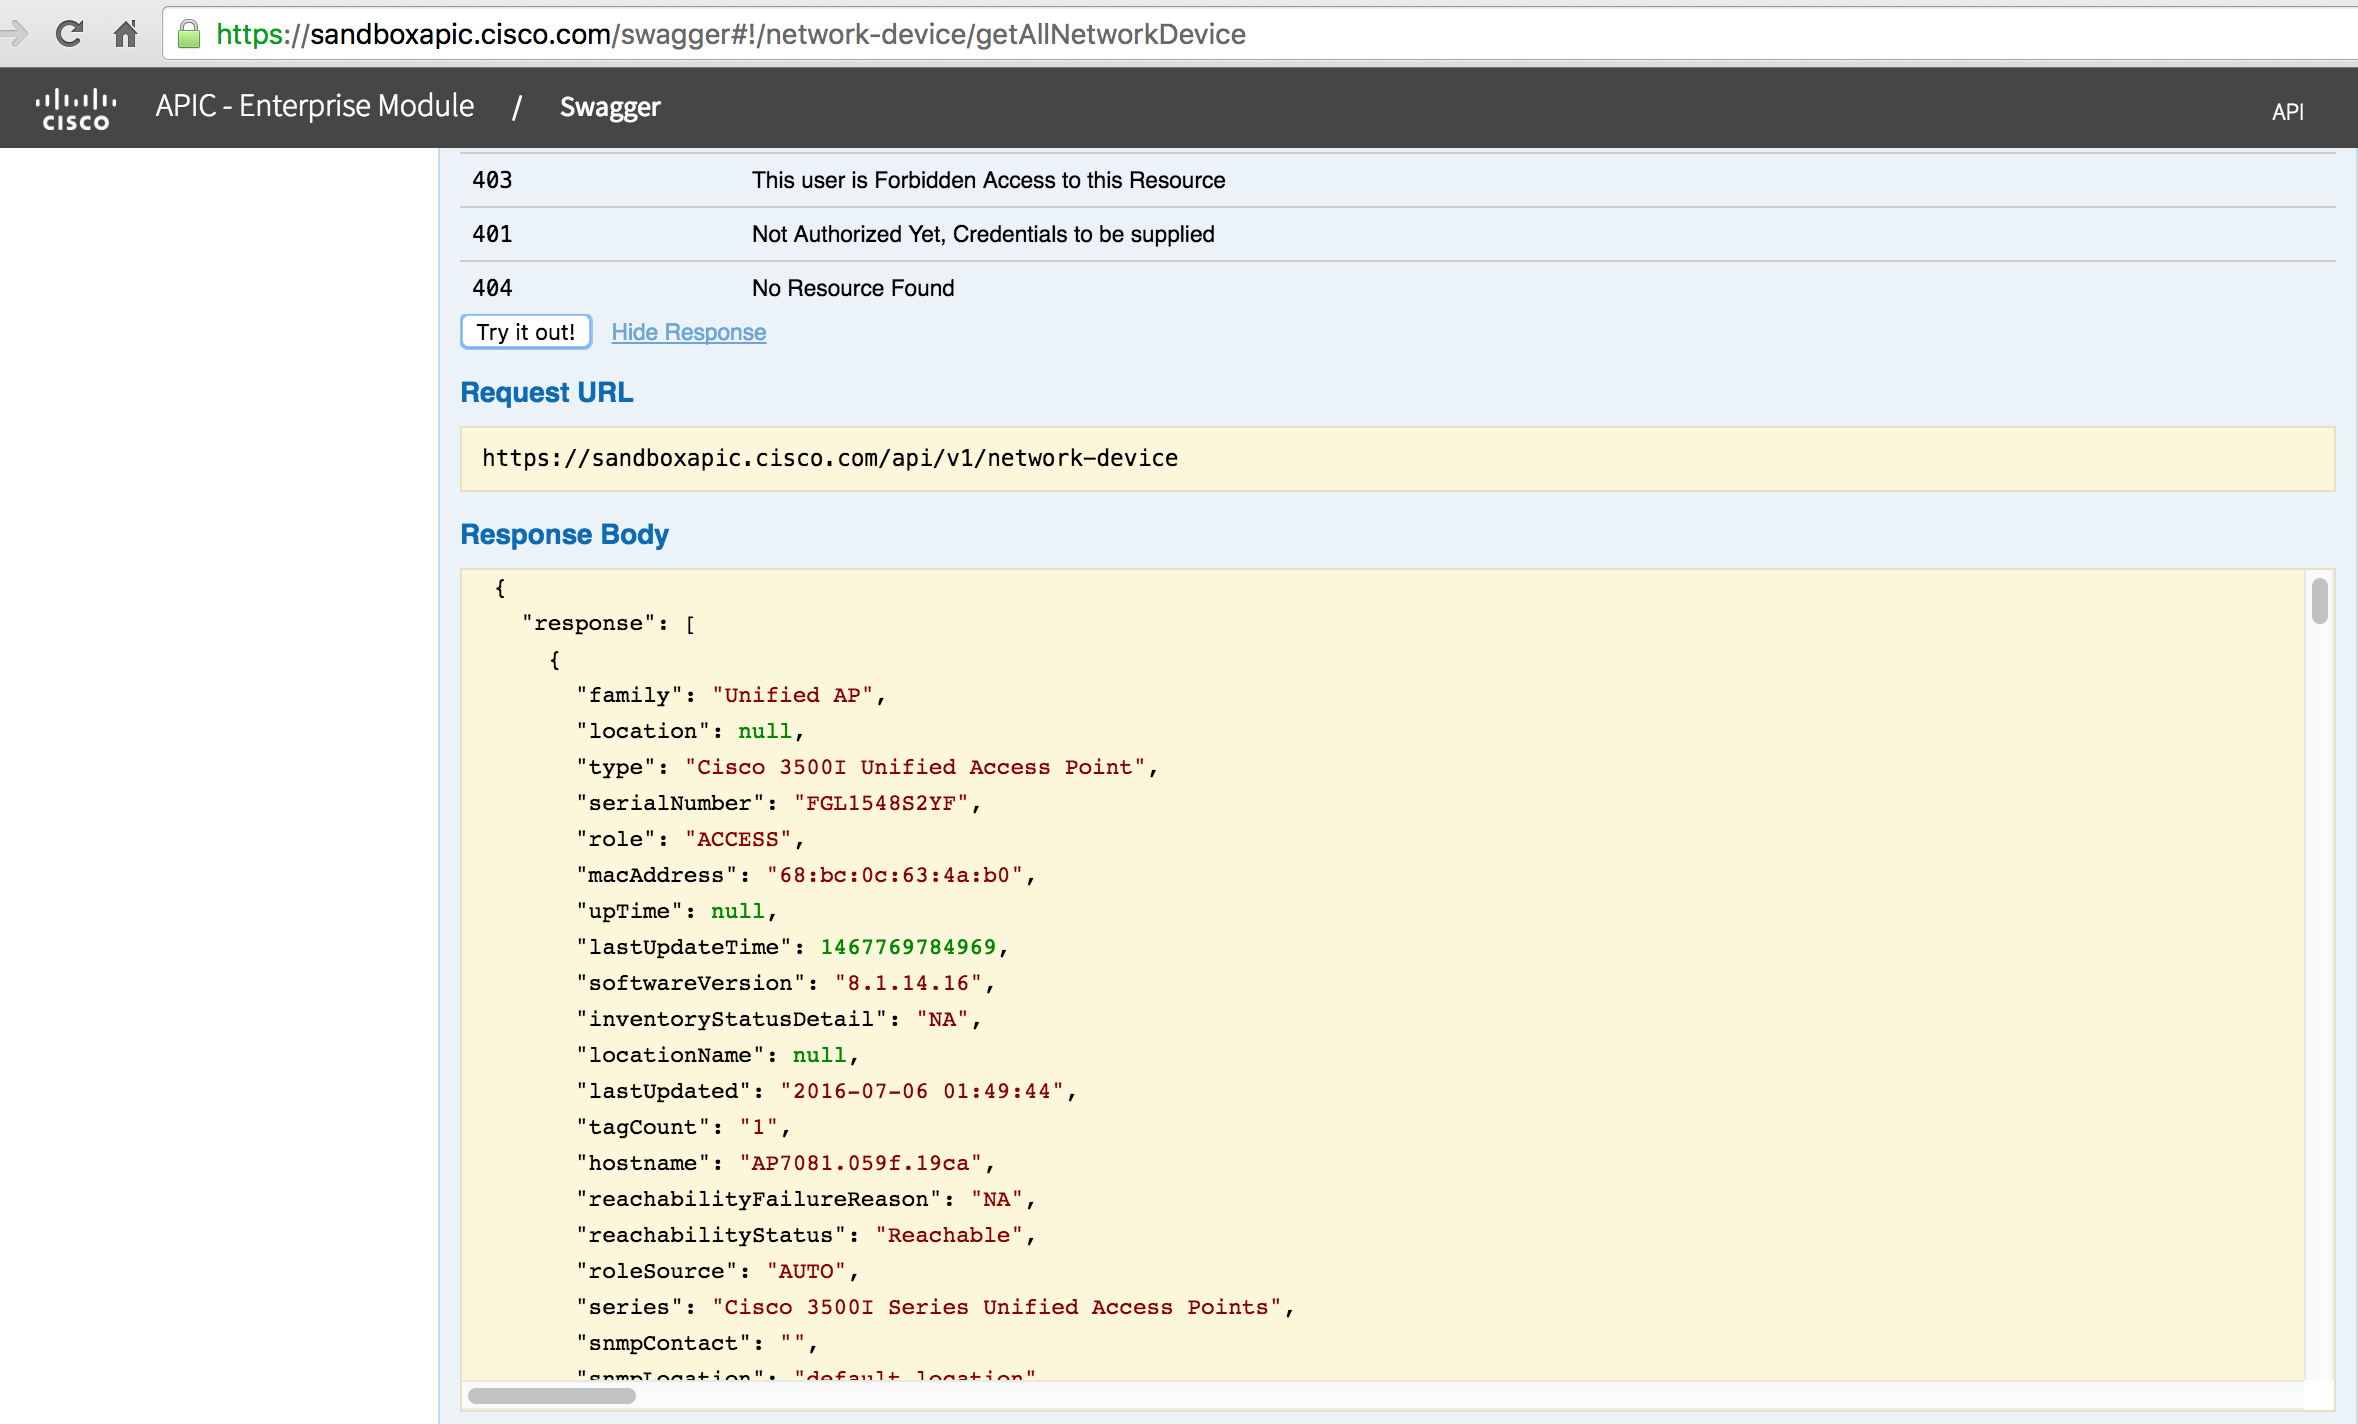
Scroll down and you will see a list of network devices, with their attributes.
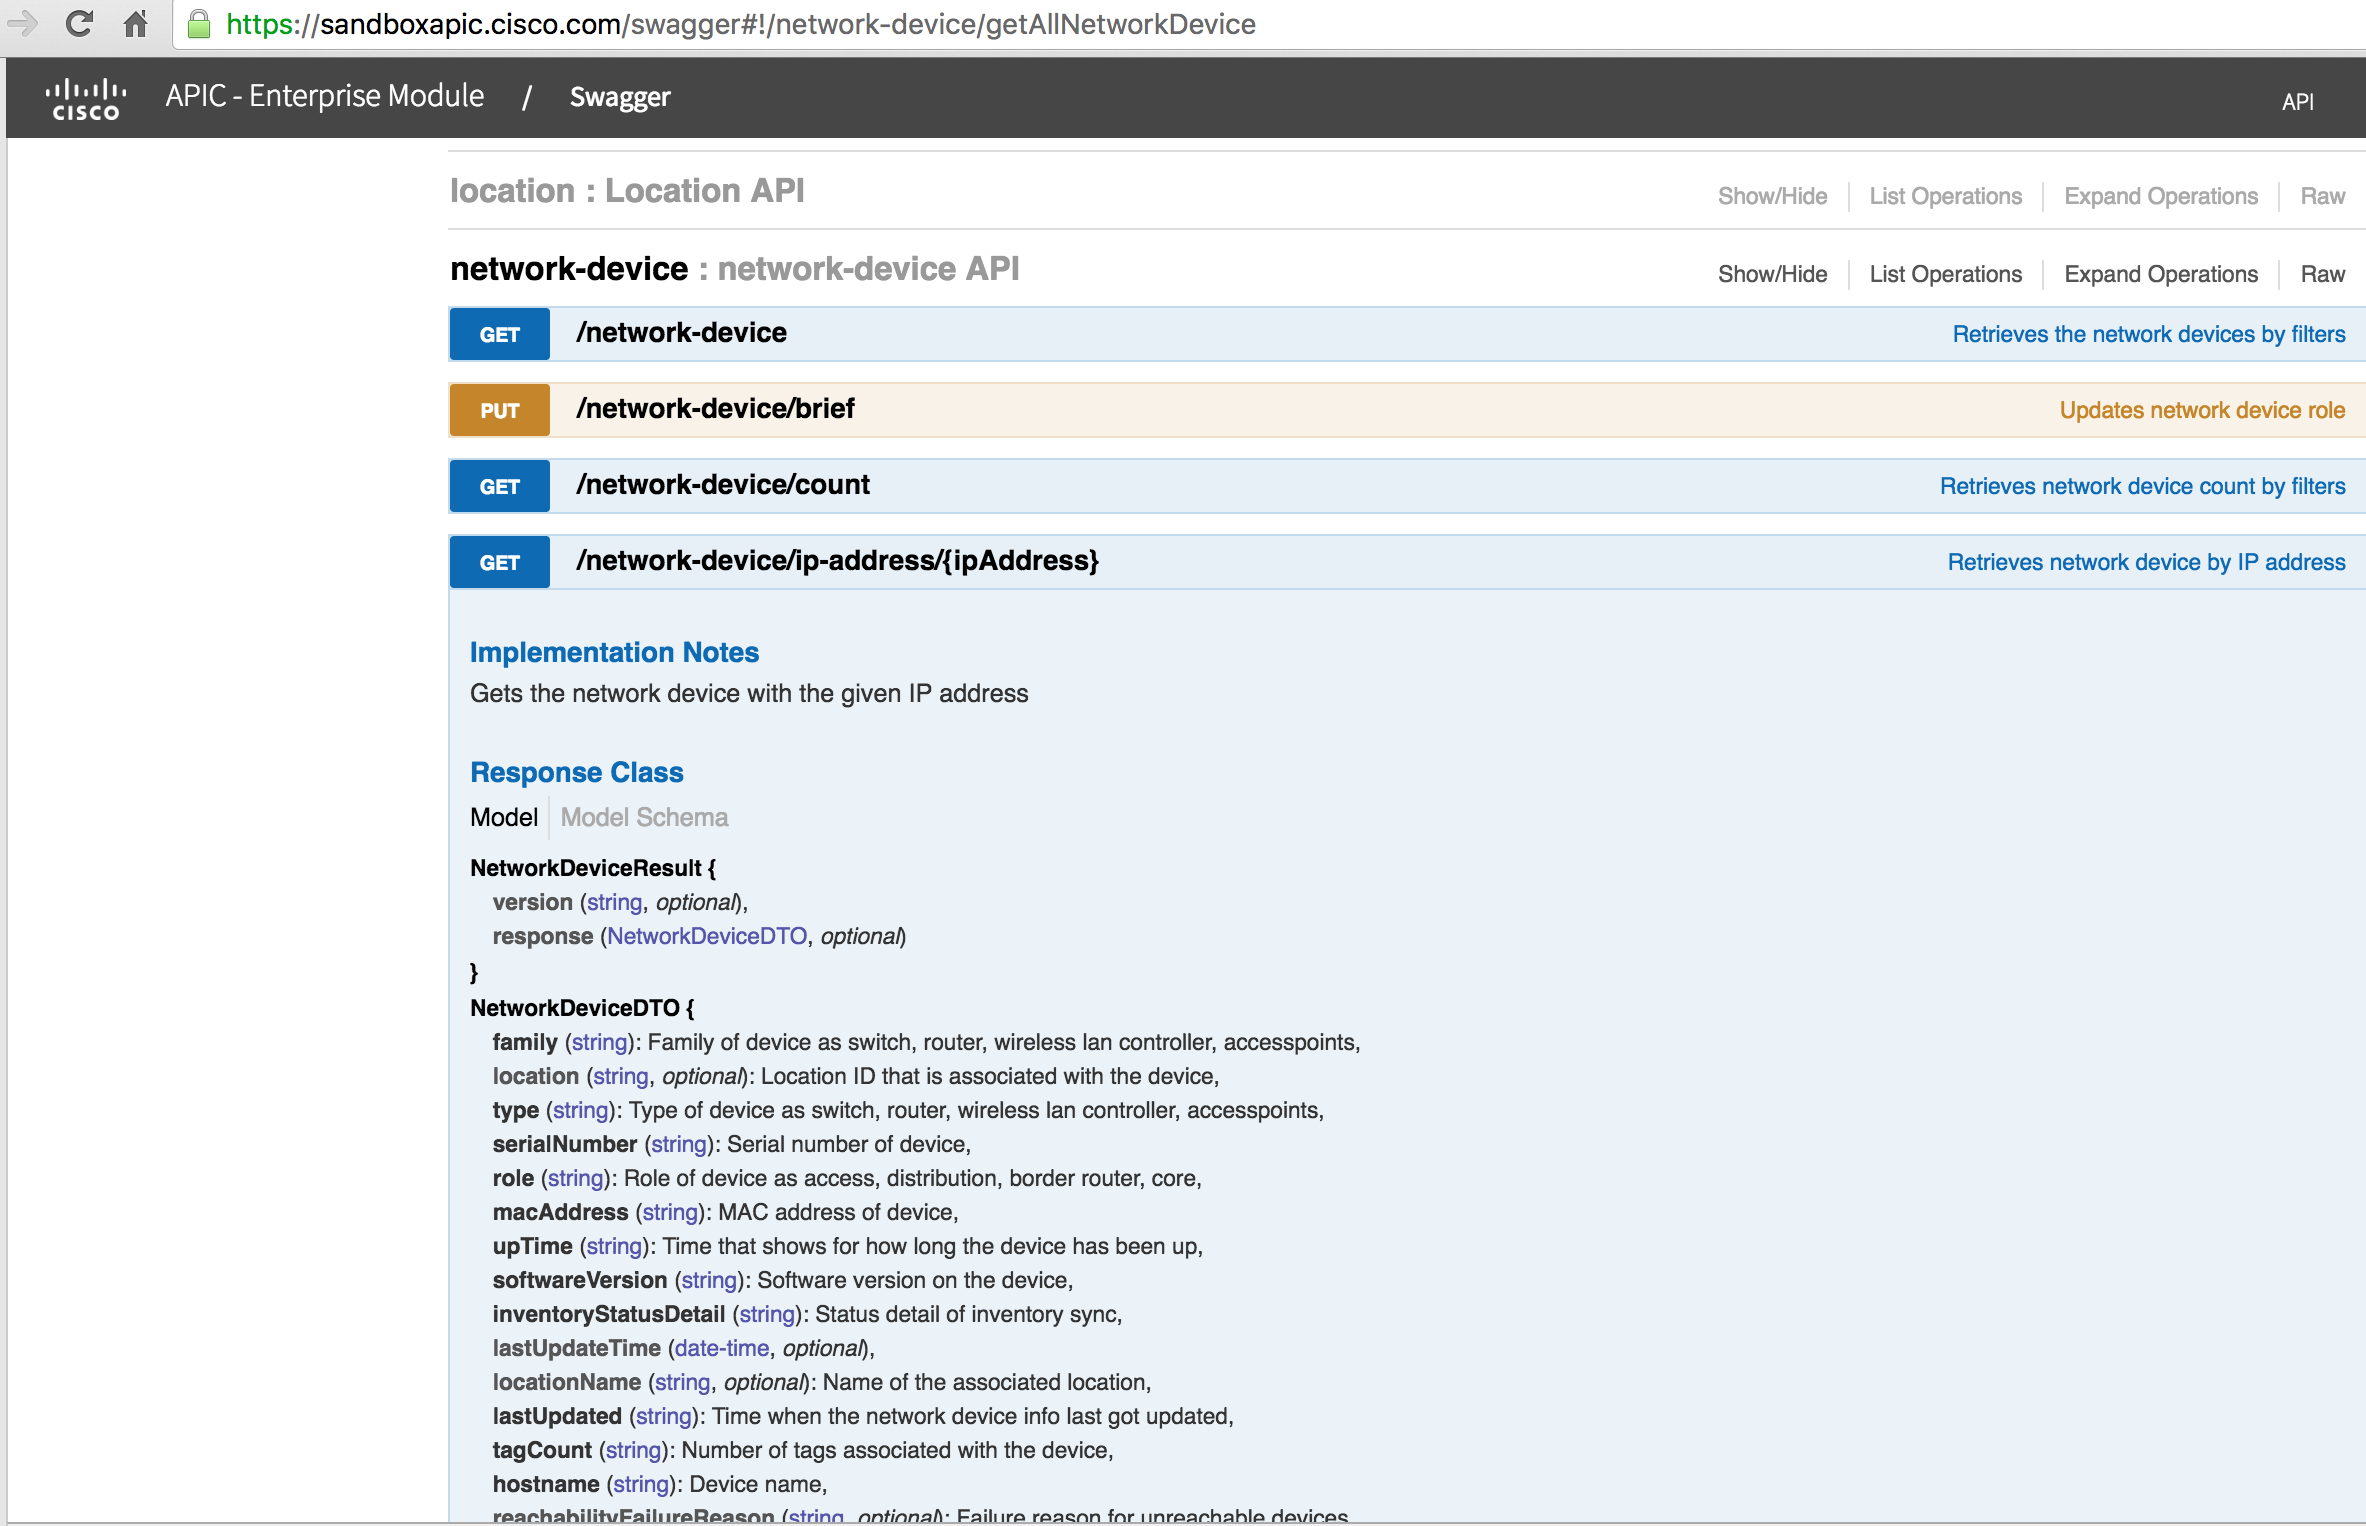
You can also get information for a specific device. In this case you will need to scroll to the URL "/network-device/ip-address"
Scroll down and set the IP address to "212.1.10.1". You need to set scope to "ALL"
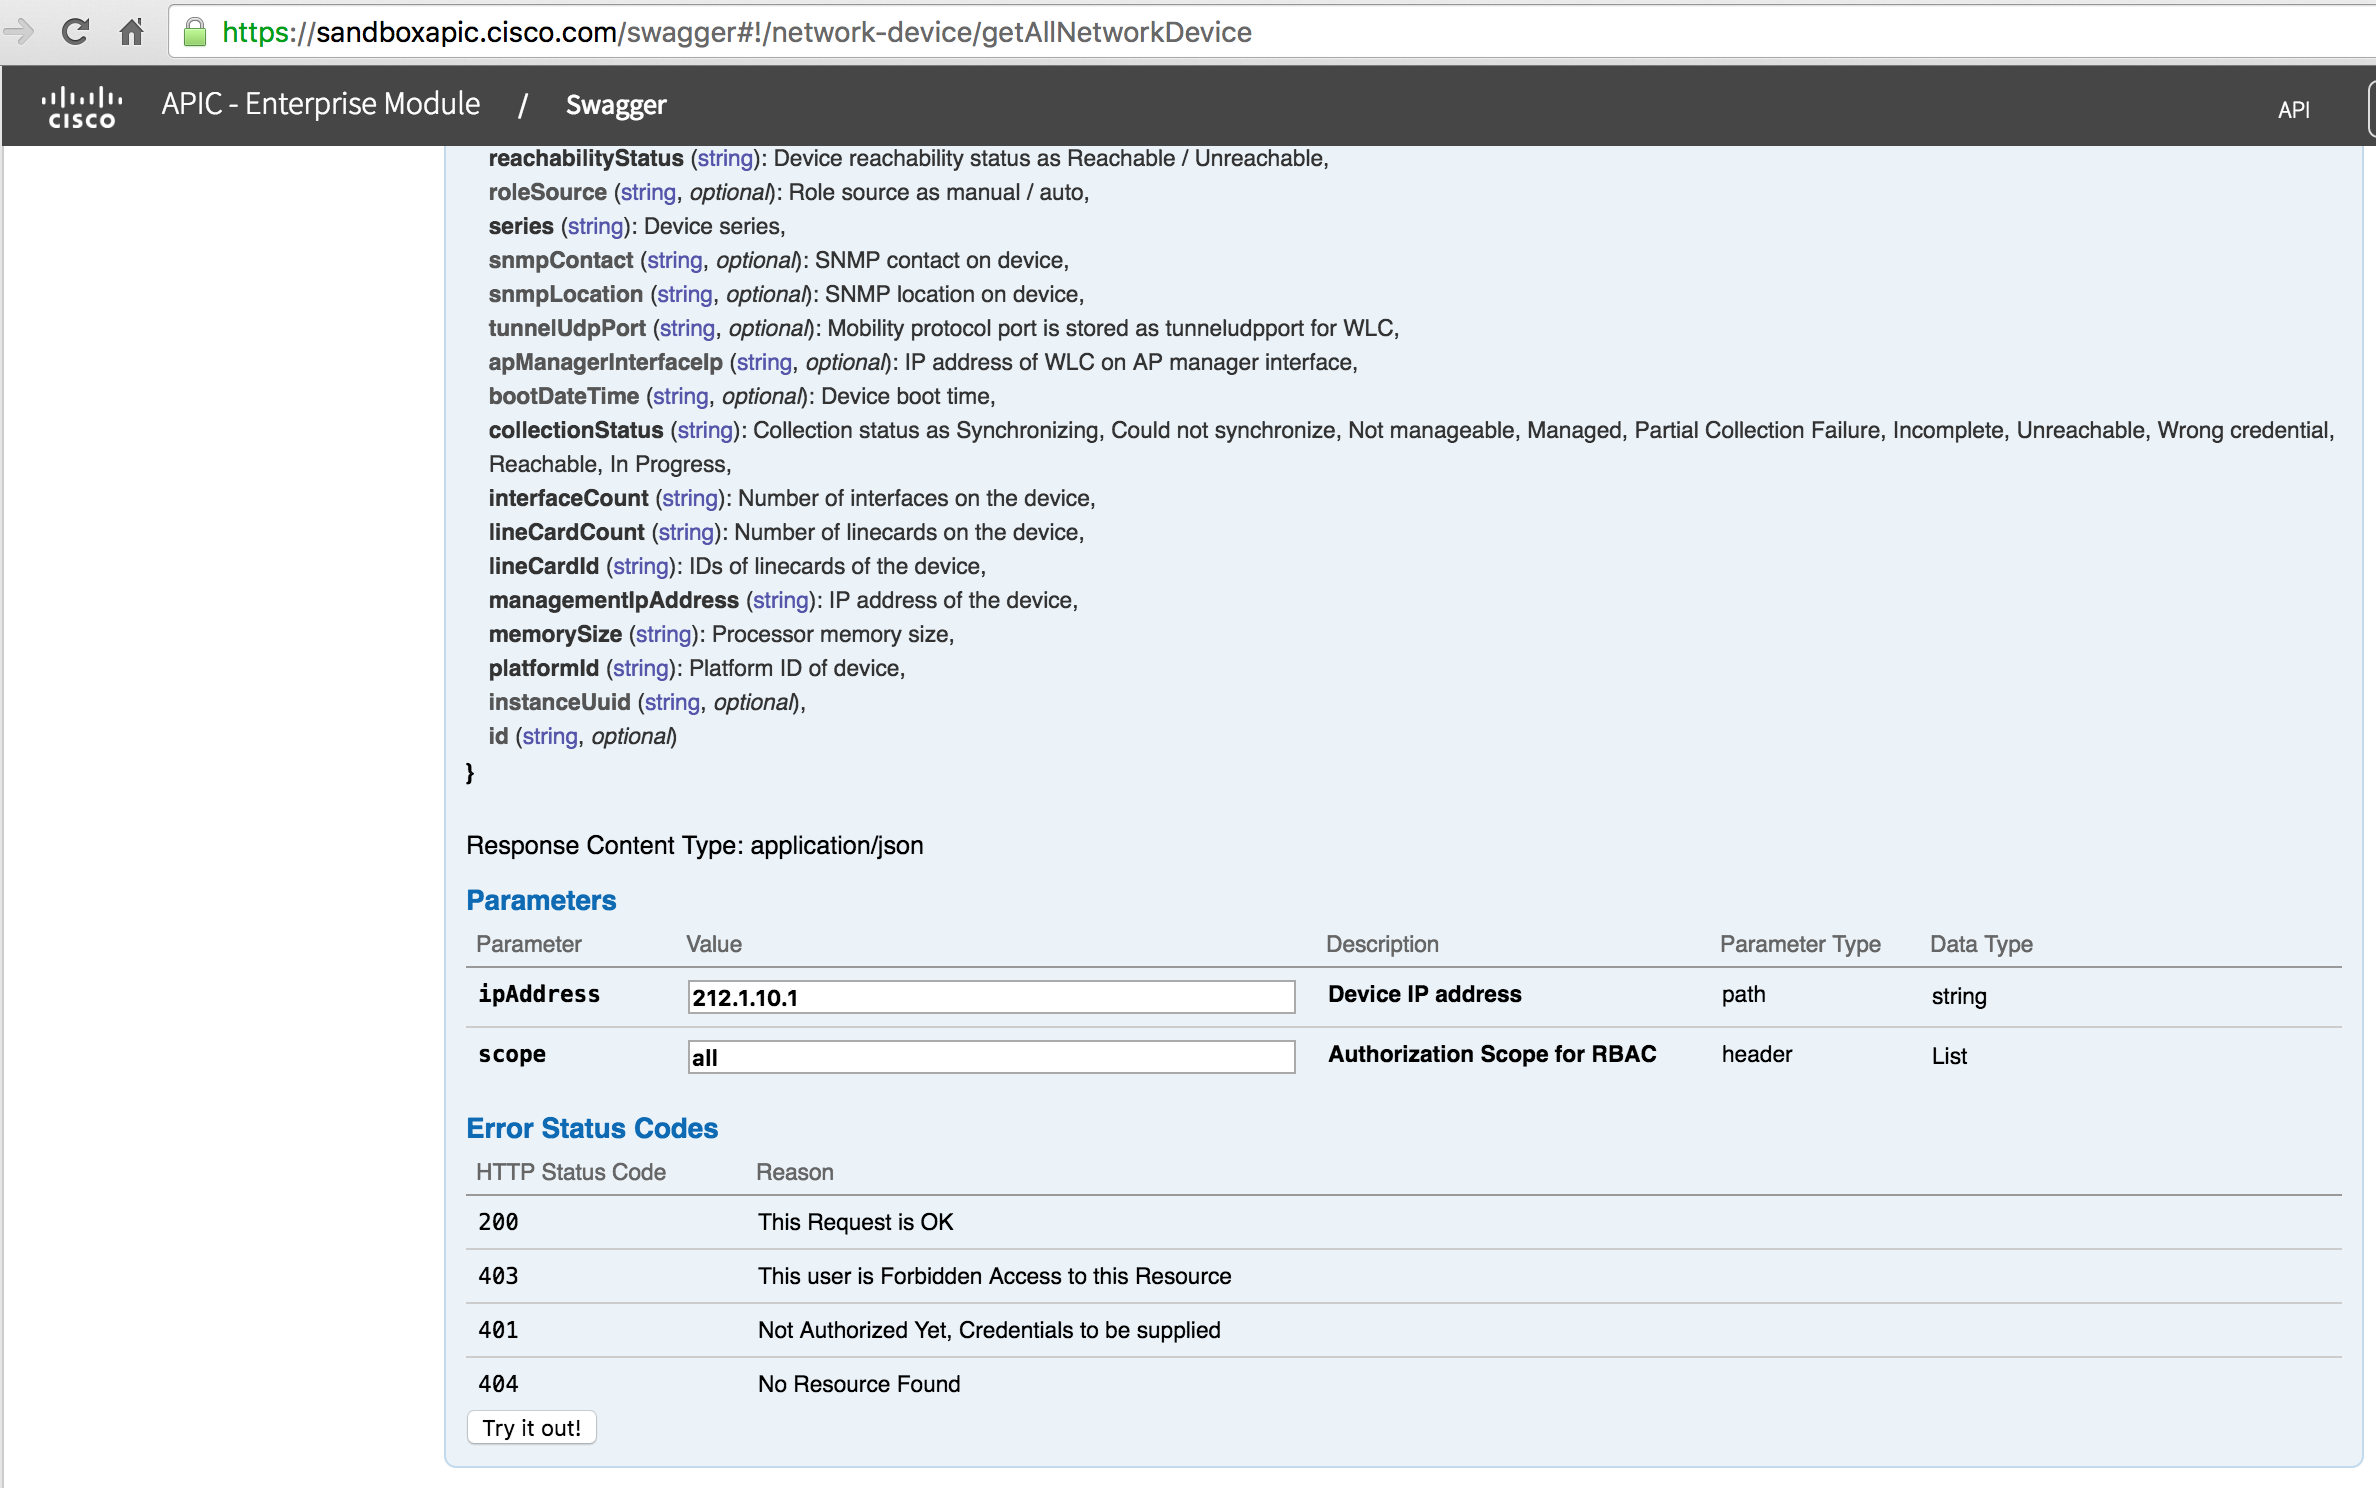
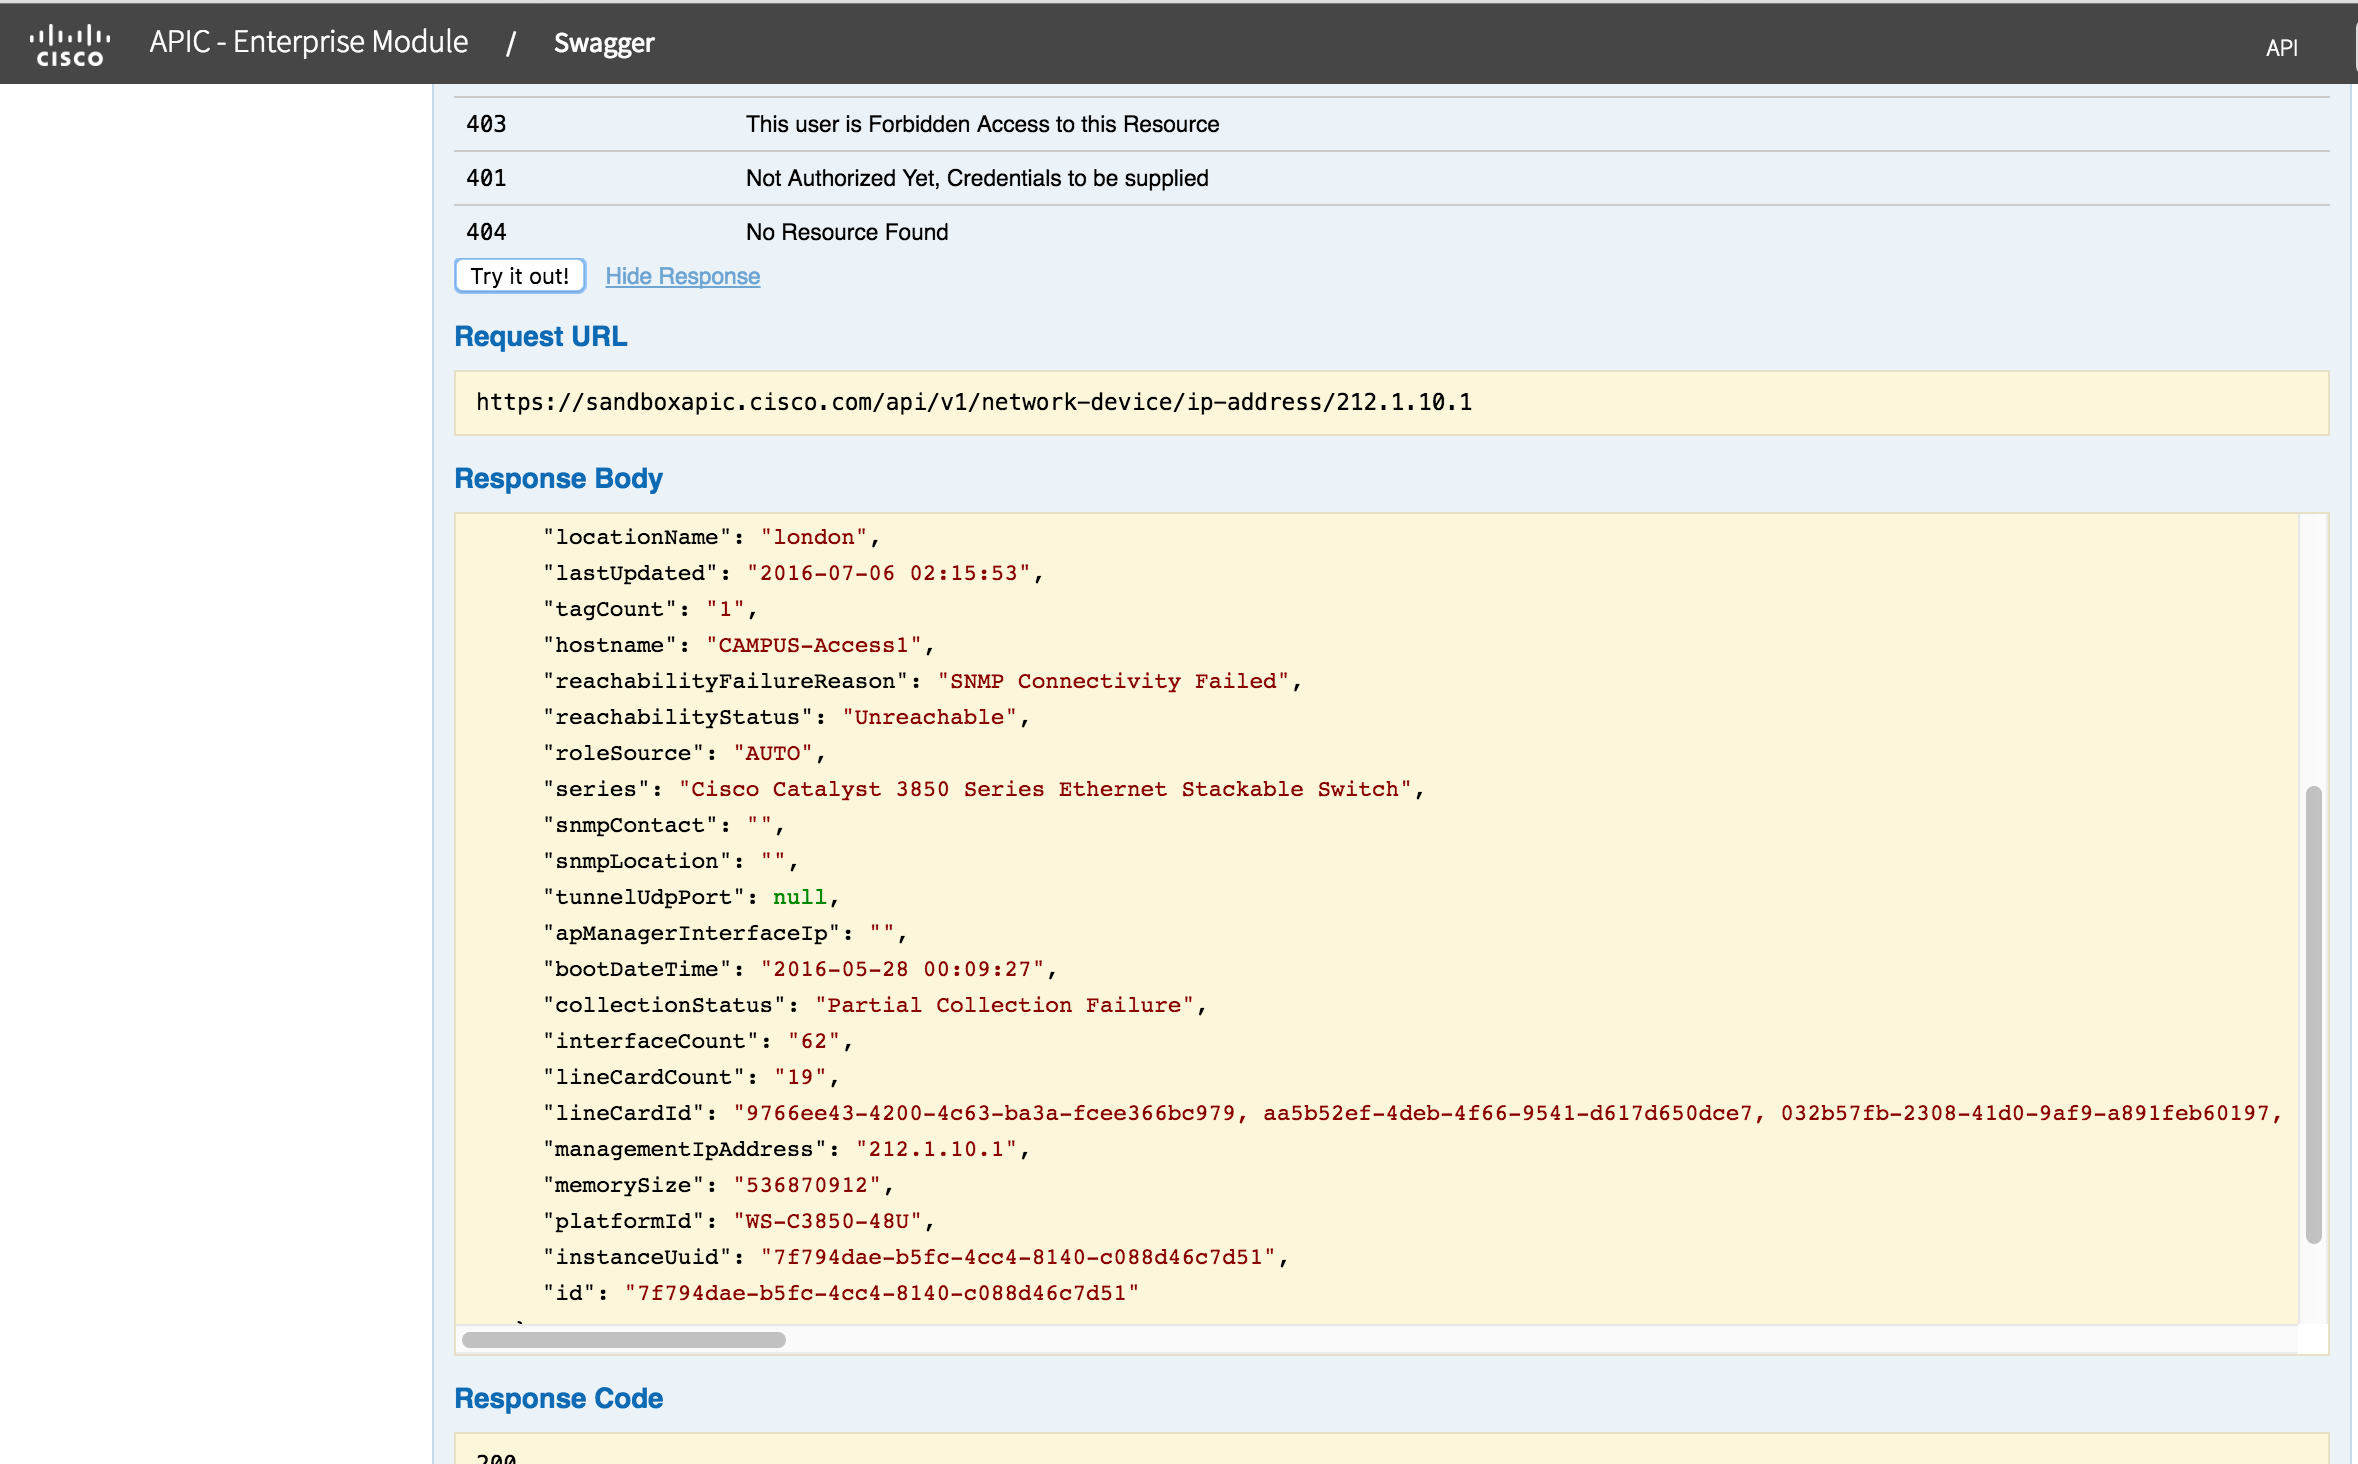
Click "Try it Out" and you will see the following result. You can see the URL that was sent as part of the API call "https://sandboxapic.cisco.com/api/v1/network-device/ip-address/212.1.10.1"
Script
You can do a similar thing with the scripts. Run the script "01_network_device", and you will see the following fields. Most of these are self-explanatory. The column labelled "role" is interesting. Role has been inferred by the controller, based on knowledge of the network as a system. AccessPoints do not have an uptime.

If you run the script with a specific network-device ip address, you will get all the attributes of the network-device. Notice the following
- - There is an attribute called "id" 24ac6aa8-7759-44d5-90a3-00c83e96583d .This is a 32 character Universally Unique ID (UUID) . You can always reference the network-device by UUID, as other attributes ("hostname" etc) could change. It is also how the network-device will be referred to in other tables such as "licence", "interface", "host". You will see examples of this later on
- - "role" and "roleSource" are highlighted. You can change this (via UI/API). If you do change the "role", you will need to change the "roleSource" to "MANUAL"
- The attributes highlighted in yellow "inventoryStatusDetail", "reachabilityFailureReason", "reachabilityStatus" are useful for troubleshooting controller to device communication issues.
$ python 01_network_device.py 212.1.10.1
https://sandboxapic.cisco.com/api/v1/network-device/ip-address/212.1.10.1
{
"version": "1.0",
"response": {
"macAddress": "f0:29:29:5c:30:e2",
"upTime": "39 days, 20:10:40.60",
"bootDateTime": "2016-02-21 21:56:34",
"lastUpdateTime": 1467836368401,
"snmpContact": "",
"lineCardCount": "19",
"series": "Cisco Catalyst 3850 Series Ethernet Stackable Switch",
"interfaceCount": "62",
"tunnelUdpPort": null,
"id": "24ac6aa8-7759-44d5-90a3-00c83e96583d",
"inventoryStatusDetail": "<status><general code=\"SUCCESS\"/></status>",
"instanceUuid": "24ac6aa8-7759-44d5-90a3-00c83e96583d",
"family": "Switches and Hubs",
"reachabilityFailureReason": "",
"reachabilityStatus": "Reachable",
"hostname": "CAMPUS-Access1",
"memorySize": "536870912",
"roleSource": "AUTO",
"platformId": "WS-C3850-48U",
"collectionStatus": "Managed",
"role": "ACCESS",
"lineCardId": "65728300-84bf-4249-a2f0-db6044c1703a, 24e13fdd-143b-4ec1-b54d-e5f132f678a9, 401b1fdf-2093-4d6a-839c-1e7906c29b17, 87fdab91-6298-4685-a21d-0927fa210b0e, ca0d7123-79e6-4016-be7d-792ede171d1d, 3fd121f4-968d-4d88-9ebf-fa1d54ee2793, 3a33bb17-a789-4c2b-ae23-bb78c7010993, 0e144a21-f1b9-4950-bbe0-9a9e47638a1f, 7d28c1f7-5f8b-4aff-b055-597253499741, e0950cbc-1d69-49a5-90a5-6ee4c469570c, ce71f3c3-a6f4-4e94-a7b2-00d57ffcbe85, f91ed4e2-872c-452f-8ac0-bcedca0252f8, 34d259eb-56c5-42ab-964e-ec1b0a496563, a0e52da3-a1ad-45b2-af0d-54f6c69c89af, ad5e786f-f8ed-4156-b7b8-4cd6a8459586, 4a818639-d5de-47c1-a359-ba9543b4ce58, 1152c73d-e2bb-4499-b1fb-dda1bcb21def, de5843b6-ba69-4f62-b309-e5730b50422b, 42e1e19e-5290-4220-b344-a998a4cbfbe8",
"type": "Cisco Catalyst 3850-48U-E Switch",
"location": "d6716748-d9cd-4baf-a3a0-315388077059",
"apManagerInterfaceIp": "",
"lastUpdated": "2016-07-06 20:19:28",
"managementIpAddress": "212.1.10.1",
"serialNumber": "FOC1703V36B",
"locationName": "Walnut Creek",
"softwareVersion": "03.06.04.E",
"snmpLocation": "",
"tagCount": "0"
}
}
This first example gives you a tool to get an overview of your network-devices and their properties. You can the concept of "network as a system" with inferred attributes such as "role".
Looking at the code
The code for this script is very simple. It does rely on some helper scripts that are out of scope for this discussion. There are two different REST API calls.
- 1) "network-device/ip-address/%s" – this is to get a single network-device with a management ip address. In this case the JSON response is printed in it entirety.
- 2) "network-device" - which returns a list of network-devices. In this case, the output is formatted, displaying a sub-set of the attributes.
#!/usr/bin/env python
from __future__ import print_function
import sys
import json
from util import get_url

def list_single_device(ip):
    return get_url("network-device/ip-address/%s" % ip)

def list_network_devices():
    return get_url("network-device")

if __name__ == "__main__":
    if len(sys.argv) > 1:
        response = list_single_device(sys.argv[1])
        print(json.dumps(response, indent=2))
    else:
        response = list_network_devices()
        print("{0:17}{1:14}{2:12}{3:18}{4:12}{5:16}{6:15}".
                  format("hostname","mgmt IP","serial",
                         "platformId","SW Version","role","Uptime"))

        for device in response['response']:
            uptime = "N/A" if device['upTime'] is None else device['upTime']
            print("{0:17}{1:14}{2:12}{3:18}{4:12}{5:16}{6:15}".
                  format(device['hostname'],
                         device['managementIpAddress'],
                         device['serialNumber'],
                         device['platformId'],
                         device['softwareVersion'],
                         device['role'],uptime))
The script has a simple print format string which you can modify. You could easily change this to output a cvs format, add new fields etc. Don't be too concerned about the complexity of the print statement with the format string. The numbers in the {} are just positional paramters, and the number after the : is the number of characters for the field. e.g. {0:17} says the first variable (device['hostname']), will need 17 characters. The next {1:14} will be the device['managementIpAddress'] and it needs 14 characters.
In case you are wondering about authentication, all of the API are authenticated. This is hidden in the util.py file. For more information about APIC-EM authentication, see this CiscoDevNet learning lab.
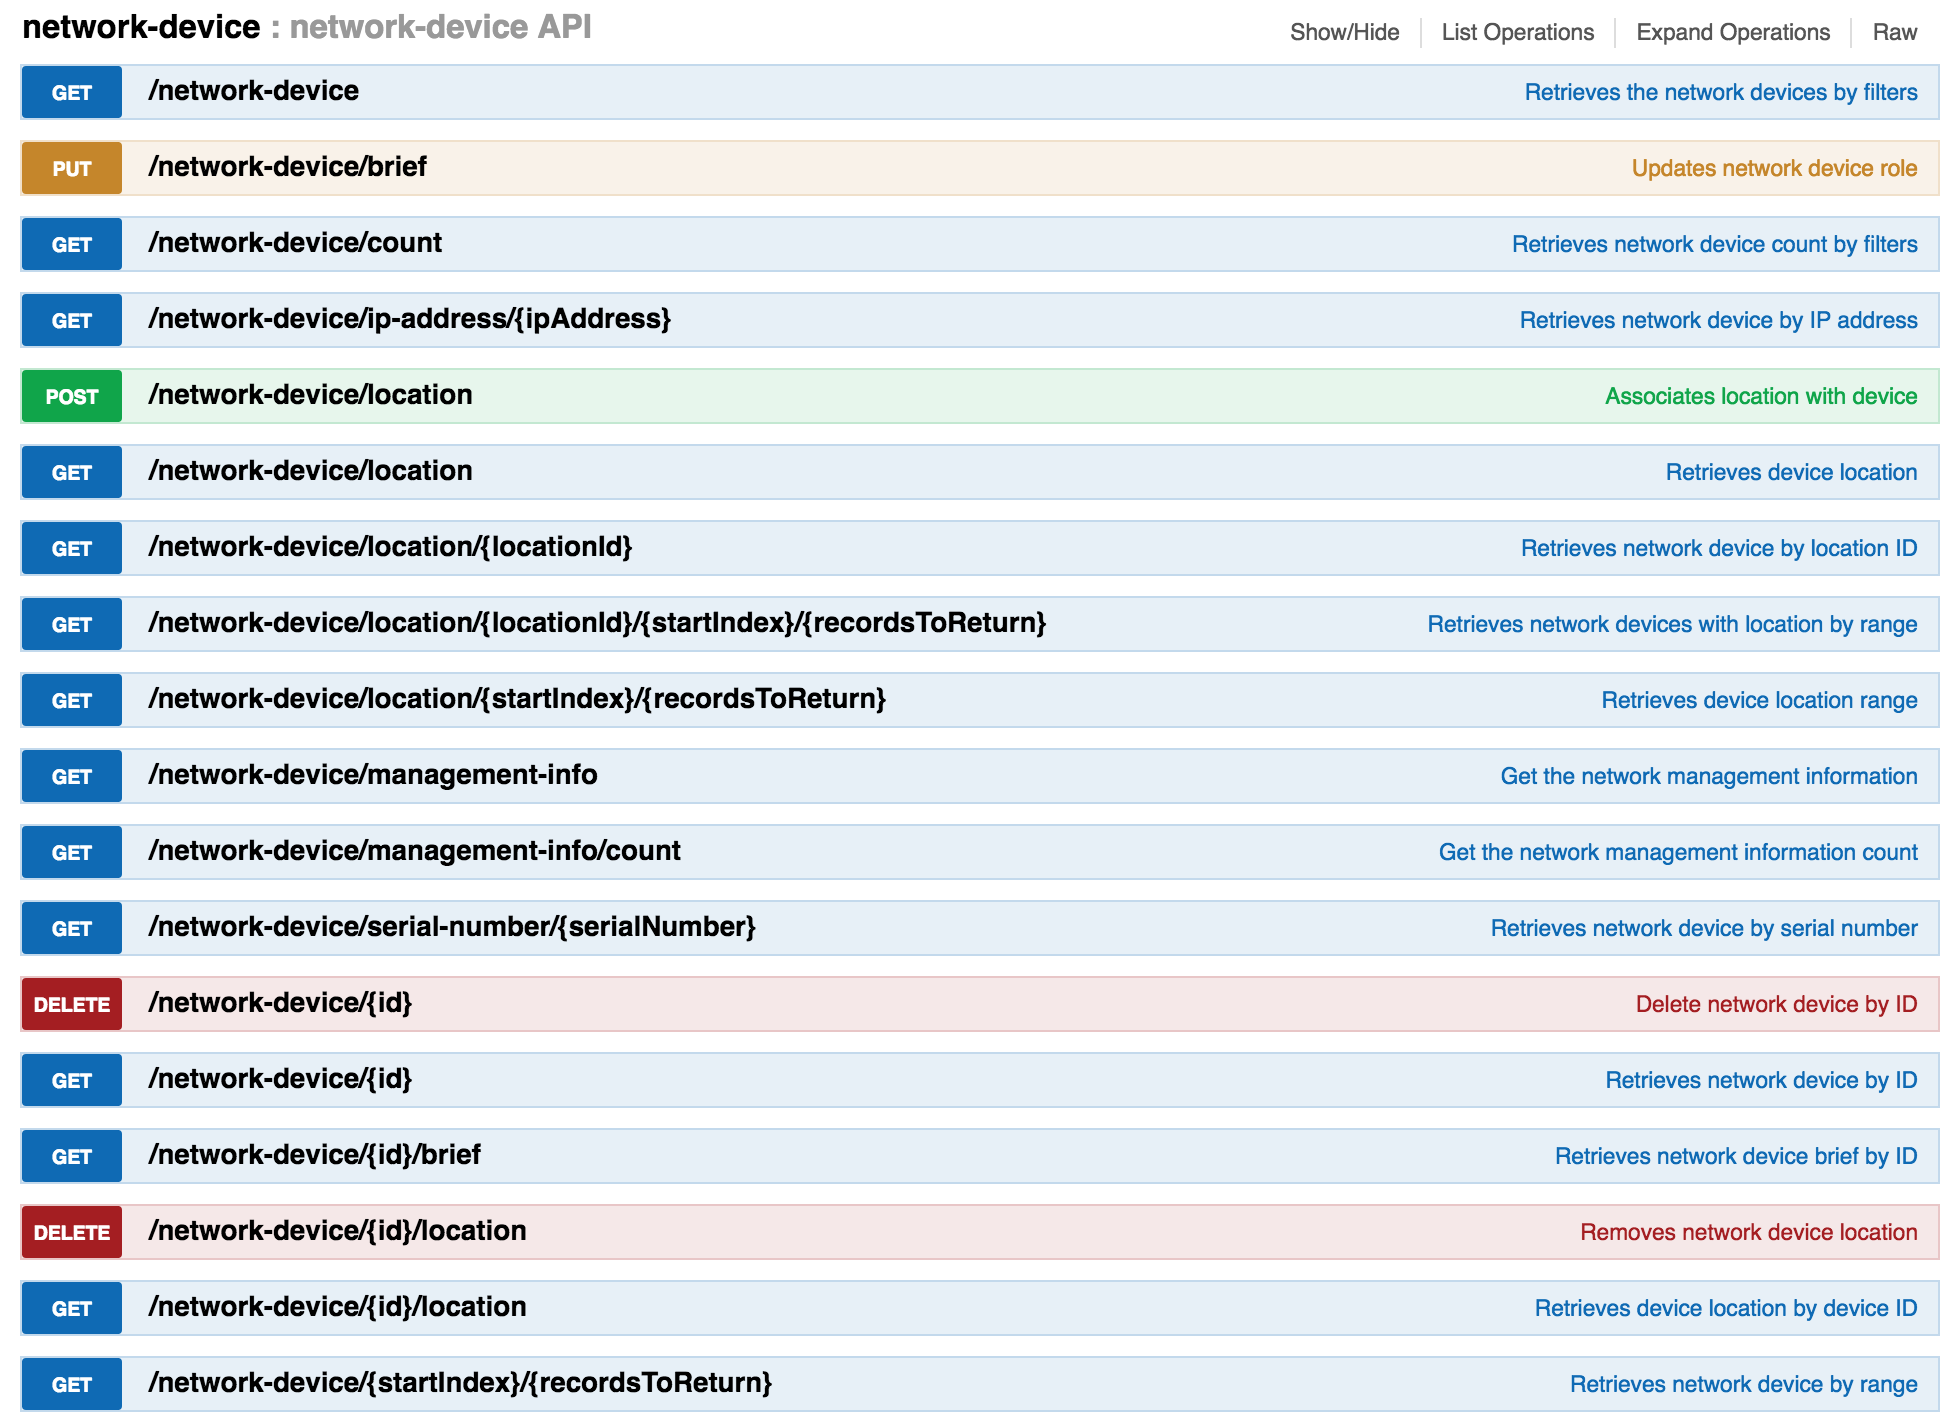
Here are all the other "/network-device" API endpoints. You can see API calls to manipulate location, get network-devices in a particular location, get management-info (which includes device credentials).
What Next?
This blog covered the first of the useful API /network-device. The next blog in the series will look at /interface and a tool for finding all the hosts and status of the interfaces on a device.
In the meantime, if you would like to learn more about APIC-EM, you could visit Cisco Devnet. All of the code samples can be found in this Github repository.
Thanks for reading
You must be a registered user to add a comment. If you've already registered, sign in. Otherwise, register and sign in.
Find answers to your questions by entering keywords or phrases in the Search bar above. New here? Use these resources to familiarize yourself with the community:
