If you do not have a programming background, it might be a bit daunting to get started with REST API. Fortunately there are tools that allow you to and use REST API without needing to write a line of python. My favourite REST client is POSTMAN.
This blog provides instructions for downloading a POSTMAN collection for APIC-EM sandbox controller.
The collection has samples for many common API calls. In addition it uses some of the awesome POSTMAN features to pre-populate variables, so you do not have to cut/paste information between calls that are linked.
Getting Postman
You can download POSTMAN from https://www.getpostman.com/ You do not need to create an account, and it is free to use.
Importing the Collection
Once you open postman, you will need to import the two files below
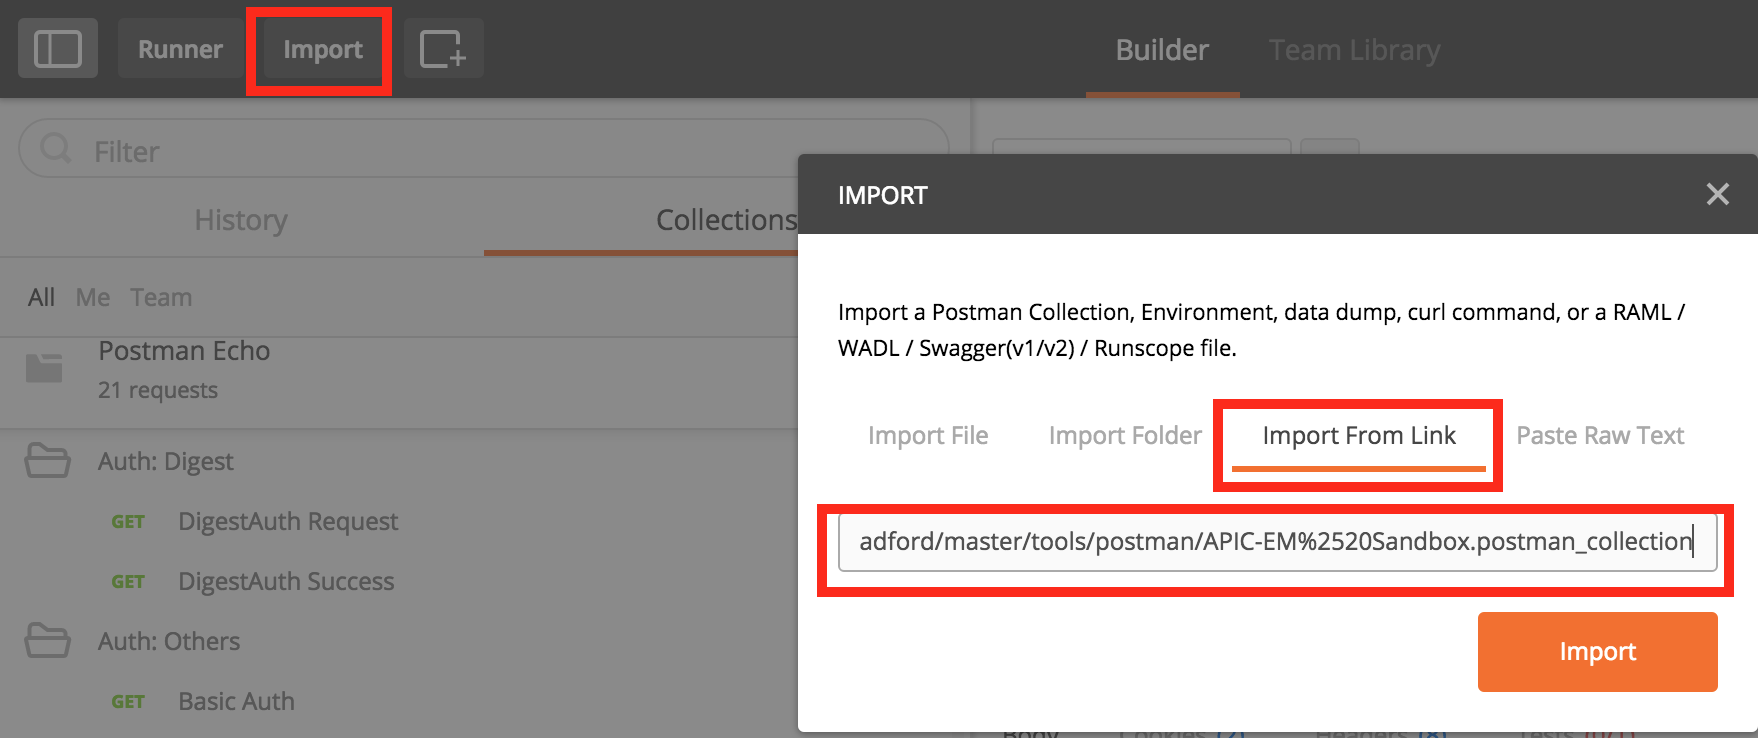
First click on "Import",
Then "Import from Link",
Then paste the URL into the box as shown.
Press "Import". NOTE: You need to do this for both files.
Getting Started - Authentication
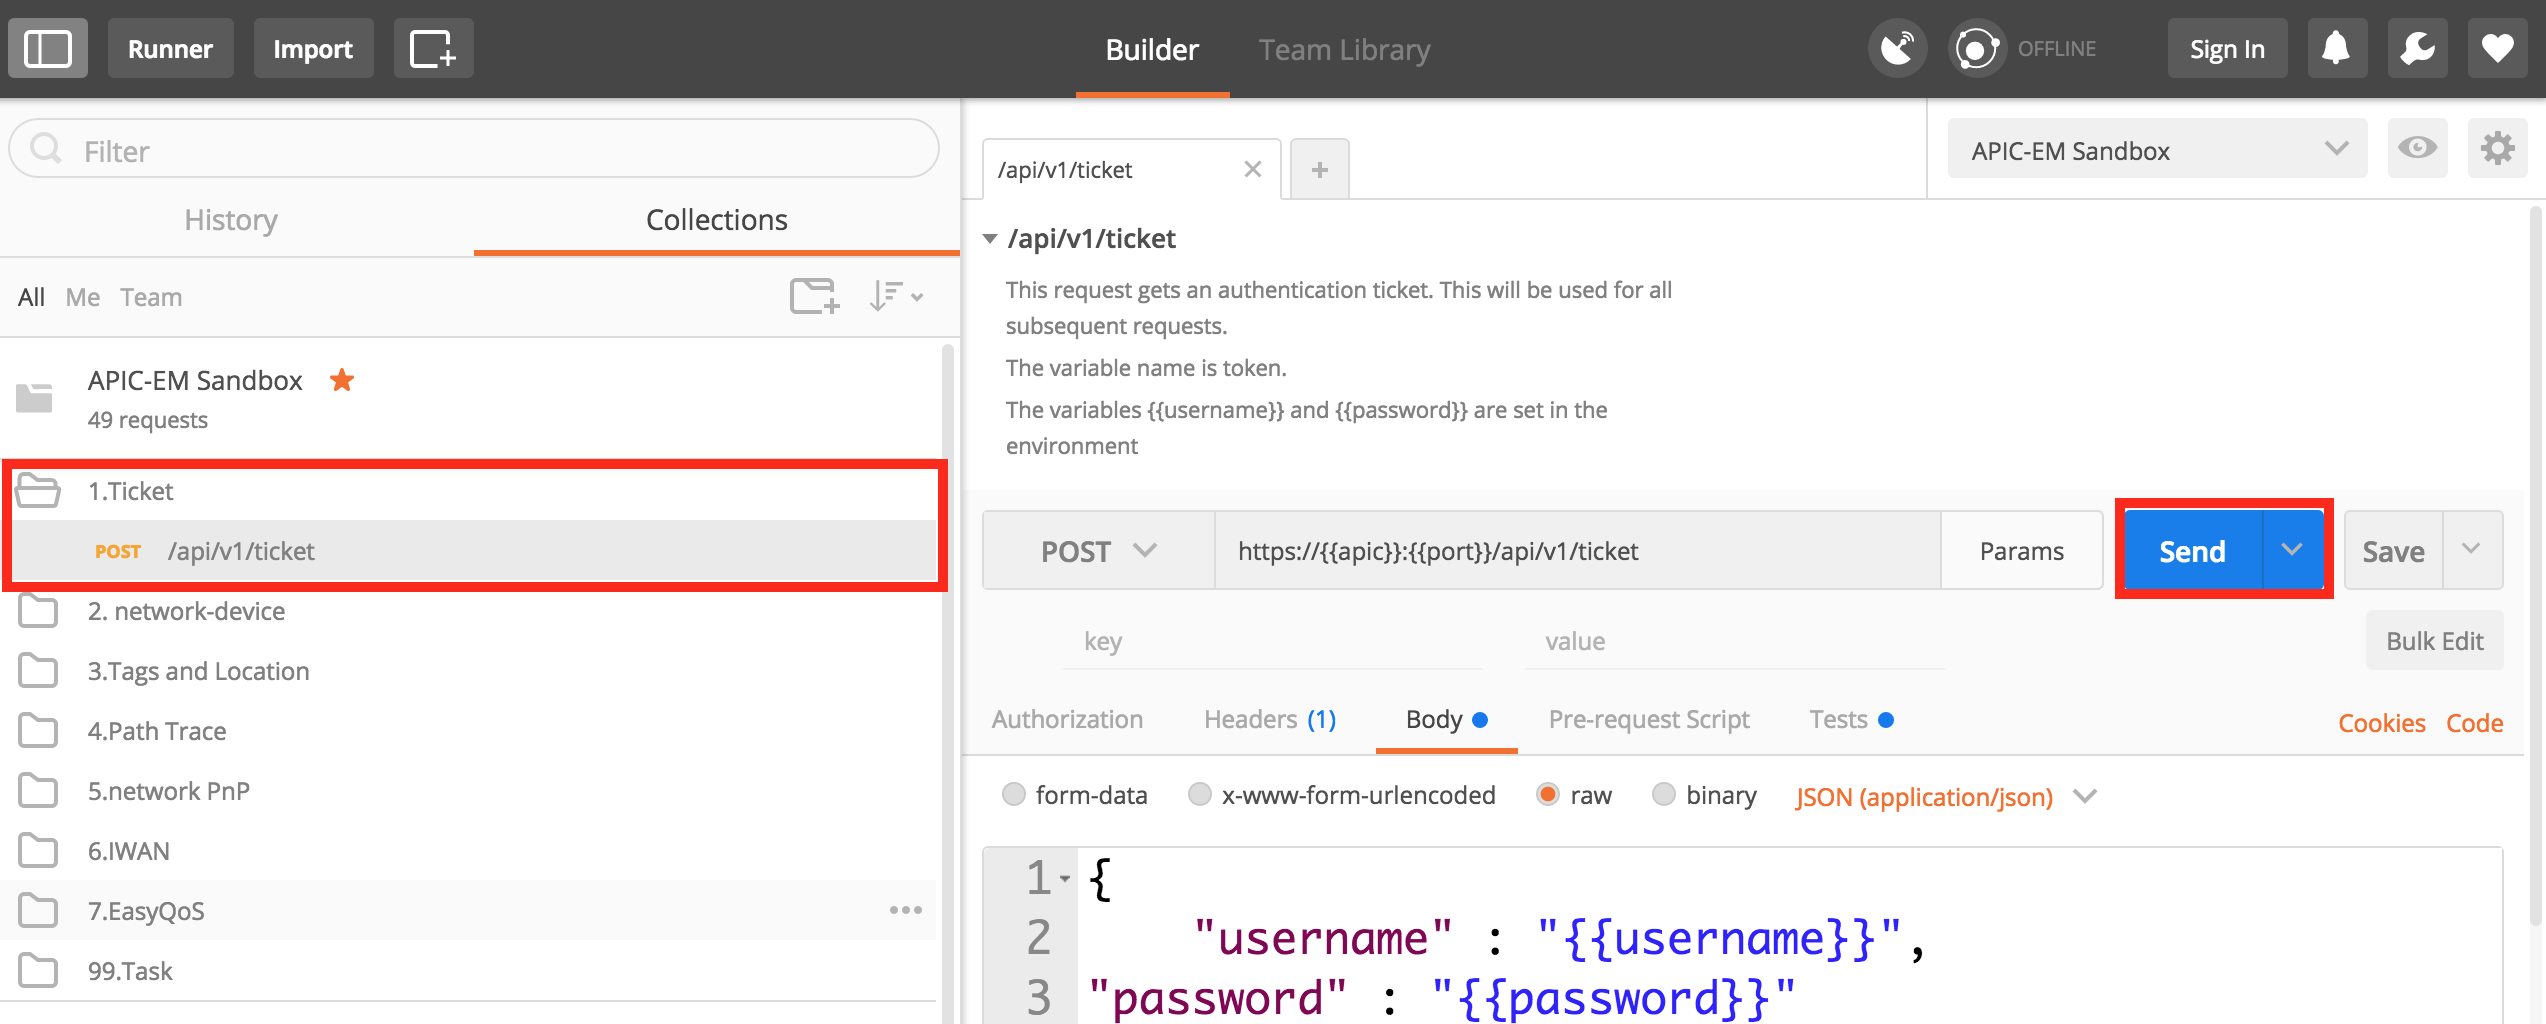
After the two steps above you should have the collection and the environment successfully imported into POSTMAN. The next step is to get an authentication token, as all API calls on APIC-EM are authenticated.
You need to open the folder in the collection called "1. Ticket" and then press "SEND" on the right hand side. The body off the call is using two variables "{{username}}" and "{{password}}". These come from the environment variables that you downloaded. You will notice that the APIC call itself also has environment variables for the {{apic}} and the {{port}} that it is listening on.
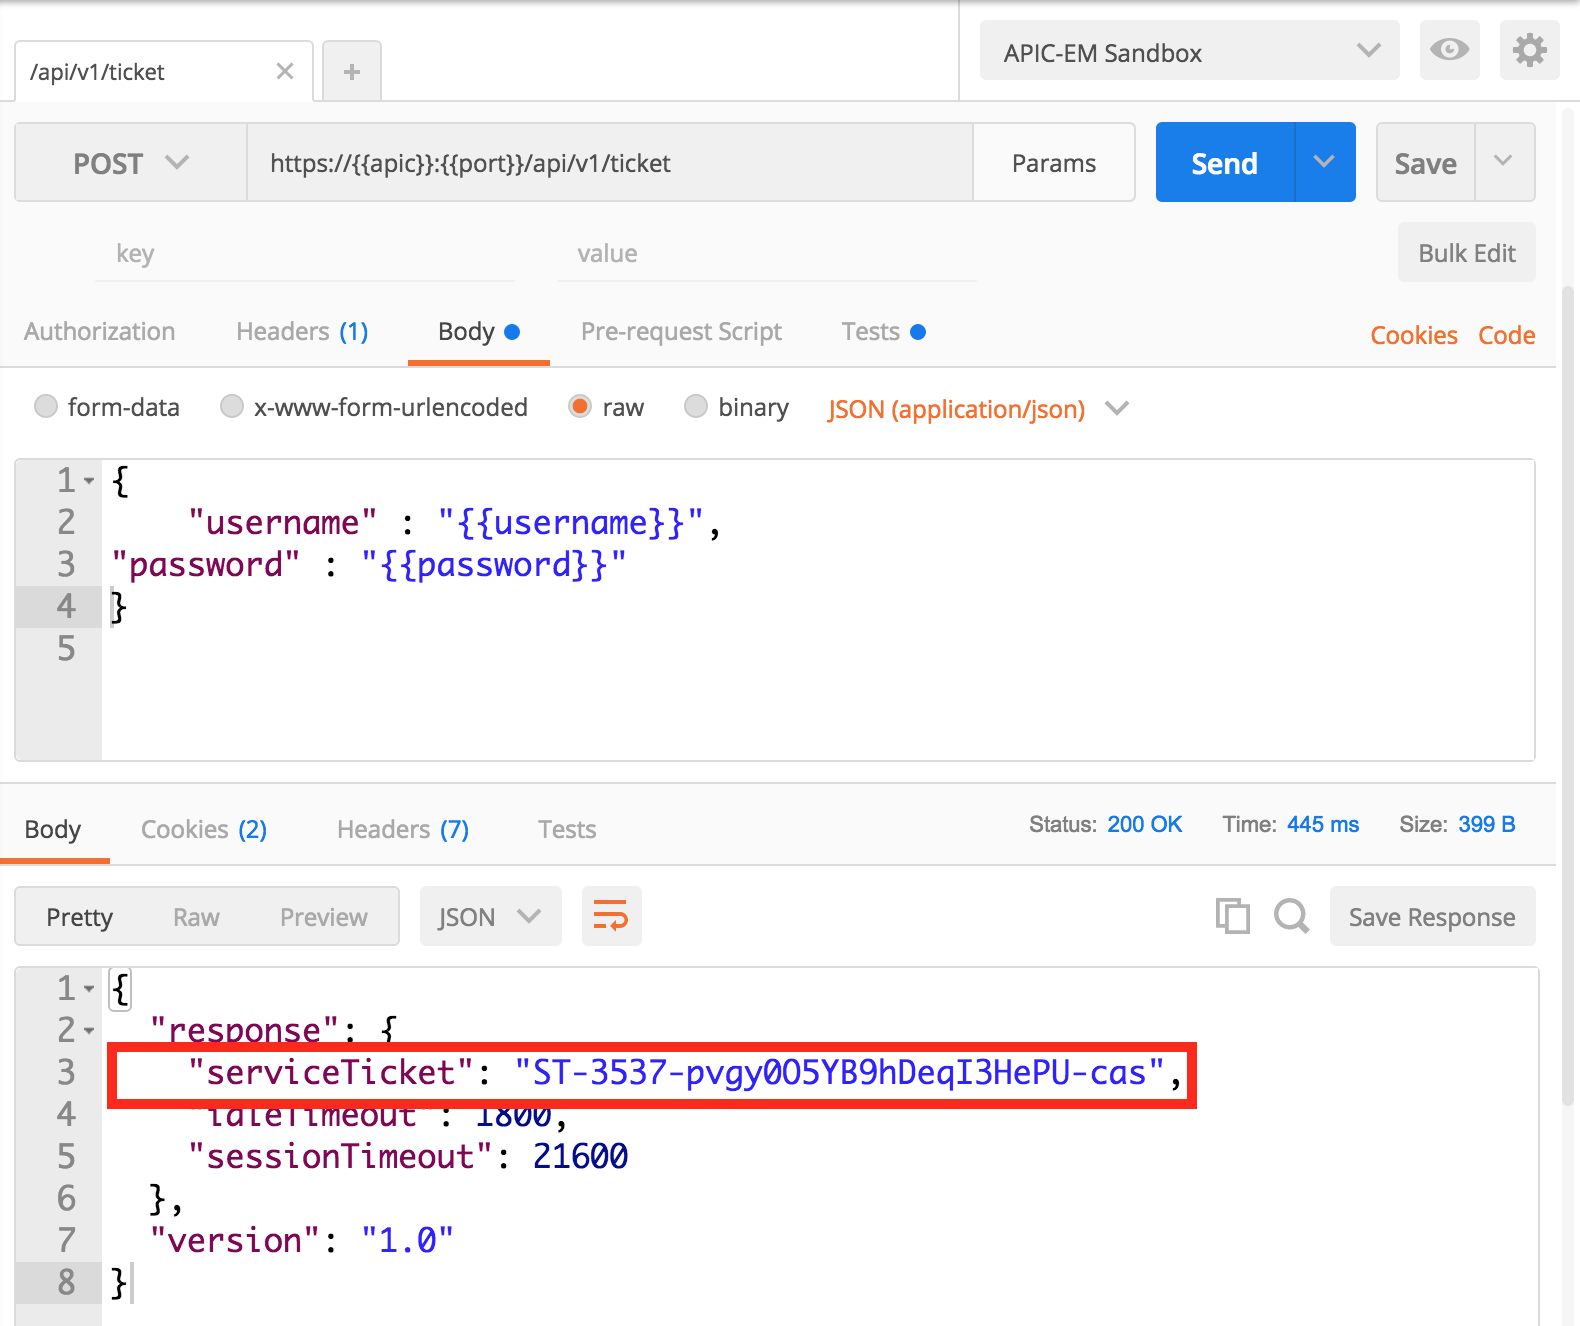
You should see a response similar to the following. The "serviceTicket" contains the token that will be required for all subsequent API calls. The timeouts are in seconds. The idle timeout for this ticket is 30mins.
To make life easier, the value of the ticket has been automatically collected and saved in an environment variable called "ticket". If you click on the icon to the right of the "APIC-EM Sandbox", you will see all of the variables (and their values). Notice how the token variable has been populated.

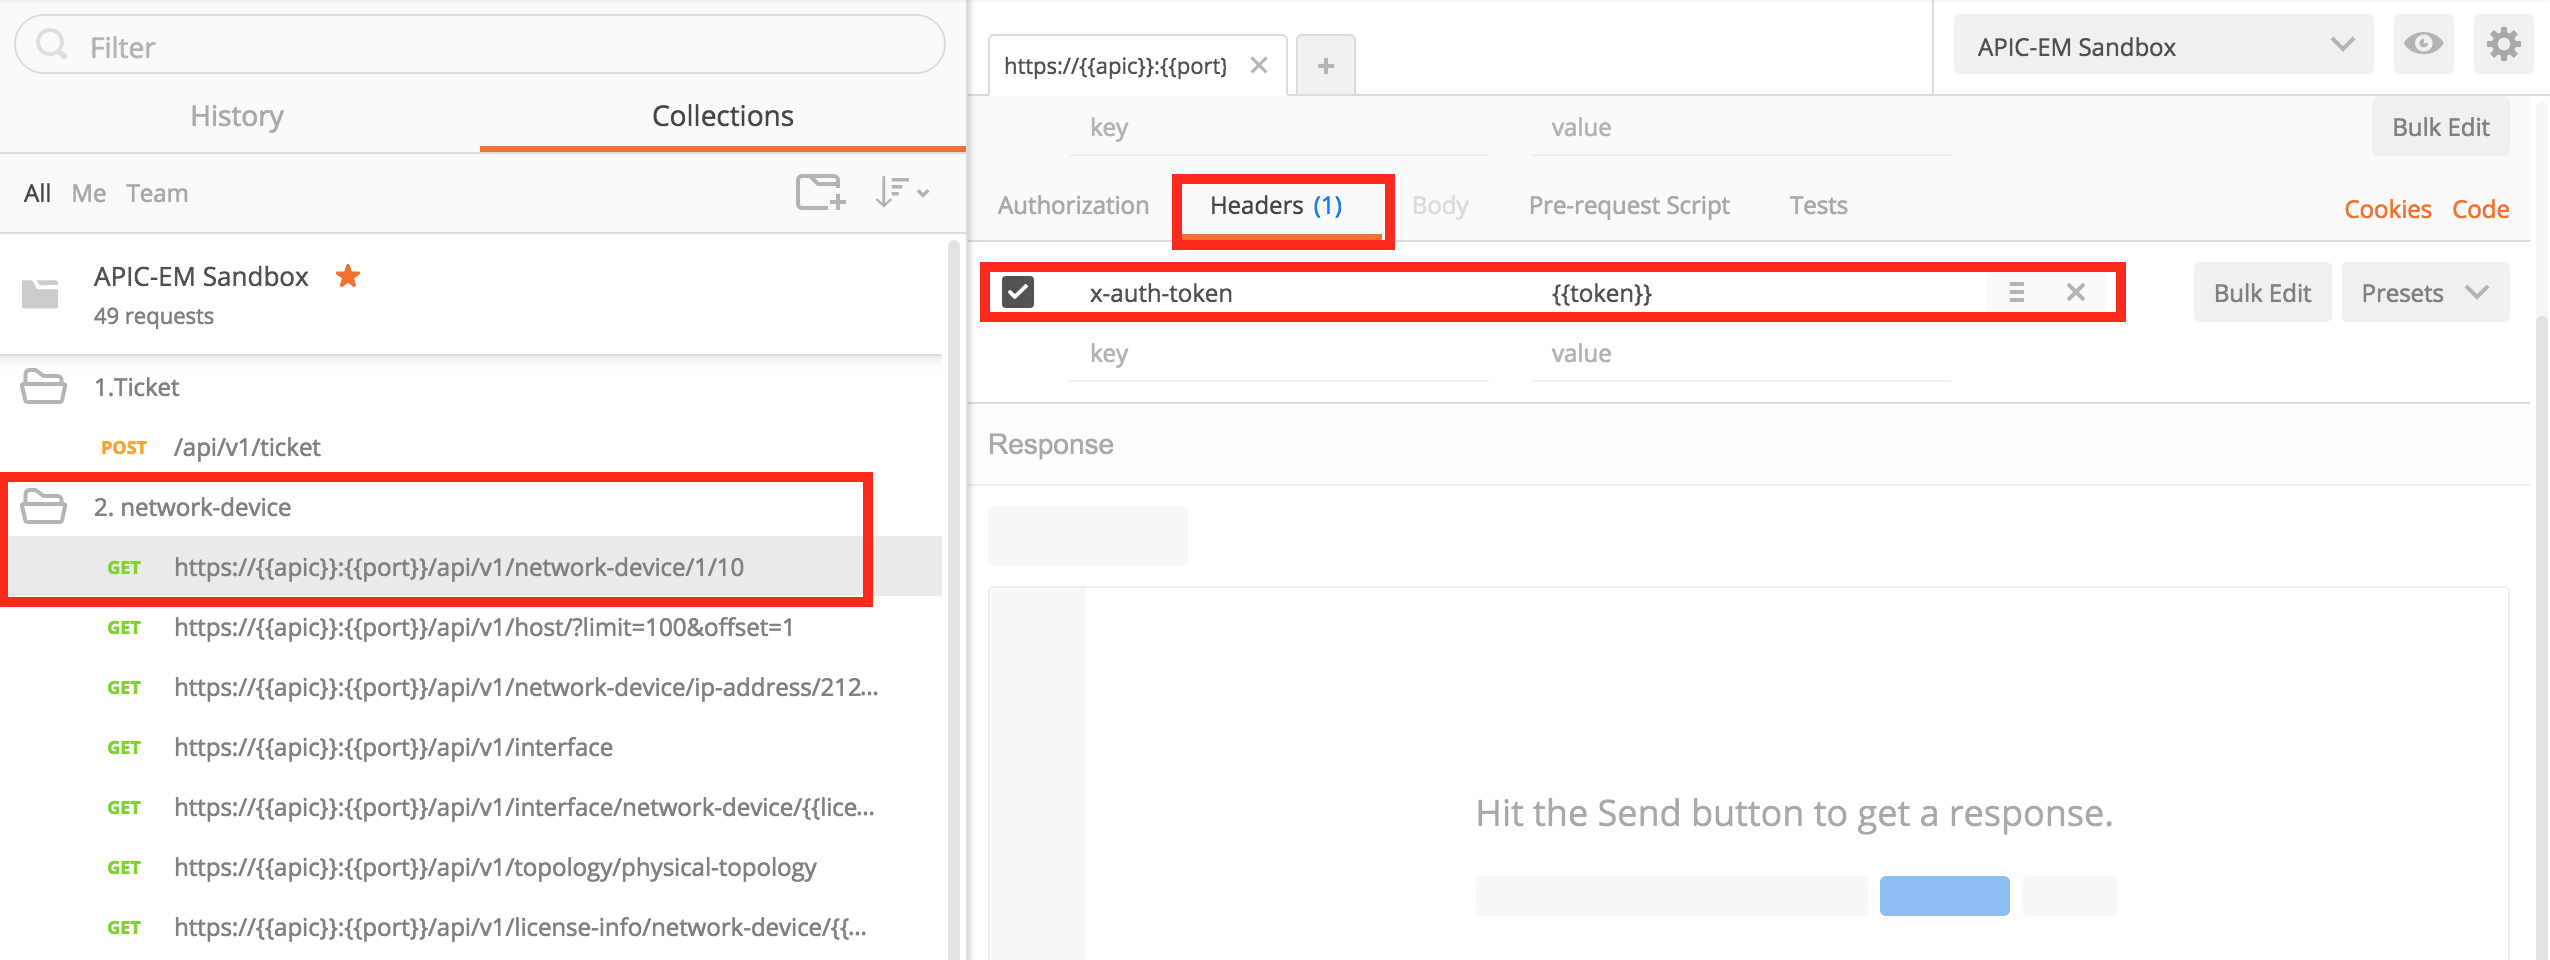
If you open the "2. network-device" folder and click on the first API call, then on "headers" you will see that the "x-auth-token" header is set to the variable "{{header}}". This will be changed dynamically each time you POST the "/api/v1/ticket" request. Note: a ticket is valid for 6 hours in this example
Linking API Calls
As seen in the https://communities.cisco.com/community/developer/dna/blog/2017/02/20/top5-api-for-apic-em-engineer-productivity-part5 blog, some API calls need to be linked together. Data from the output of one call, needs to be used as a parameter to the next.
Open the "4. Path Trace" folder and the first call to setup a Path Trace. This API call requires a source and destination IP address. Press "Send".
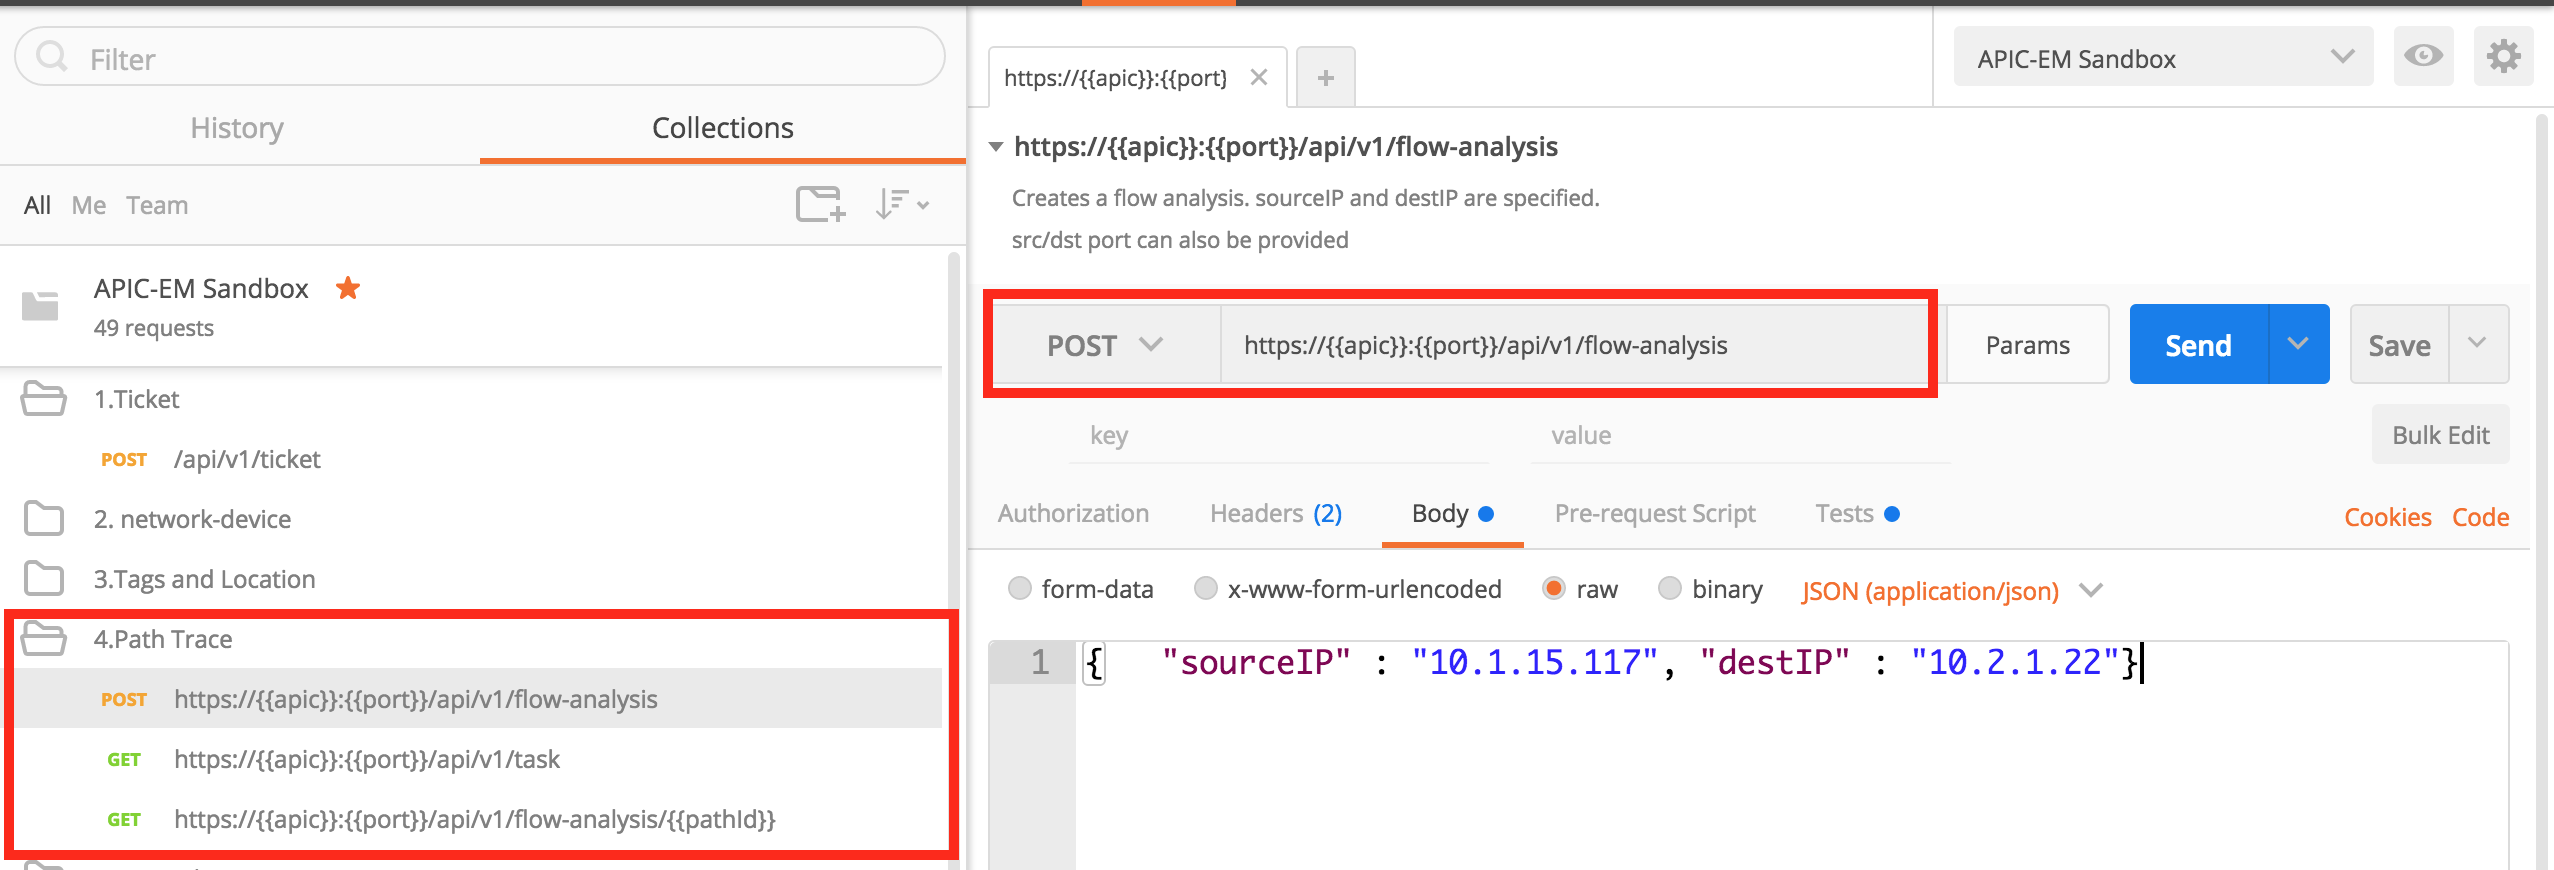
The result is a Task. The ID of the task is return and also saved in a variable in the environment in the top right hand corner.
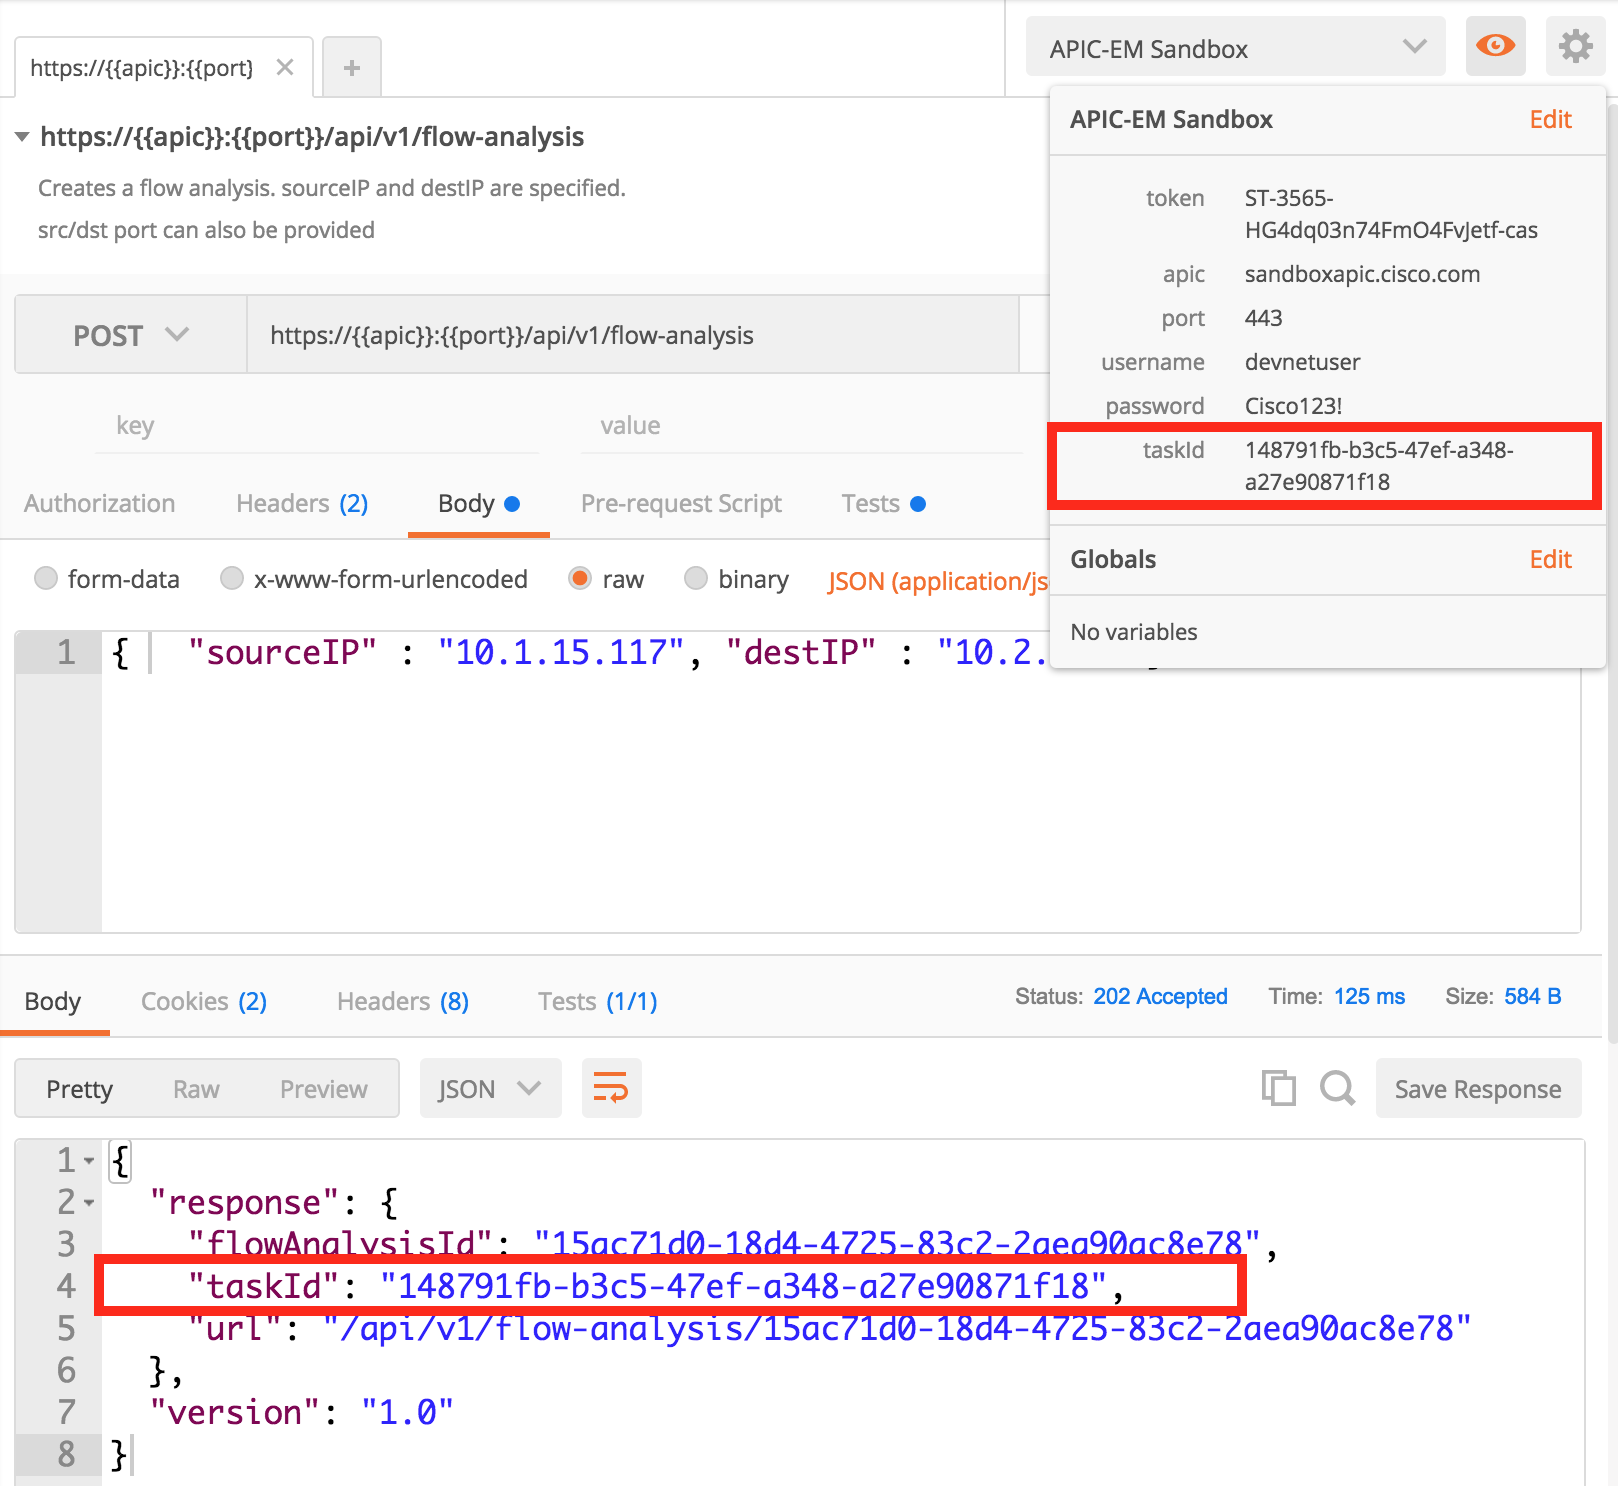
This will be used in the next call, which will show the output of the task. The GET of "/task/{{taskId}}" show the output of the task. The value in the "progress" field is the path trace result obtained in the next API call.
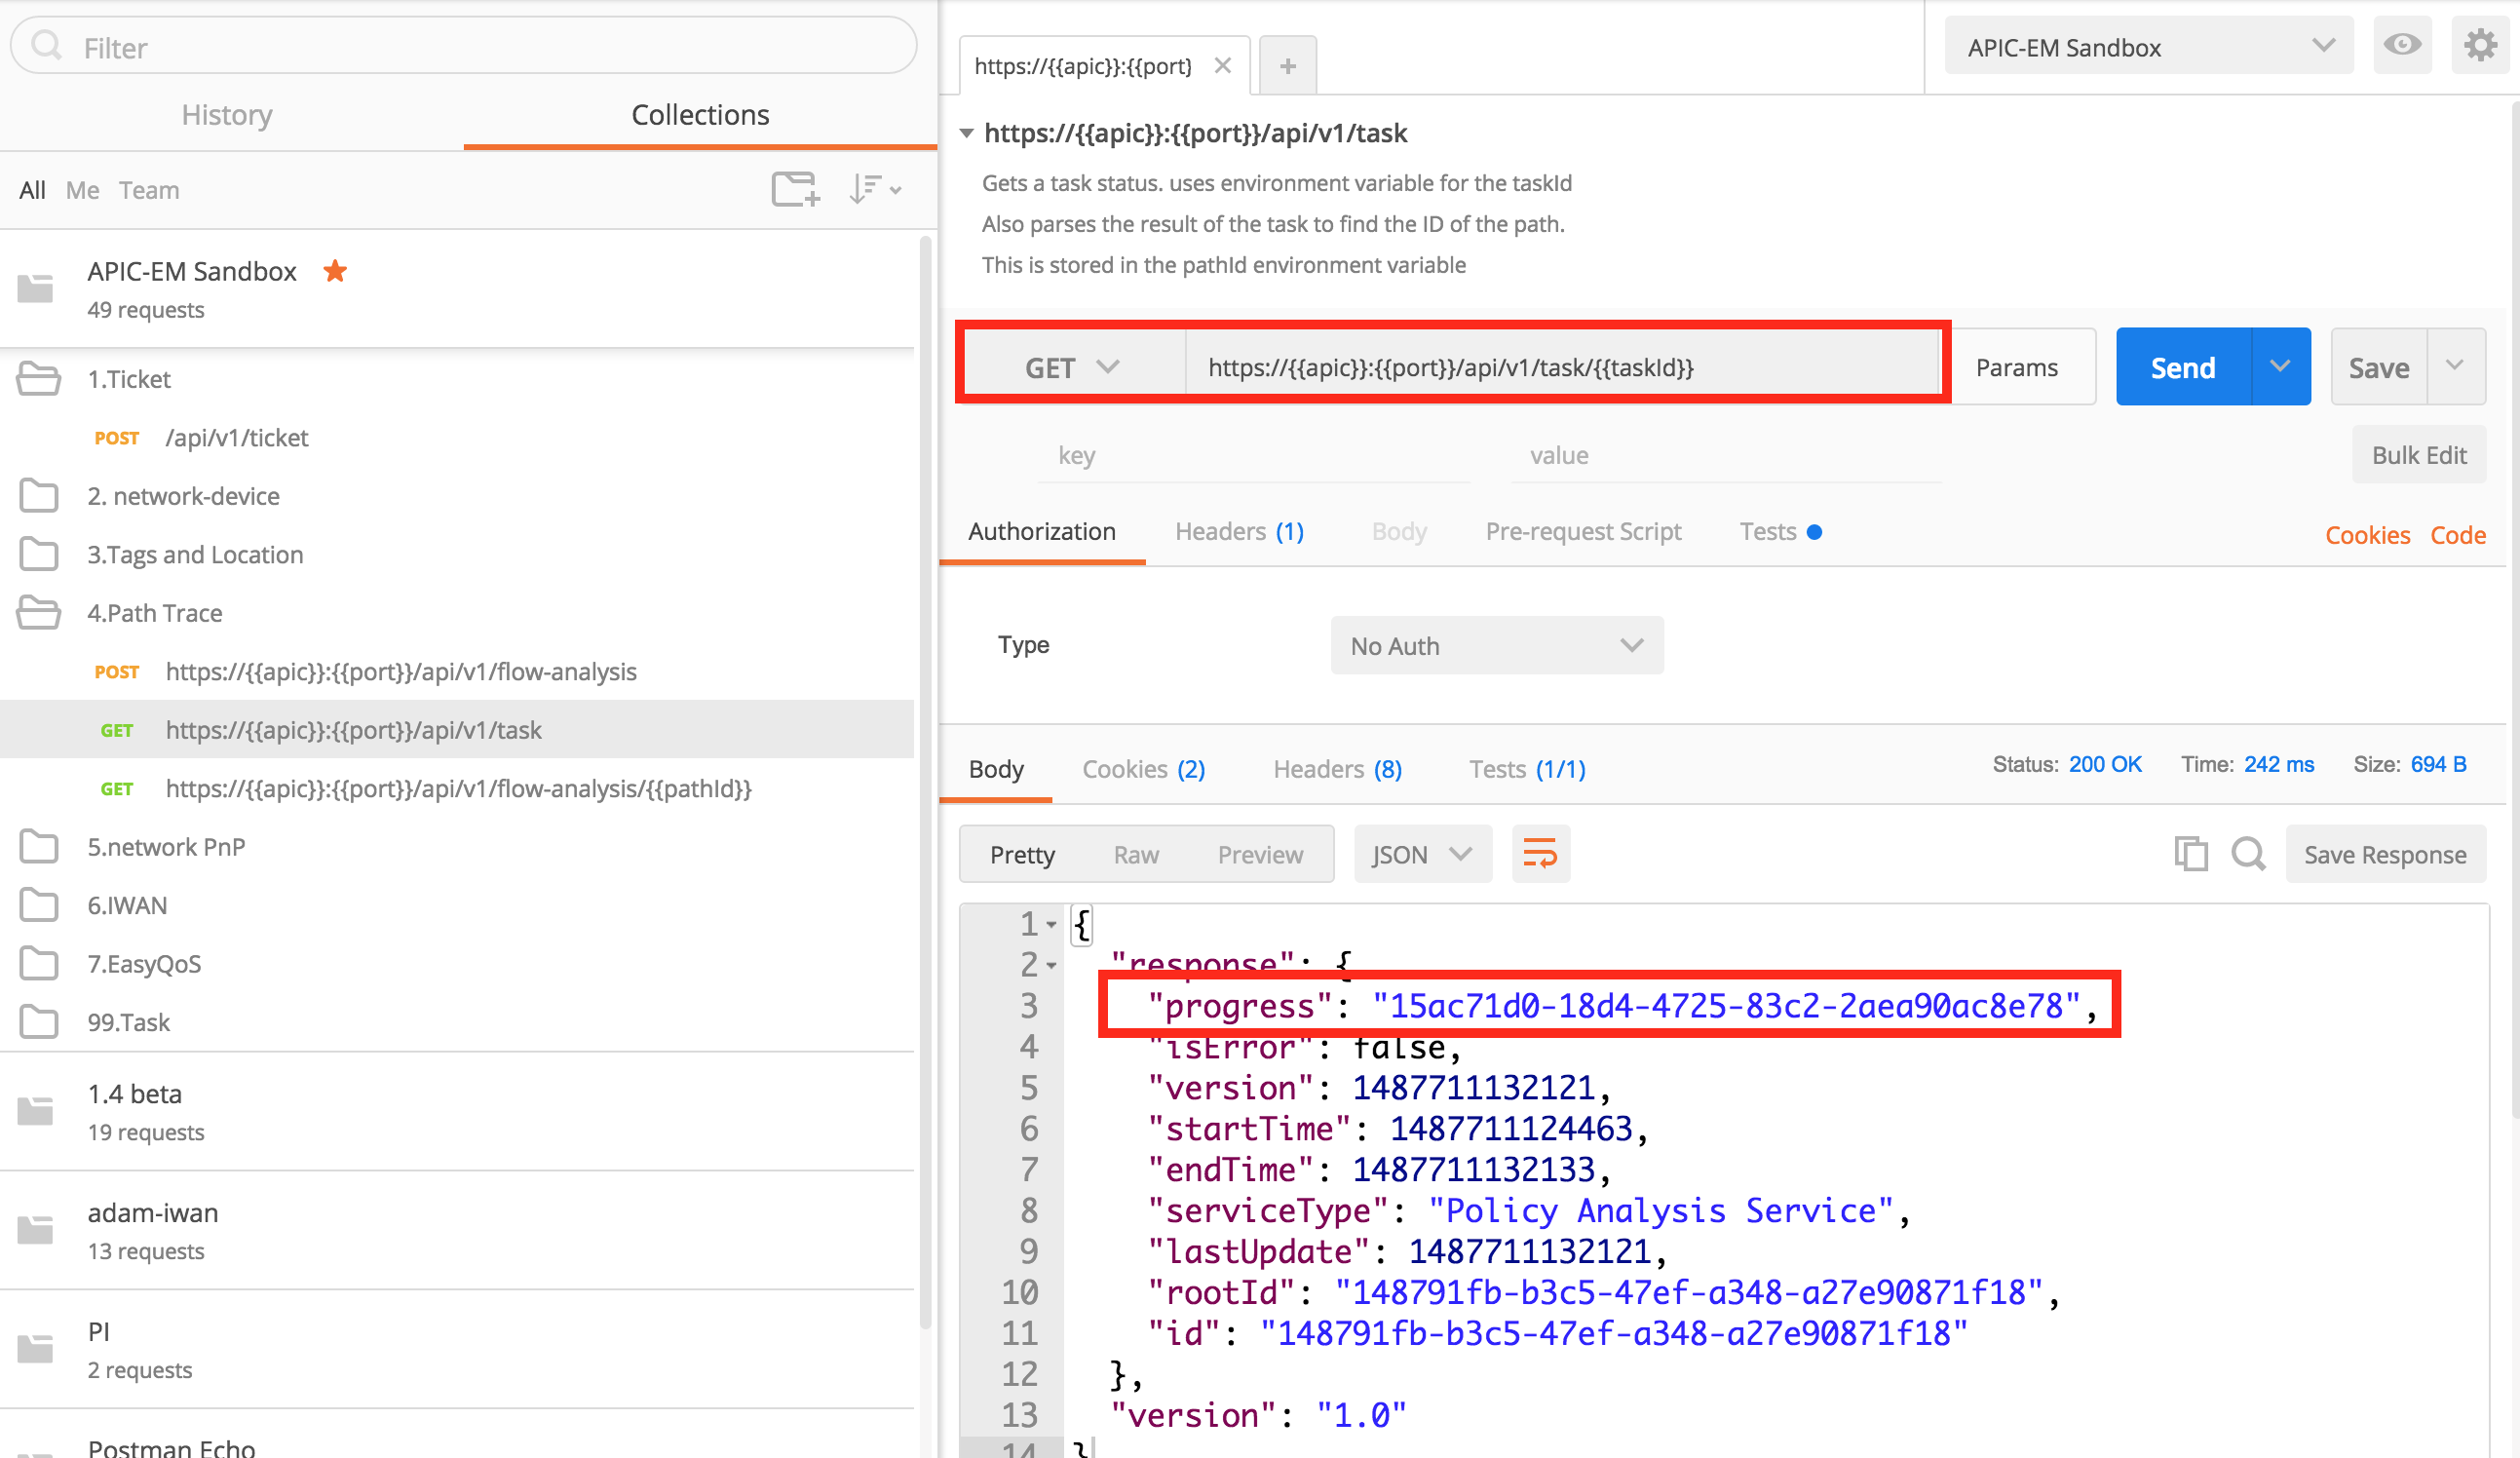
Select the "flow-analysis/{{pathId}}" call, and run that. You will now get the result of the path trace.
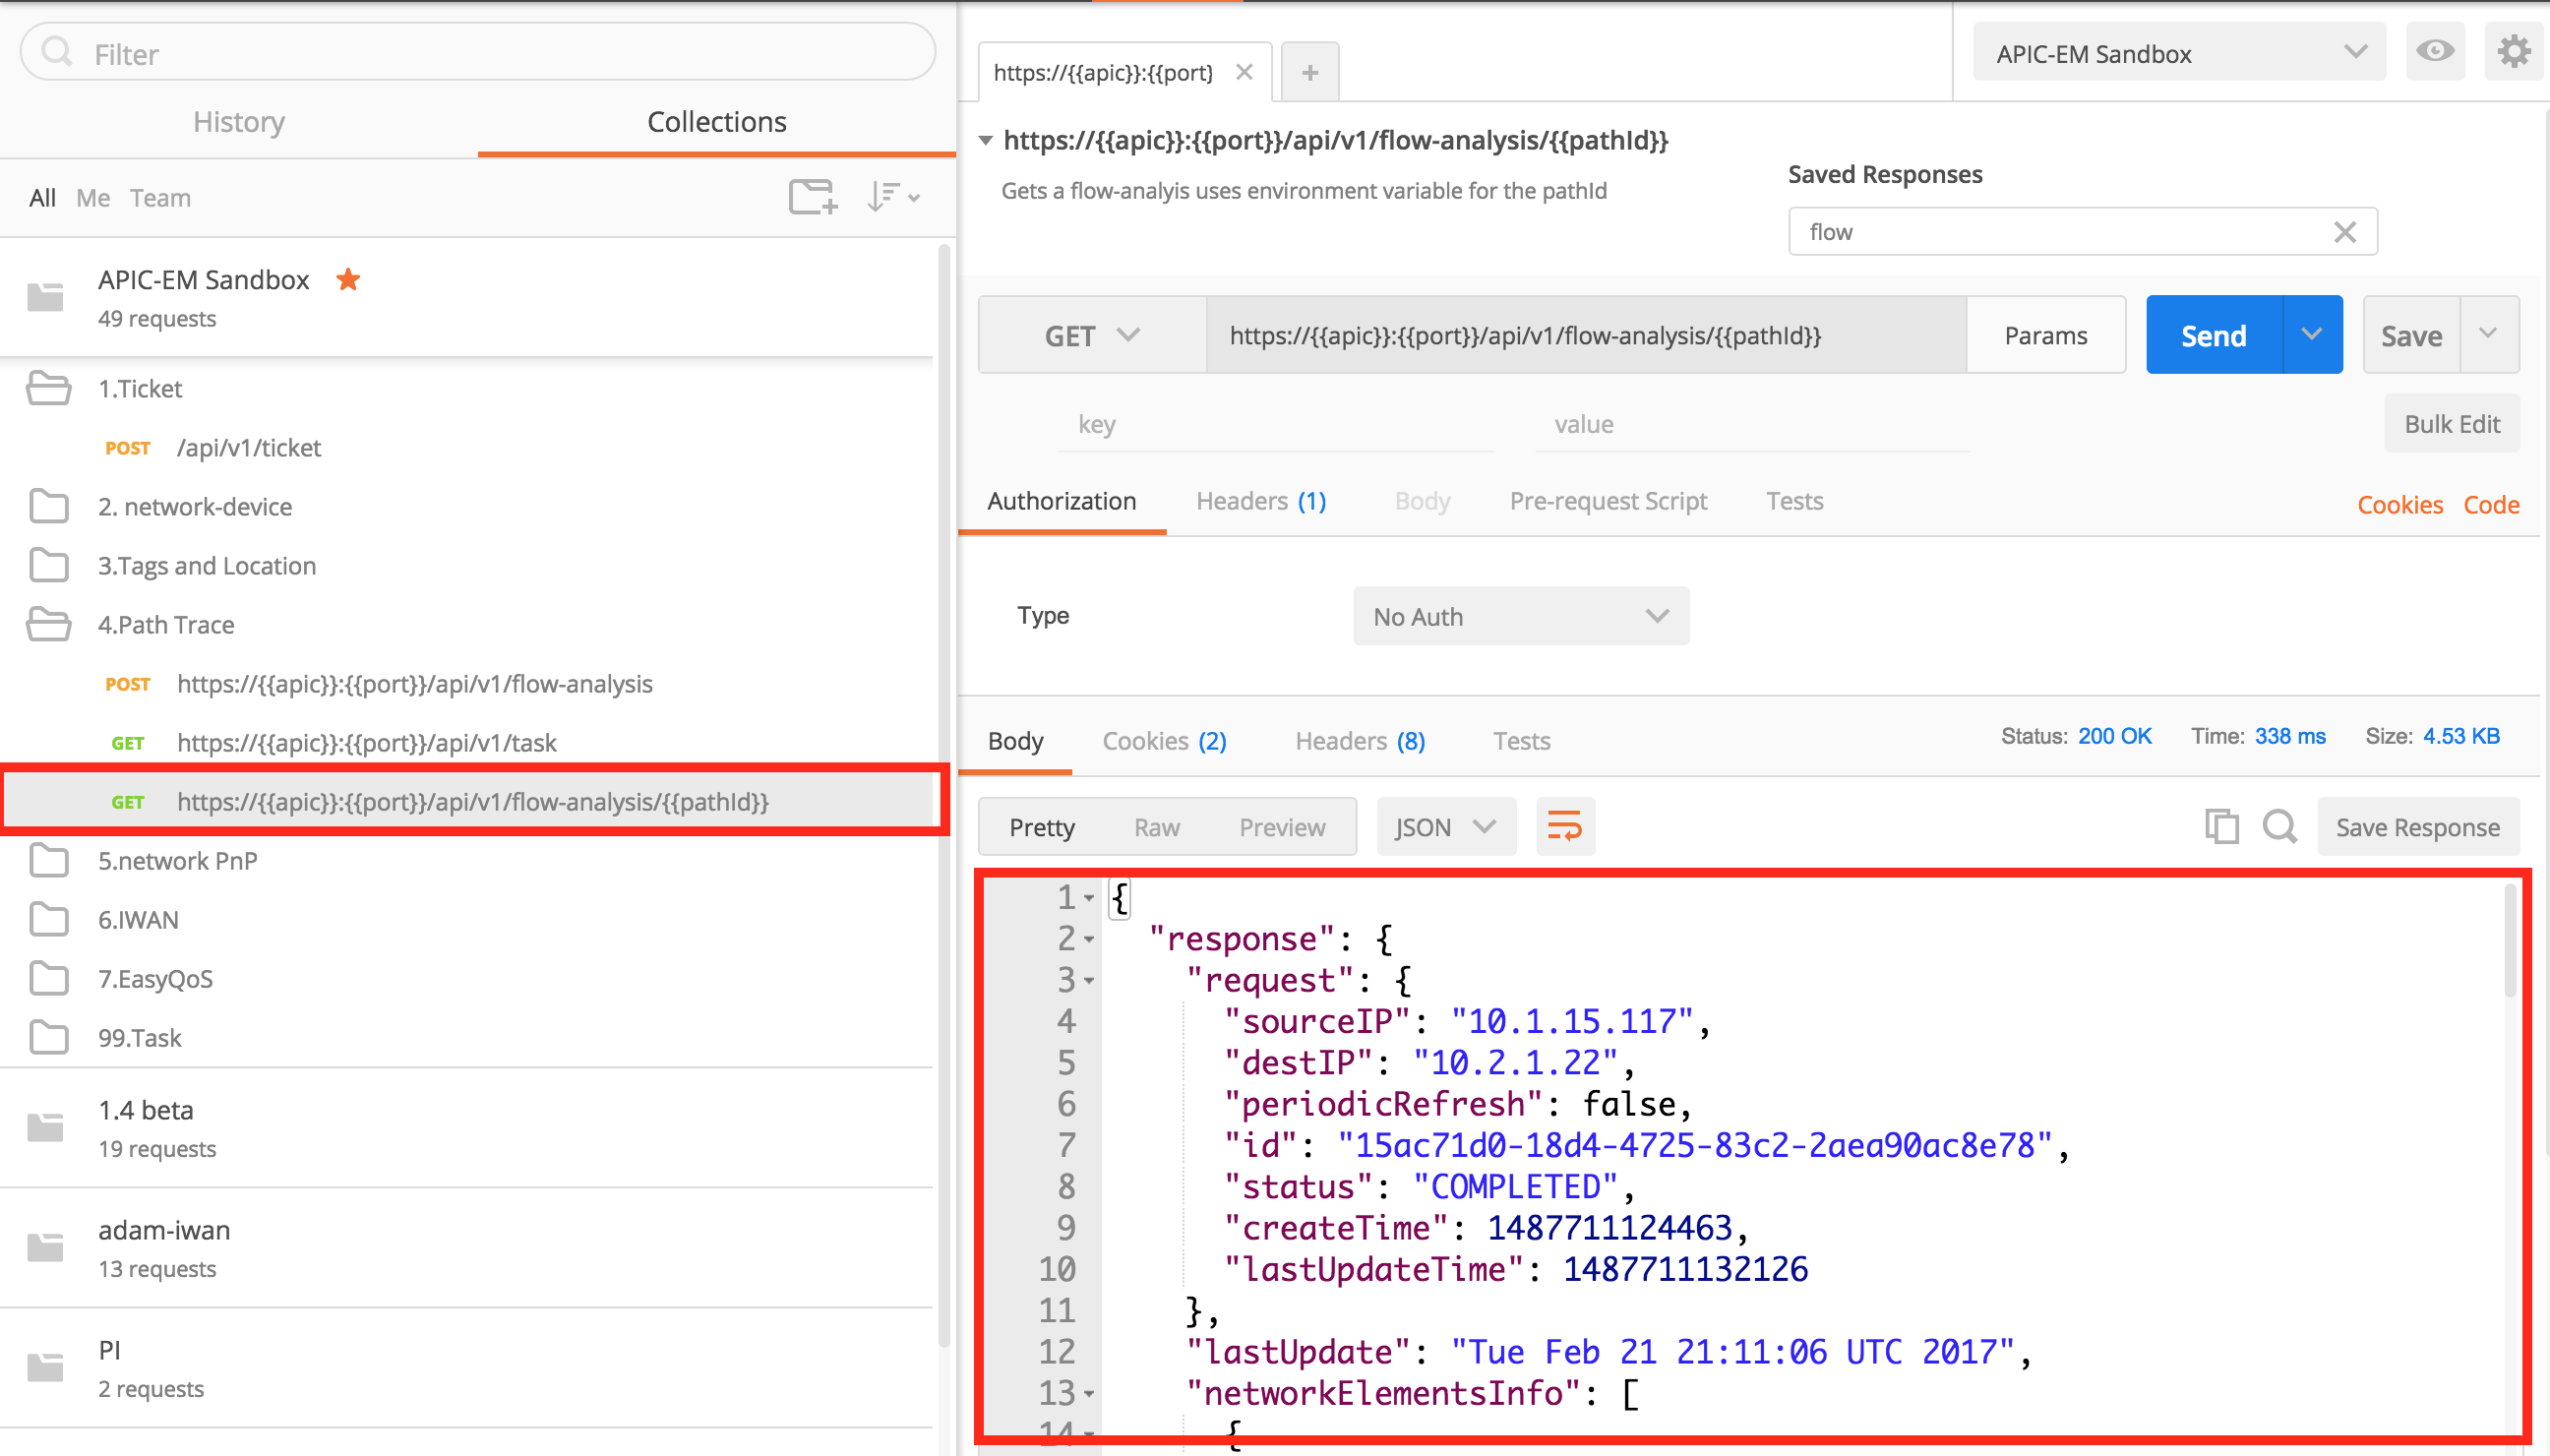
Without the variables, you would need to cut and paste the token, the "pathId" and the "flowId" from call to call.
What is the Trick?
Go back to the "/api/v1/ticket" API call. Click on "Tests". There is some javascript that runs after the API call, that collects the token from the reponse and saves it in an environment variable.
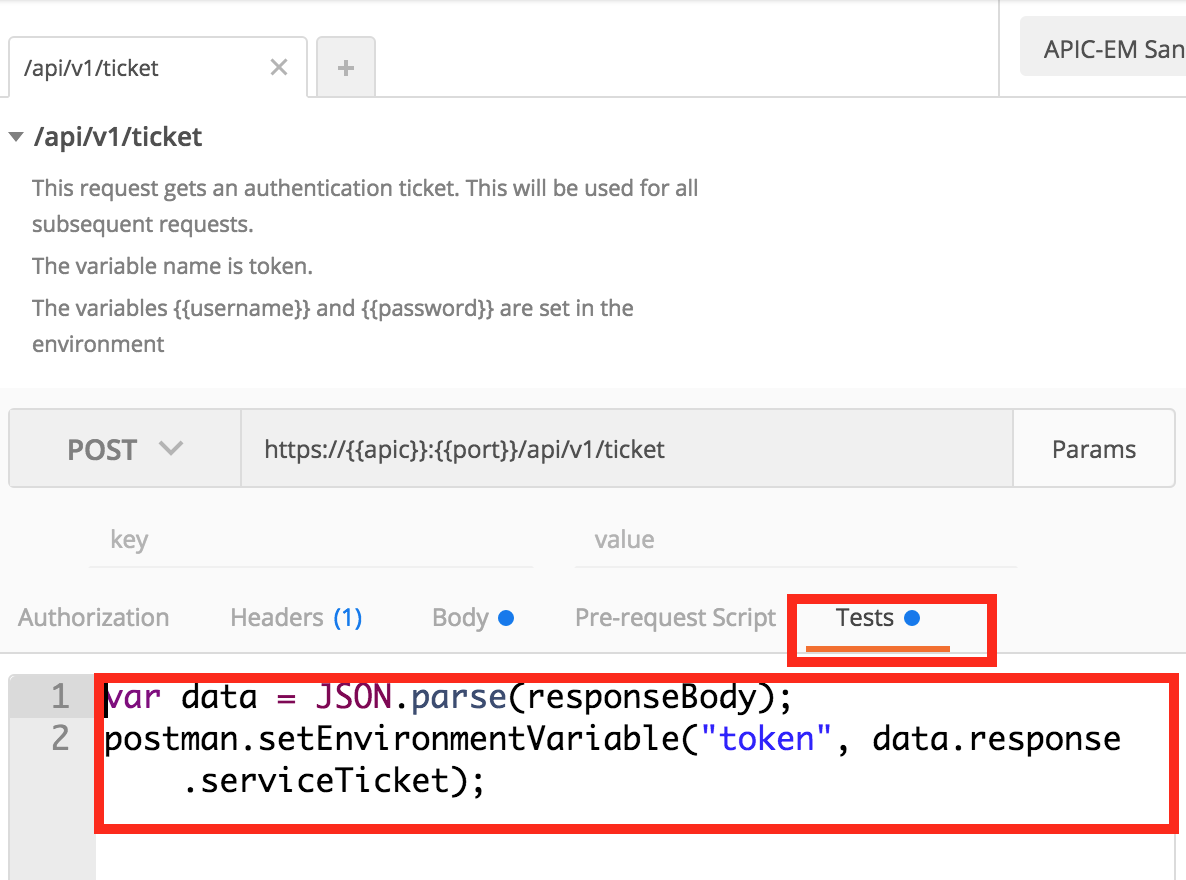
Other API calls that need to collect data will use a similar approach. This is how the environment variables are populated.
What Next?
This blog will get you started with REST API calls to an APIC-EM controller in the cloud. You can change the environment variables to point to your own controller.
Take a look at my blog index for other related topics. https://communities.cisco.com/people/aradford/blog/2016/11
In the meantime, if you would like to learn more about APIC-EM, you could visit Cisco Devnet. All of the code samples can be found in this Github repository.
Thanks for reading
@adamradford123
