- Cisco Community
- Technology and Support
- Security
- Security Knowledge Base
- Configure ISE-PIC to monitor AD using WMI
- Subscribe to RSS Feed
- Mark as New
- Mark as Read
- Bookmark
- Subscribe
- Printer Friendly Page
- Report Inappropriate Content
- Subscribe to RSS Feed
- Mark as New
- Mark as Read
- Bookmark
- Subscribe
- Printer Friendly Page
- Report Inappropriate Content
02-27-2017 11:45 AM - edited 02-21-2020 10:01 PM
This short guide will show you how to configure ISE-PIC (Passive Identity Connector) to monitor Active Directory using WMI. In previous versions of ISE, configuring PassiveID was a long process that involved many configuration steps on the AD controller. With the enhancements to PassiveID in ISE 2.2 and ISE-PIC, that process has become significantly easier. To begin, we need to configure an AD instance.
Configure an AD instance in ISE-PIC
Navigate to Providers -> Active Directory
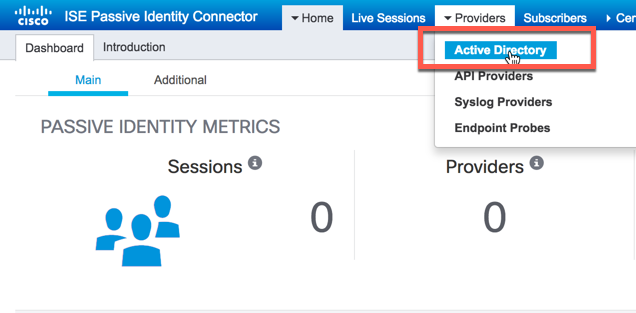
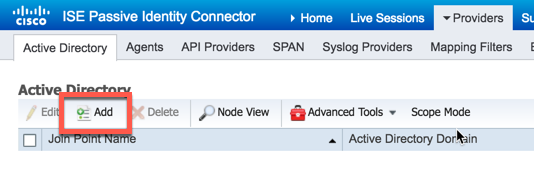
Click the "Add" button to configure a new instance:
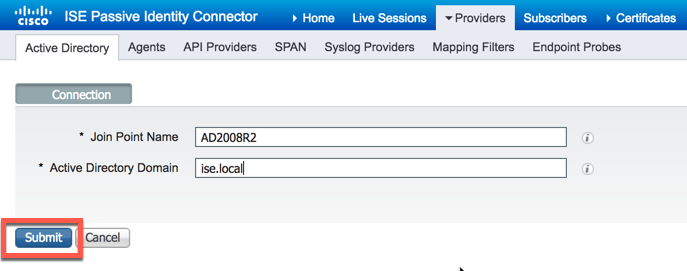
Give your instance and name and the domain we wish to monitor then click "Submit":
ISE-PIC will now ask you if you would like all nodes in the deployment to join AD. If you have more than one node in your deployment, click "Yes"

ISE-PIC will now ask you for domain admin credentials so that it can create a computer account in AD. Enter valid domain administrator credentials and click "OK":

If successful, ISE-PIC will state the process was completed. Click "Close":
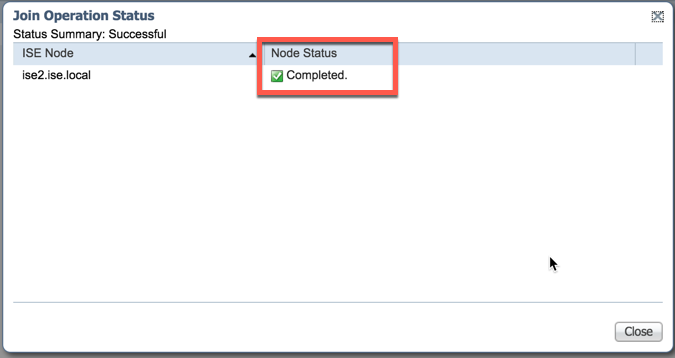
Configure the AD instance for PassiveID
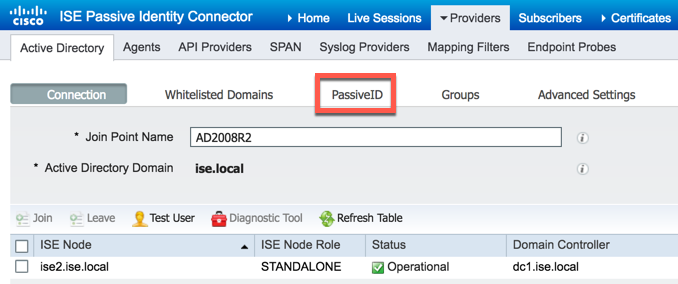
Now that we have our instance of Active Directory configured, we need to configure it for PassiveID. Begin by selecting the PassiveID Tab:
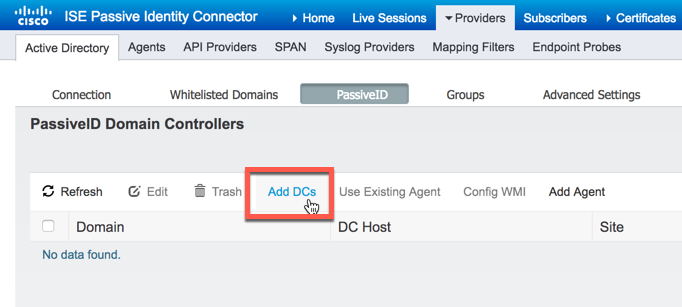
Click the "Add DCs" button:
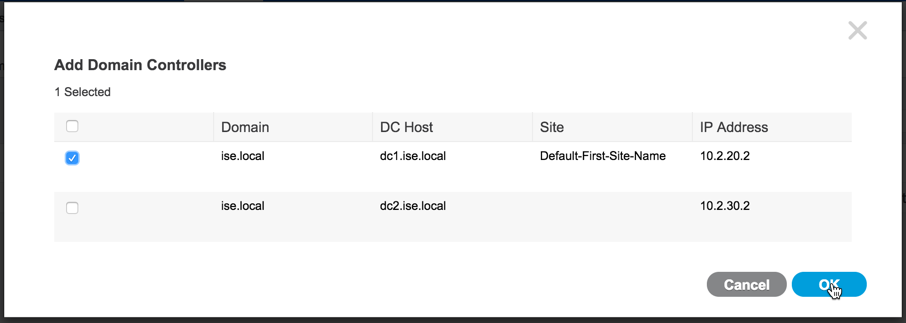
Select the domain controller we want to monitor, then click "OK":
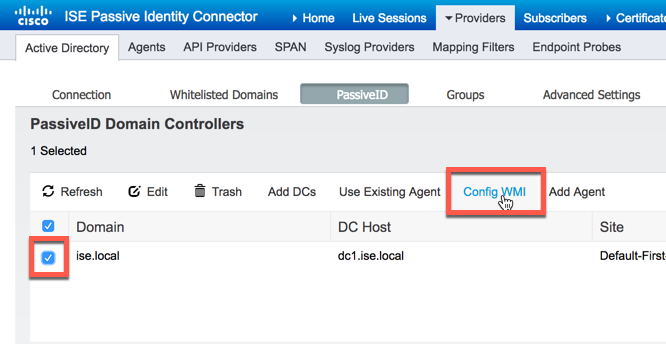
Notice that the domain controller has been added and the default monitoring state is WMI but that doesn't mean the domain controller is prepared to be monitored at this point. To monitor it using WMI, we need to configure it. Check the box for the domain controller then click "Config WMI"
The WMI configuration process could possible take some time to complete so ISE-PIC will offer to run the process in the background:

Once the WMI configuration process completes, ISE-PIC will give you the status of the configuration task:

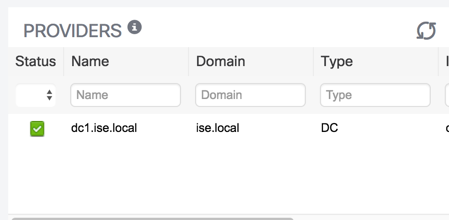
At this point, ISE-PIC is monitoring the domain controller remotely via WMI. You can check the status of the domain controller on the dashboard using the "Providers" dashlet. Do not be alarmed if you don't see a green check right away:
At this point, you should have at least one session in the the sessions directory. That session is from the AD join process previously:

At this point, ISE-PIC has been successfully configured to remotely monitor AD using WMI.
- Mark as Read
- Mark as New
- Bookmark
- Permalink
- Report Inappropriate Content
Why Domain Administrator is a requirement to make it work? Can customers create a custom permissions account that does not require full Domain Administrator permissions on the domain to make it work?
- Mark as Read
- Mark as New
- Bookmark
- Permalink
- Report Inappropriate Content
Domain Admin level credentials are what was tested by QA and there are a number of modifications that need to be made to the DC for remote monitoring via WMI. Anything else would not be supported.
Regards,
-Tim
- Mark as Read
- Mark as New
- Bookmark
- Permalink
- Report Inappropriate Content
Thanks! Looks like a more feasible option, but I am concerned with previous reply from Tim if this will be supported by Cisco?
- Mark as Read
- Mark as New
- Bookmark
- Permalink
- Report Inappropriate Content
Tim was focusing more on the button "Config WMI" to automate by ISE / ISE-PIC to update the configuration changes needed on an Active Directory domain controller. This automation works with a Domain Admin only.
Cisco supports WMI since CDA and ISE supports WMI since ISE 1.3 and the requirements on the DC side have not changed.
- Mark as Read
- Mark as New
- Bookmark
- Permalink
- Report Inappropriate Content
I used the Config WMI and it says it was successful, however the status on the dashboard never turns green. It is always in progress.
- Mark as Read
- Mark as New
- Bookmark
- Permalink
- Report Inappropriate Content
I've tried your settings for ISE-PIC 3.1 and even though the tests all past and the username/password check also work the "Live Sessions" page is still blank, any ideas?
- Mark as Read
- Mark as New
- Bookmark
- Permalink
- Report Inappropriate Content
Firewall is configured correctly on DC and I am using a DOMAIN ADMIN account. I still get this error no matter what:
"Unable to run executable on [DC], The IseExec remote copy failed to set credentials"
What is the current workaround/solution?
- Mark as Read
- Mark as New
- Bookmark
- Permalink
- Report Inappropriate Content
@SRW4jsconnect I'm using release 3.3 and I have the same problem right now. All tests are successful, but the "live sessions" are completely empty. Has anyone managed to solve this dilemma, I imagine it's some configuration in Active Directory?
Find answers to your questions by entering keywords or phrases in the Search bar above. New here? Use these resources to familiarize yourself with the community:


