はじめに
本稿では、SWA(Secure Web Appliance / 旧称:WSA)の基本的な動作を確認するためテスト用のSWAの簡易的にセットアップ方法をご紹介します。
注意事項
- 本稿でご紹介している設定項目は、ソフトウエアバージョンにより異なる場合があります。
- 評価ライセンスが必要な場合は、以下のページを参考にして事前に用意しておきます。
評価ライセンスの取得方法
- 15.1以降では「スマートライセンス」が必要となります。評価用スマートライセンスについては営業までお問合せください。
- ソフトウエアのダウンロードやライセンスの取得には、Ciscoのサービス契約が必要です。
ソフトウエアのダウンロード
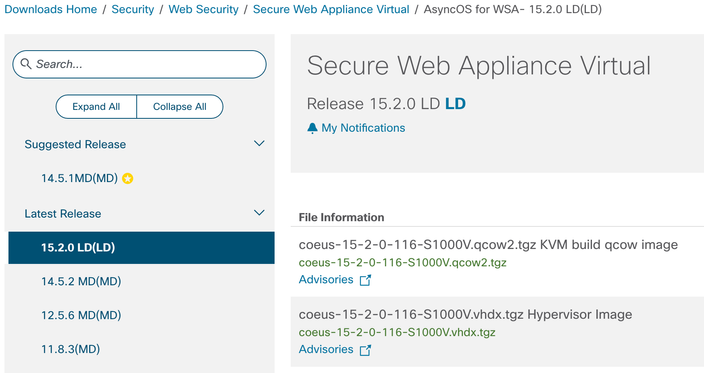
Software Downloadのページから、Secure Web Virtual Gateway のイメージをダウンロードします。全てのバージョンのイメージが提供されている訳ではありませんので、必要なバージョンのイメージがない場合は、下位バージョンをインストールしてアップグレードすることも検討します。
初期設定
Consoleへアクセス
イメージのディプロイが完了したら、SWAへConsoleアクセスします。以下の初期パスワードでログインできます。
login: admin
Password: ironport
IPアドレスの設定
以下のコマンドでIP/Netmaskの設定を行います。
ironport.example.com> interfaceconfig

Currently configured interfaces:
1. Management (192.168.42.42/24 on Management: ironport.example.com)

Choose the operation you want to perform:
- NEW - Create a new interface.
- EDIT - Modify an interface.
- DELETE - Remove an interface.
- DETAILS - Show details of an interface.
[]> edit

Enter the number of the interface you wish to edit.
[]> 1

Would you like to configure an IPv4 address for this interface (y/n)? [Y]>

IPv4 Address (Ex: 192.168.1.2
[192.168.42.42]> 172.16.0.6

Netmask (Ex: "24", "255.255.255.0" or "0xffffff00"):
[255.255.255.0]> 255.255.0.0
引き続きその他の設定項目も表示されますが、特に初期設定を変更する必要がなければ、そのままEnterを押していきます。最後にcommitコマンドを実行して変更を確定させます。
ironport.example.com> commit

Warning: In order to process these changes, the proxy
process will restart after Commit. This will cause a brief
interruption in service. Additionally, the authentication
cache will be cleared, which might require some users to
authenticate again.

Warning: Processing of network configuration changes might
cause a brief interruption in network availability.

Please enter some comments describing your changes:
[]>

Changes committed: Fri Jun 14 03:36:14 2019 GMT
ライセンスの投入
バージョン15以前と15.1以降で投入の方法が異なります。
バージョン15.1以降の場合
15.1以降では「スマートライセンス」が必要になります。評価用スマートライセンスについては営業までお問合せください。
https://SWAのIP:8443にブラウザでアクセスし、Username: admin Passphrase: ironportでログインします。
Network > Routesと進みます。
Default Routeにデフォルトゲートウェイを設定し、【Submit】をクリックします。

Network > DNSと進みます。
DNSを設定し、【Submit】をクリックします。

【Commit Changes】をクリックします。

System Administration > Smart Software Licensingと進みます。
Smart License Registrationを選択し【Confirm】をクリックします。

【Register】をクリックします。

テキストエリアにSmart Licenseをペースト(貼り付け)し、【Register】をクリックします。

バージョン15以前の場合
PuTTYなどのSSHクライアントでSWAにアクセスし、Username: admin / Passphrase: ironportでログインします。
以下のコマンドでライセンスを投入します。
ironport.example.com> loadlicense

This command will remove all existing feature key (including evaluation keys)
and the license file from the system prior to installing the new license file
and keys. Are you sure you want to continue? [N]> y

1. Paste via CLI
2. Load from file
How would you like to load a license file?
[1]> 1

Paste the license file now.
Press CTRL-D on a blank line when done.

<ここにライセンスをペーストします>

空白行でCTRL-Dをクリックすると、License Agreementが表示されます。内容を最後まで確認して同意します。

Do you accept the above license agreement? []> y
The license agreement was accepted.
ライセンスファイルはXML形式となっています。Internet Explorerなどのブラウザでファイルを開いてコピーすると、SWAがライセンス情報を正しく認識することができないため、メモ帳など「テキストエディタ」で開いてコピーします。
GUIへアクセス
https://SWAのIP:8443 にブラウザでアクセスし、Username: admin Passphrase: ironportでログインします。

システムセットアップウイザード
System Administration > System Setup Wizardと進みます。

「I accept the term of this license agreement」にチェックを入れ【Begin Setup】をクリックします。

Appliance Mode

Standard Modeが選択されていますので、そのままNextをクリックします。
System Settings
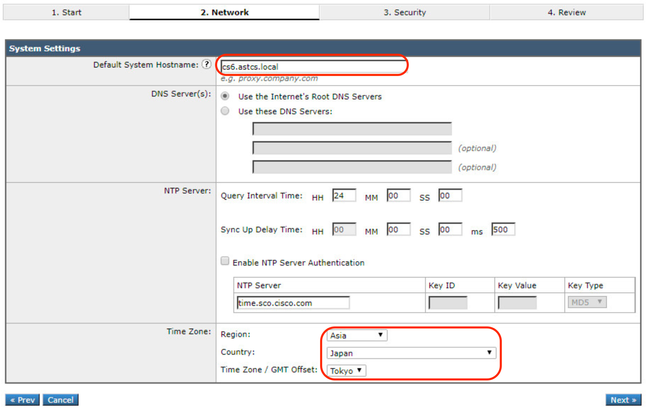
SWAのホストネームを設定する必要があります。タイムゾーンを日本時間に変更することもできます。
Network Content
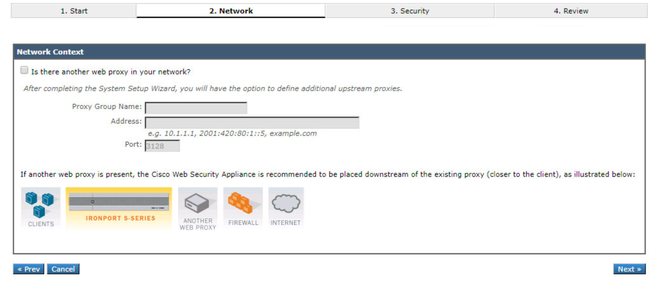
上流プロキシの設定が必要なければ、そのままNextをクリックします。
Network Interfaces and Wiring
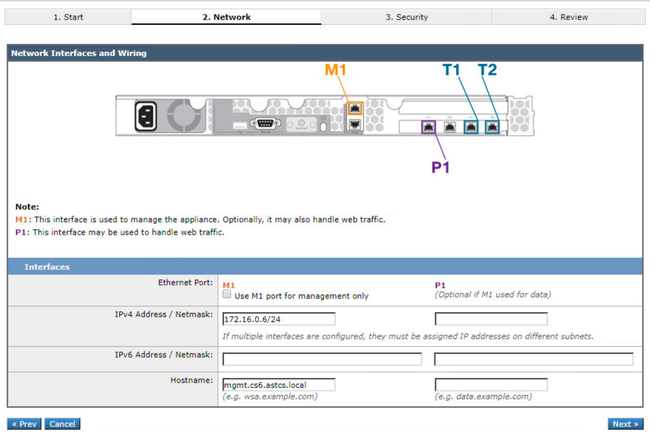
Interfacesの設定を変更する必要がなければ、そのままNextをクリックします。
Layer 4 Traffic Monitor Wiring

Layer 4 Traffic Monitor機能の配線タイプを変更する必要が特になければ、そのままNextをクリックします。
IPv4 Routes for Management and Data Traffic

Default Gatewayを設定(確認)します。
Transparent Connection Settings
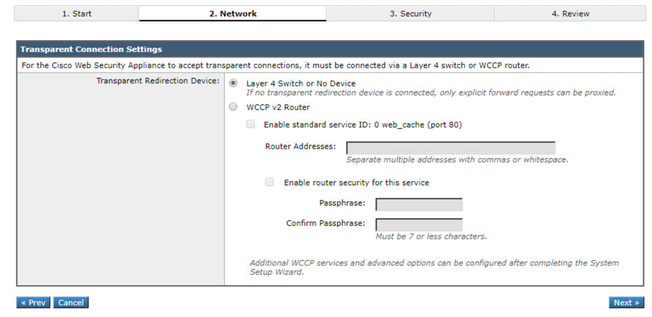
WCCPプロトコルを利用することがなければ、そのままNextをクリックします。
Administrative Settings

adminユーザの新規Passphrase、およびアラートメールの送信先を設定します。
新しいPassphraseは8文字以上となり、以下の4つを含んでいる必要があります。
- 大文字(A-Z)
- 小文字(a-z)
- 数字(0-9)
- 特殊文字( ~ ? ! @ # $ % ^ & * - _ + = \ | / [ ] ( ) < > { } ` ' " ; : , .)
Security Settings
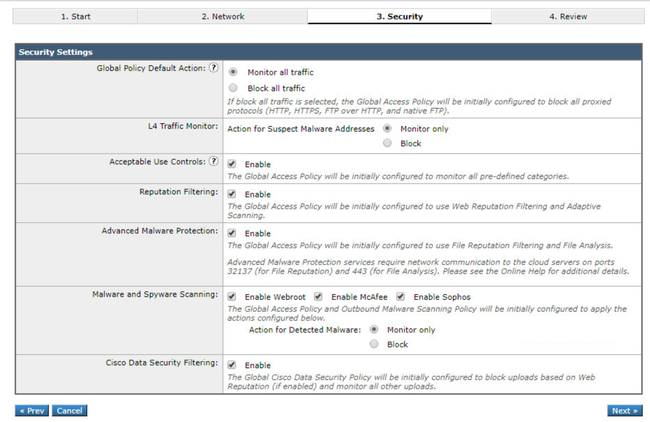
Anti-Malwareなどのセキュリティ機能を選択できます。特に変更の必要がなければ、そのままNextをクリックします。
Review Your Configuration

設定内容を確認して、Install This Configurationをクリックします。
動作確認
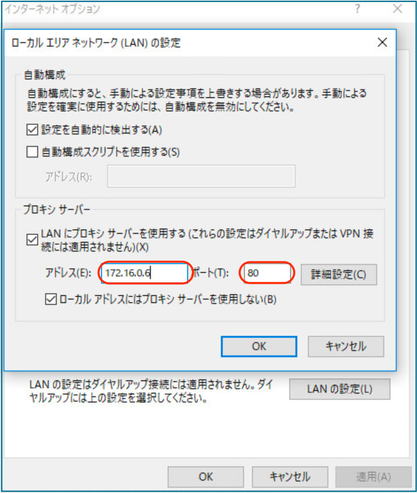
ブラウザのプロキシ設定にSWAのアドレスを指定して、SWAを経由したHTTP通信ができるかを確認します。
