| Task Name | Patch UCSD with Ansible |
| Description |
|
| Prerequisites | - Tested on 6.5.0.2 / 6.6 Beta
|
| Category | Workflow |
| Components | vSphere 6.5 |
| User Inputs | |
Instructions for Regular Workflow Use:
- Download the attached .ZIP file below to your computer. *Remember the location of the saved file on your computer.
- Unzip the file on your computer. Should end up with a .WFD file.
- Log in to UCS Director as a user that has "system-admin" privileges.
- Navigate to "Policies-->Orchestration" and click on "Import".
- Click "Browse" and navigate to the location on your computer where the .WFD file resides. Choose the .WFD file and click "Open".
- Click "Upload" and then "OK" once the file upload is completed. Then click "Next".
- Click the "Select" button next to "Import Workflows". Click the "Check All" button to check all checkboxes and then the "Select" button.
- Click "Submit".
- A new folder should appear in "Policies-->Orchestration" that contains the imported workflow. You will now need to update the included tasks with information about the specific environment.
A thank you goes out to Marc Smith(Nashville) for this contribution/inspiration. Thank you.
NOTE:
The zip patch file has to be in /tmp on UCSD:
/tmp/cucsd_patch_6_6_0_0B1_66300.zip
/tmp/cucsd_patch_6_5_0_3_65941.zip
Move Example to UCSD (Mac to UCSD):
scp cucsd_patch_6_5_0_3_65941.zip root@172.16.50.55:/tmp/.
NOTE:
UCSD has to have internet access and DNS has to be able to resolve external address to get Ansible via YUM install.
NOTE:
The UCSD workflow could be scheduled to run during a maintenance window.
NOTE:
Be aware this workflow will take down UCSD. All GUI services will stop running and after patching re-started.
UCSD Patching:
Typically patching of UCSD is done via the shelladmin account in a ssh session. This process requires UCSD be shut down and then patched. After that the services can be started again or the system re-booted. Since the services go down the GUI is turned off and the workflow engine stops running. This process below can install Ansible on the UCSD appliance and then create the YML file and then call Ansibel to take down the UCSD services and then patch UCSD and then re-boot the UCSD appliance. Further I have this workflow exposed as a catalog item hence eliminating the need to hand out the shelladmin account to a user. I have tested upgrades from 6.5.0.2 to Beta 6.6 and from 6.5.0.2 to 6.5.0.3. Please note below the various log files that can be monitored in a root ssh session.
The YML file (item in red will be a variable in the UCSD workflow to feed the actual patch name):
---
- name: Start
hosts: localhost
tasks:
- name: Stop the UCSD DB
shell: /opt/infra/stopInfraAll.sh > /tmp/patchfile.txt
- name: Remove /opt/infra/UpdatePatch.log
file:
path: /opt/infra/UpdatePatch.log
state: absent
- name: Patch UCSD
shell: nohup /opt/infra/applyPatch.sh -zip file:///tmp/cucsd_patch_6_6_0_0B1_66300.zip >> /tmp/patchfile.txt &
- name: Set facts
set_fact:
node_ip: "{{ ansible_host | default(inventory_hostname) }}"
- name: Print node IP
debug:
msg: "node ip is {{ node_ip }}"
- name: Sleep for a while and wait for this Completed upgrading in file /opt/infra/UpdatePatch.log
wait_for:
path: /opt/infra/UpdatePatch.log
search_regex: Completed upgrading
host: "{{ node_ip }}"
sleep: 60
timeout: 9200
- name: Start UCSD
shell: init 6 >> /tmp/patchfile.txt
Start the patch process vi command line example:
ansible-playbook /tmp/t9.yml
The result:

The log file that is monitored for "Completed upgrading":

The UCSD command line sequence to install Ansible:
yum install -y epel-release
yum install -y ansible
ansible-playbook /tmp/t9.yml
The patch progress/progreess can be monitored via these file(s):
tail -f /tmp/patchfile.txt
tail -f /tmp/ansibleinstall.log
tail -f /tmp/t10.tml
tail -f /opt/infra/UpdatePatch.log
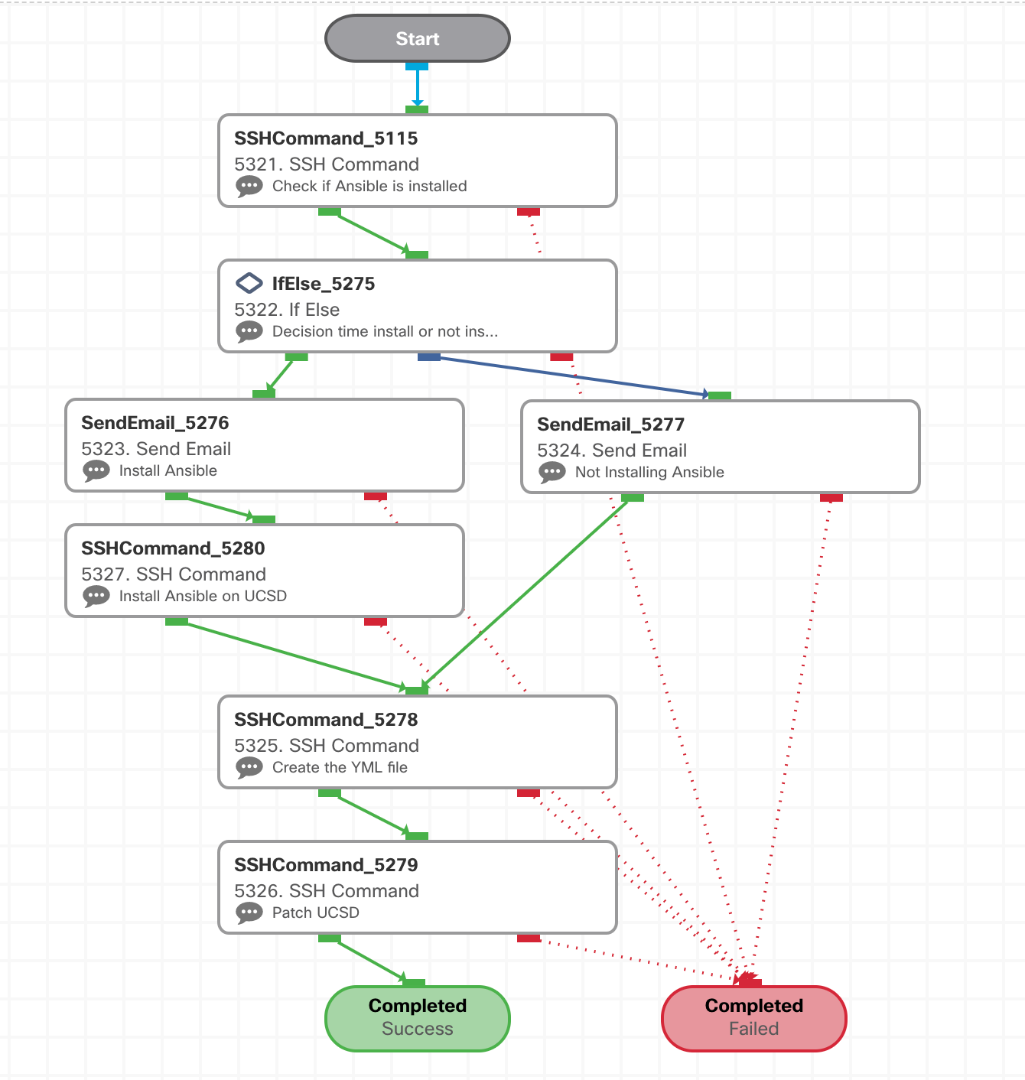
The workflow:
Workflow service offering in the catalog:

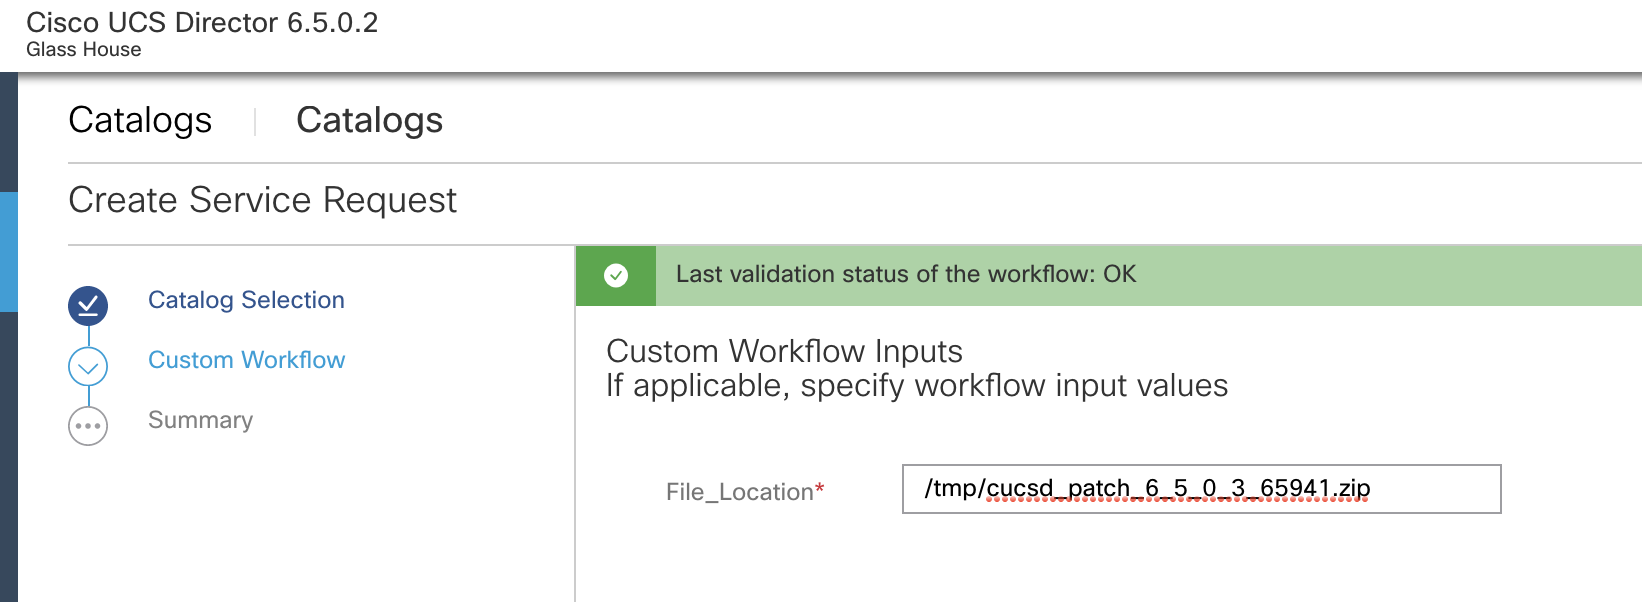
Workflow input:
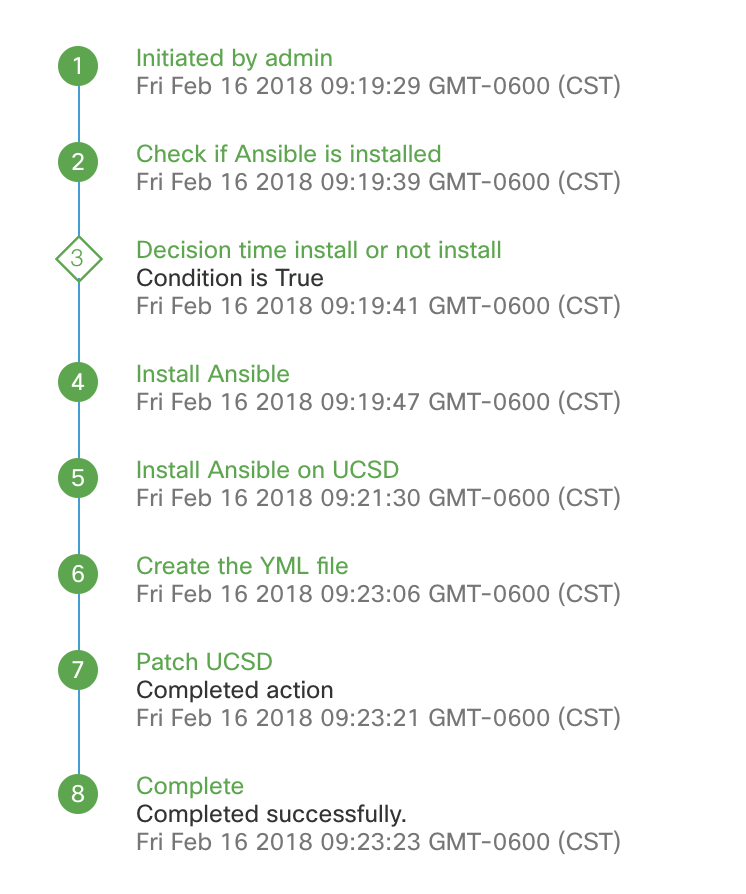
Workflow run with Ansible install:
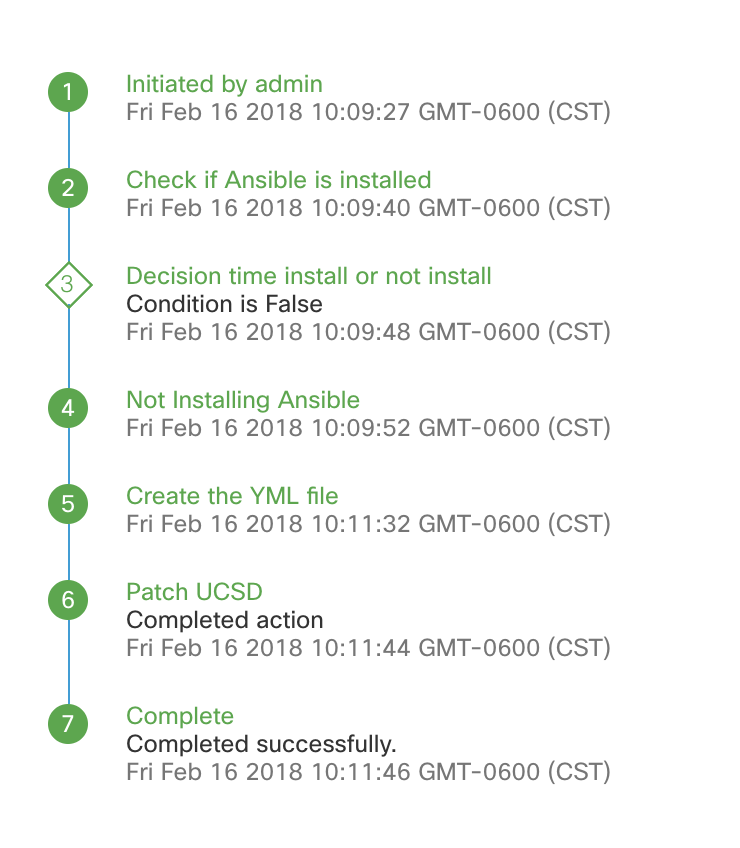
Workflow run without Ansible install: