| Task Name | Random Password Generator version 4 |
| Description | |
| Prerequisites | Minimum Tested UCSD version: 5.4 |
| Category | Custom task |
| Components |
|
| User Inputs | Standard Characters, Special Characters, Password Length |
| User Output | Random Password (of user-input length) |
A Little Background
The reason I started working on this modification of the UCSD - Random Password Generator (thanks go to Patrick Hornerpahorner and Orf Gelbrich ogelbric for that!) was because I was using their random password to modify passwords in AD as well as in some flat files on some linux hosts via SSH commands. In the case of the linux hosts, I was running an SSH task on that linux host and running a text replacement command (sed). I noticed that there were places where certain special characters didn't replace text, but rather added text. As an example, I was modifying a template file on a linux box with some user settings including the phrase 'password = "temp"'. Well, it just so happens that if you use a password with an ampersand sign (&) in the sed command in linux, you get an additive response, not a replacement one. Ex: if my random password was 123&abc and my template password was "temp", sed would change "temp" to "123tempabc", and obviously that's not really going to work. In stead of going in and modifying the custom workflow task that Patrick had created any time I ran into something like this, I decided that I would just expose the special characters as an input from the user. Well, while at it, I figured, why stop with only special characters, why not just expose all the inputs?
What I Ended Up With
Therefore, what I have created is a workflow task that can take inputs from the user for:
1) the array of standard characters
2) the array of special characters
3) the output password length
This will allow the user to dictate the pool of characters that they want to use and therefore dictate the field of choices in a random password output. Hopefully this is helpful for others - it has been very helpful for me.
Example Workflow Using This Task
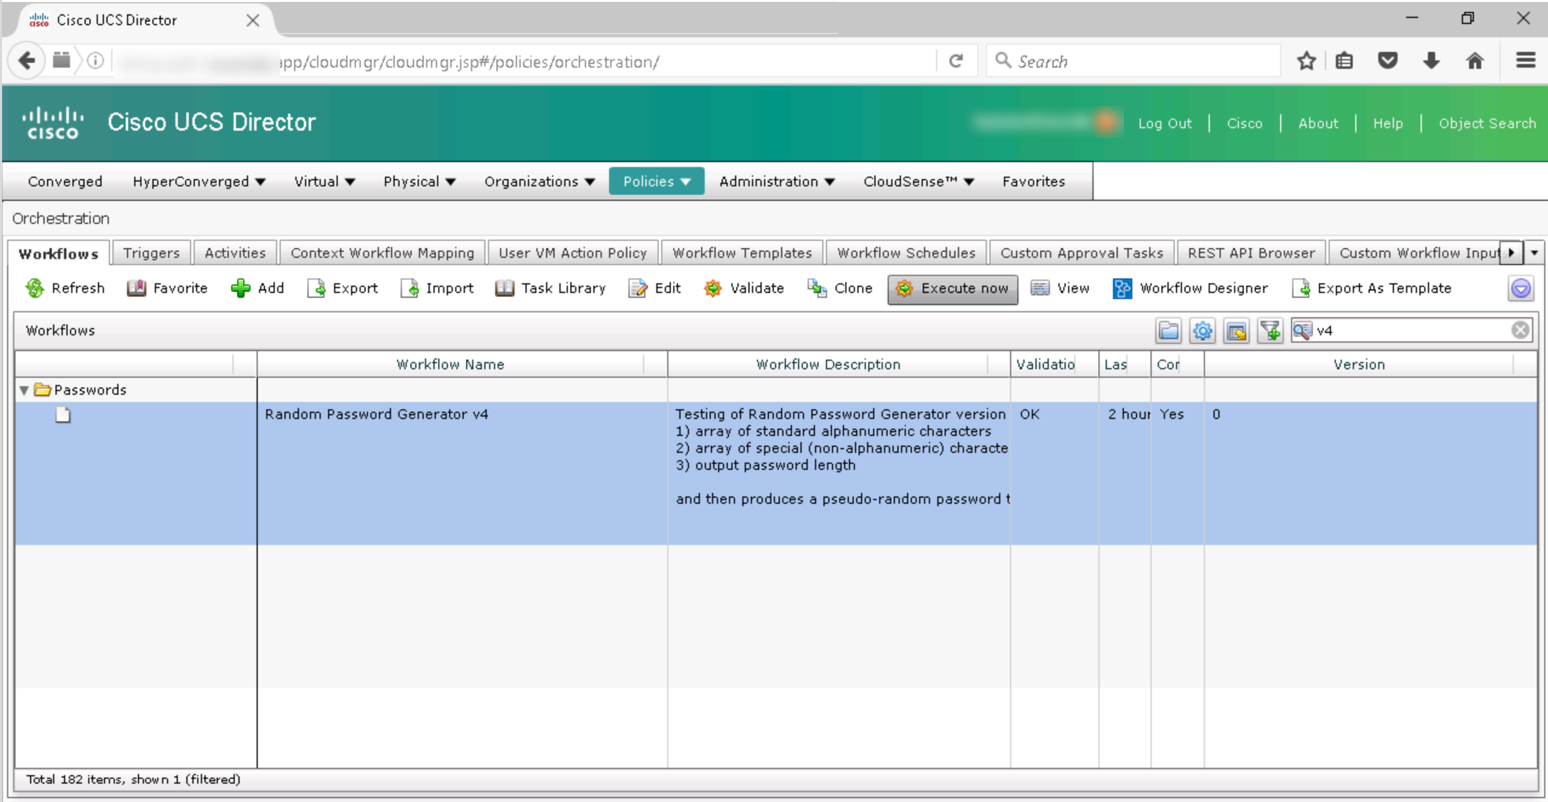
If you download and import the workflow and task attached to this post, you will end up with a custom task called "RandomPasswordGeneratorv4" and a simple workflow called "Random Password Generator v4". Below are some screen shots of a run of that workflow using the following inputs:
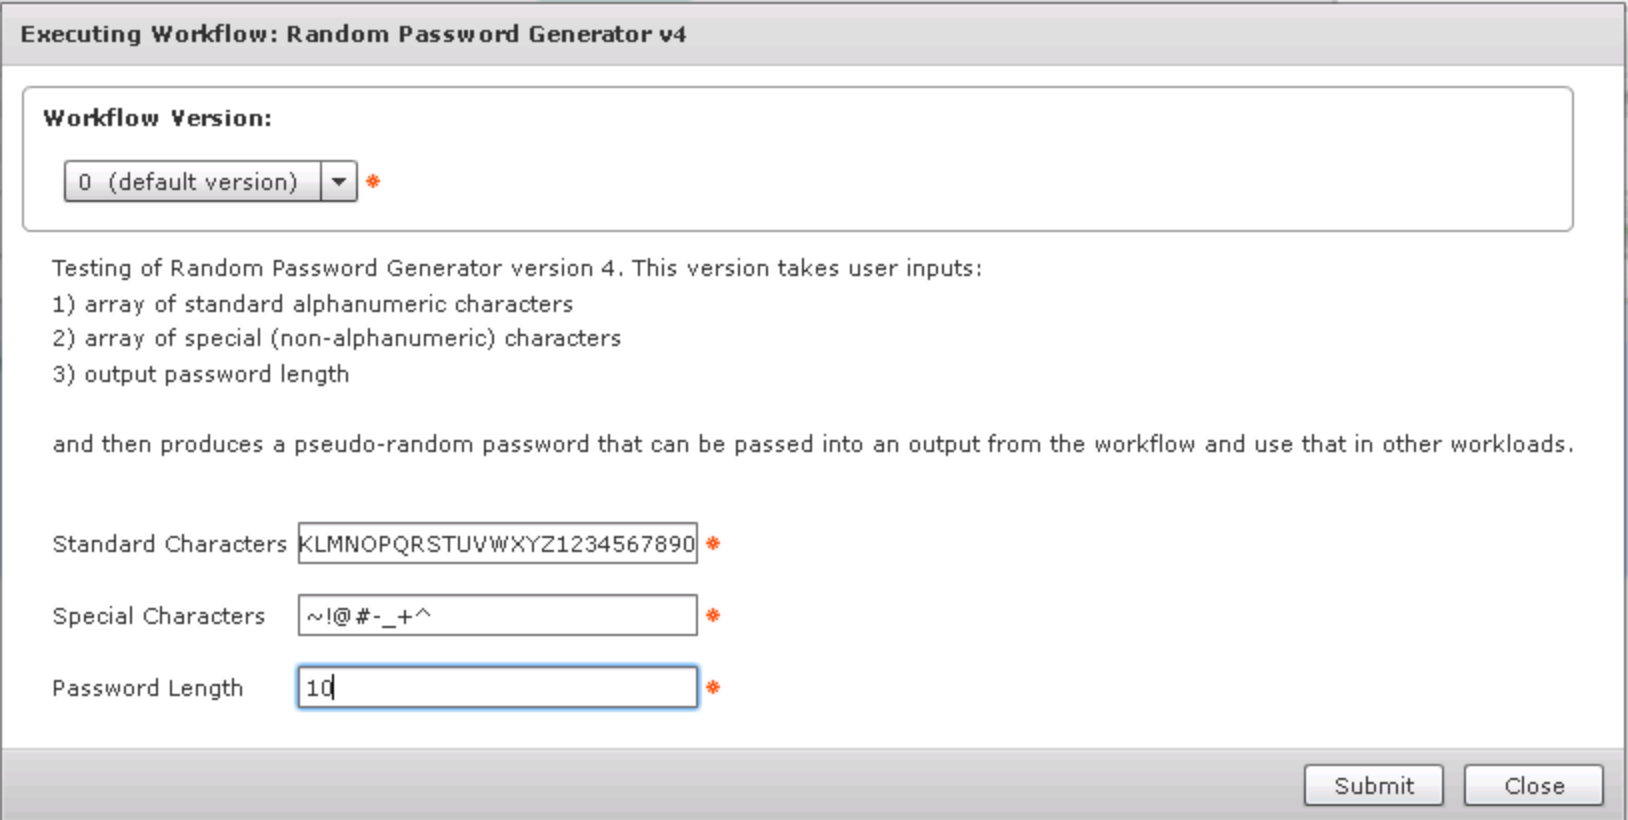
1) Standard Characters: "abcdefghijklmnopqrstuvwxyzABCDEFGHIJKLMNOPQRSTUVWXYZ1234567890"
2) Special Characters: "~!@#-_+^"
3) Output password length of 10 characters
Workflow Selection:
Workflow Execution and User Inputs:
Workflow Output:

Log capture:
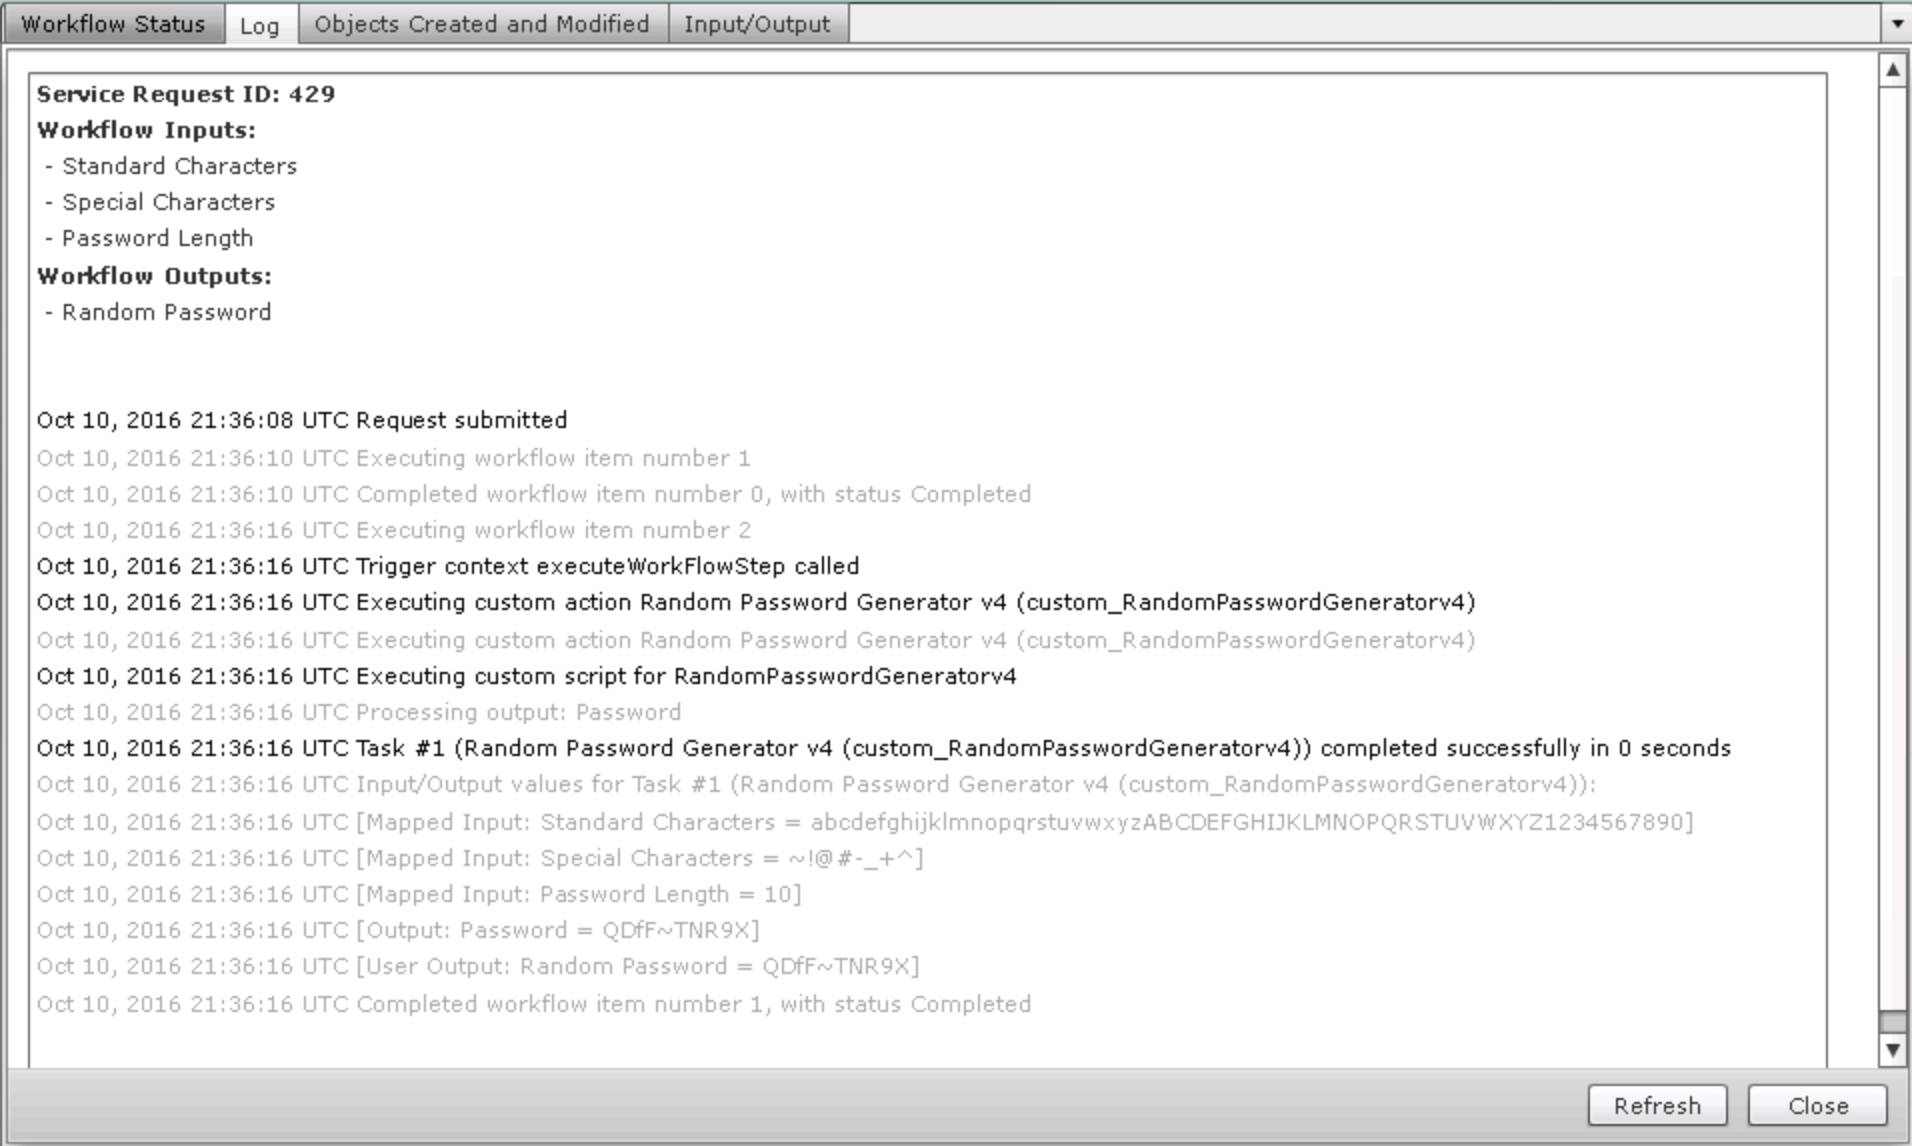
Here you see the inputs and outputs are:
1) Standard Characters: "abcdefghijklmnopqrstuvwxyzABCDEFGHIJKLMNOPQRSTUVWXYZ1234567890"
2) Special Characters: "~!@#-_+^"
3) Output password: "QDfF~TNR9X"
Realistic Usage
Of course, you see a single workflow with a single step that only calls this one single custom task. That's most likely not the realistic way to use this. In my case, I'm using the random password generation task as a hidden (non-user input) task that will generate some random passwords that get used in multiple other complex workflow steps. All of the inputs for that task are not exposed to the user at all... but they are extremely editable by the admin of the workflow. I, as the admin, have them set as a part of the workflow that they don't need to interact with, but I can change any time I find that there is a need to do so, but it doesn't require me modifying any javascript.
BTW, In case you couldn't tell... the workflow that comes in the imported version is just an example of how to use it.
Instructions for Regular Workflow Importing
- Download the attached .ZIP file below to your computer. *Remember the location of the saved file on your computer.
- Unzip the file on your computer. Should end up with a .WFD file.
- Log in to UCS Director as a user that has "system-admin" privileges.
- Navigate to "Policies-->Orchestration" and click on "Import".
- Click "Browse" and navigate to the location on your computer where the .WFD file resides. Choose the .WFD file and click "Open".
- Click "Upload" and then "OK" once the file upload is completed. Then click "Next".
- Click the "Select" button next to "Import Workflows". Click the "Check All" button to check all checkboxes and then the "Select" button.
- Click "Submit".
- A new folder should appear in "Policies-->Orchestration" that contains the imported workflow. You will now need to update the included tasks with information about the specific environment.
