- Cisco Community
- Technology and Support
- Wireless - Mobility
- Wireless - Mobility Knowledge Base
- OmniPeek Remote Assistant (ORA)
- Subscribe to RSS Feed
- Mark as New
- Mark as Read
- Bookmark
- Subscribe
- Printer Friendly Page
- Report Inappropriate Content
- Subscribe to RSS Feed
- Mark as New
- Mark as Read
- Bookmark
- Subscribe
- Printer Friendly Page
- Report Inappropriate Content
10-20-2011 12:34 PM - edited 11-18-2020 02:55 AM
- Introduction
- Installation
- Supported Wireless Adapters and Drivers
- Driver Installation for Linksys USB600N with Windows XP
- Running Omnipeek Remote Assistant
- Capture Settings
- File Properties
- Capture Control
- Uploading the files to TAC
Introduction
Omnipeek Remote Assistant (ORA) - Cisco TAC can provide the Omnipeek Remote Assistant application to assist in performing wireless packet captures. The tool will capture wireless packets and encrypt them for processing by the TAC. A full version of Omnipeek Enterprise is required to decrypt and analyze the capture files.
Installation
You should receive a ZIP file from TAC – such as “ORADist_Default_7.0.zip” (the filename may change with different release versions). Unzip this file to some folder - to run ORA, simply launch OmniPeekRemoteAssistant.exe from that folder.
Supported Wireless Adapters and Drivers
Capturing Wireless Packets with ORA requires the use of supported Wireless Network Adapters along with the appropriate driver version. To view a complete list of supported adapters and drivers, please see:
https://mypeek.savvius.com/driver_downloads.php
In most cases, the Mediatek (formerly Ralink) USB adapters will be the easiest to install - and, because you can install multiple USB adapters on a single laptop - they are the best way to get a multichannel capture. The following Mediatek/Ralink adapters have been tested by Cisco TAC:
Linksys WUSB600N (V1 and V2), Linksys AE1000, Linksys AE6000, ALFA AWUS051NH, Netgear A6210 (recommended)
Driver Installation for Linksys USB600N with Windows XP
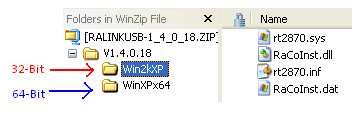
a. If this is the first time using the adapter on the workstation, Windows will start the New Hardware Wizard. Do not search for a driver automatically and click Next. Skip to step 3.
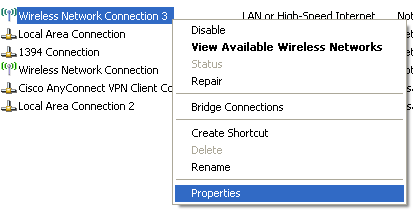
b. If you have previously installed the Linksys USB600N on your workstation, you will need to change the driver to the Omnipeek version. Go to Start > Control Panel > Network Connections and Right Click on the Linksys adapter and click Properties. In this example, the interface is “Wireless Network Connection 3”.
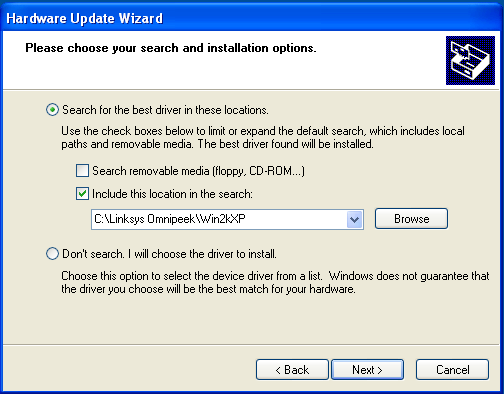
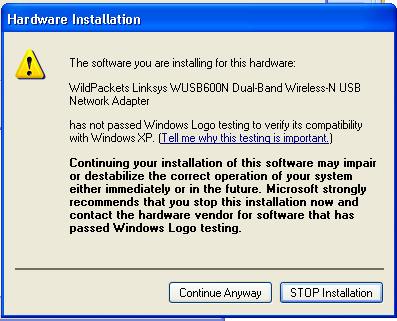
Under the General Tab, Click the “Configure…” button, and then click on the Driver Tab > Update Driver. This will prompt the Hardware Update Wizard.
Running Omnipeek Remote Assistant
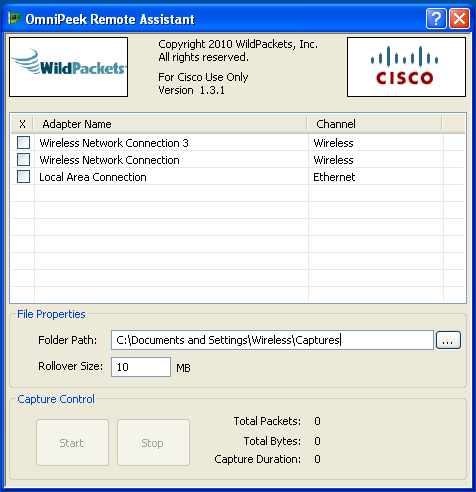
If the correct driver isn’t loaded, ORA may appear to work, but not provide the option to select the desired channel to monitor. The Channel cell will read ‘Ethernet’ or ‘Wireless’ and not offer the option to select a channel:
Capture Settings
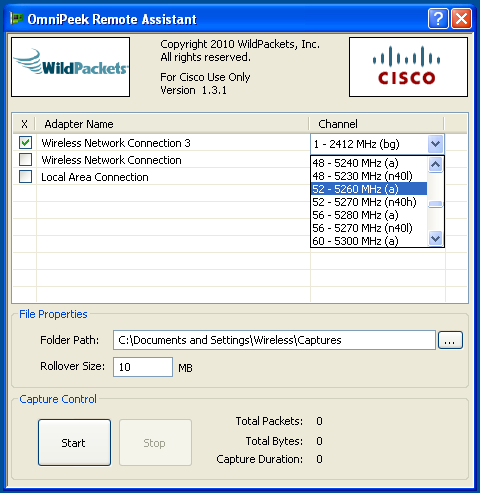
Select the desired adapter(s) to perform the capture and indicate the desired channel. If you have multiple supported adapters installed you can capture on multiple channels simultaneously (but you cannot mix wired and wireless interfaces at the same time). You can select either an 802.11b/g channel or 802.11a channel in the dropdown. You can select 40 MHz 802.11n channels using the (n40l) or (n40h) options. The n40l will be the selected channel and adjacent lower channel, while n40h will be the selected channel and adjacent higher channel.
File Properties
Select the folder you would like to store the capture files in. You can then also specify the file rollover size. Each new filename will include a timestamp so data will not be overwritten.
Capture Control
If you have selected correct adapter/channel settings, you will now be able to click the Start/Stop buttons at the bottom. You will not be able to see the packets, but you will see the counters incrementing. Click Stop when finished.
Uploading the files to TAC
If the capture file(s) are too large for email, you can upload them to your TAC Service Request - see the Customer File Uploads article for more details.
- Mark as Read
- Mark as New
- Bookmark
- Permalink
- Report Inappropriate Content
Nice work Arron! +5
- Mark as Read
- Mark as New
- Bookmark
- Permalink
- Report Inappropriate Content
+5 :-)
Thanks for Sharing Aaron.
Find answers to your questions by entering keywords or phrases in the Search bar above. New here? Use these resources to familiarize yourself with the community: