Introduction
This document will provide instruction of how to create an EX90 console cable and console into a unit.
Core Issue
There may be situations where consoling into an EX90 can solve an issue that is not related to hardware.
A console cable for the EX90 is not provided by default or readily available for purchase, but, one can be assembled relatively easy.
Resolution
Gather the Necessary Tools and Equipment
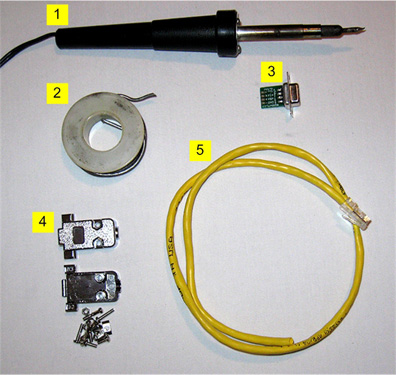
- Soldering iron
- Solder
- RS232 to TTL/CMOS converter Alldav.com sells the one used here. Cisco does not recommend or endorse Alldav specifically.
- DB9 Enclosure Several options are available for the enclosure. This one is being used here.
- Cable w/RJ45 connector on one end Any type of cable with an 8P8C (RJ45) connector could used as long
as pins 1,2,7 & 8 are connected. A standard RJ45 cable is being used here.
You will also need wire strippers (not shown) and coudl need other ancillary tools such as a screwdriver.
Prep the Cable
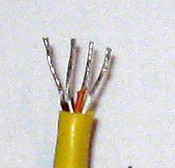
Strip the sheathing from the wires that correspond to pins 1,2,7& 8.
.
Connect the RS232 to TTL/CMOS converter
Connect the RS232 to TTL/CMOS converter to the cable and solder the connections.
Wiring Diagram:
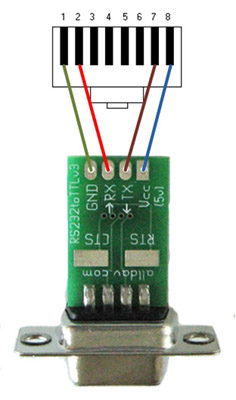
Note: The colors used in the wiring diagram don't correspond to the color of the actual wires.
Cable with RS232 to TTL/CMOS converter connected.
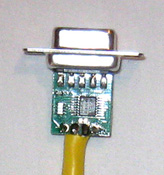
.
Install the Enclosure
Cable with enclosure installed.
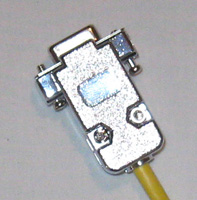
The EX90 console cable is now complete.
Make a Console Connection
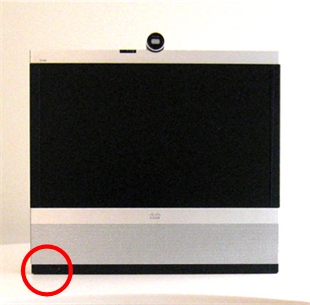
Locate the Console Port
The EX90 console port is an 8P8C (RJ45) connection and is located on the bottom left corner of the unit.
 .
.
Connect to the Console Port
Plug the 8P8C (RJ45) end into the console port.
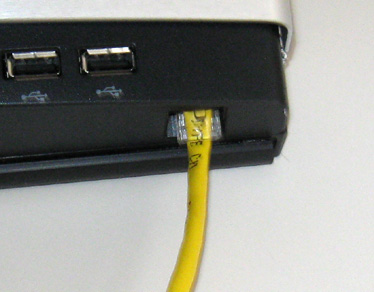
You'll have to lean the unit forward to plug the cable in.
It might be a little awkward to do alone. If someone else is available, ask for their assistance.
As a last resort, lay the unit down. Ensure you have something soft (like a towel) to lay the unit on.
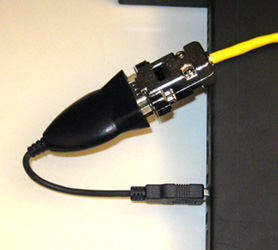
Connect the DB9 to a USB serial adapter and connect to a laptop/PC.
 .
.
Configure a Terminal Emulator Session
Configure your terminal emulator with the following parameters.
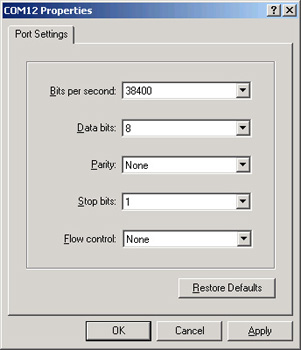
The example uses HyperTerminal forWindows; configuring your terminal emulator may vary slightly.
.
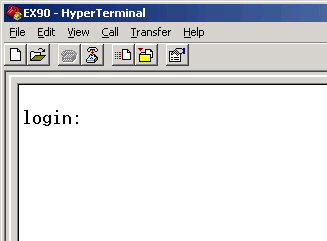
You should see a login prompt:
This completes making an EX90 console and connecting to the console port.