Introduction
Malicious Call Identification works by setting a specific flag in the CDR records. These flagged calls can be reported on, attaining whatever information is necessary to take action. This document cover the configuration procedure to Identify the Malicious Calls using CDR (Call detail record).
What is Malicious Call Identification?
Whenever a User receives a disturbing call, malicious call identification (MCID) feature allows a user to report a call of a malicious nature by requesting that Cisco Unified Communications Manager identify and register the source of an incoming call in the network.
Malicious call identification (MCID), an internetwork service, allows users to initiate a sequence of events when they receive calls with a malicious intent. The user who receives a disturbing call can invoke the MCID feature by using a softkey or feature button while the user is connected to the call. The MCID service immediately flags the call as a malicious call with an alarm notification to the Cisco Unified Communications Manager administrator. The MCID service flags the call detail record (CDR) with the MCID notice and sends a notification to the off-net PSTN that a malicious call is in progress.
Configuration
Below Configuration procedures tested on Cisco Unified Communications Manager 8.5(1)
1. Navigate to the Service Parameters configuration page (System | Service Parameters).
2. Select -> Server
3. Select -> Cisco CallManager Service
4. Under the System section, select True for CDR Enabled Flag:

5. Click -> Save
6. Next navigate to the Serviceability page by clicking on Cisco Unified Serviceability
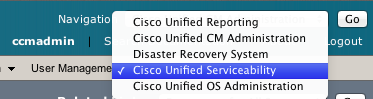
7. Click -> Go
8. Navigate to the Alarm configuration page (Alarm | Configuration)
9. Select -> Server
10. From the Service Group drop-down select -> CM Services:
11. From the Service drop-down, select -> Cisco CallManager
12. Click -> Go
13. Check Enable Alarm under the Local Syslog section.
14. Under the same section, select Informational from the Alarm Event Level drop-down.
15. If using multiple nodes, check Apply to All Nodes
16. Click -> Save
Now the service has been enabled, we can configure a softkey template with the appropriate button and assign it to a device.
1. Navigate back to the Unified CM Administration page
2. Navigate to the Softkey Template configuration page (Device | Device Settings | Softkey Template).
3. Click -> Add New
4. Select Standard User from the Create a softkey template based on drop-down.
5. Click -> Copy
6. Specify a Name
7. Specify a Description

8. Click -> Save
9. From the Related Links drop-down, select Configure Softkey Layout:
10. Click -> Go
11. From the Select a call state to configure drop-down, select Connected
12. Move the Toggle Malicious Call Trace (MCID) to the Selected Softkeys field, in the desired position:

13. Click -> Save
At this point we can assign the softkey template we just created to the appropriate devices. After selecting the MCID softkey from the phone, a CDR flag is set for malicious calls. After the button has been selected, we can search the CDR logs for the flag, and determine and provide the information necessary for the authorities to take appropriate action.
Related Information