Get the Meraki Postman Collections!
Postman Collection:
Dashboard API v1
Dashboard API v0
Dashboard Docs:
API Documentation
About
Meraki has an API for managing your cloud network. Although the Dashboard website is very powerful, you may want to manage your network in a more flexible way. For instance, you may frequently have to perform a task that could be automated or want to create your own portal for customers and partners.
Postman is a popular graphical tool for working with REST APIs.
If you are new to programming or a seasoned software engineer, knowing what's possible is half the battle. Postman allows you to interact with APIs by simply entering the URL and parameters into the application. By hitting Send, you will be able to get the API data back, typically in JSON format.
You can also export the API call into your preferred programming language, like Python or NodeJS.
This data consists of name/value pairs, which makes it easy to read and apply logic operations.
Getting Started
Open the Postman Collection and then hit the "Run in Postman" button.

You will be prompted to either install Postman on your computer or via Google Chrome application. The choice is up to you.
Once installed, you should be able to open the collection.
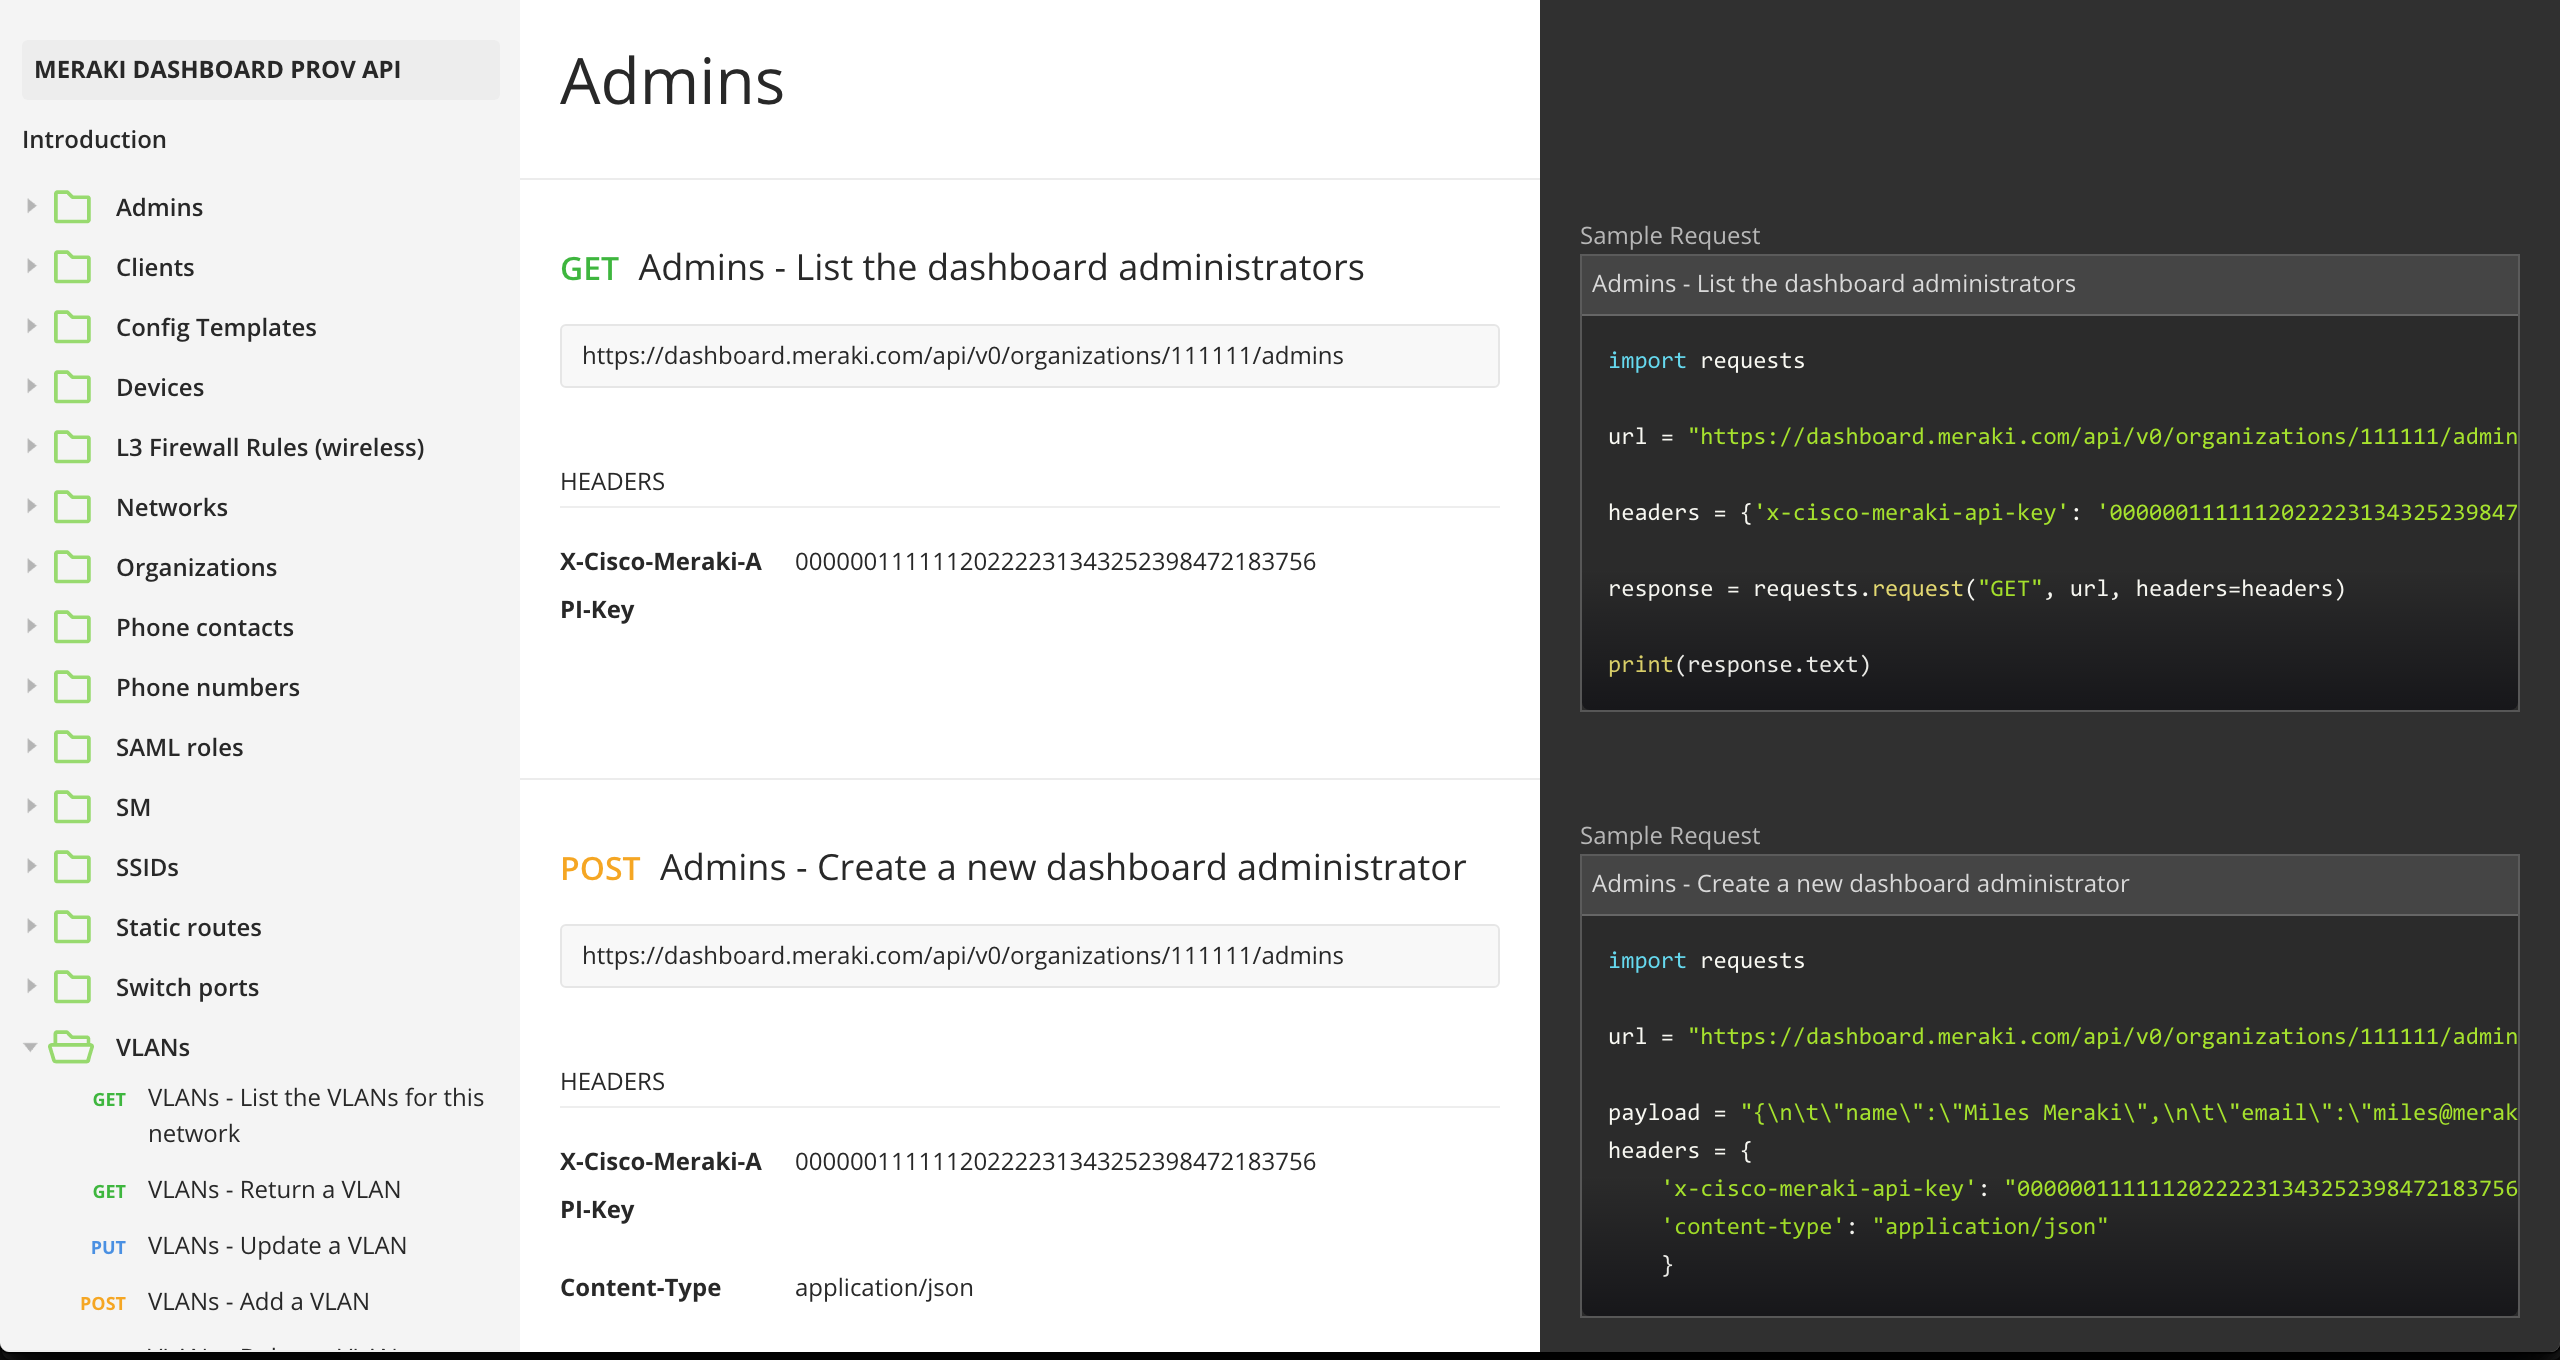
Obtaining your Meraki API key
- Open your Meraki dashboard: https://dashboard.meraki.com
- Once logged in, navigate to the Organization Settings menu.
- Ensure that the API Access is set to "Enable access to the Cisco Meraki Dashboard API"

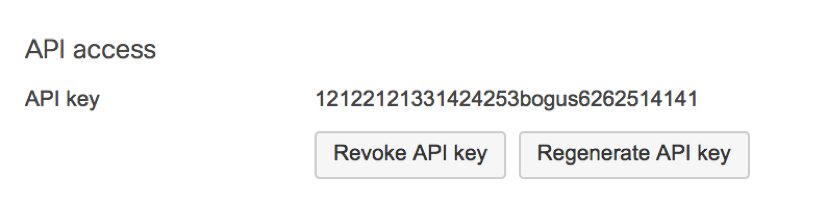
- Then go to your profile to generate the API key. (save this key in a secure location, as it represents your admin credentials)
Configuring Postman
Environment Variables
Since many of your API calls will use the same settings, it’s best to use a variable for this. Postman has a convenient function to handle this called Environment Variables. You can create your own environment to store things like the API key and frequent attributes.
- Open Postman and navigate to the top right corner. Click on the “eye” icon to manage your environment, and then “edit”.

- To start with, create a VARIABLE for the API key (this name is different depending on Collection version)
- Then place your API key in the value form.
0000000123123123671547612576125764 (your real key)
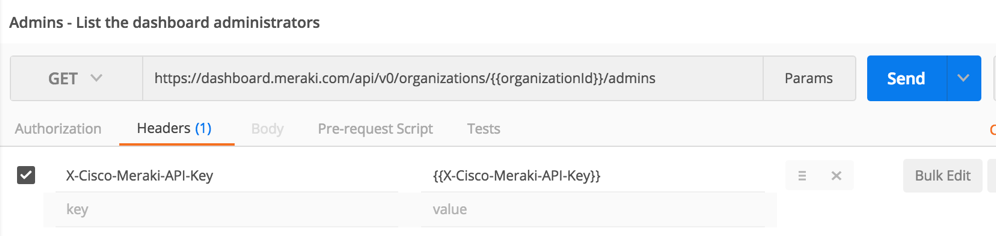
- The headers are automatically applied to each API request in the official collection using your variable. Alternatively, you can access these variables in your API calls with following syntax: {{youVariable}}
Create a Postman Collection
Collections are a way to group related API calls. You can do this for various platforms or use cases. Today we will be creating a collection for a customer PoC.
- To create and save a collection, you first create an API call. Then hit the Save As.. button, which will allow you to create your collection and add any details.
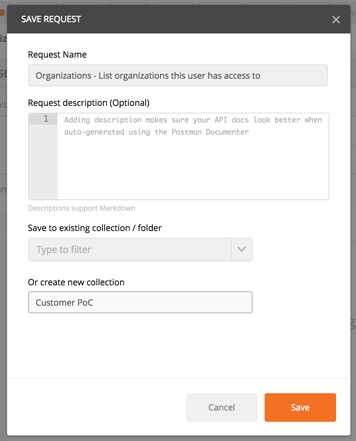
- You will now have a collection on the left menu.
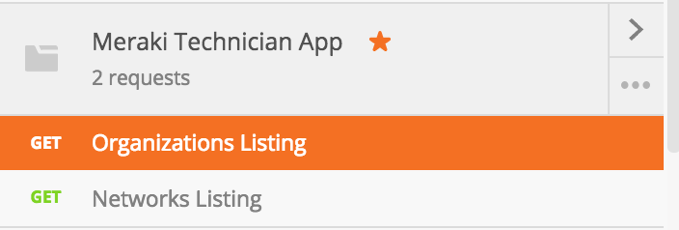
- You can also duplicate calls and move them between collections. This makes routine tasks very easy.

Sample Proof of Concept demonstration
Scenario
A large retail customer needs to roll-out Meraki APs at hundreds of locations and will use local 3rd party technicians to complete the task. Since they are unclear of the specific serial numbers being delivered to each site, the on-site technician will need to record this information using a custom tool. The technician will then configure an SSID with the location’s preferred name and password. Finally, a report of the inventory, license status and potentially other reports should be available.
Developer Meeting
The developers are excited to build a Meraki Technician App, but first need to understand how to gather the following information. Your mission is not to program the software, but to demonstrate the various API calls to provide the details and functions they require.
Objective
Build a Postman collection of API calls to demonstrate the ability for Meraki to deliver on the application requirements.
Requirements from developers (your tasks for PoC)
- List organizations the technician has access to
- List networks for the selected organization
- List inventory
- List license status
- Create a network
- Bind the network to a template
- Remove a device
- Remove an AP from your default lab network (note its serial)
- Claim device
- Claim the AP into your new network
- Update the attributes of an access point
- Change the tag of the access point to “labRoom”
- List SSIDs
- Modify the SSID name and PSK
- Set an SSID name to “Lab-YourName”
- Set the WPA2 PSK to “Meraki123!”
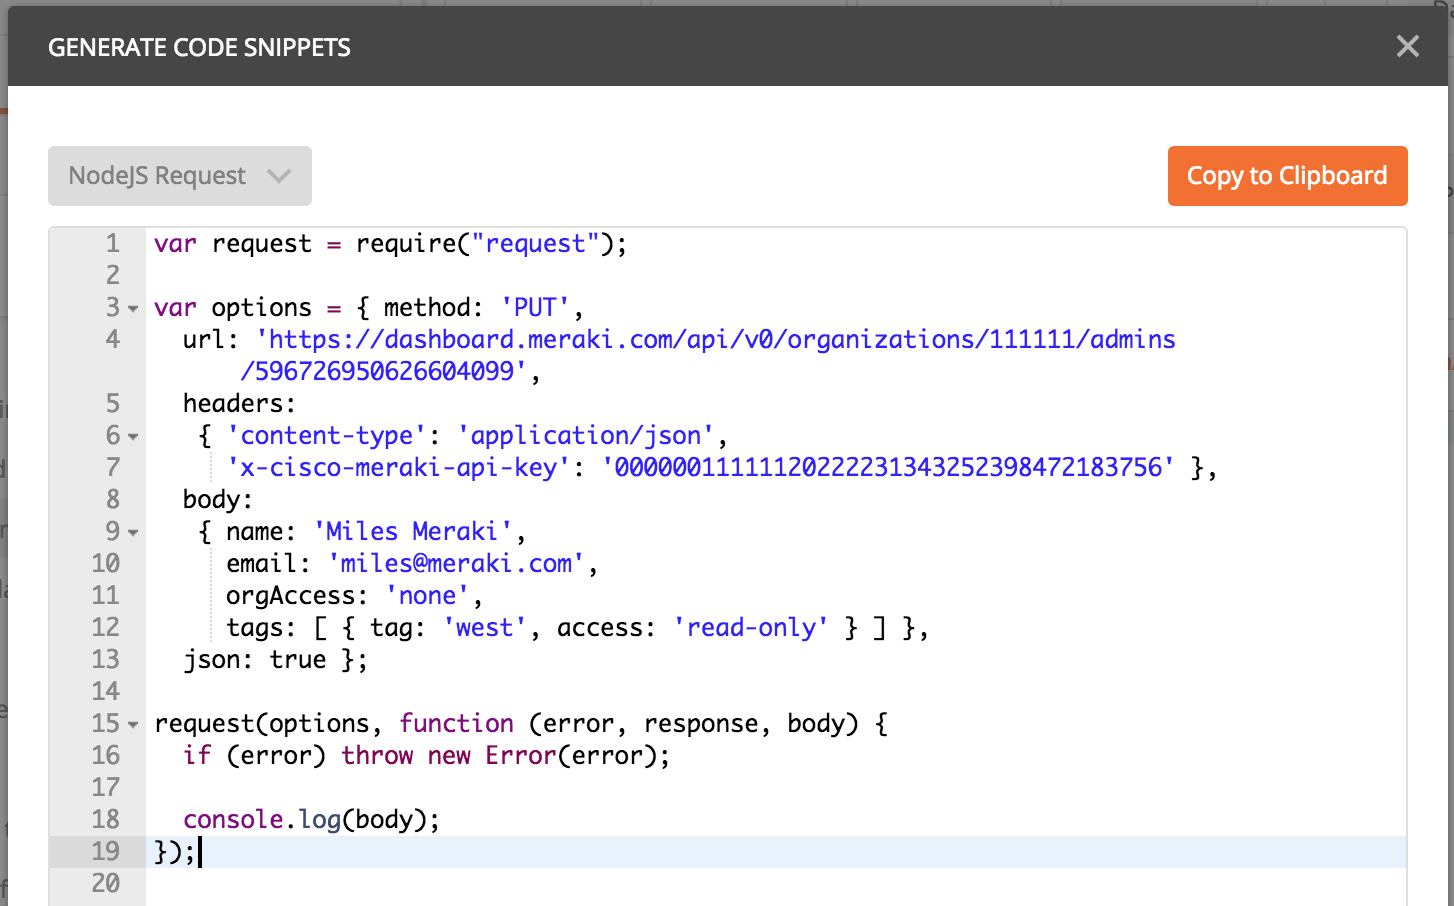
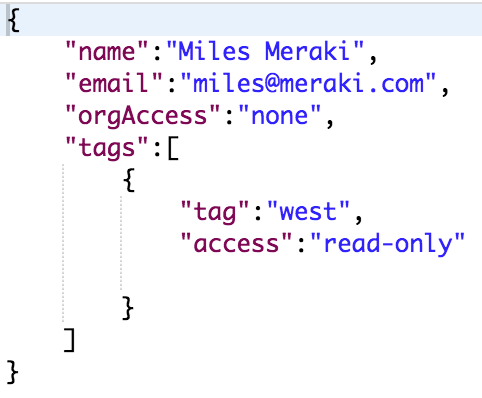
- Create a read-only admin account
- Create an administrator account using your name & email.
Written by Cory Guynn
May 30th, 2017 (updated Feb 4, 2021)
