- Cisco Community
- Technology and Support
- Networking
- Switching
- Why did my switch(SG300-28) disconnect ?...
- Subscribe to RSS Feed
- Mark Topic as New
- Mark Topic as Read
- Float this Topic for Current User
- Bookmark
- Subscribe
- Mute
- Printer Friendly Page
Why did my switch(SG300-28) disconnect ?...
- Mark as New
- Bookmark
- Subscribe
- Mute
- Subscribe to RSS Feed
- Permalink
- Report Inappropriate Content
09-15-2015 05:07 AM - edited 03-08-2019 01:46 AM
Hi all,
whoo.. whenever I have a question, I use this forum..
In order to set up by myself, I enthusiastically configured it...while searching useful manual..but failed ,
So I'm here to ask you guys my issues..
Actually the task I should do is to assign IP address each vlan..
So I followed below useful manual I found.
But I found one problem..
That is, as you can see the below contents, there is a RED font I write down.
First time that's alright! very good steps..
But after (RED font)procedure, my switch was disconnected, FAILED.
After that, web site environment was changed ( unable_to_use_web_site.png)
So I used wire shark and found what's going on. (wireshark_contents.png)
In my surroundings, there's no person who teach me...
Please teach me ...
Thank you.
-----------------------------------------------------contents-------------------------------------------------------------------------------------------------------------------------------------------------------
This article will show how to setup a Cisco SG 300-20 switch to work on a home / office network.
First of all you need to change your System Mode to Layer 3.
To get to the Console, you can either use the provided serial cable and login with the default userid/pw, or by enabling SSH.
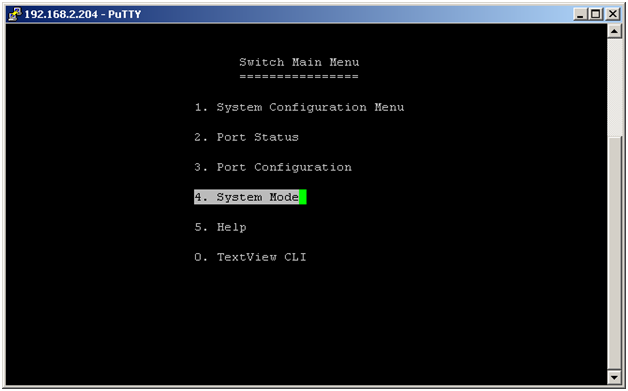
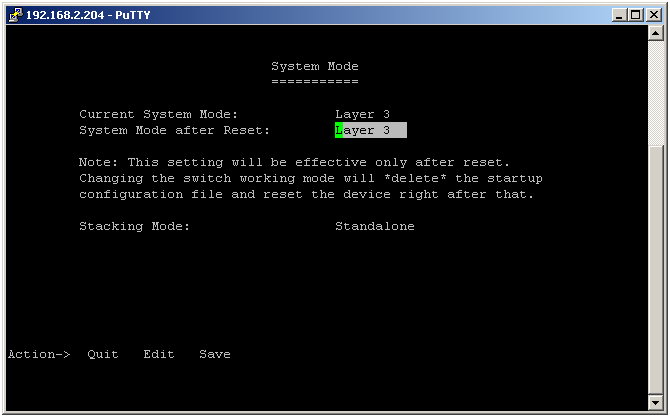
Choose System Mode
Choose Edit, then hit your space bar to toggle the Layer 2 over to Layer 3. Save that and reboot. Important – This will erase everything so backup or make notes
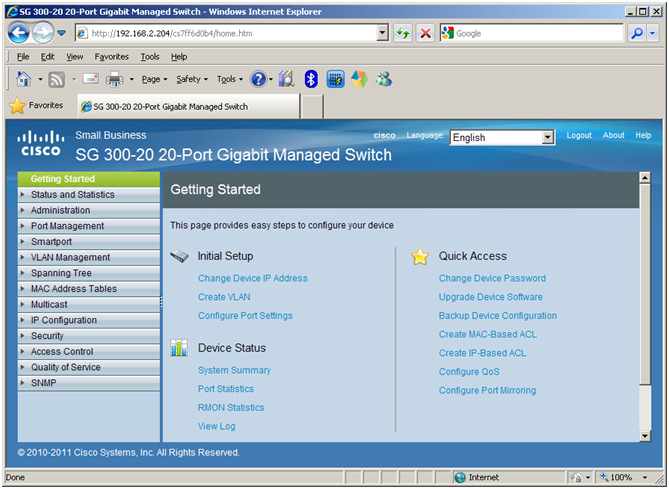
Once the system comes back browse over to the Web GUI interface.
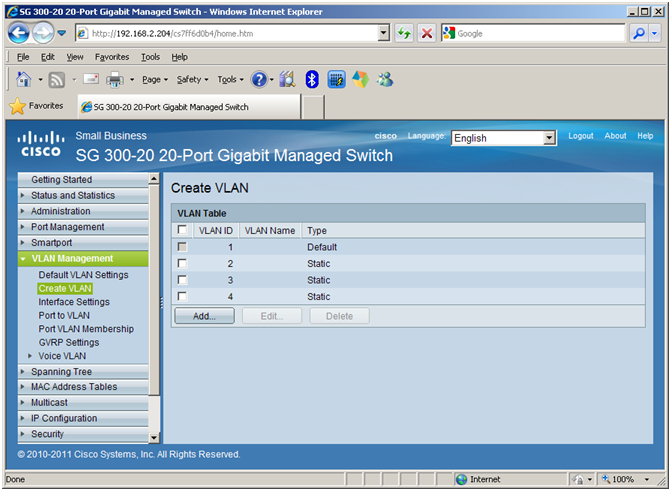
Choose “VLAN Management / Create VLAN” and enter as many VLANs as you like.
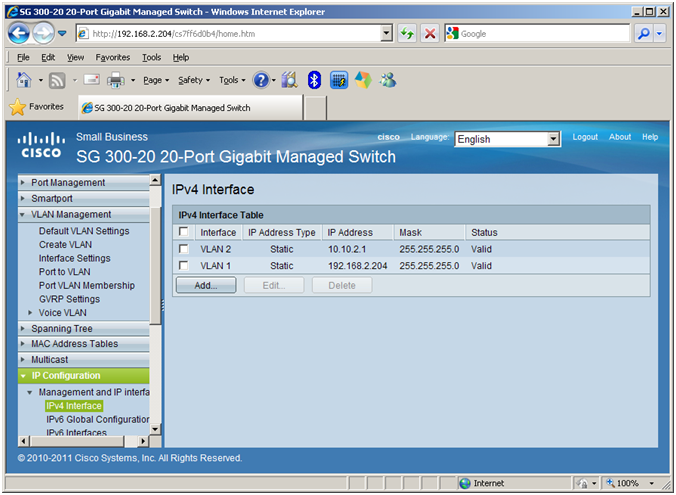
After you create the VLANs, you need to setup the IPv4 Interfaces.
Choose “IP Configuration / IPv4 Interface” and add VLAN 2
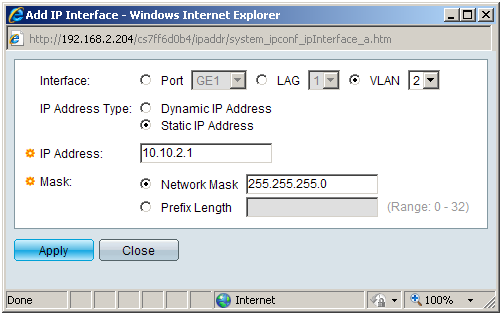 <-- my issue point
Things should look like this
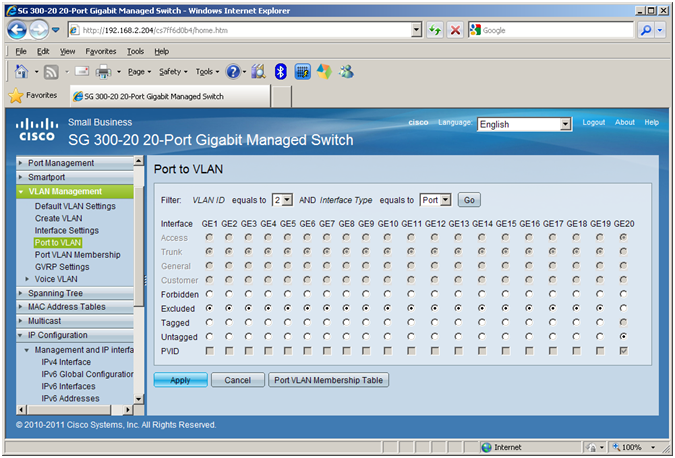
Now you want to Untag the Ports that will be included in your first VLAN.
Change your VLAN ID to 2 and hit GO.
Then untag the port that your first computer is connect to (GE20 in my case on VLAN 2)
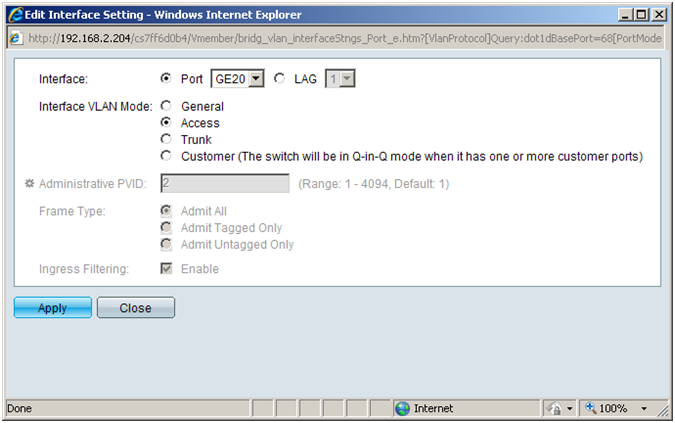
Then under “Interface Settings” you need to change the port to Mode = Access for VLANs to work properly.
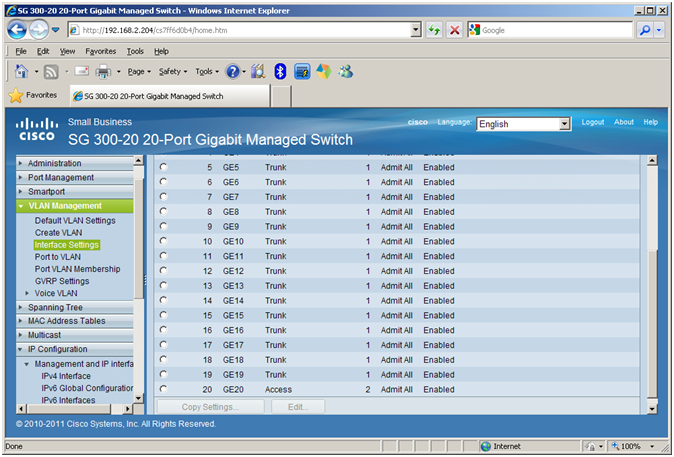
Choose GE20 and Edit
Finishing Touches (Routing)
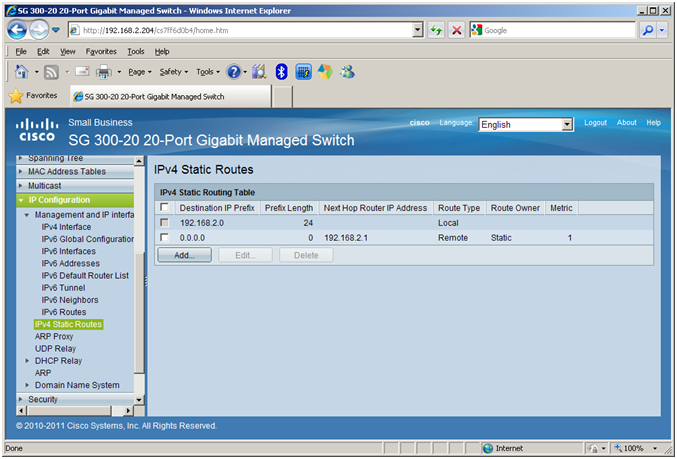
I needed to add a route to my Router using the “IPv4 Static Routes” page.
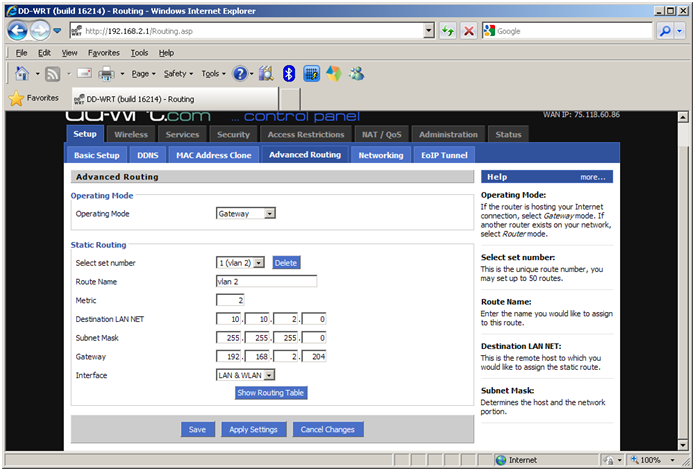
And also a reverse route on my Router which is a DD-WRT.
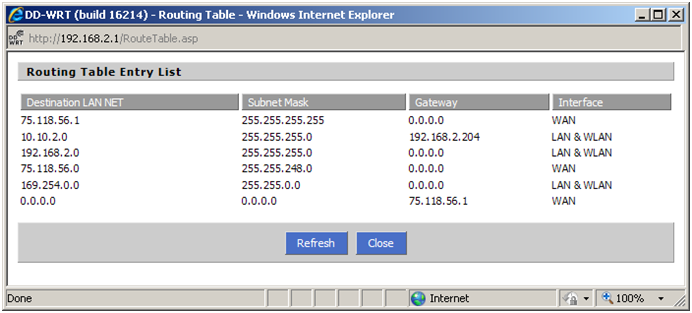
And this is my routing table on my DD-WRT
- Labels:
-
Other Switching
- Mark as New
- Bookmark
- Subscribe
- Mute
- Subscribe to RSS Feed
- Permalink
- Report Inappropriate Content
05-11-2016 07:27 AM
Installation of DD-WRT:
- You need to connect your computer to the wireless Linksys WRT54GL with the help of the Ethernet cable.
- Then, launch any popular web browser such as Internet Explorer, Firefox, or anything and then navigate to this DD-WRT download page.
- In the next step, you have to type WRT54GL in to the search box of your router device and click on the model when there is search result displayed on the screen.
- It is important to download the mini-build necessary for the initial flashing through the WEB.
- Then, you have to reset a Linksys WRT54GL router by pressing and also holding a reset button at the back of your device for about 30 seconds.
- Launch a browser and navigate to the ip address 192.168.1.254.
- Once you got a login page, leave your username field blank and type admin as a default password in order to access the administrative page of your router.
- Click on the administration option and then click firmware update.
- In this step, you should click browser button and choose this DD-WRT mini-build you just downloaded. An upgrade process will take a few minutes to finish. You will now get a message indicating the upgrade successful when this new firmware has been successfully installed.
- Reset your Linksys WRT54GL once again by pressing and also holding a reset button for about 30 seconds. DD-WRT has now successfully installed on your wireless router.
Discover and save your favorite ideas. Come back to expert answers, step-by-step guides, recent topics, and more.
New here? Get started with these tips. How to use Community New member guide
