| Prerequisites | - Built on UCSD 5.3
|
| Instructions for Regular Workflow Use: |
- Download the attached .ZIP file below to your computer. *Remember the location of the saved file on your computer.
- Unzip the file on your computer. Should end up with a .WFD file.
- Log in to UCS Director as a user that has "system-admin" privileges.
- Navigate to "Policies-->Orchestration" and click on "Import".
- Click "Browse" and navigate to the location on your computer where the .WFD file resides. Choose the .WFD file and click "Open".
- Click "Upload" and then "OK" once the file upload is completed. Then click "Next".
- Click the "Select" button next to "Import Workflows". Click the "Check All" button to check all checkboxes and then the "Select" button.
- Click "Submit".
- A new folder should appear in "Policies-->Orchestration" that contains the imported workflow. You will now need to update the included tasks with information about the specific environment.
These are workflows that I've put together to make it easier to leverage ACI as the Network Fabric underlying a UCSD Deployment. Some guiding principals of the way this was designed that hopefully will make it easier for others to use it.
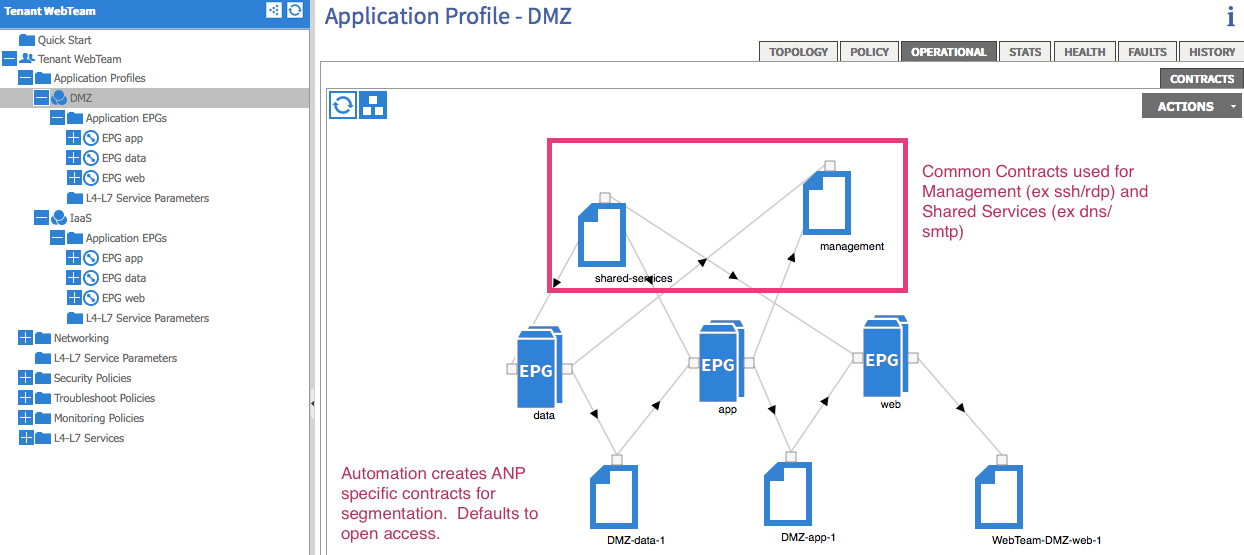
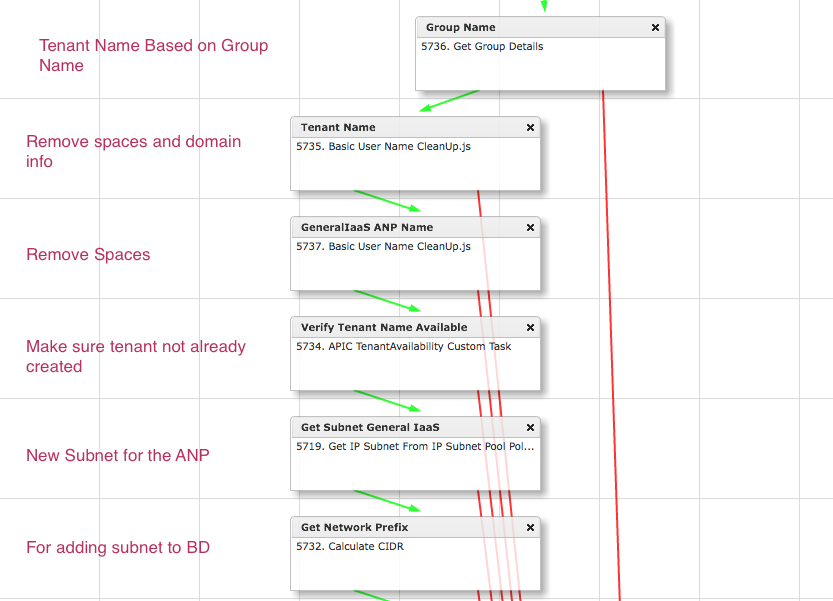
1) Each UCSD Group will have a dedicated ACI Tenant created. The Tenant Name will be based on the Group name with spaces and domain information removed.
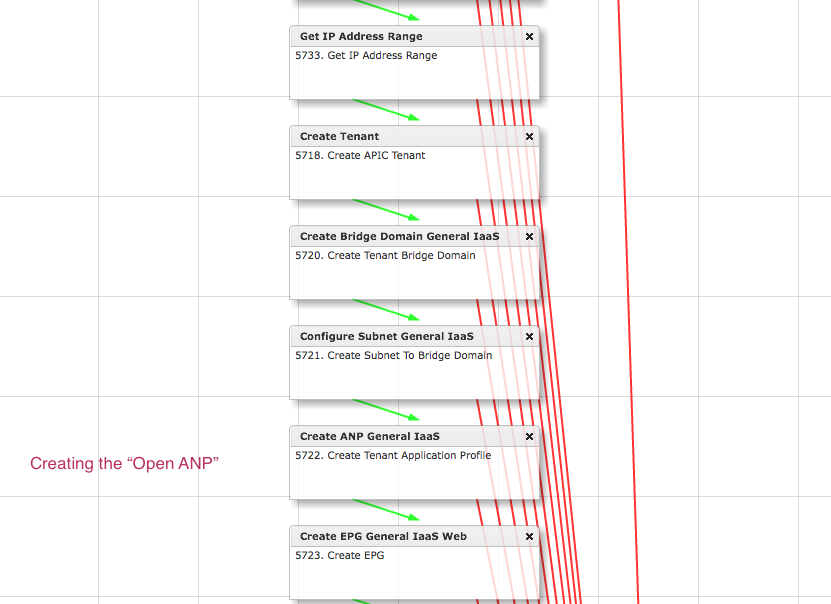
2) A UCSD Group can have 1 or more vDCs for deploying workloads. Each vDC will have an Application Profile providing the network structure
3) Each vDC is built to support 3 Tiers, Web, App, and Data with each Tier having an EPG within the ANP created.
4) Each Group will start with an initial ANP/VDC with an open Security Model with little to no restrictions between tiers
5) New Projects/VDCS can be ordered where a mroe restrictive security policy would be implemented
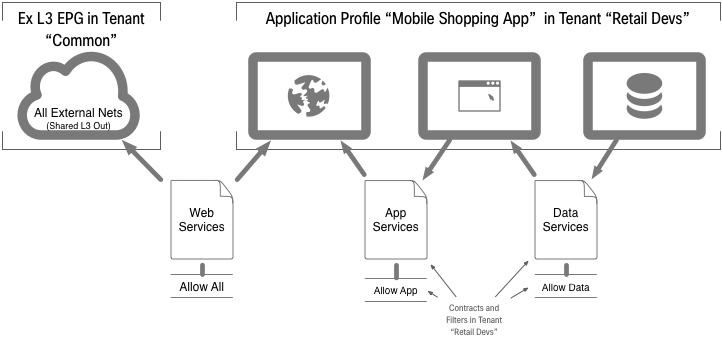
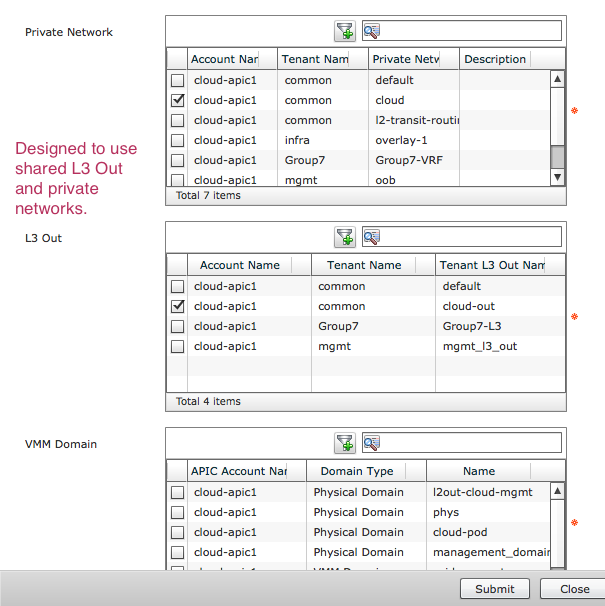
6) Though it might work with other models, this was designed for enterprises using a shared L3 Out located in the "Common Tenant" and a Shared "Private Network".
7) The workflows are intended to be easy to import and use, each contains inputs to specify the APIC Account, L3 Out, Networks, etc that are needed to run. The goal is to NOT require any changes within the workflows themselves.
These workflows are simply for creating the ACI Tenant and ANP constructs. They would typically be combined into a Compound Workflow where the network structure would be consumed by a task to create a vDC and potentially deploy some initial virtual machines. A related community post to check out is one out there for building new 3 Tier VDCs.
UCSD - New 3 Tier vDC with Policies
Included in the attachment
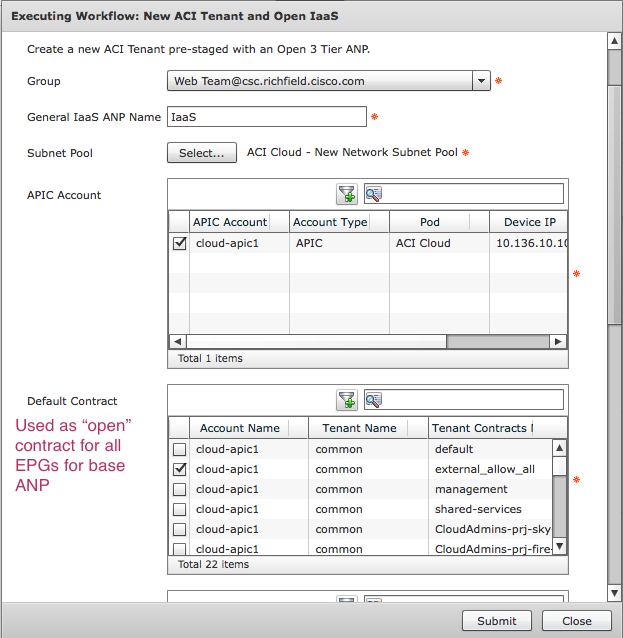
1) Workflow to Create new ACI Tenant with an ANP with open security
2) Workflow to Create a new 3 Tier ANP for a tenant with standard segmentation implemented with contracts
3) Some Custom Tasks that provide features to:
- Get Group Name
- Verify ACI Tenant Availability
- Perform Input Formatting
- Calculate CIDR for a subnet
Diagram of ACI Structure Created for Projects
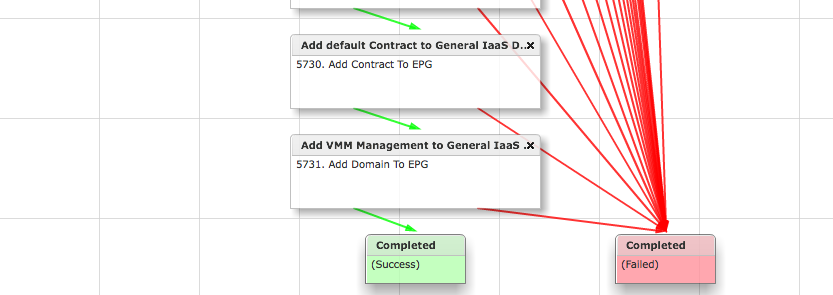
Images for New Tenant and Open IaaS
Execution Inputs
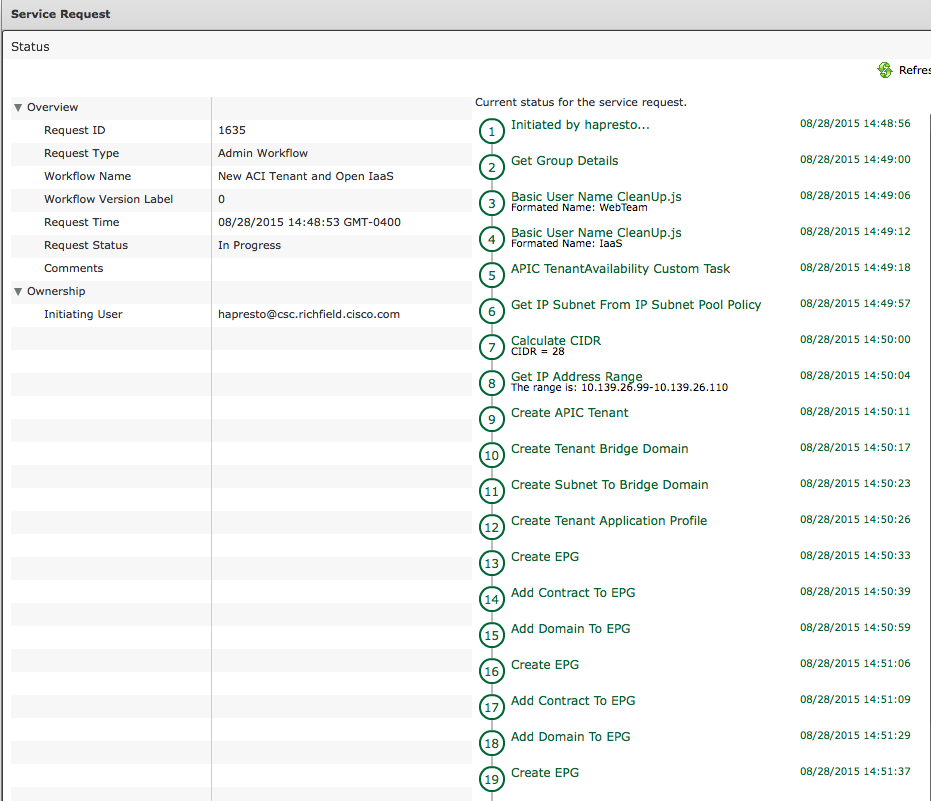
SR Status
Workflow Details

APIC Tenant - With Segmented ANP Details