Cisco Aironet 3600e
LWAPP Mode to Autonomous Mode
CONTENTS
1.Considerations
2.TFTP Configuration
3.DHCP Server Configuration
4.Using a TFTP Server to Return to a Previous Version
5.Reference Documents
1. CONSIDERATIONS
This document explains how to convert a LWAPP (Lightweight Mode) Access Point to Autonomous mode without a wireless LAN controller focusing on Cisco Aironet 3600 Series
Notes:  The lightweight 1300 series access points can only be converted back to autonomous mode using a wireless LAN controller. Document does not apply to Cisco C3201WMIC and Cisco C3201LAP.
TFTPD32 Software should be installed in the computer. Server can be downloaded from http://tftpd32.jounin.net/tftpd32_download.html
2. TFTP CONFIGURAITON
For this process a TFTP server should be configured in a computer connected to the AP with an Ethernet cable. This section explains how to configure the TFTP server.
Software to be used is Tftpd32 which can be downloaded from http://tftpd32.jounin.net/tftpd32_download.html. Once the software is installed, the configuration will be as follows:
Step 0 Open Tftpd32 and select the folder where the new IOS will be placed for the AP to download it. For this example it will be located in the Desktop within a folder named Share.

Figure 2.1. Configuring the share folder for the TFTP server.
Step 1 Configure the IP of the PC NIC as 10.0.0.10 255.255.255.0 and select that IP for the TFTP server as shown in Figure 2.2.
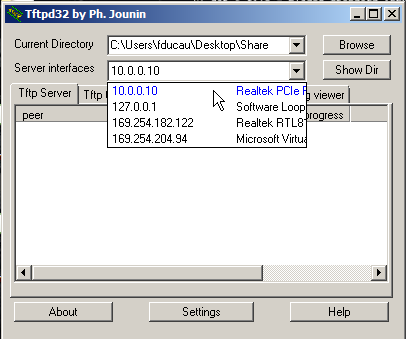
Figure 2.2. Select the network interface with IP address 10.0.0.10
Step 2 Configure the timeout timer for the TFTP server in 30 seconds as shown in Figure 2.3.
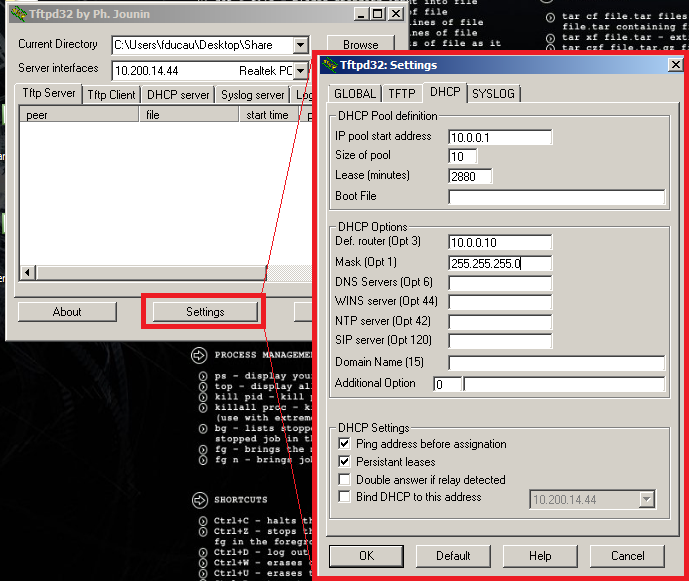
Figure 3.1. DHCP server setup.
4. USING A TFTP SERVER TO RETURN TO A PREVIOUS RELEASE
Follow these steps to revert from LWAPP mode to autonomous mode by loading a Cisco IOS release using a TFTP server:
Step 0 The computer containing the TFTP server should be connected to the AP via Ethernet cable. Furthermore, the AP should be accessible via console.
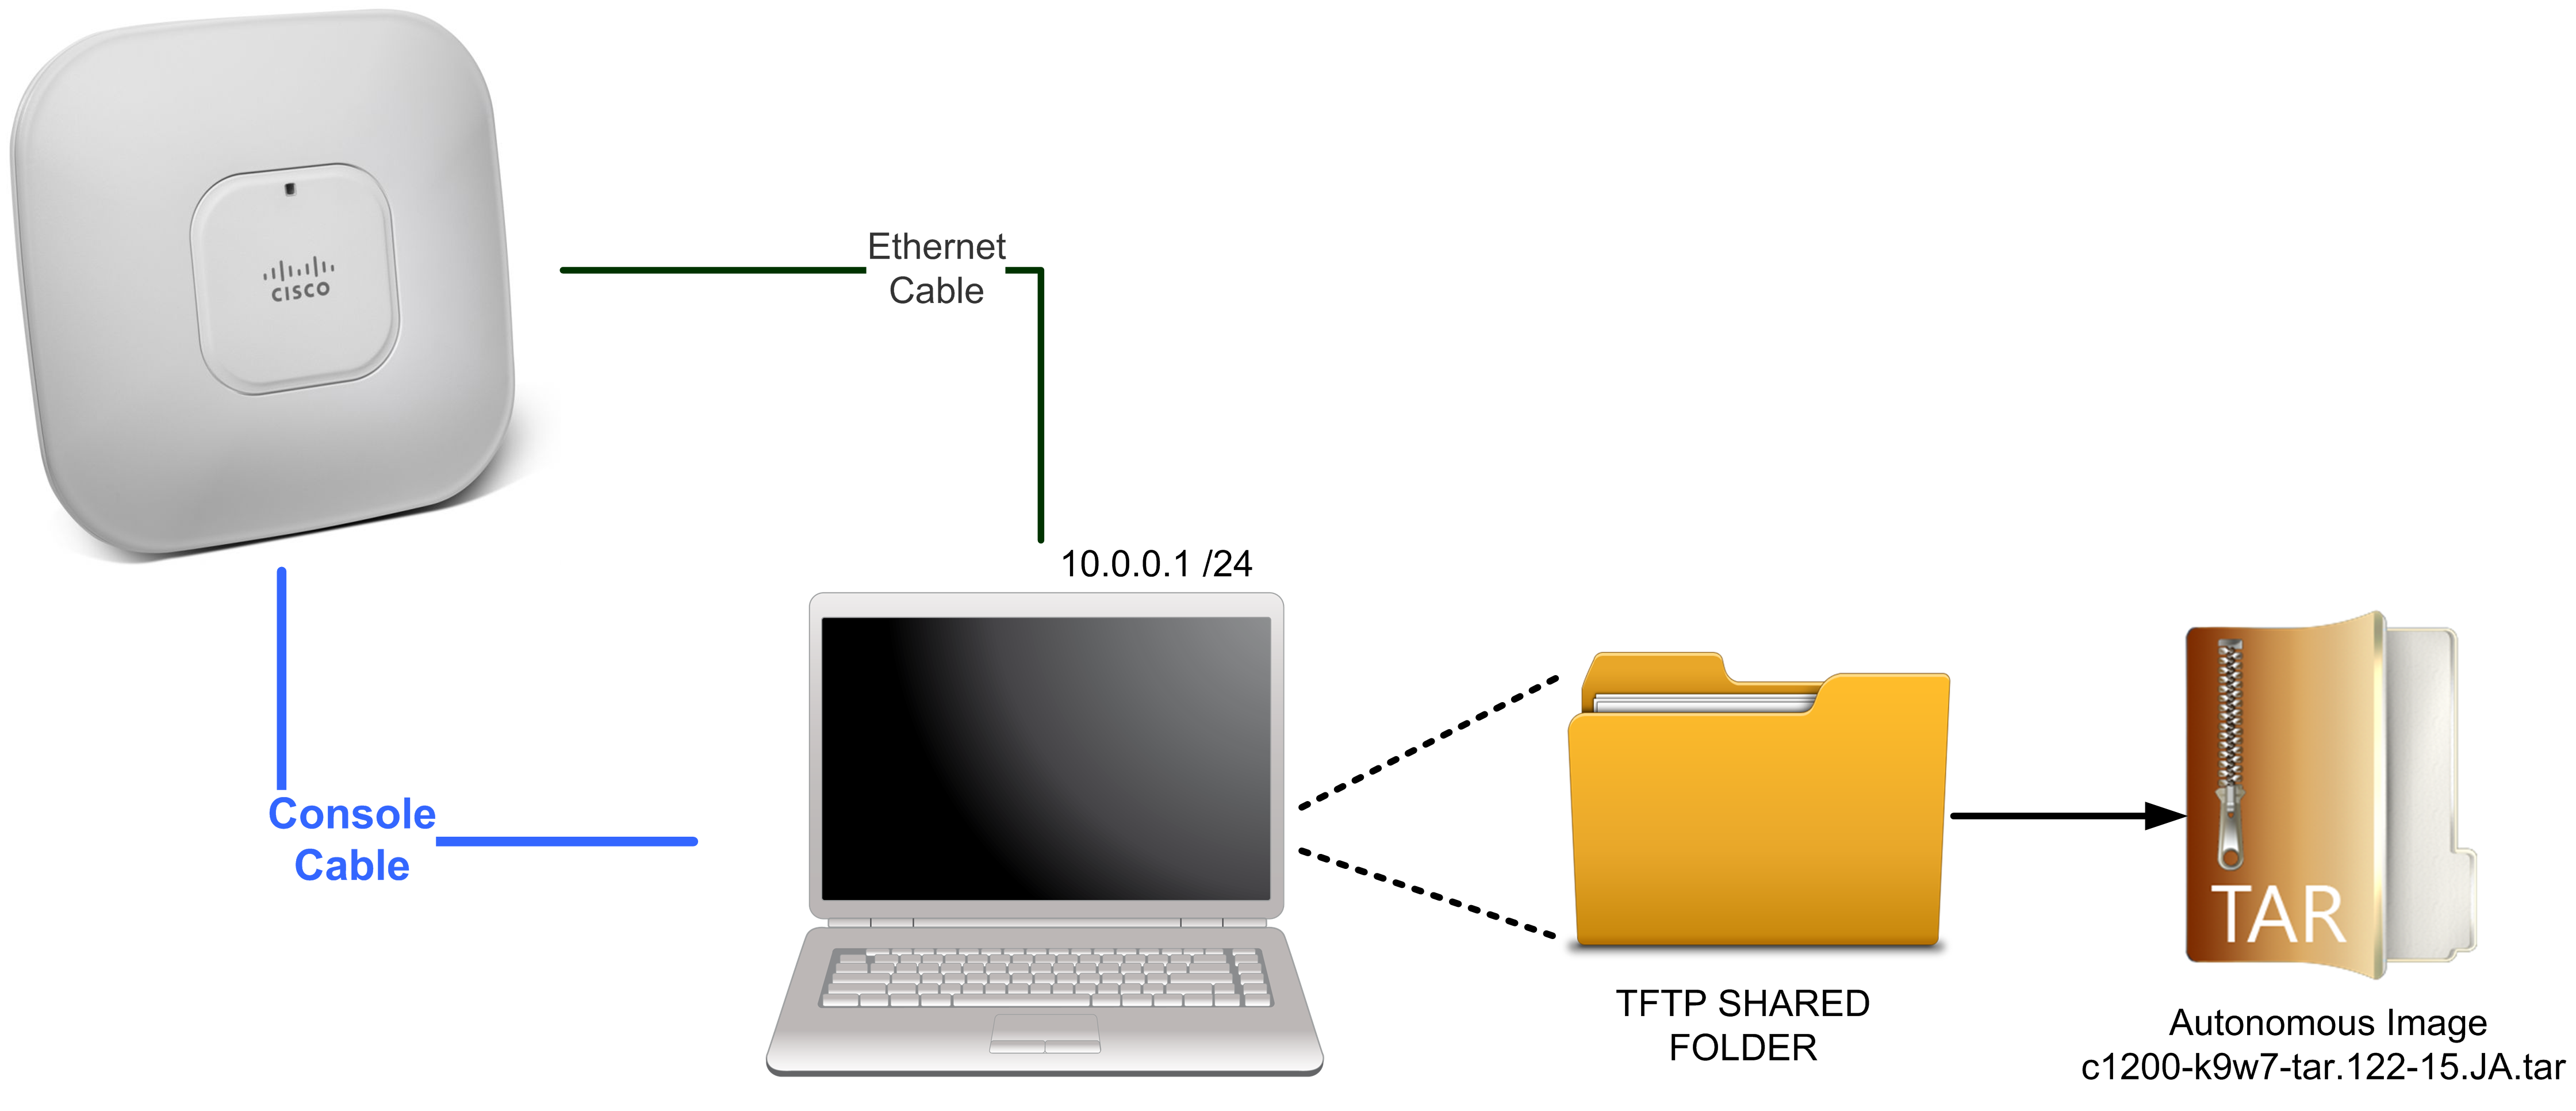
Figure 4.1. Necessary setup for the procedure.
Step 1  The static IP address of the PC on which your TFTP server software runs should be between 10.0.0.2 and 10.0.0.30.
Step 2 Make sure that the PC contains the access point image file (ap3g2-k9w7-tar.152-4.JB5.tar) in the TFTP server folder and that the TFTP server is activated. You can click on Show Dir in TFTPD32 and check that the file is visible.
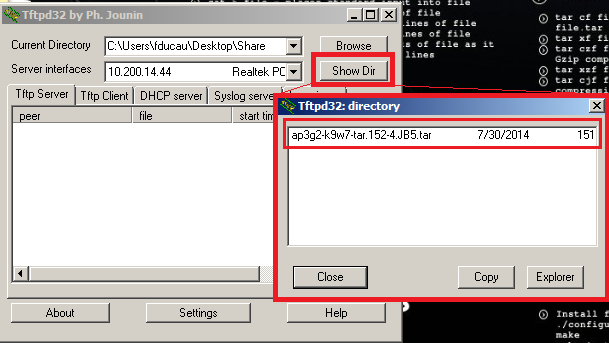
Figure 4.2. Check that the file is in the right folder.
Step 3 On the PC where the TFTP server is located, perform these steps:
a.  Disable any software firewall products, such as Windows firewall, ZoneAlarm firewall, McAffee firewall, or others.
b. Ensure all Windows files are visible. From Windows Explorer, click Tools > Folder Options > View; then uncheck the Hide extensions for known file types check box.
Step 4 Make sure that the image file has the following properties:
Description: WIRELESS LAN
Release: 15.2.4-JB5
Release Date: 02/May/2014
File Name: ap3g2-k9w7-tar.152-4.JB5.tar
Min Memory: DRAM 256 MB Flash 32 MB
Size: 14.41 MB (15114240 bytes)
MD5 Checksum: a2dc17127ce29c6d1a2e04905caeb3d0
Step 5 Execute the following commands in the AP:
Ap> enable
Password: *********
Ap# debug capwap console cli
Ap# conf t
Ap(config)# Interface BVI1
Ap(config-if)# ip address dhcp
Ap(config-if)# do archive download-sw /force-reload /overwrite tftp://10.0.0.2/ap3g2-k9w7-tar.152-4.JB5.tar
AP should start the process of downloading and decompressing the new image.
Step 6 Wait until the access point reboots, as indicated by all LEDs turning green followed by the Status LED blinking green.
Step 7 After the access point reboots, reconfigure it using the GUI or the CLI.
6. REFERENCE DOCUMENTS

