Introduction
This document covers the configuration procedure for Cisco Unified IP Phone VPN solution.
List of Phones supported
Cisco VPN Phone is supported on 7942G, 7945G, 7962G, 7965G, 7975G, and 99xx
series as well as 89xx series Cisco Unified IP Phones. Also on Cisco DX650, Cisco Dual mode for Android, Cisco Dual mode for iPhone, Cisco Jabber for Tablet
To view list of phones supported:
Go to Cisco Unified CM Administration and select Cisco Unified Reporting > System Reports > Unified CM Phone Feature List >
Generate a New Report > Feature: Virtual Private Network Client

Requirements for Implementing VPN Phone
Ensure that you meet these requirements before doing the configuration
- Cisco IP Phone supported Models - 79xx / 89xx
- CUCM 8.0.1 or later
- Cisco ASA IOS 8.0.4 or later
- AnyConnect VPN Pkg 2.4.1012
- AnyConnect premium license and AnyConnect for Cisco VPN Phone license
Cisco ASA VPN Configuration
Sample configuration:
ip local pool SSL_Pool 10.10.10.1-10.10.10.254 mask 255.255.255.0
group-policy GroupPolicy_SSL internal
group-policy GroupPolicy_SSL attributes
split-tunnel-policy tunnelall
vpn-tunnel-protocol ssl-client
tunnel-group SSL type remote-access
tunnel-group SSL general-attributes
address-pool SSL_Pool
default-group-policy GroupPolicy_SSL
tunnel-group SSL webvpn-attributes
authentication certificate
group-url https://asa5520-c.cisco.com/SSL enable
webvpn
enable outside
anyconnect image disk0:/anyconnect-win-3.0.3054-k9.pkg
anyconnect enable
ssl trust-point SSL outside
Configuration on CUCM for Cisco VPN phone feature
1. Log in to CallManager and choose Unified OS Administration > Security > Certificate Management > Upload Certificate > Select Phone-VPN-trust in order to upload the certificate file saved in the previous step.
2. Configure VPN Gateway
Go to Cisco Unified CM Administrator and select Advanced Features > VPN > VPN Gateway
In the VPN Gateway Configuration window, complete these steps:
a. Enter the name for the VPN gateway with description
b. Enter the VPN gateway url in the URL field
c. Select the certificate that was uploaded to callmanger previously

3.Create a VPN group under Advanced Features > VPN > VPN Group
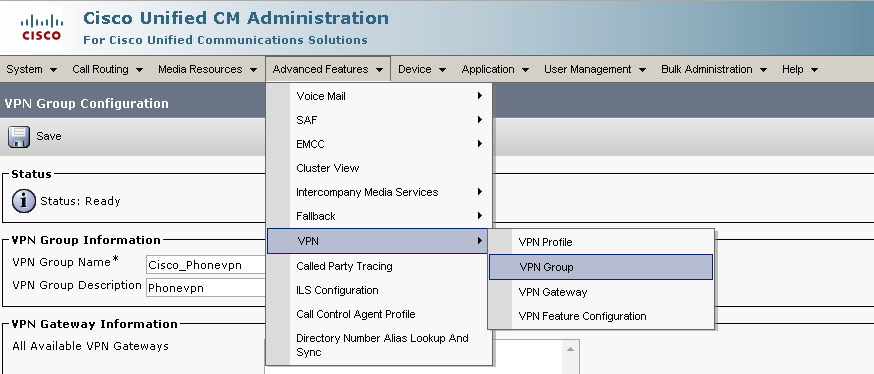
Select the VPN gateway in the VPN group created.
4.Configure the VPN Profile under Advanced Features > VPN > VPN Profile.

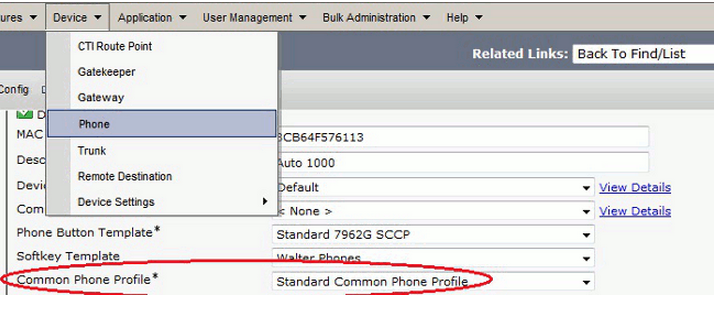
5. Assign the VPN group and profile to the Common Phone Profile by going to
Device > Device Settings > Common Phone Profile .

6.If you created a new profile for specific phones/users, go to the Phone Configuration window. In the Common Phone Profile field, choose Standard Common Phone Profile.
7. Test whether the VPN works internally. Configure the Cisco Unified IP Phone with a TFTP server manually and register the IP Phone for testing.
8. On the Cisco Unified IP Phone, go to Settings > Security Configuration > VPN Configuration . Enable VPN and use your credentials/certificate to establish a VPN connection.
Verification:
Check the status of IP Phone registration on CUCM using VPN IP address.