Prior to anything, make sure the WSA has basic configs (IP address, licensing, etc).
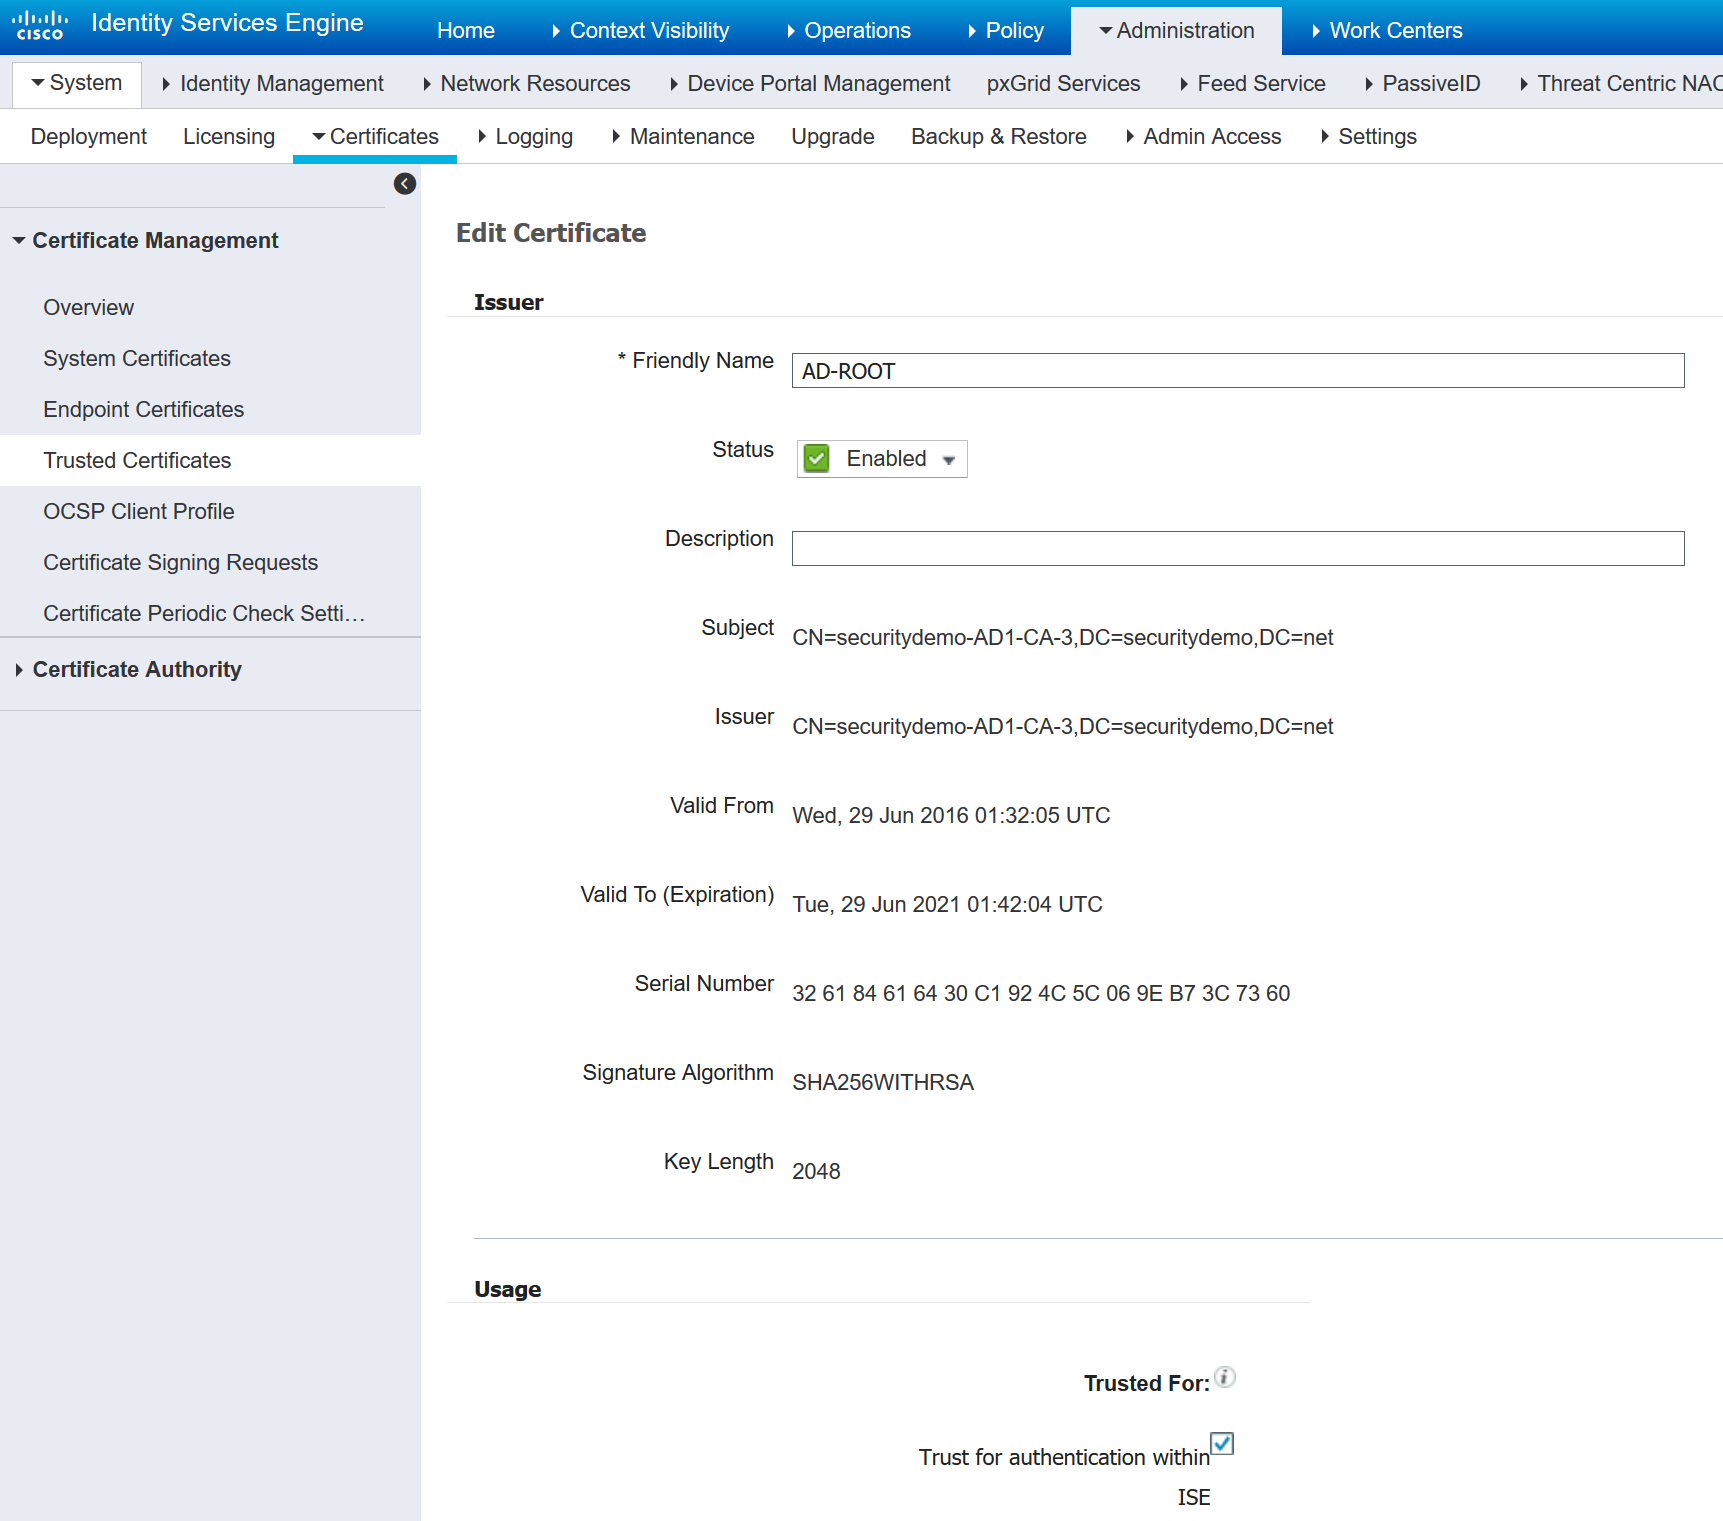
For ISE, navigate to Administration>System>Certificates>Trusted Certificates and make sure the Root CA certificate is uploaded and that it’s Trusted for Client Authentication and authentication within ISE:
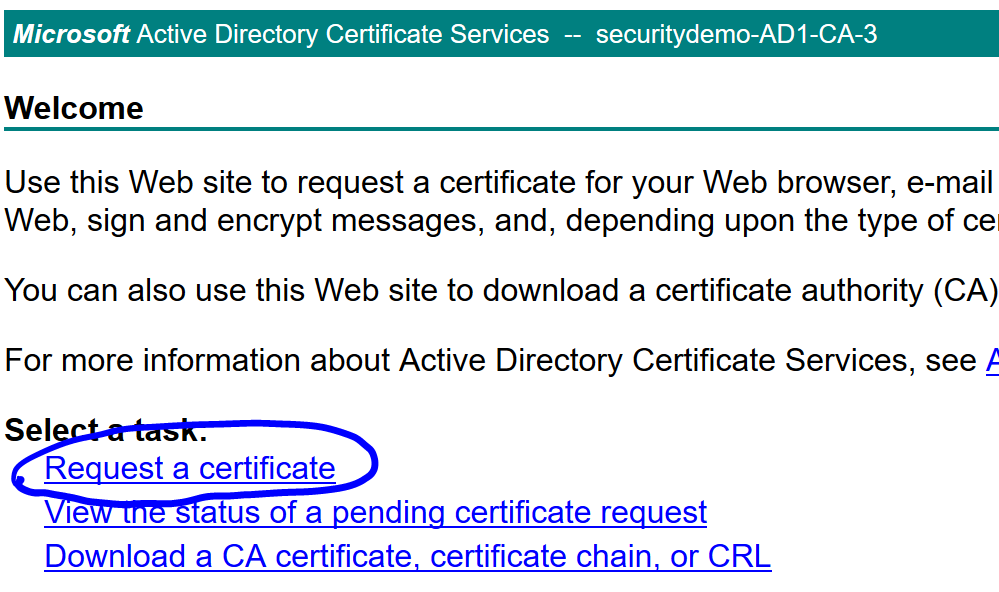
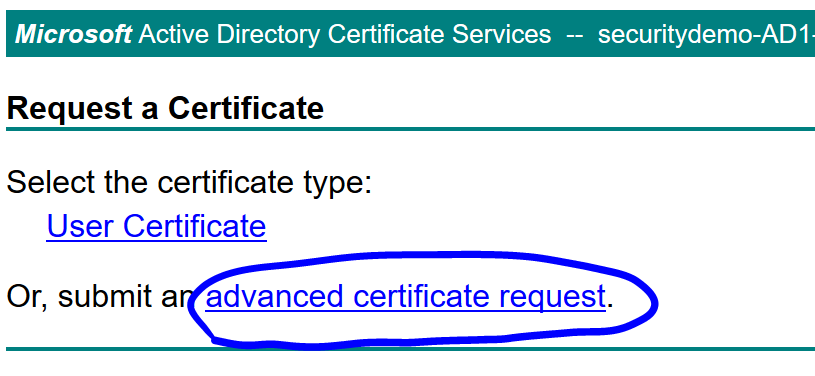
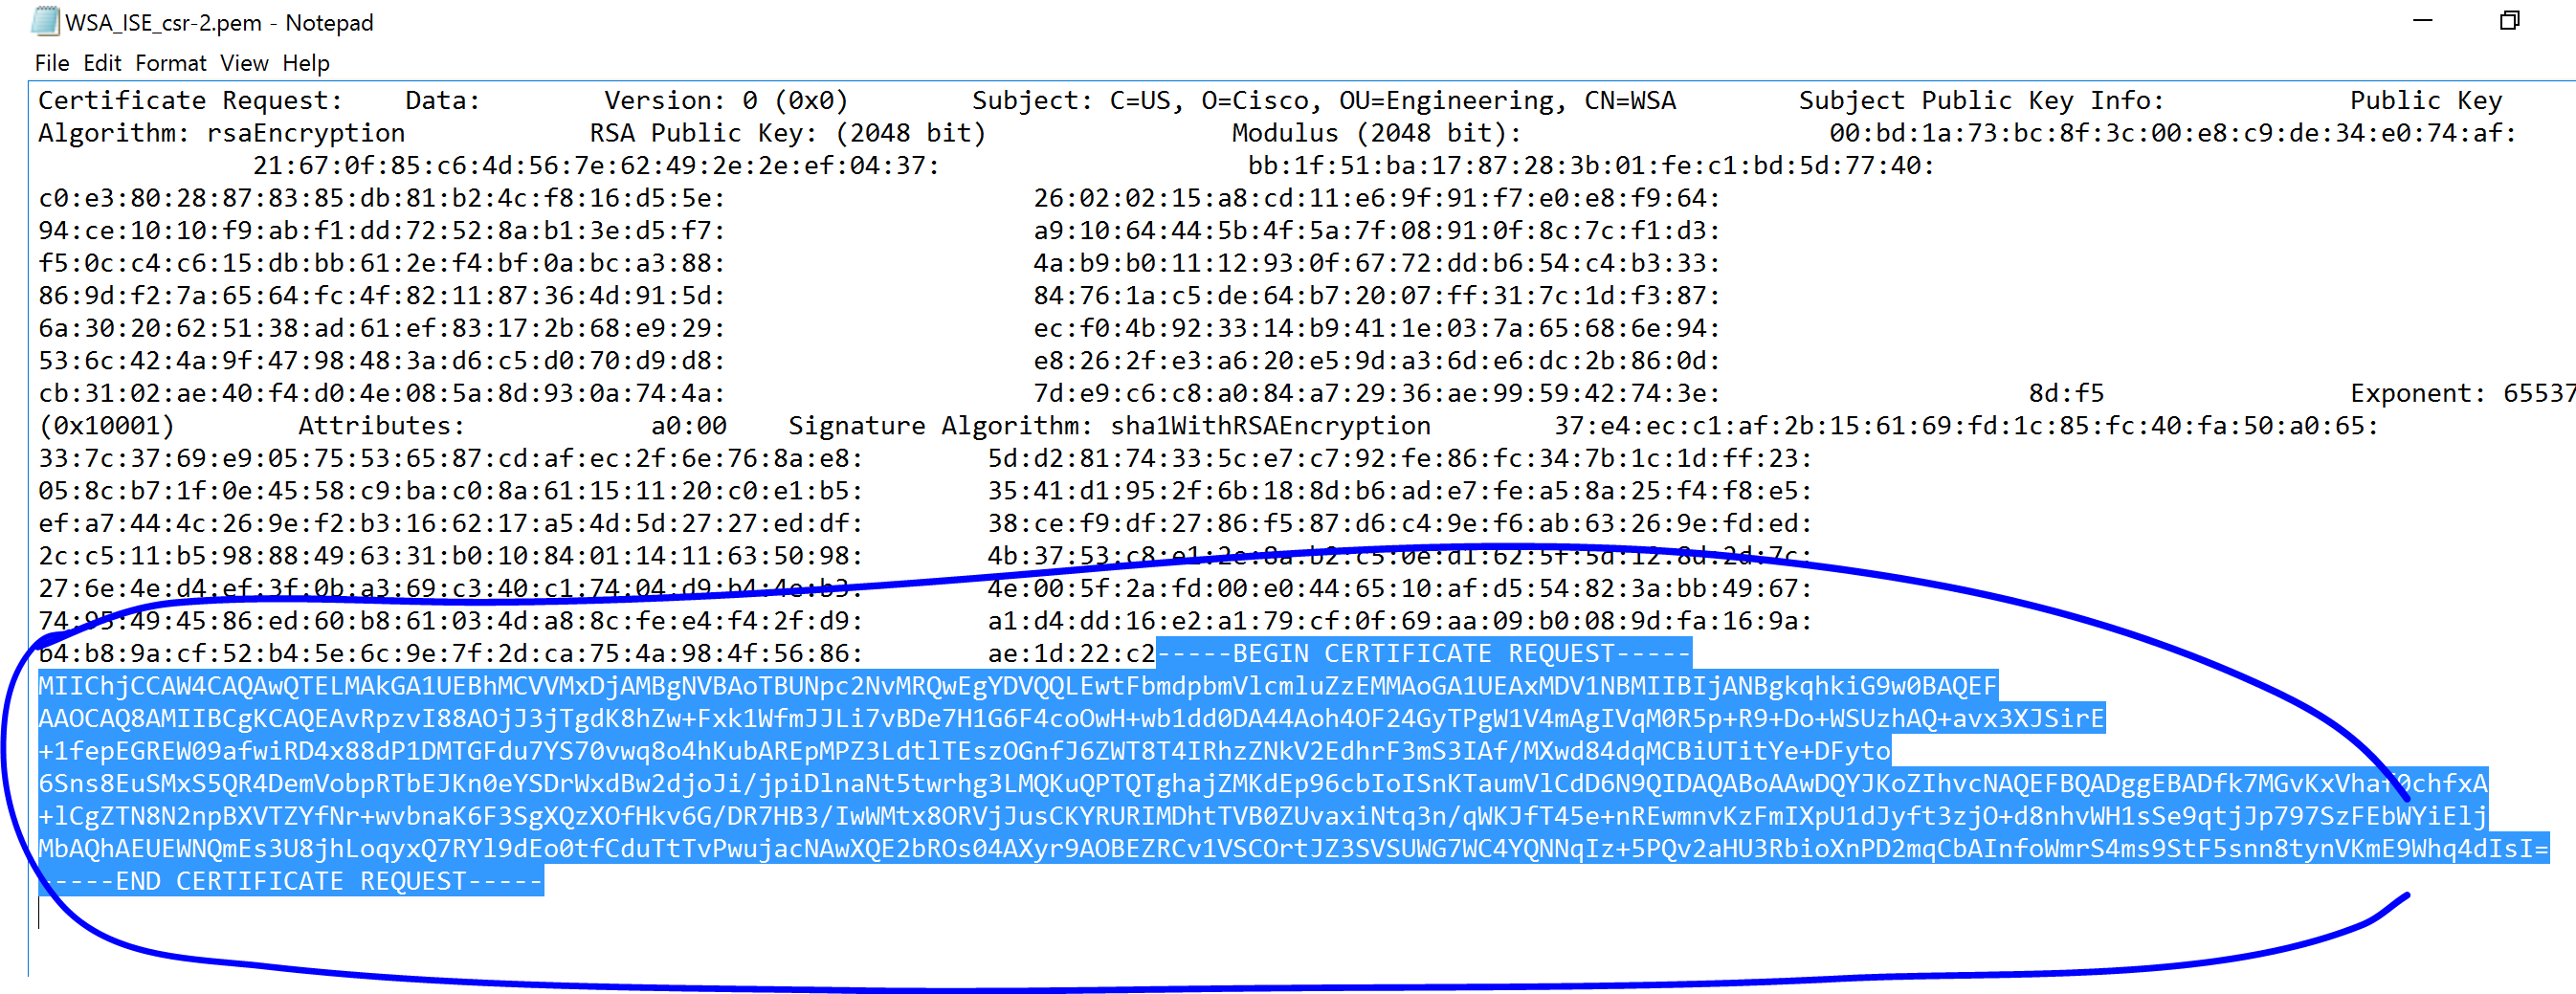
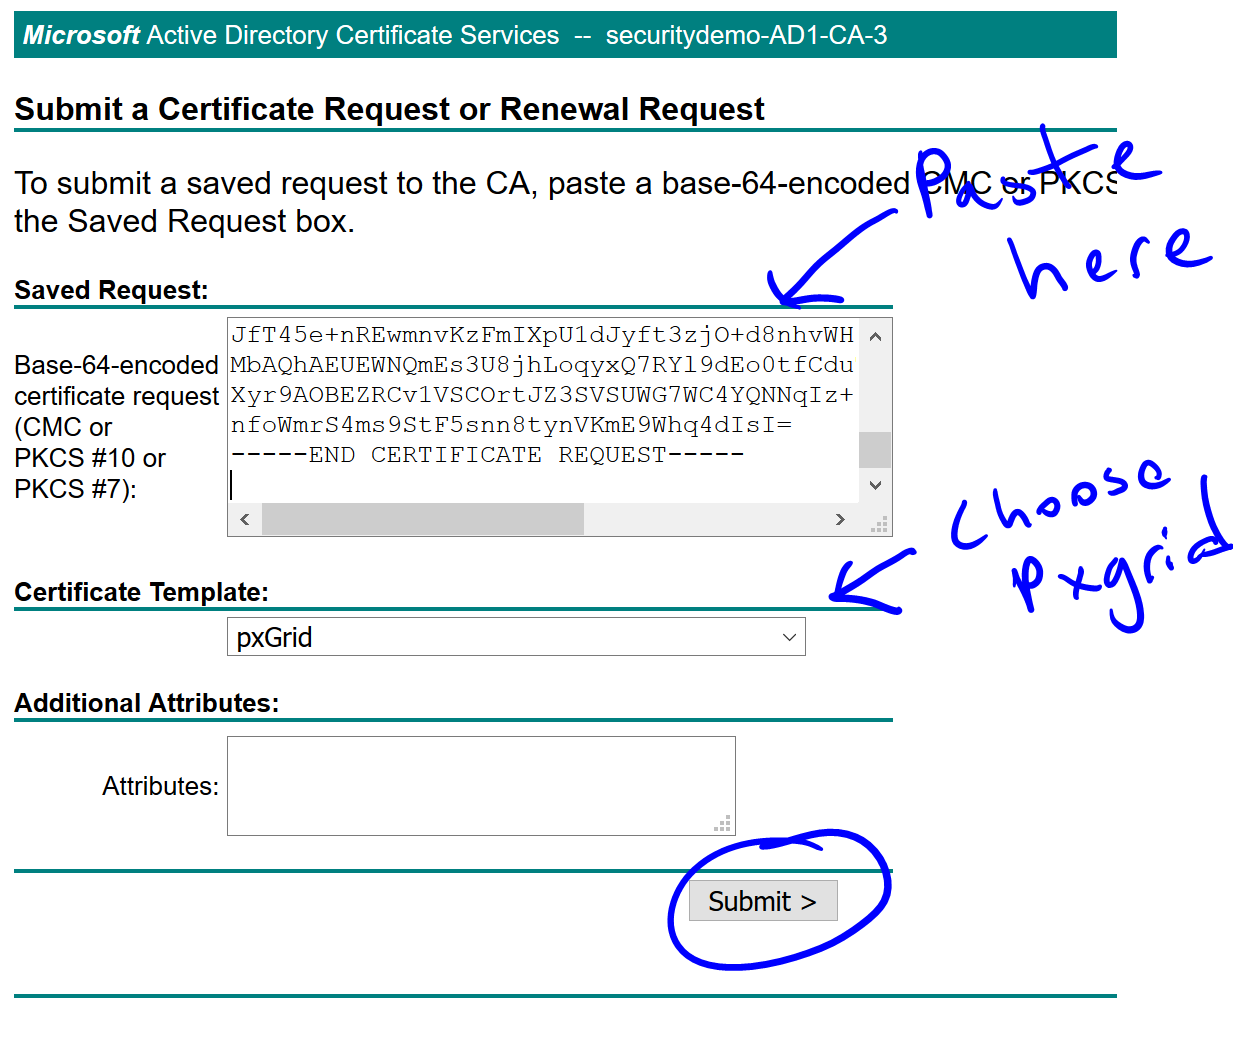
Navigate to Administration>System>Certificates>Certificate Signing Requests and click Generate Certificate Signing Requests (CSR). Create a Multi-Use certificate for your ISE node and once created, export it. Open it with Notepad, copy the CSR and open your AD Certificate Services page. Click on Request a certificate>advanced certificate requests, paste the CSR in the Base-64-encoded request and choose pxGrid ads the certificate template before clicking Submit. On the next page, download the certificate as Base-64 encoded.
Go back to Administration>System>Certificates>Certificate Signing Requests, check the box next to the CSR and bind the certificate and specify that the certificate will be at least used for pxGrid.
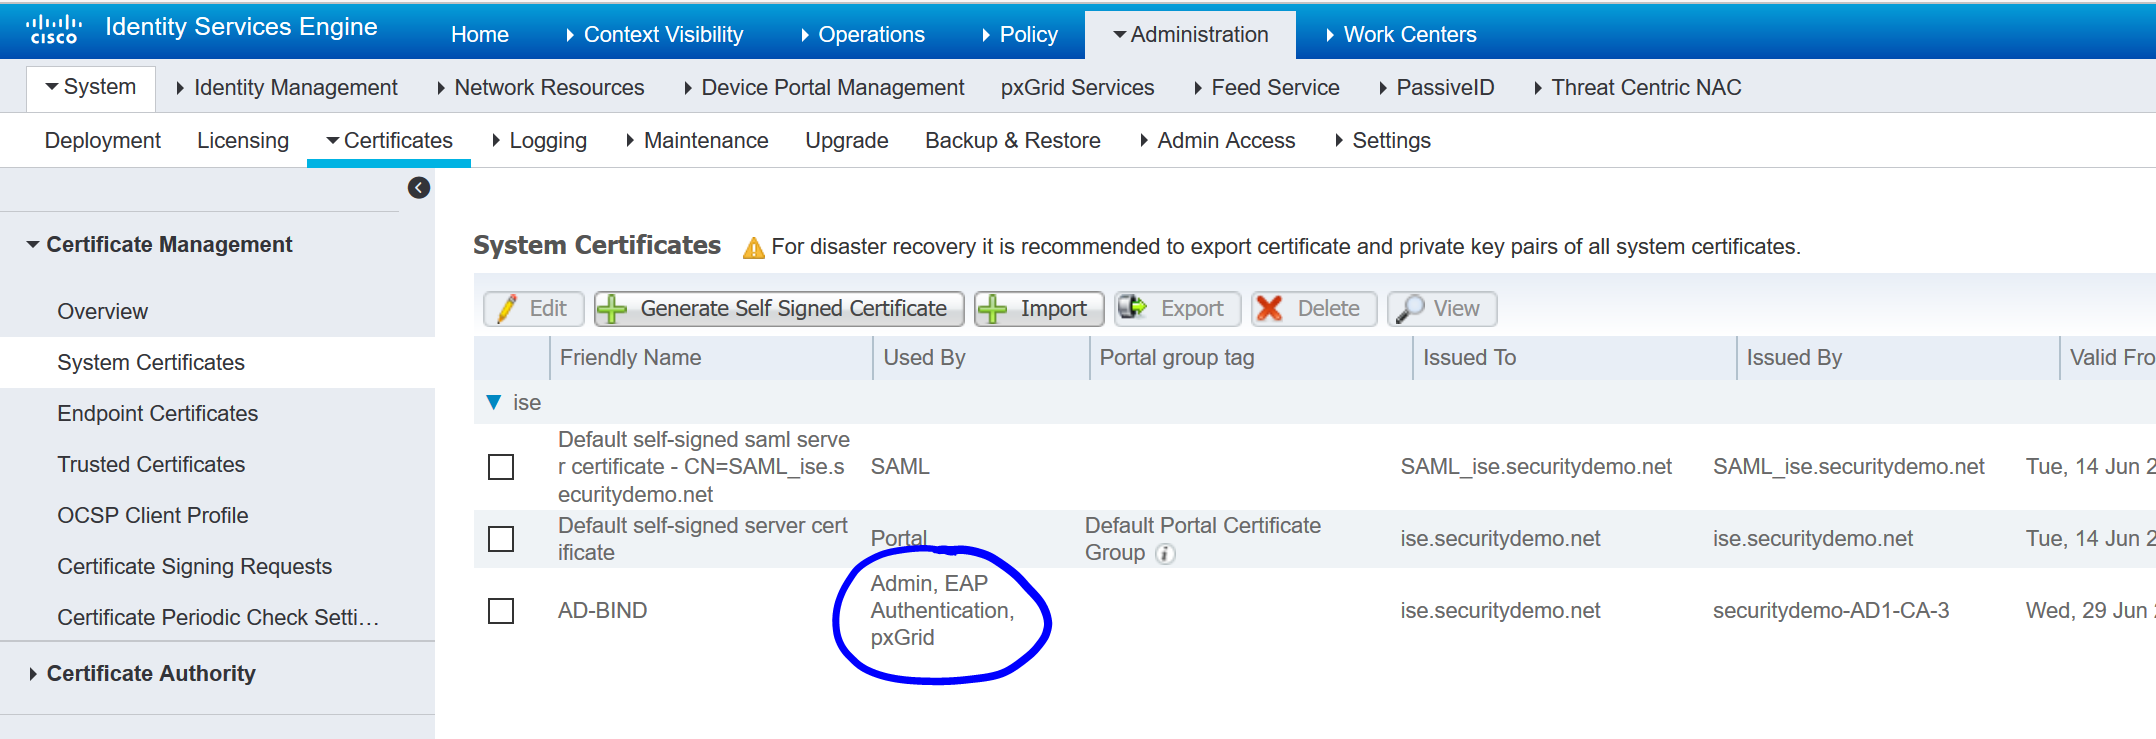
Navigate to Administration>System>Certificates>System Certificates and make sure your bond certificate is there with the pxGrid usage:
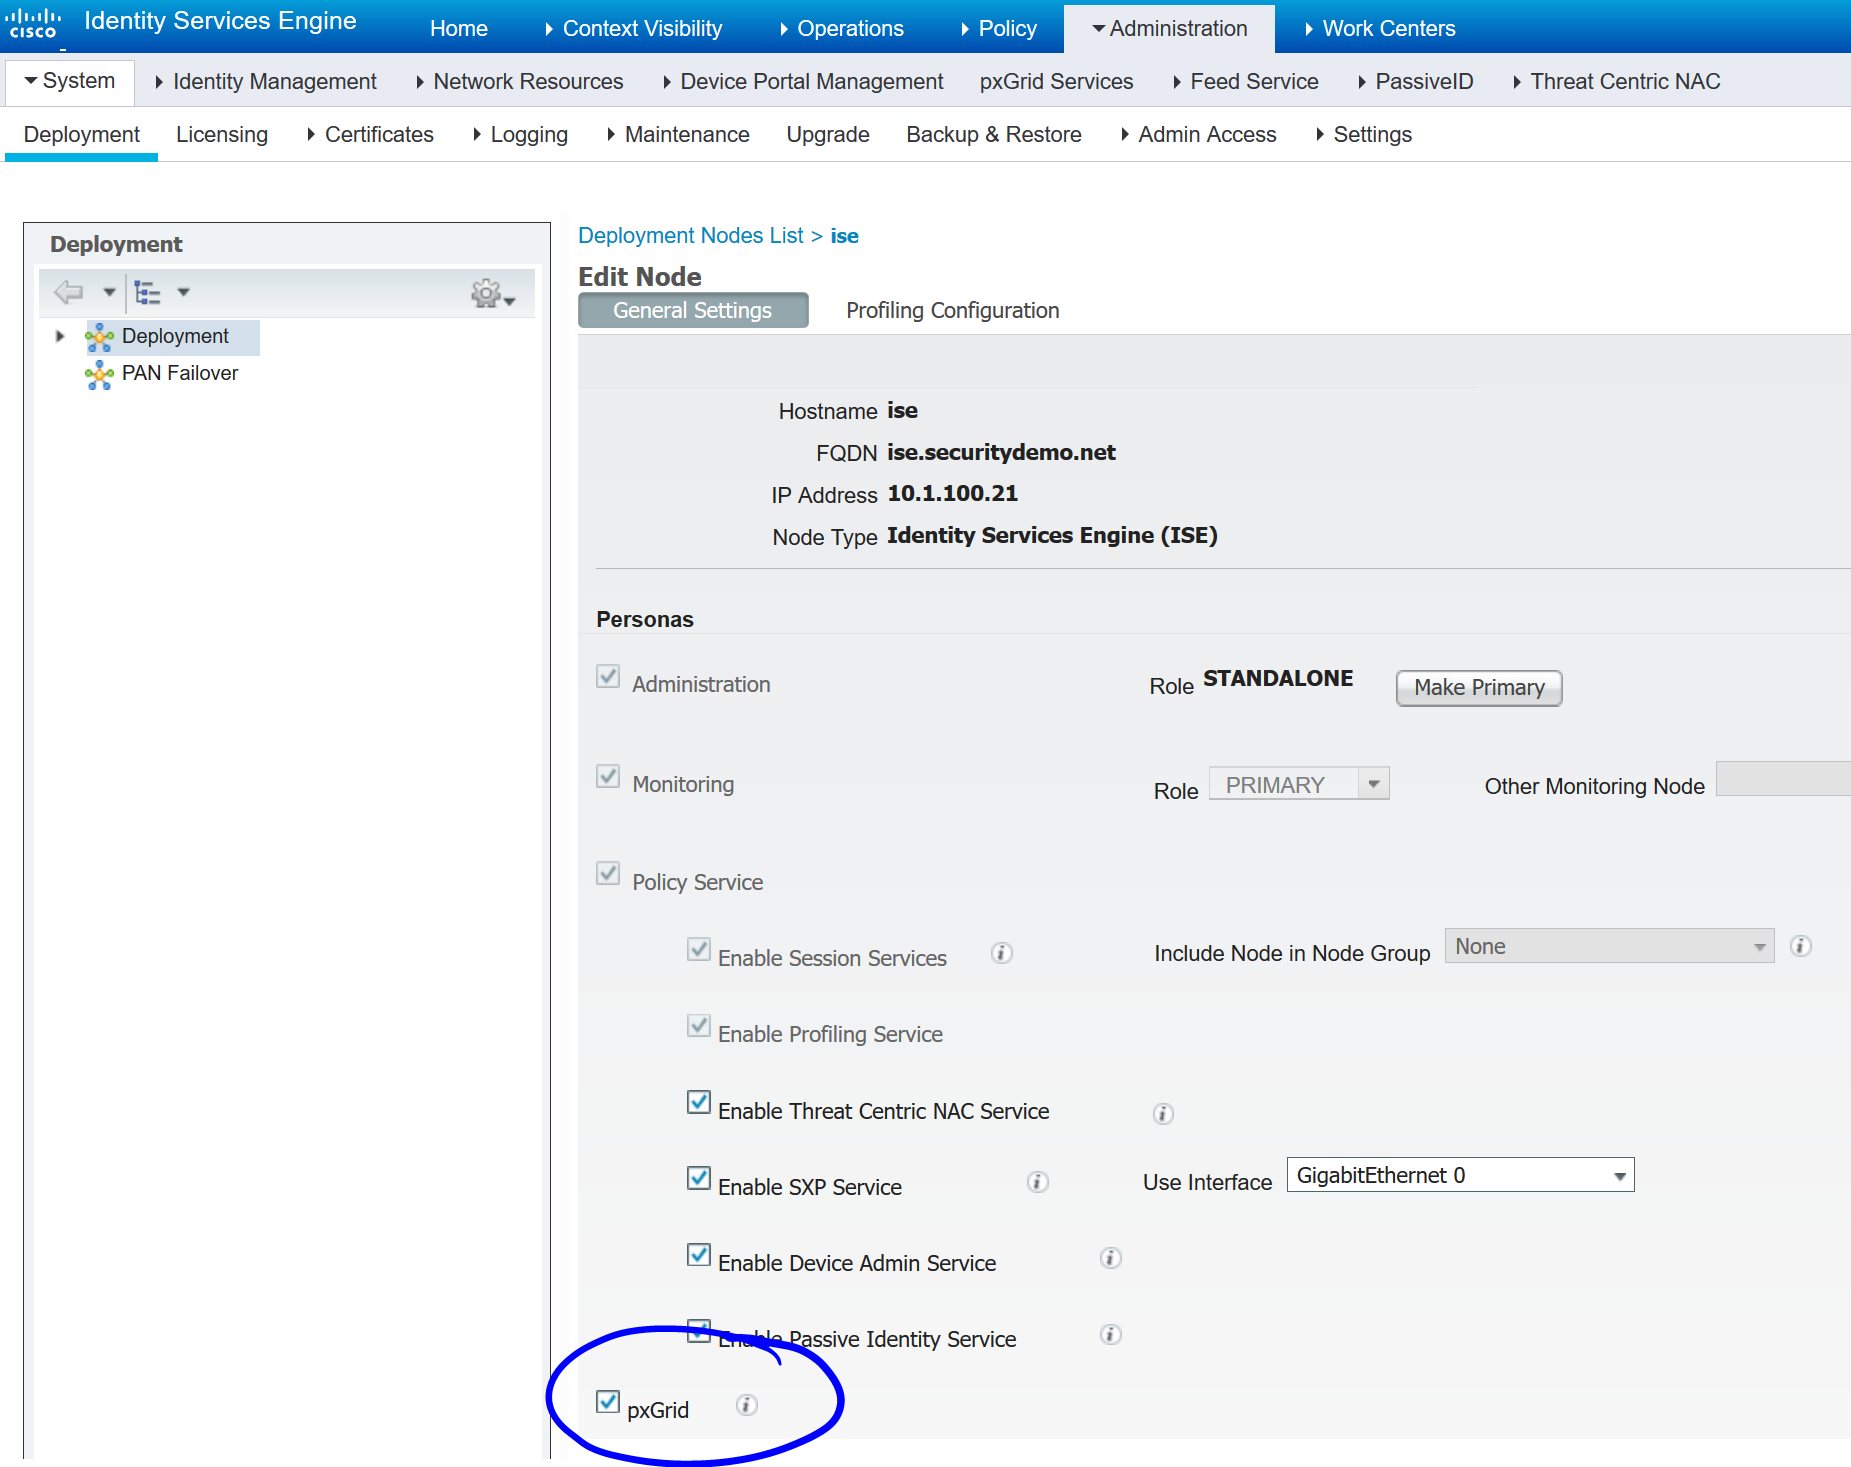
Navigate to Administration>System>Deployment and click on your ISE node:

Ensure that pxGrid is checked:
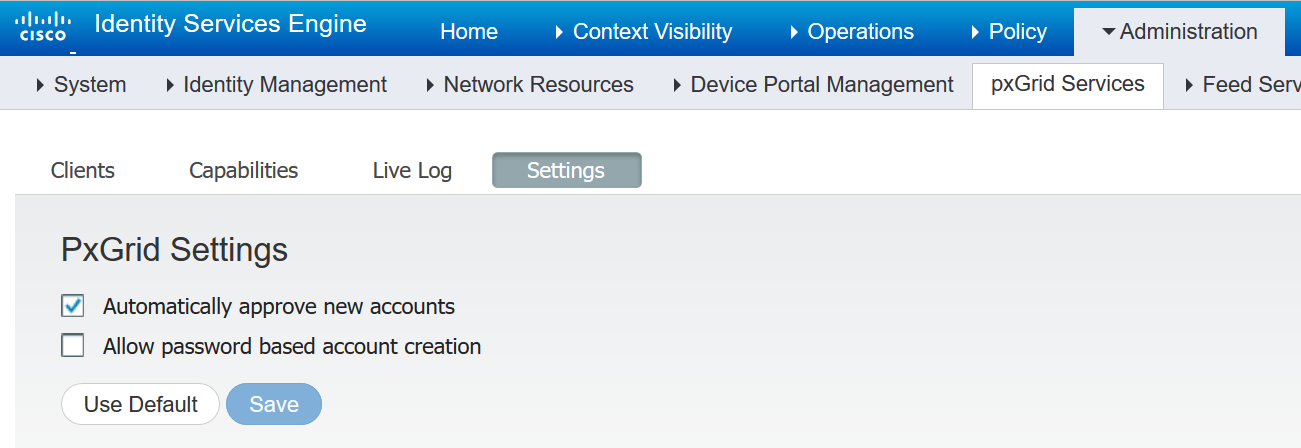
Navigate to Administration>pxGrid Services>Settings and ensure that automatically approve new accounts is checked:
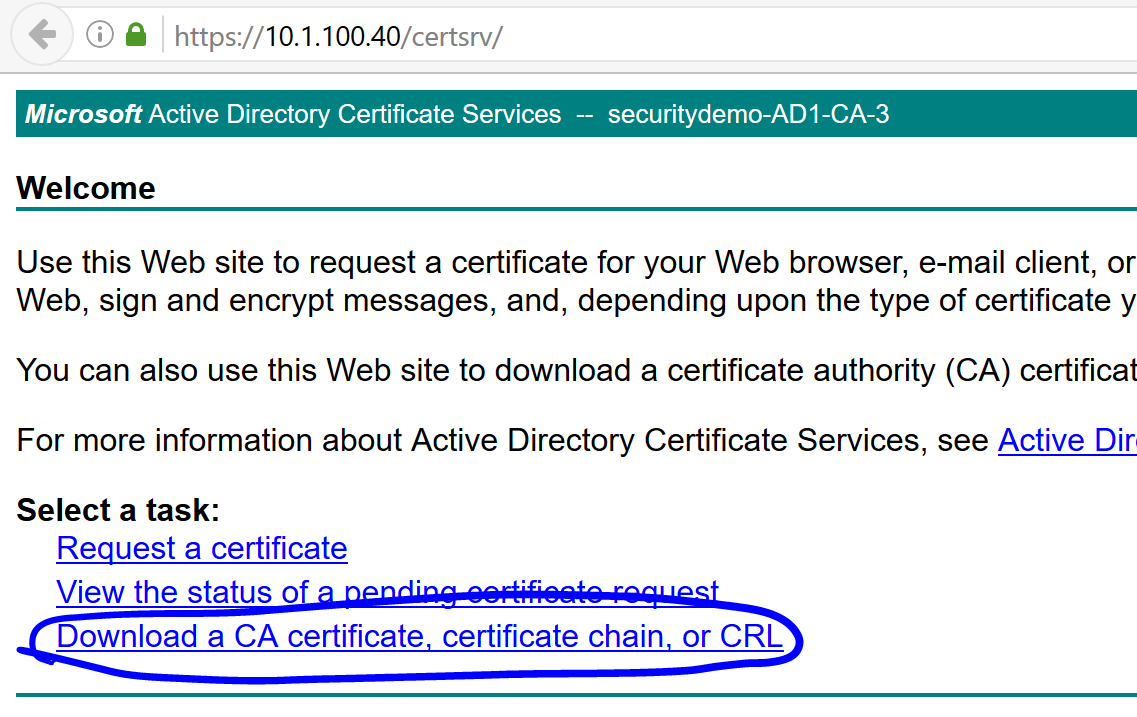
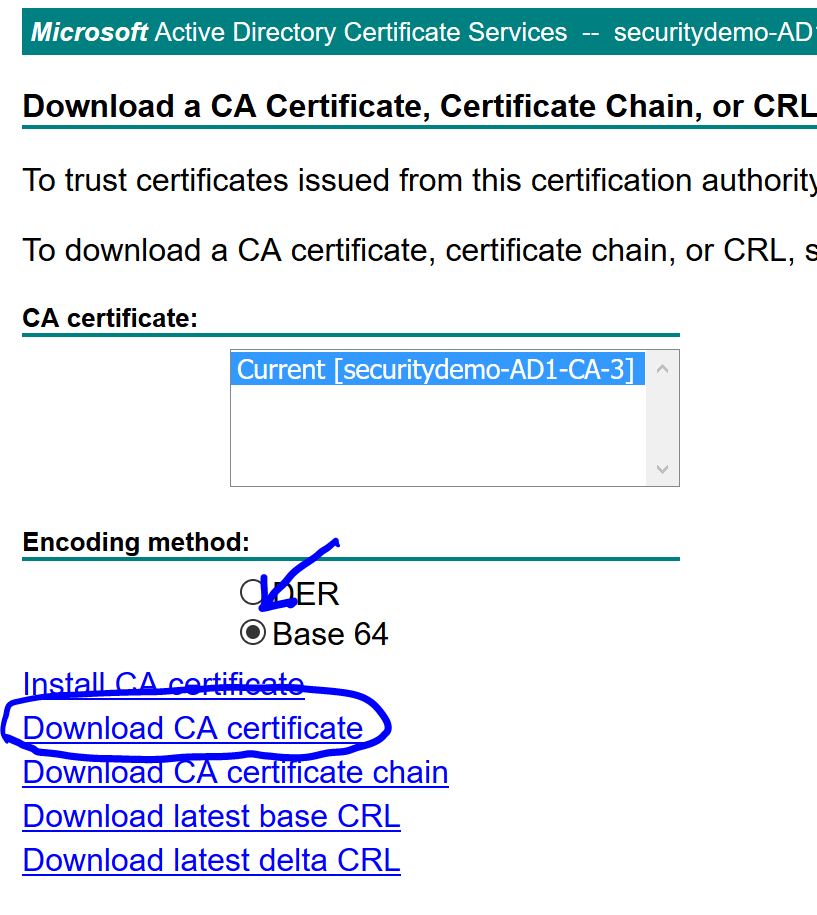
Navigate to the AD certificate services and ensure that the CA certificate is downloaded if you haven’t already:
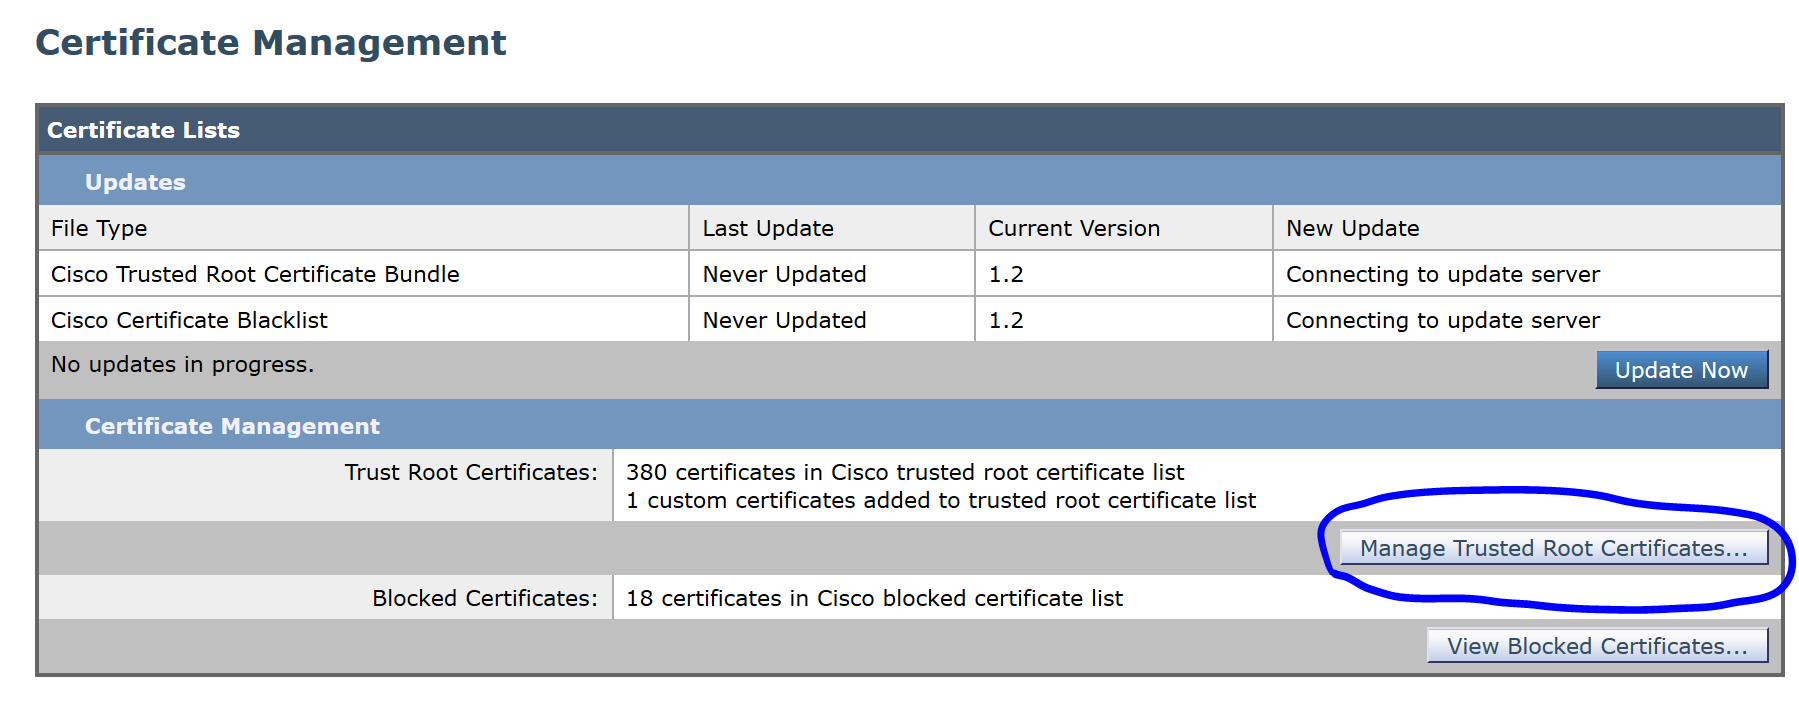
In the WSA, navigate to Network>Certificate Management and click on Manage Trusted Root Certificates.. to upload the CA certificate you just downloaded.
Click Import:
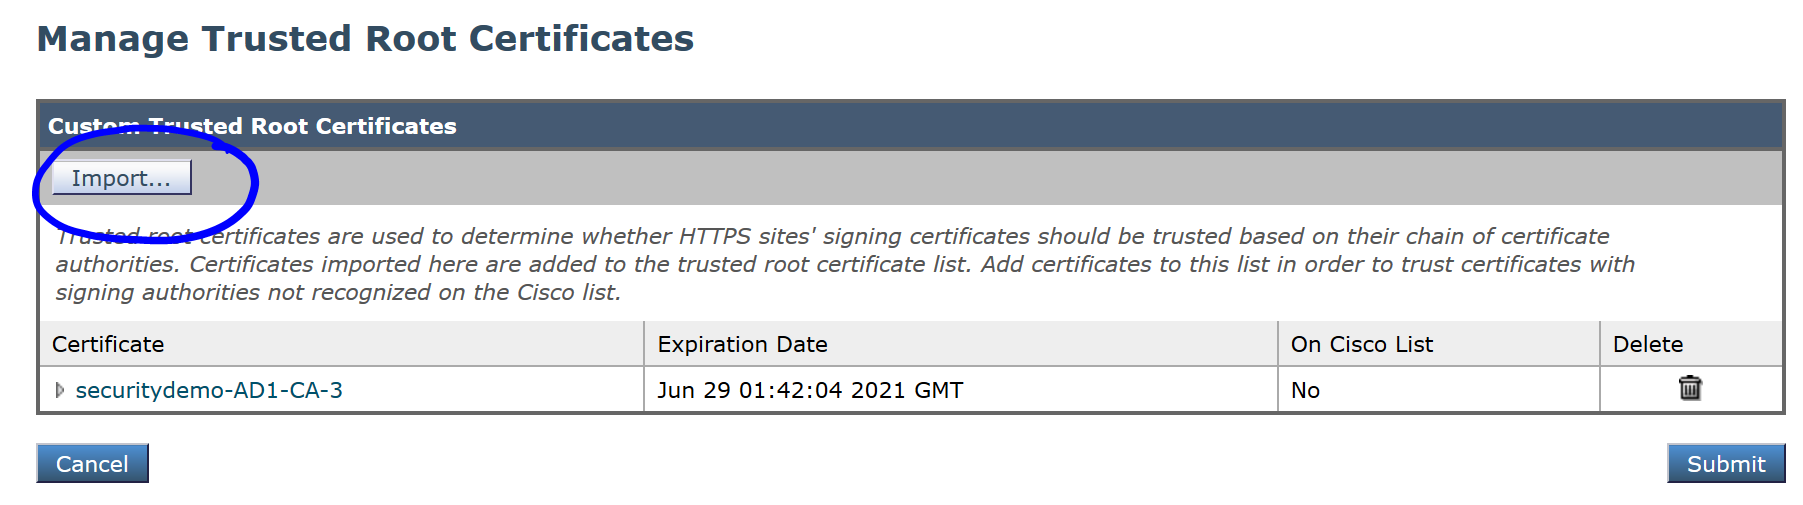
Browse to your downloaded and upload the CA certificate and click Submit:

Click Submit again:

Click Commit Changes to apply the changes:

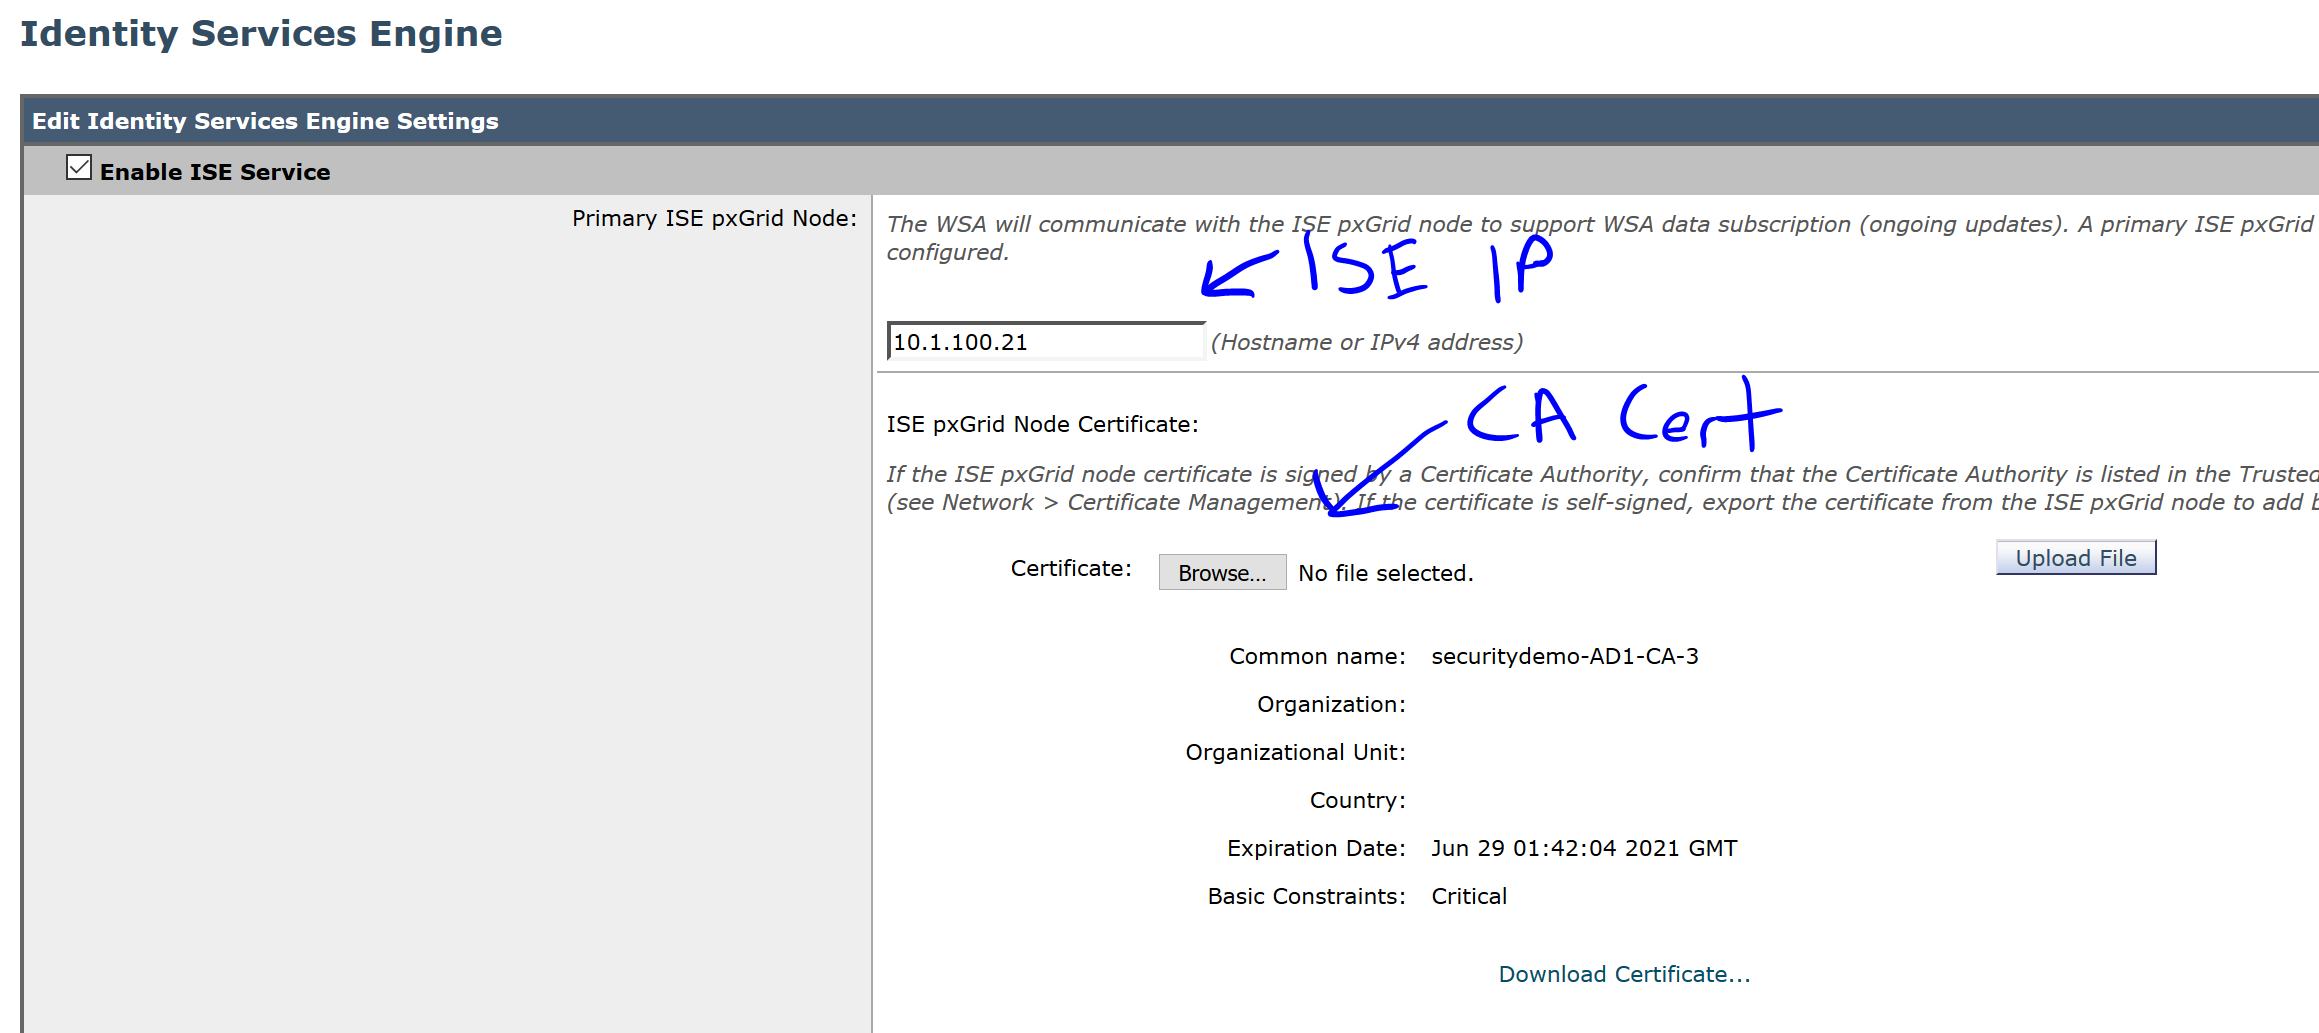
Navigate to Network>Identity Services Engine and click Enable and Edit Settings..

In the first section, add your ISE IP or hostname, click Browse, select the CA certificate and click Upload File:
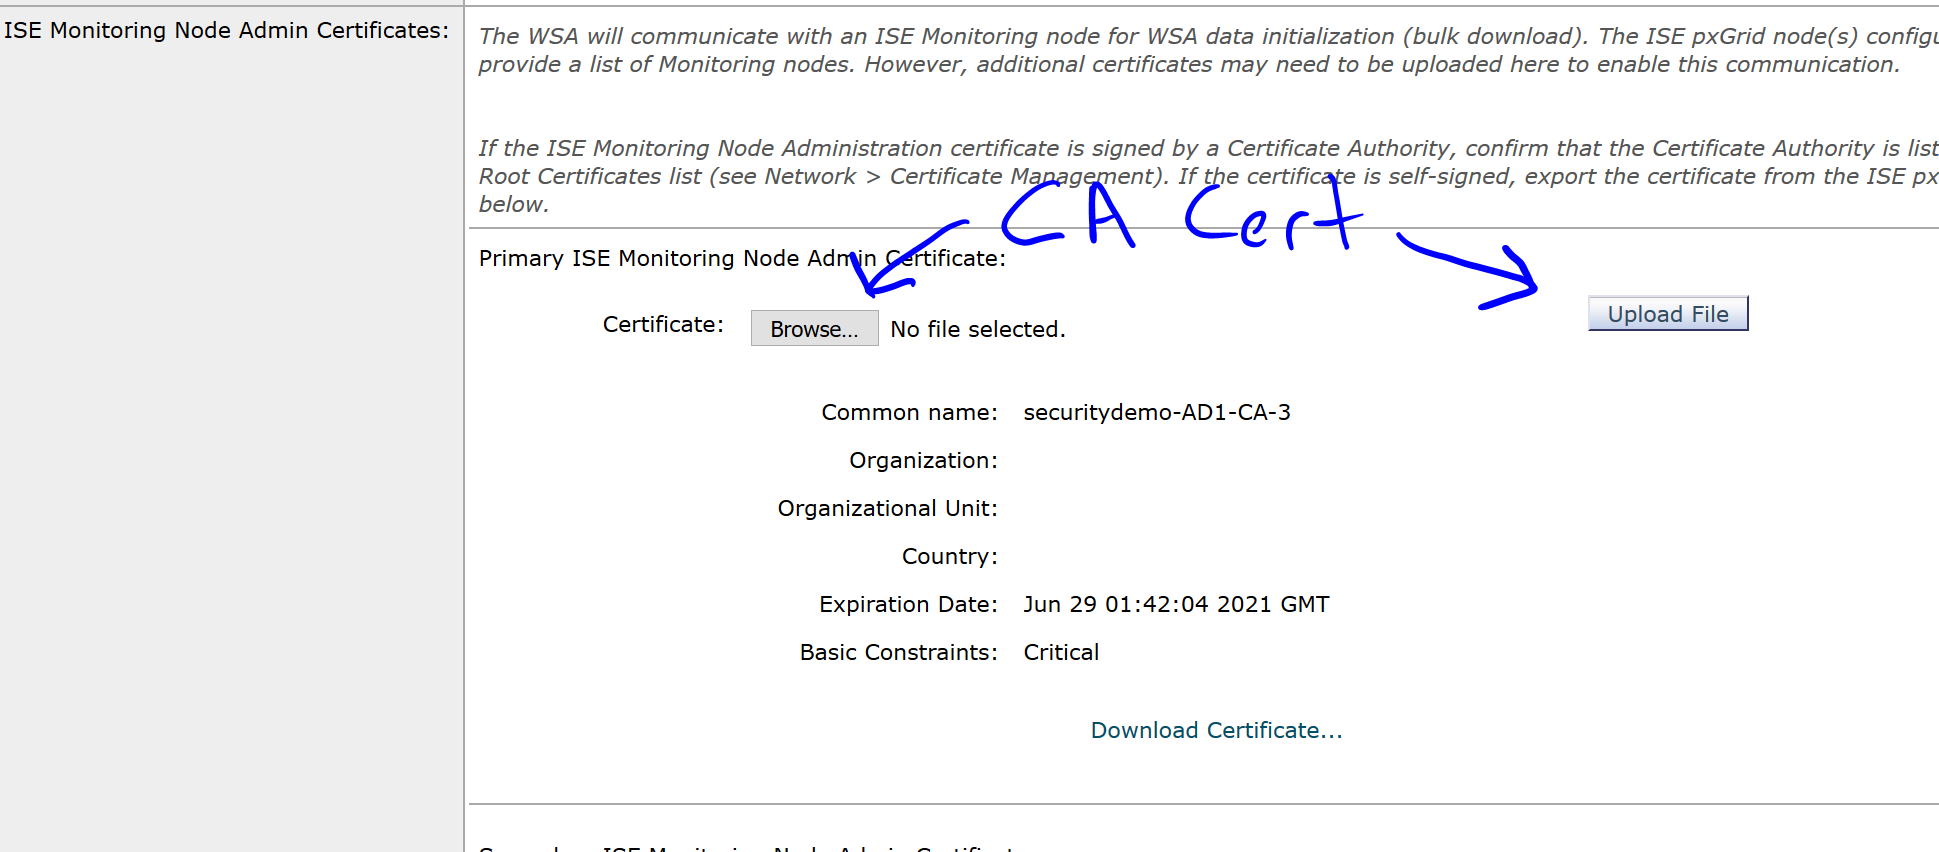
In the next section, upload the CA certificate again:
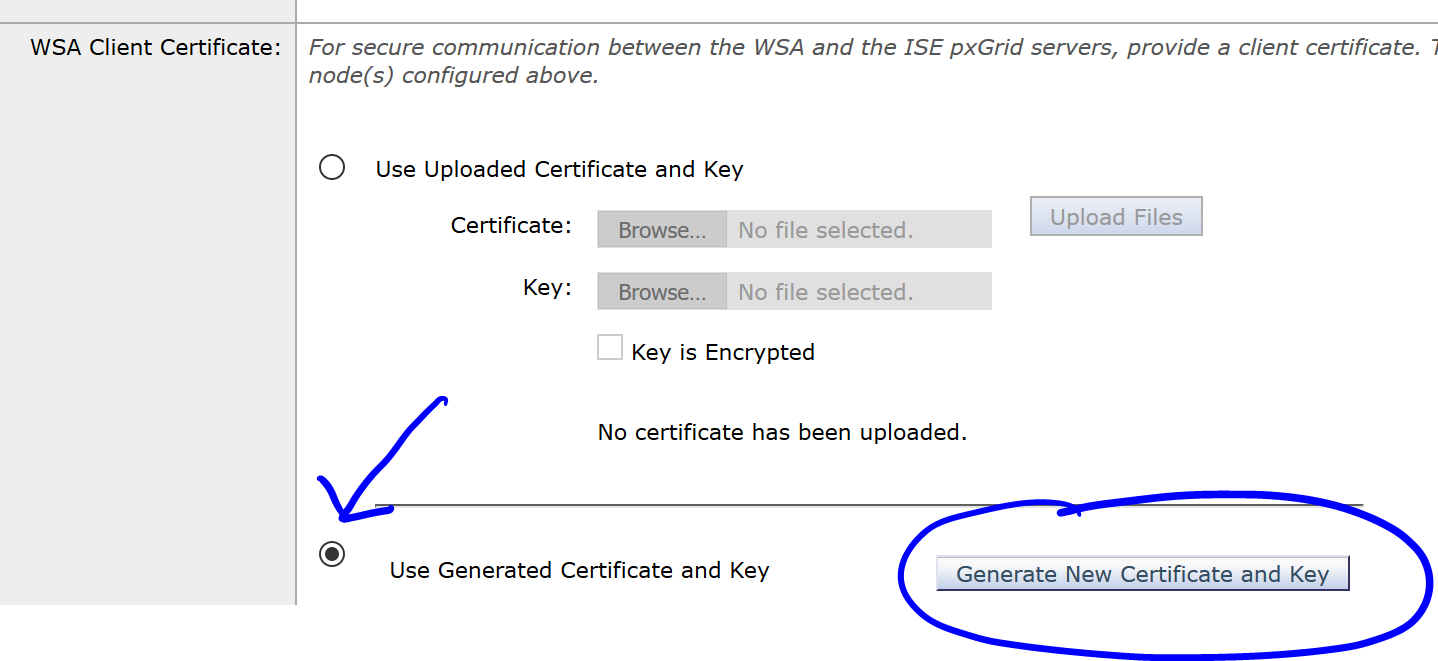
In the last section, choose the radio button for Use Generated Certificate and Key and click the button Generate New Certificate and Key:
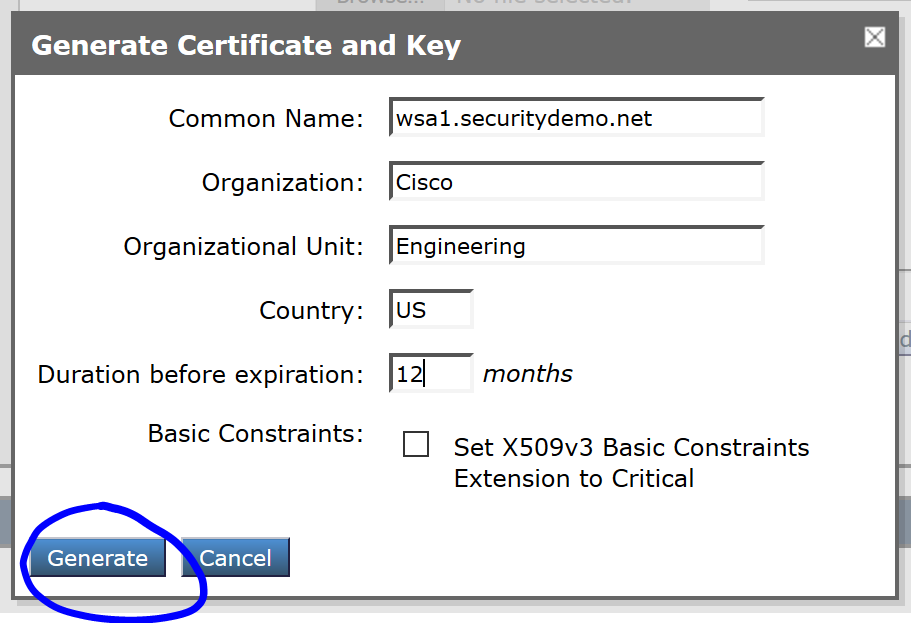
Fill in the certificate fields and click Generate:
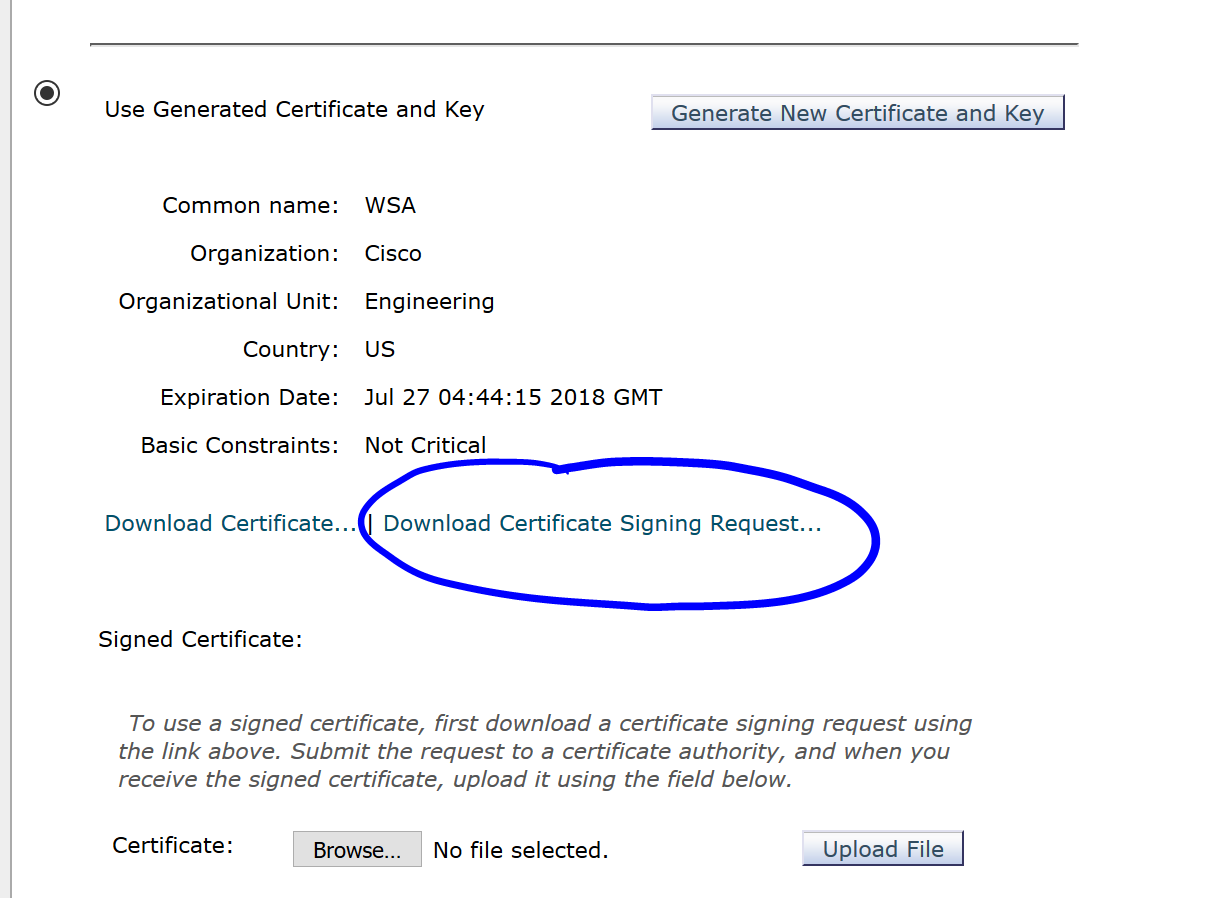
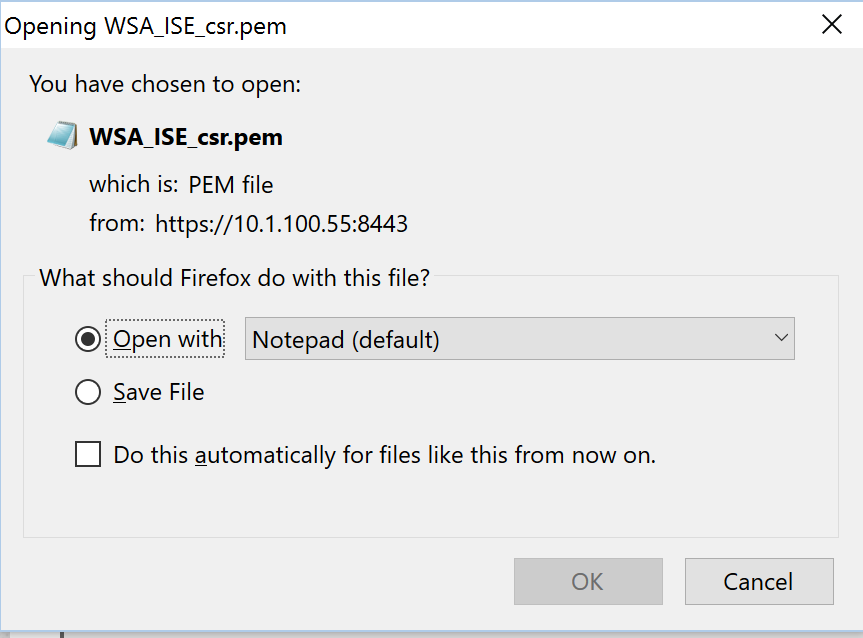
After Generating it, click on the Download Certificate Signing Requests… link and open the CSR in Notepad:
Very important: Click Submit at the bottom of the page and then Commit Changes in the WSA.
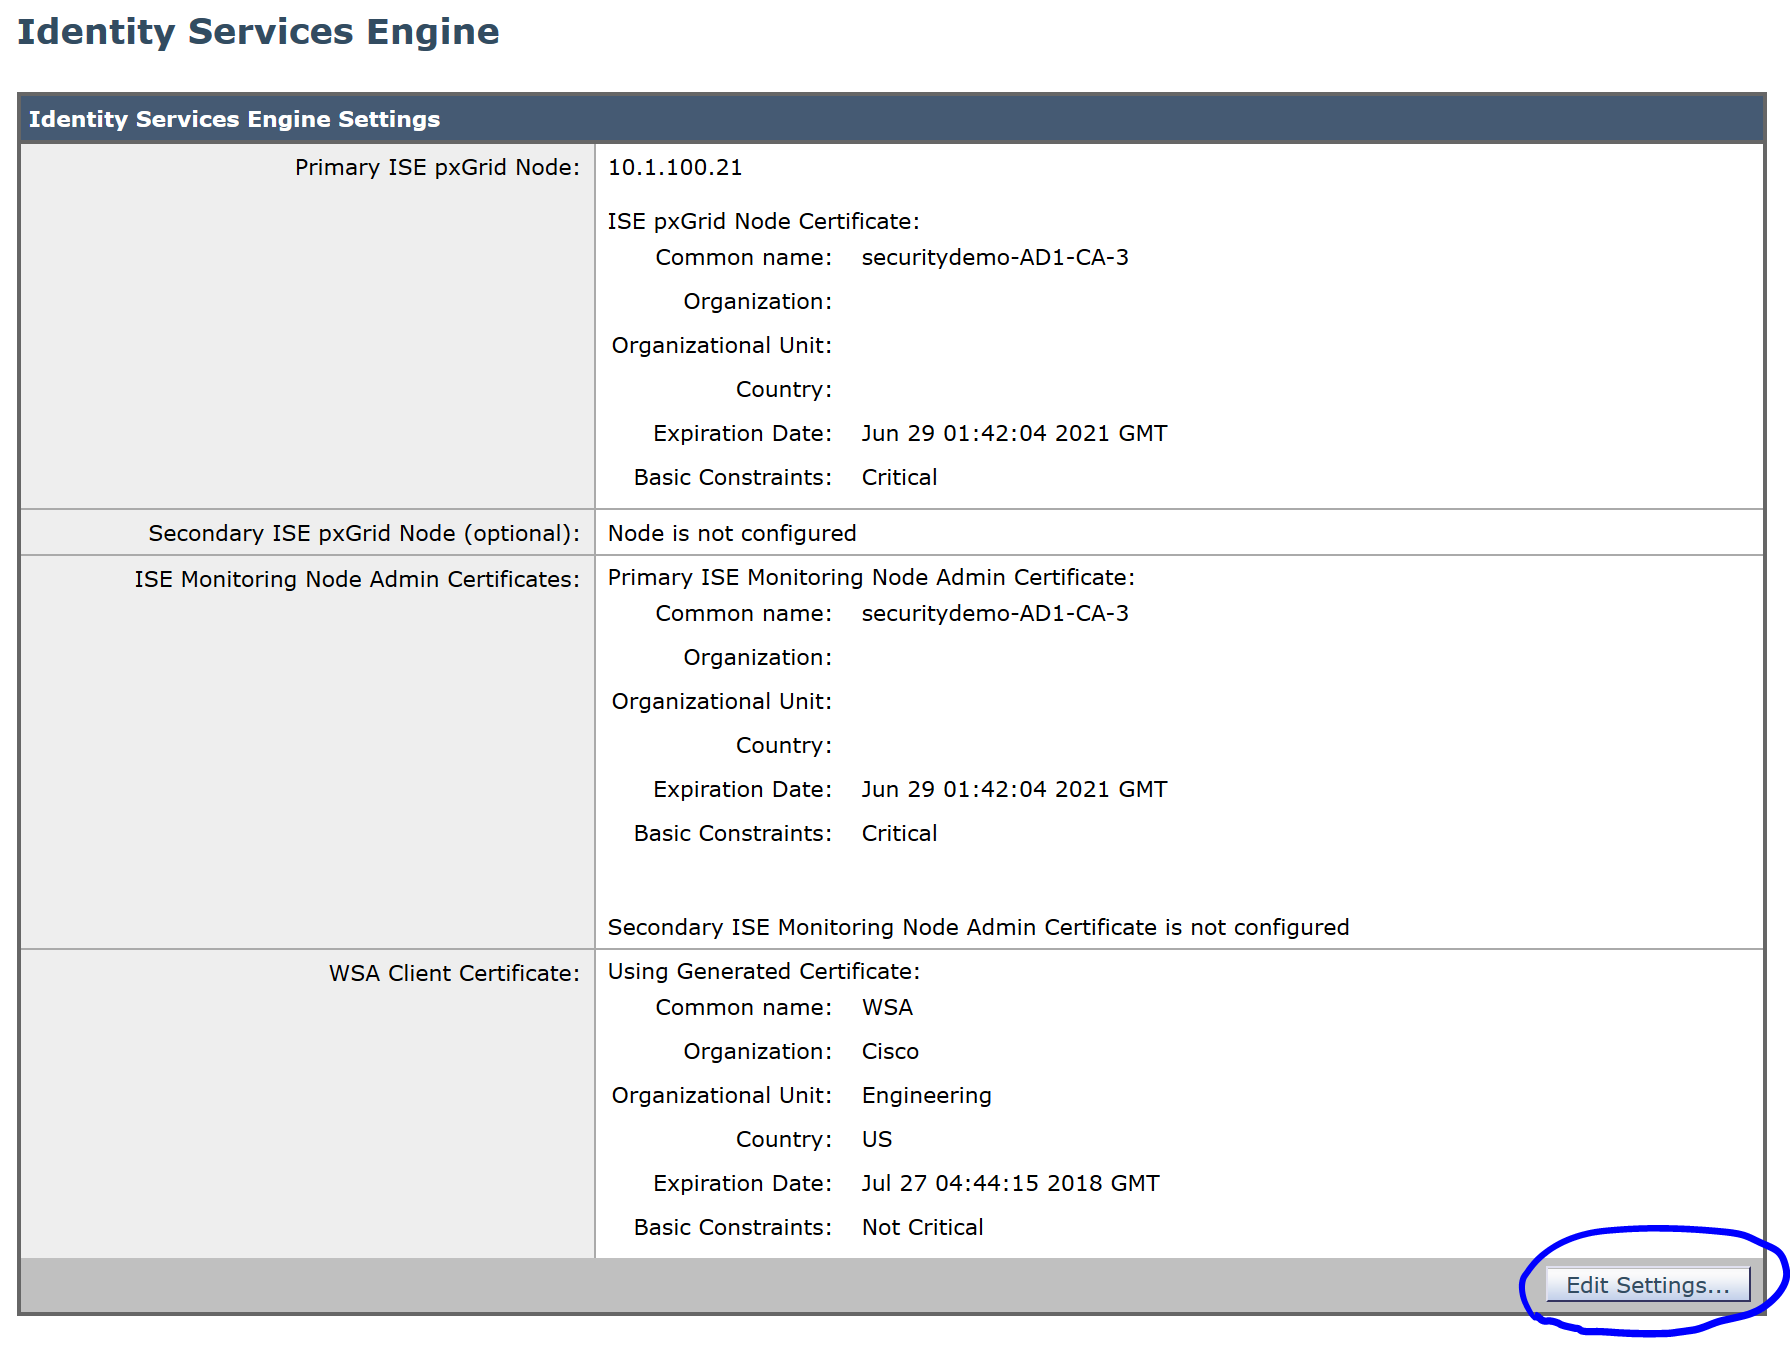
After doing so, navigate back to Network>Identity Services Engine and click on Edit Settings:
Open up your AD Certificate Services and click on Request a certificate:
Click advanced certificate request:
On the opened CSR you downloaded from the WSA, Copy this section only:
Back in the AD Certificate Services, paste it, choose the pxGrid template and click Submit:
Download the new certificate in Base 64 format
Back in the WSA, upload the certificate:
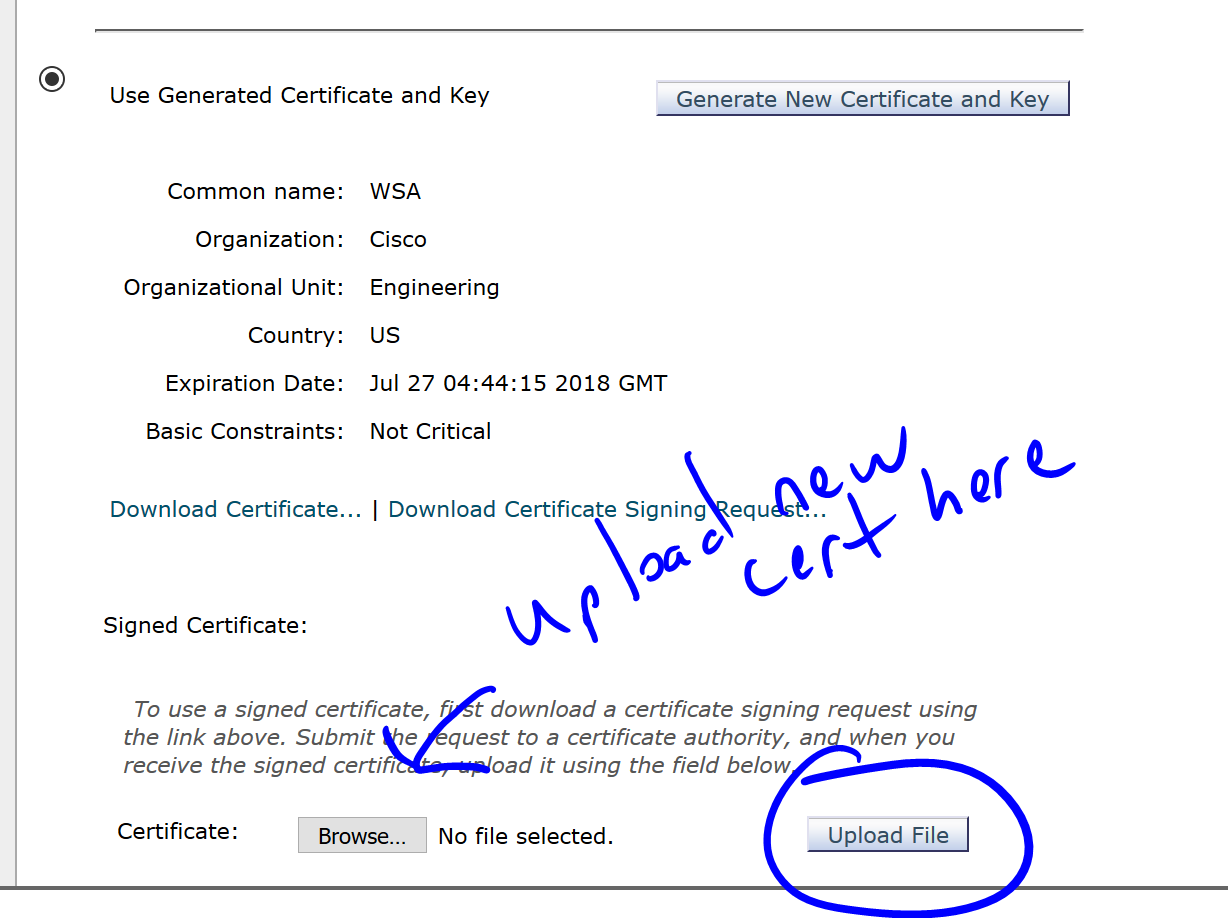
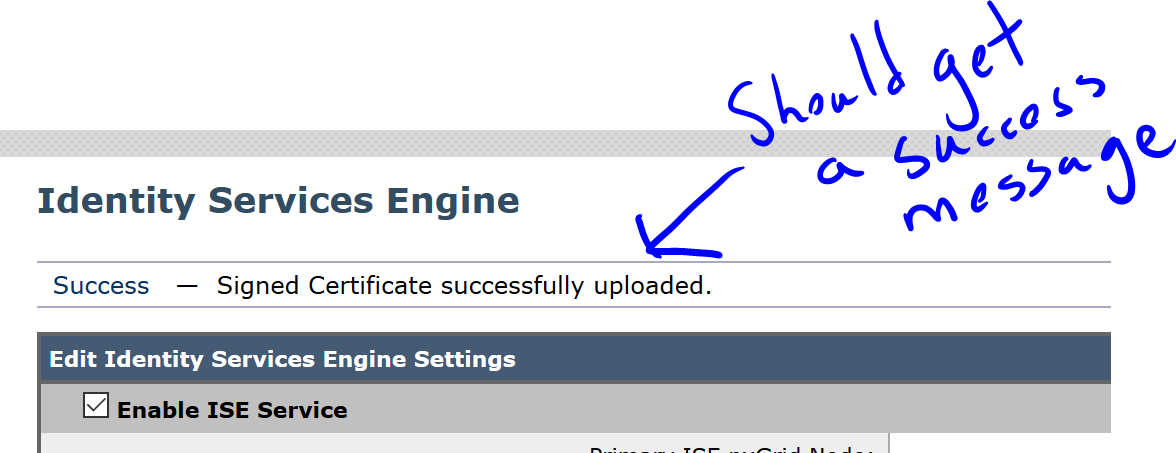
You should see a success message at the top:
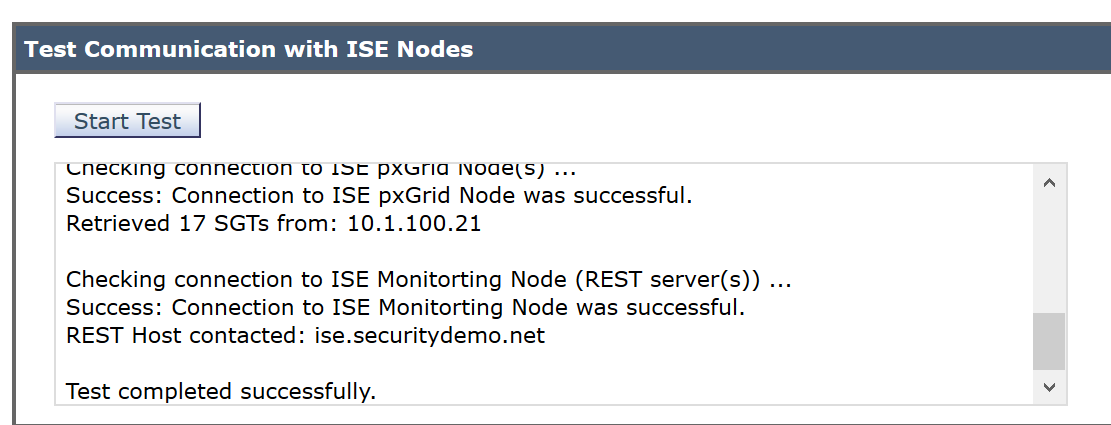
On the bottom of the screen, click Start Test to verify everything is working:
In the WSA, navigate to System Administration>Log Subscription and click accesslogs. Under the Custom Fields (optional), add %m
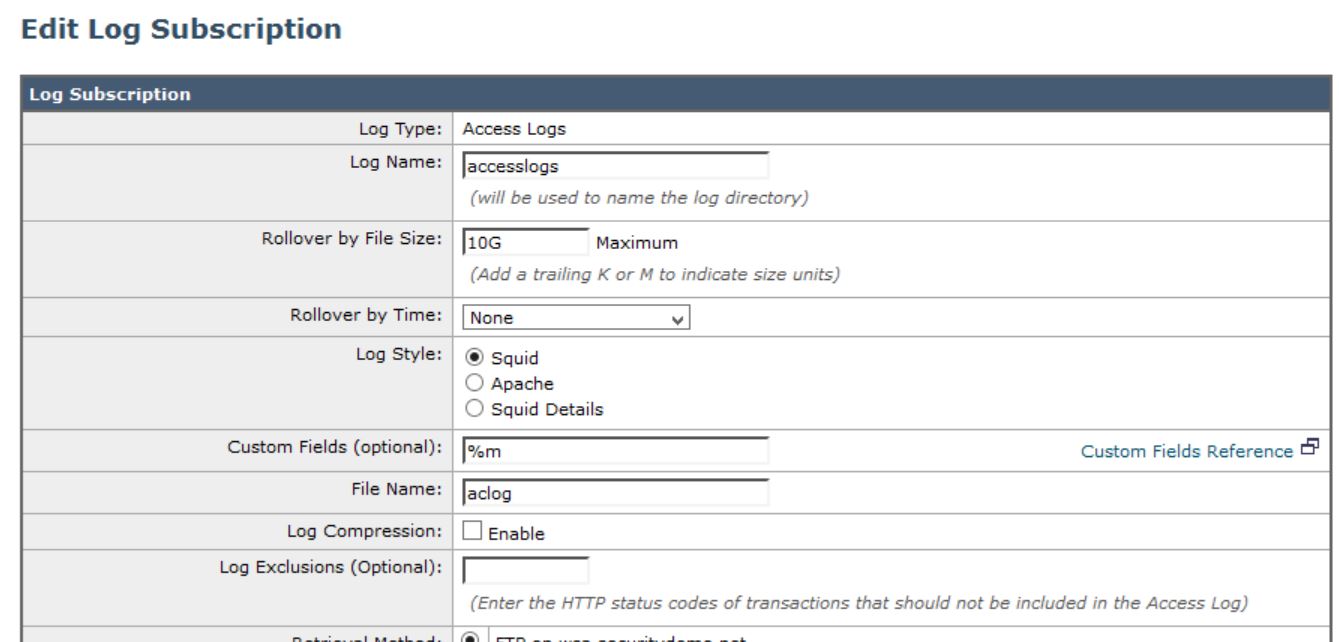
Click Submit and Commit Changes
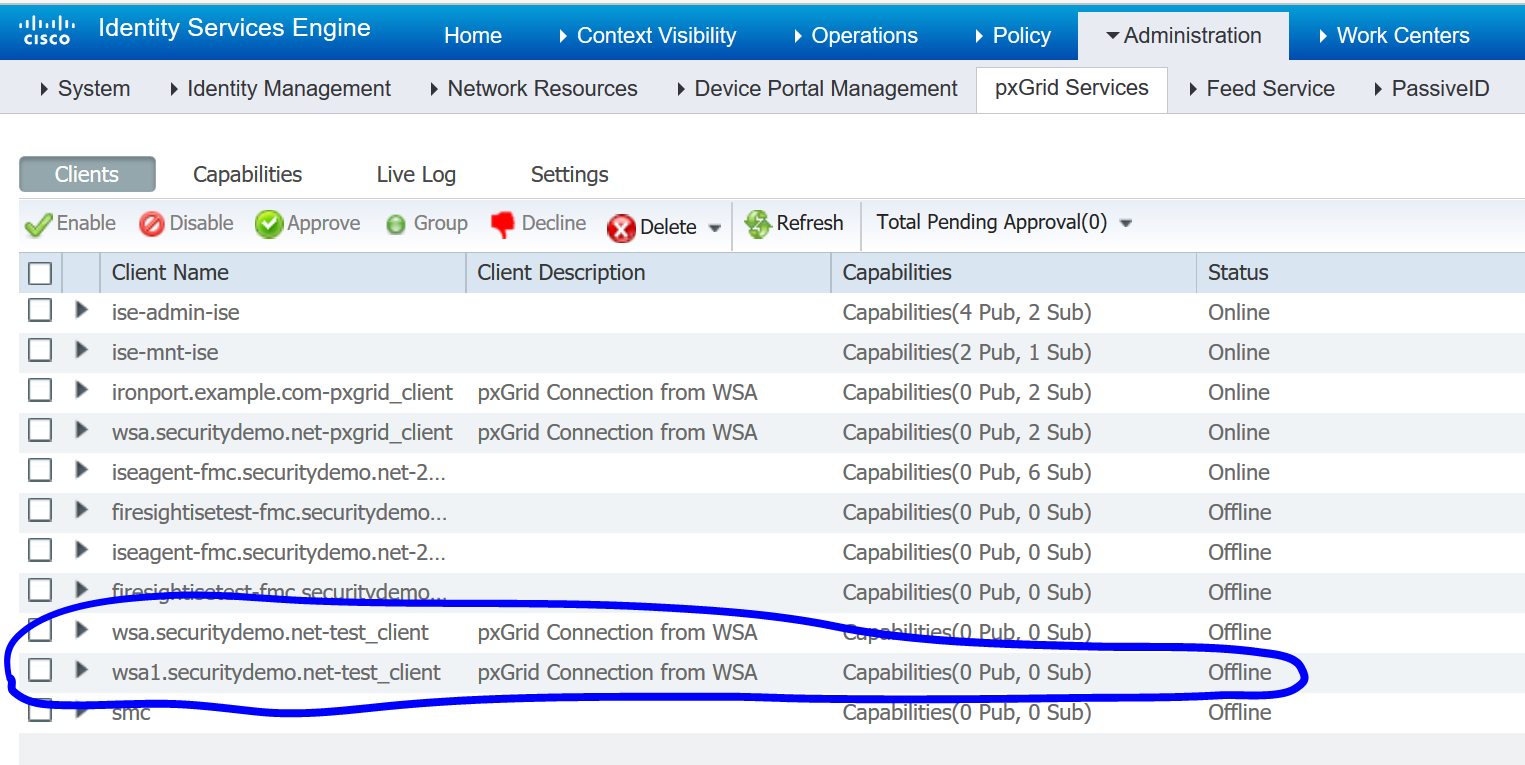
In ISE, navigate to Administration>pxGrid Services>Clients to verify the new pxGrid node is showing up: