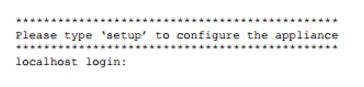
Now that we have Active Directory configured, we're going to start setting up ISE. I'm going to walk through basic bootstrapping of ISE and how to join it to the Active Directory domain in this post. I'm using ISE 2.0 in my lab which is the latest version of ISE as of this post but the process for bootstrapping and joining to an Active Directory domain remains unchanged from previous versions. In my lab, I'm using an ISE virtual machine deployed off an OVA file. VMWare should create the virtual machine from the OVA file without issue. After that has completed, you must power up the virtual machine and console in via the vSphere client. You will be presented with a login screen where you can type setup to configure the appliance:
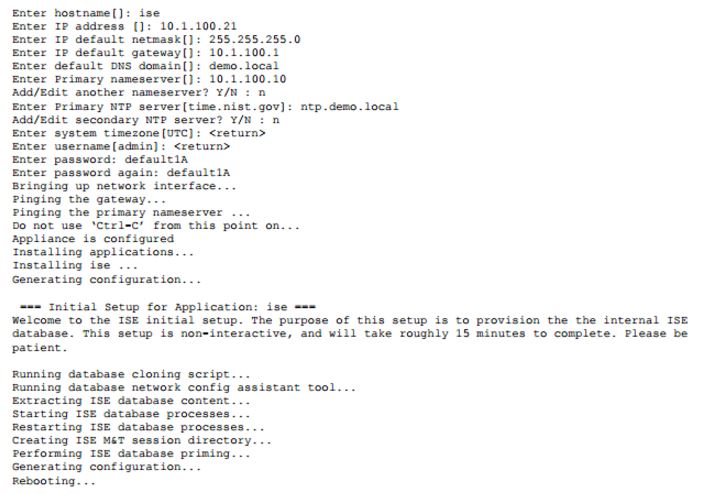
During the setup, you need to provide the following information:
- Hostname
- IP Address of ISE
- Netmask
- Default Gateway
- DNS Domain - I use my Active Directory domain
- Nameserver - This is my AD server since it is also my DNS server
- NTP Server - (At least one)
- Timezone
- Username - The default is admin. This is for the CLI login, not the GUI
- Password - Again, for logging into the CLI
After you enter this information, ISE will bring up the network interface, attempt to contact the default gateway and nameserver and reboot if that is successful after setup is complete.
After it reboots, I would recommend doing a couple sanity checks:
- Login to the CLI and make sure that your credentials work
- Ensure that NTP is synchronized by issuing the show ntp command
- Ensure that you can SSH to the ISE server. If you cannot, enable the service with the service sshd enable command
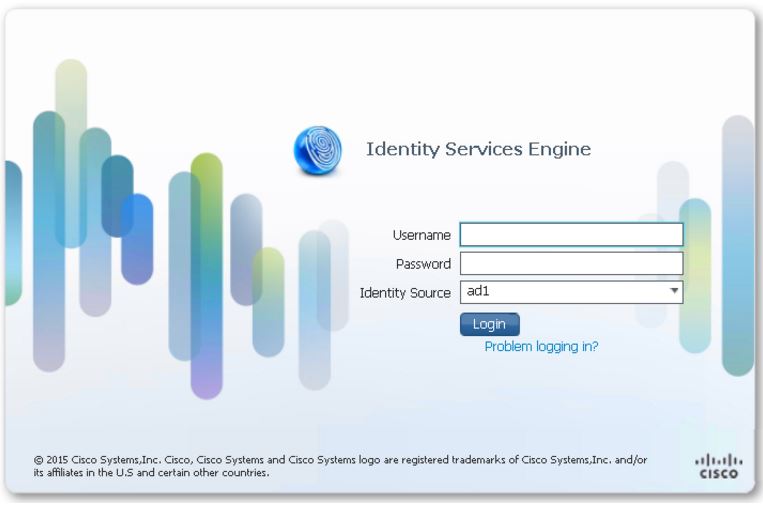
Navigate to the ISE GUI by entering the IP address in your browser. Make sure that your browser has Flash enabled. I would recommend using Firefox for ISE 2.0. While Chrome now works and Internet Explorer does as well, I have found in my experience that Firefox tends to be less buggy.
Login to the GUI:
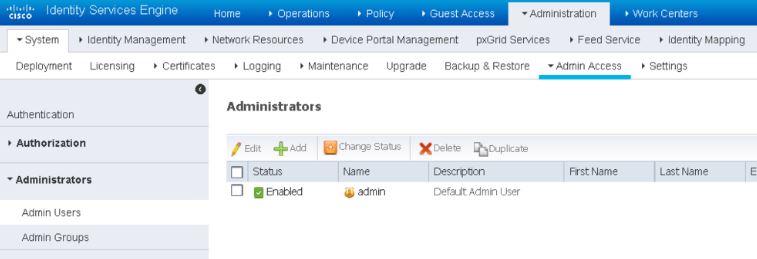
Navigate to Administration>System>Admin Access>Administrators>Admin Users. Here you can either create a new administrator or change the password for the default admin user so it's not the default credentials anymore.
Next, we are going to join ISE to the Active Directory domain. In previous posts when we were initially configuring AD, I mentioned the importance of having the time synchronized. The reason is that if the time synchronization between ISE and AD is greater than 5 minutes, ISE will not join the domain. Another thing to note is that you want to ensure that whatever DNS server you use, it has the AD pointer records for the domain controller. If it does not, ISE will fail to find the domain controller and not join the domain.
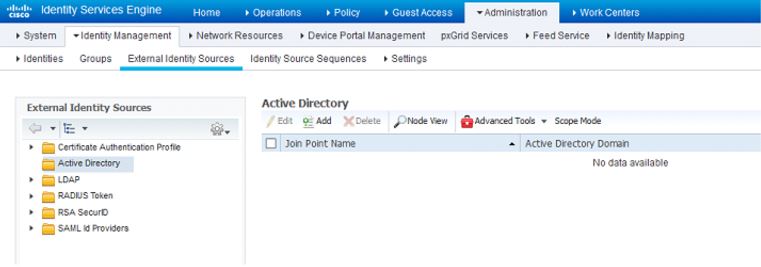
Navigate to Administration>External Identity Sources>Active Directory and click Add
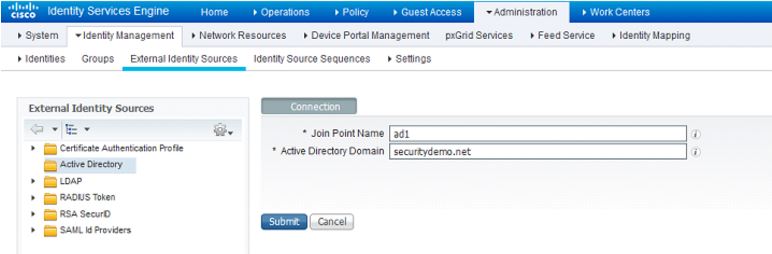
In the Join Point Name field, use the computer name of the AD server and add the domain name in the Active Directory Domain field:
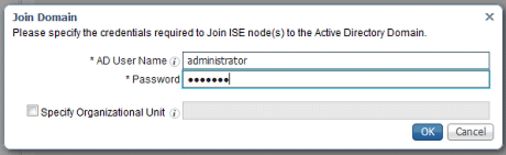
After clicking on Submit, a window will pop-up asking for domain credentials to add ISE to the domain. I used the administrator credentials but you can use one of the other accounts if you created on in a previous exercise:
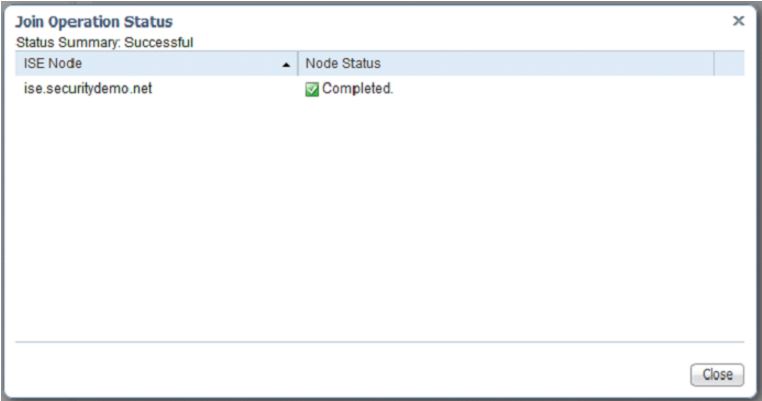
At this point, ISE will try to join the domain. If it goes well, you should get the following message:
If you are unable to join the domain, you should get a message that states why not. If it is still not clear, check the following:
- Network connectivity between ISE and the domain controller
- Network connectivity between ISE and the DNS server
- That records exist for the AD server on the DNS server
- Time difference between ISE and your domain controller
- Domain controller and DNS server firewall settings
- Active Directory username and password
After ISE is joined to the domain, click on the Groups tab. Click on Add and then Select Directory Groups. This is where we add Active Directory groups to ISE for future use in my Authentication policy. In a production environment, you could use the Name Filter field to search for a specific group or narrow it down if you have a large Active Directory domain. In the case of my lab, I used an asterisks to pull up all my AD groups:
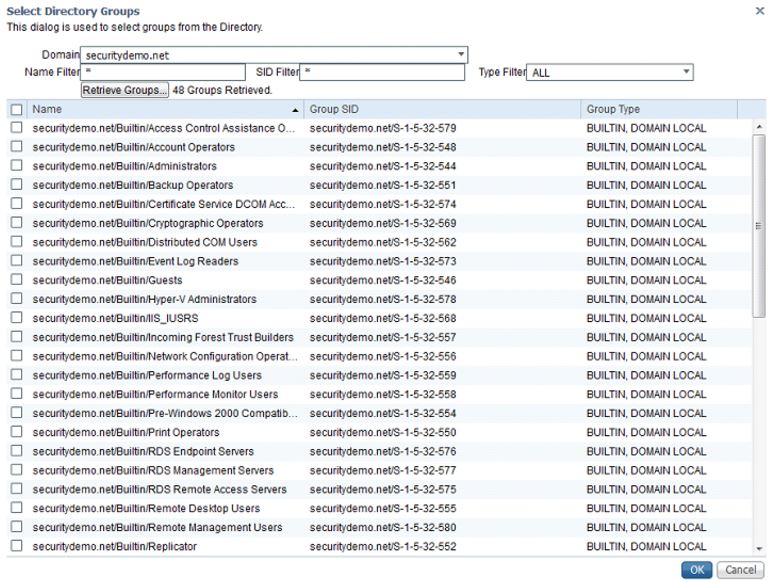
In my lab, I checked the boxes for Domain Users, Domain Computers, Domain Admins, Employee and Vendor since I will later be creating roles based access with my authentication policies.
Then navigate to the Attributes tab. Click Add and Select Attributes from Directory. In the sample user or machine account, enter the administrator username or another you created. This will pull up the AD attributes for that account. You can check the boxes for attributes you might want to use later in your policies. In my case, I used the cn, memberOf, and userCertificate attributes:

After you are done, click Save to finish this Active Directory configuration.