This is where we're going to create our group policy to push down to our clients. The idea of pushing the settings down to users via GPO is to make security mandatory but also try to make it as transparent to a user as possible. Little things such as pushing the dot1x SSID information and enabling the users to auto-connect to the SSID when in range goes a long way to user experience. Likewise, having your users automatically be enrolled with a user certificate and their NIC card settings automatically configured increases the transparency of ISE from a user perspective. Ideally, the users should never know ISE is there authenticating and authorizing their corporate computers and acting as the gatekeeper between them and the rest of the network UNLESS a policy is violated somehow.
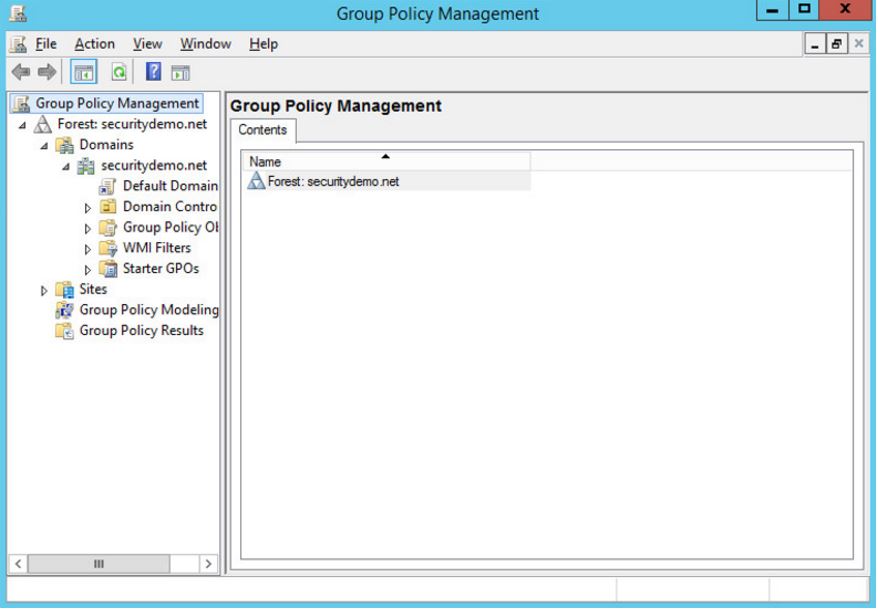
Go to your Start menu and open Group Policy Management. Highlight the domain and right-click on it. Choose Create GPO for this domain and link it.
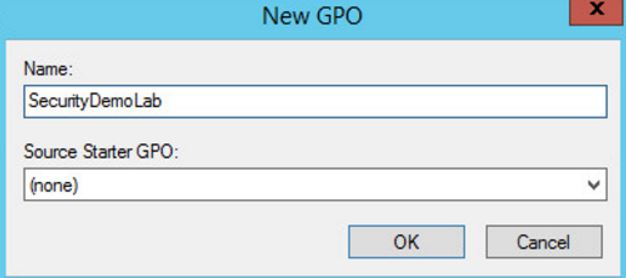
Quick note: You can also use the default domain policy in a lab or create a separate policy for a specific OU to test with a group of users in production. I'm just creating a new policy out of habit here but for labbing purposes, it doesn't matter.
Highlight the new Group Policy you just created and right-click it. Choose Edit.
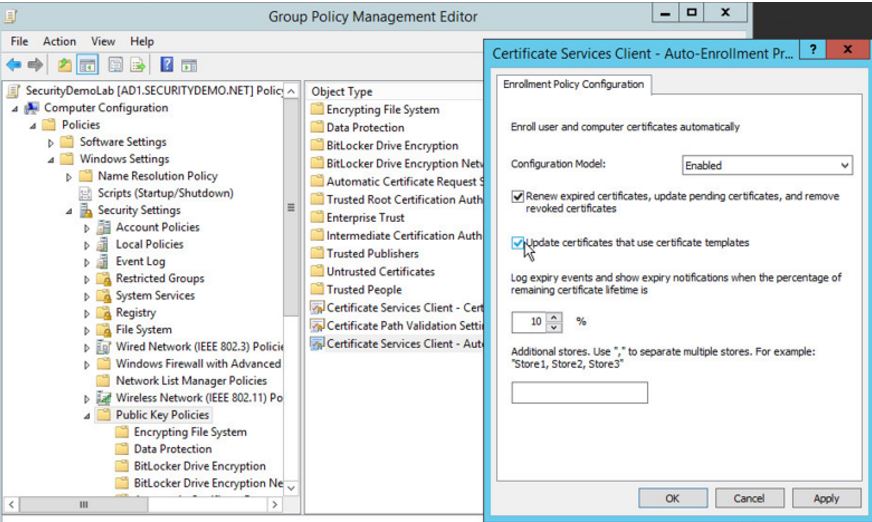
Your new GPO should pop-up. This is where we will make our policy changes. Navigate to Computer Configuration>Policies>Windows Settings>Security Services>Public Key Policies>Certificate Services Client - Auto-Enrollment. Open this up and change the setting to Enable and check the top two boxes. This will enable computers to auto-enroll using the computer certificate template we previously created.
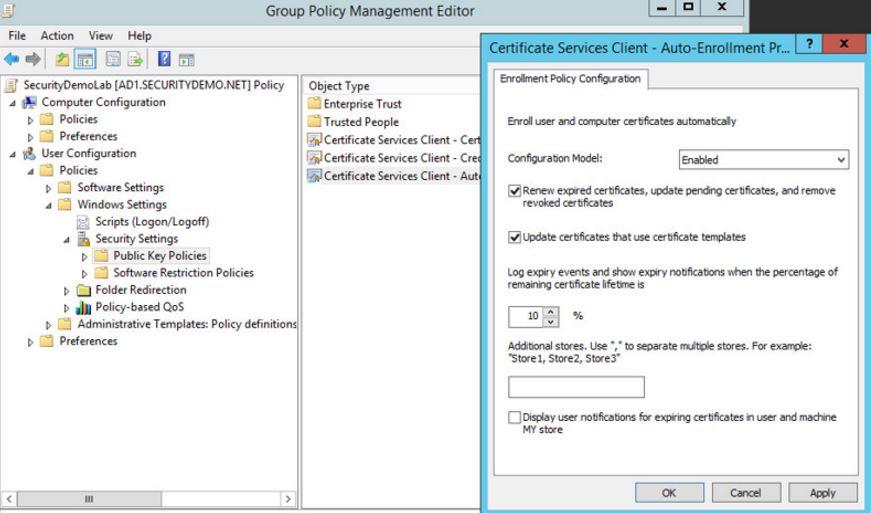
Navigate to User Configuration>Windows Settings>Public Key Policies>Certificate Services Client - Auto Enrollment and do the same thing as the previous step. This will enable auto-enrollment for user certificates when a user logs into a domain PC
The next thing I like to do is configure the dot1x settings for both the wired and wireless NICs for our domain PCs. As stated before, this is for user transparency and reducing your administrative overhead so you don't have to go configure every NIC card By configuring it all here in group policy, your domain computers will know which SSIDs to jump onto when not connected to wired, what dot1x settings to use, what EAP type, root cert to trust, etc.
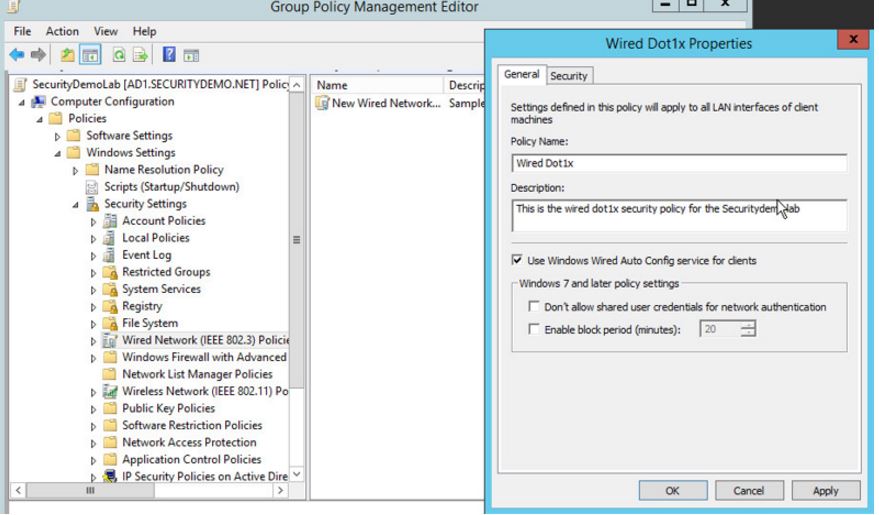
Navigate to Computer Configuration>Windows Settings>Security Settings>Wired Network and right-click on it. Choose Create a New Wired Network Policy. This will open the New Wired Network Policy Properties box. Name your policy whatever you'd like it to be and make sure the Use Windows Wired Auto Config service for clients box is checked.
On the Security tab, we will choose our authentication types. Some of the most widely deployed types native to Windows 7 are as follows:
- PEAP/MS-CHAPv2
- PEAP/EAP-TLS
- PEAP/GTC
- EAP-TLS
Some methods are more secure than others. EAP-TLS is considered the gold standard but PEAP/MSCHAPv2 is the most widely deployed for simplicity. Also, Windows 8 and 10 introduced some different types but I don't go into that. For the sake of the lab, I'm going to keep it simple and use PEAP for the outer method and EAP-TLS for the internal method.
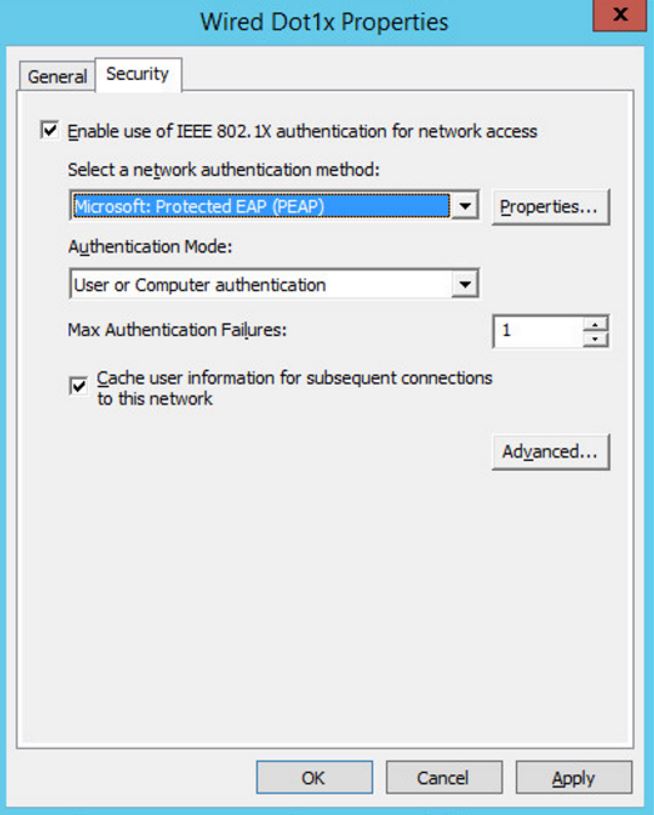
On the Security tab, ensure that the Enable use of IEEE 802.1X authentication for network access box is checked and from the Select a network authentication method drop-down, choose Microsoft: Protected EAP (PEAP). Click on the Properties button to the right of it.
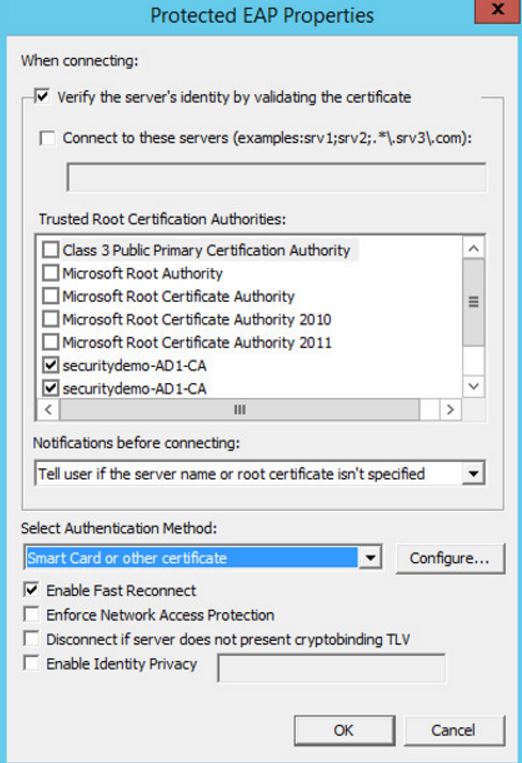
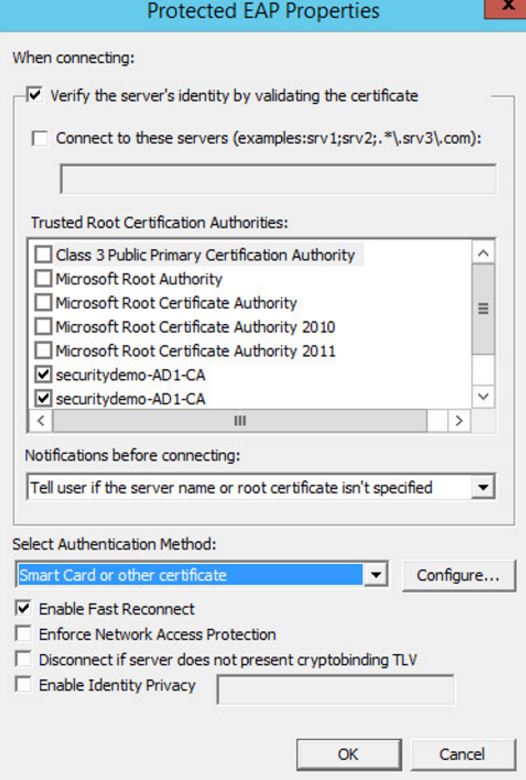
In the Properties box that pops up, check the boxes next to the Securitydemo CA root certifies under the Trusted Root Certificate Authorities header. The name of the CA Root certificates will vary depending on whatever you named your domain but for the purposes of this document, I'll refer to it as my domain name.
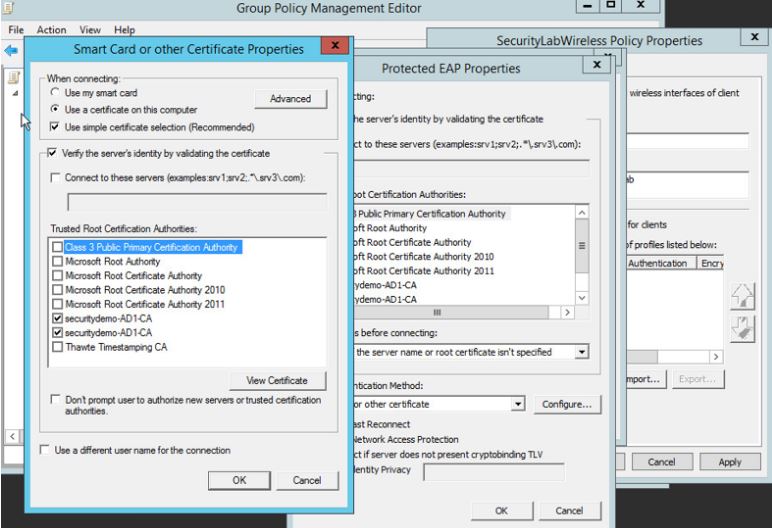
Under the Select Authentication Method drop-down, this is where we will select our inner method. Choose Smart Card or Other Certificate from the available options. Click on the Configure... box next to it.
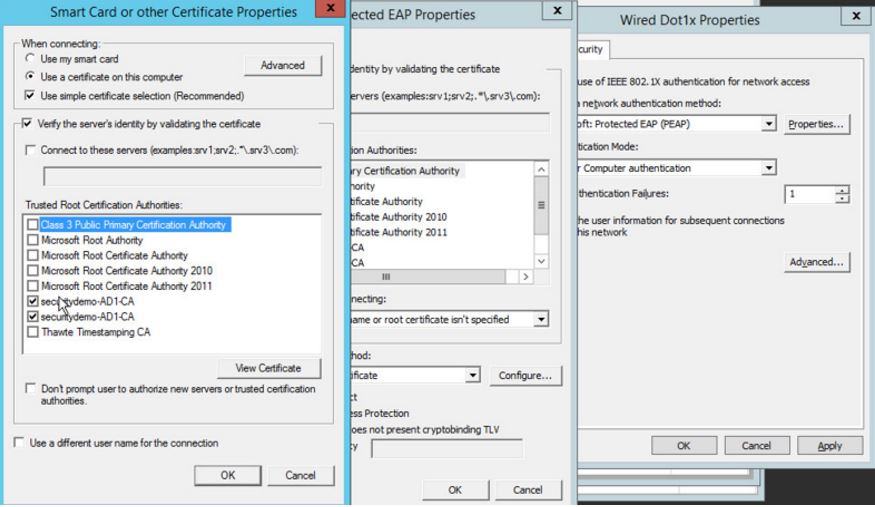
The Smart Card or Other Certificate Properties box should pop up. Check the boxes for the Securitydemo CA root certificates again and click OK to save your settings. Do the same for the rest of the boxes you have open in relation to the Wired Dot1x properties.
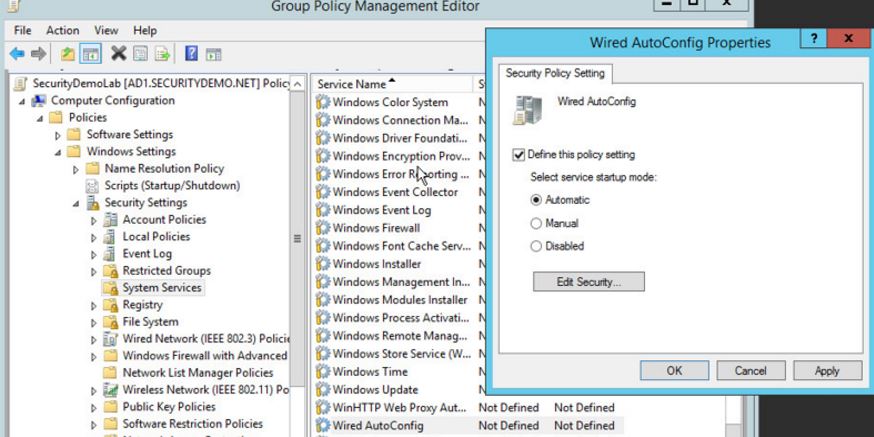
Typically, the Wired Autoconfig service is not enabled by default on Windows 7 machines in my experience. In order to get the dot1x wired settings to work, this should be enabled so I like to do it through group policy. Navigate to Computer Configuration>Policies>Windows Settings>Security Settings>System Settings>Wired Autoconfig. Check the box for Define this policy setting and choose the radio button for Automatic.
Next we are going to configure the wireless settings in our group policy. It's very similar to the wired settings but with some minor changes. Navigate to Computer Configuration>Policies>Windows Settings>Security Settings>Wireless Network (IEEE 802.11) Policy. Right-click on it and choose Create a New Wireless Network Policy.
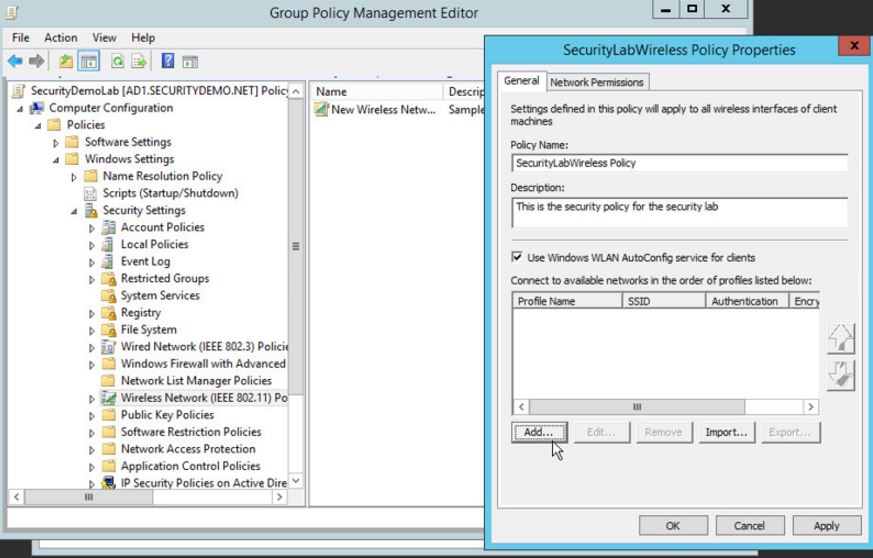
This will open up a New Wireless Policy Properties box. You can name this policy whatever you'd like but I usually like to name it something that makes sense for whatever organization I'm configuring it for. In this case, I'll just call it my SecurityLabWireless Policy. Under Connect to available networks in the order of profiles listed below box, click Add and choose Infrastructure

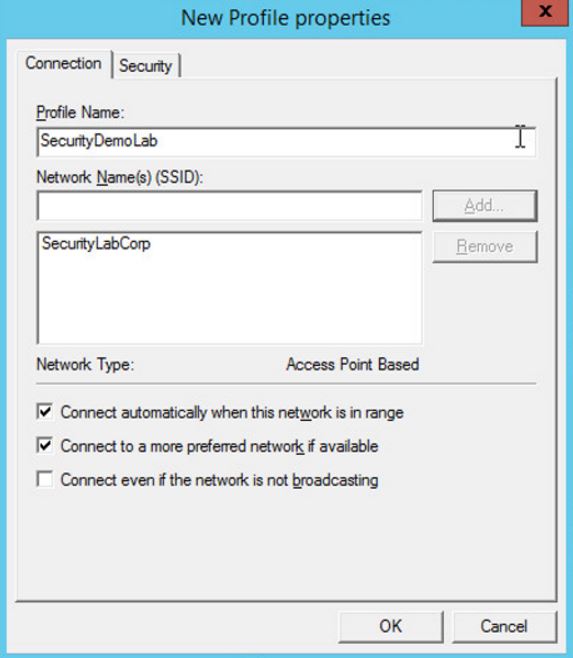
The New Profile Properties box will open. I typically like to name the profile something that makes sense. Usually I use the same name as the SSID but it's up to you. You really could put anything. Under the Network Names(s) (SSID) field, put the EXACT name of your SSID that you want your clients to connect to. I also like to check the boxes below to connect automatically if they are in range.
On the Security tab for this profile, we will be configuring it just like we did with the Wired policy. Choose Microsoft: Protected EAP (PEAP) from the drop-down and click on Properties right next to it.
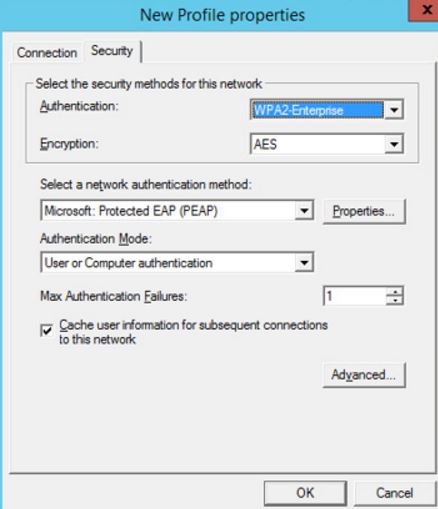
Check the boxes next to the root CA's certificates and for the inner method, choose Smart Card or other certificate from the drop-down. Click Configure... to the right of it.
On the Smart Card or Other Certificate Properties box, check the Root CA certificates again and click Ok to save. Click Ok on each box associated with the Wireless policy to save them and close them out.
At this point, I usually start to configure the PassiveID settings before closing out and applying the GPO. I'm going to create another blog post for that right now to separate the two. If you don't plan on using PassiveID integration, just skip to the end of the next blog post for directions on how to apply the GPO.