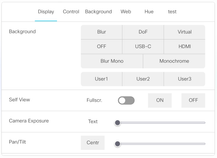
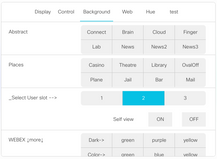
First, download the code (Opens the right GitHub page in a new tab)
1 - Access: Login to your Video device.
2 - Import Macro
- Click "Macro editor"
- Click "Import from file"
- Select "macro-MORE.js" and click open
- Save the macro (CTRL-S or CMD-S)
- Select the imported macro and click the grey toggle button to activate the macro
3 - Import GUI
- From the main page, click "UI Extensions Editor"
- In the top-right hamburger menu, select "Merge from file" (NOTE: use Merge to prevent overwriting/removing other macros)
- Select "ui-MORE.xml" and click open
- On the top-right, click the up arrow to deploy the UI to the video system
- Now, go to your video system and test!
| Important: Do you like this? Please go here and click the "Helpful" button! That helps me to create and share more projects like this. |
Customize Virtual Backgrounds
1 - Select images. Go to HERE to see the available virtual background images
2 - Assign image filenames to buttons. In the UI editor:
- Add a group-button and name it "widget_bg_"+your own text ---> Example: "widget_bg_clouds". Then update button IDs with the image filenames you want to use. OR
- Select an existing group-button and update button IDs with the image filenames you want to use.
3 - Rename buttons
Rename the BUTTON text so you know what image it contains. Use short names to make them fit. Don't forget to UPLOAD/activate the modified UI. ('arrow up' button top right
Customize Web Links
1 - Go to the Web panel in the UI editor.
URLs are configured in button IDs of groupbuttons. These group buttons can be placed anywhere in the UI (doesn't have to be the 'Web' tab)
2 - In the group button config, add the URL
And after adding the URL, change the name of the groupbutton. Can you add more groupbuttons? Yes, as long as the groupbutton widget id starts with "widget_web_"
3 - Save & Test
You can modify the max number of horizontal buttons inside the groupbutton by reducing its width. Then you can add more buttons. So, you can have:
- FROM: 2 rows (min) each with 1 button
- UP TO: x rows each with 4 buttons
- example: 3 rows each with 2 buttons horizontally


