Certificates are crucial to the operation of Identity Services Engine. Some of the uses that ISE for certificates include the following: certificate dot1x authentication, pxGrid communication, adding and communicating with new ISE nodes, BYOD, etc. Unless you are using a single ISE node on the network with only a Guest portal and basic profiling, this is going to be a post that you'll want to follow along with as much as possible.
Beginning in ISE 1.3, ISE had the ability to be it's own internal Certificate Authority (CA) and issue certificates. Since most enterprises I've worked with utilize an PKI infrastructure of some sort and since Windows Server as a CA is a popular choice in most deployments I've seen and the ISE-issued certificates are typically only used for BYOD, I'm going to focus this post on using the CA server I already built out in previous posts. In the future, I might add additional posts with comparable configurations using ISE's own internal CA but for now, I'll focus on what you'd most likely see in a typical medium-to-large ISE deployment.
In my lab, I first navigate to my Active Directory Certificate Services Web Enrollment page (https://AD-IP-address/certsrv) to download the CA certificate. We will need this certificate to add it to ISE's Trusted Certificates Store. This is a critical first step since you need the Certificate Authority to be trusted before you can start usinig it for signing Certificate Signing Requests. Once you have the page up, click on the Download a CA certificate, certificate chain, or CRL link:
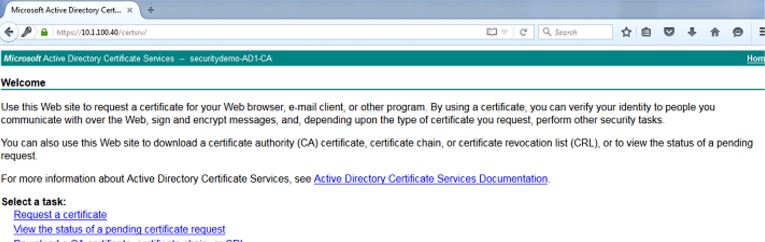
On the next page, choose the radio button for Base 64 and click on the Download CA certificate link. This will download the CA certificate locally for you:

Login to your ISE node and navigate to Administration>System>Certificate>Certificate Management>Trusted Certificates and click Import:
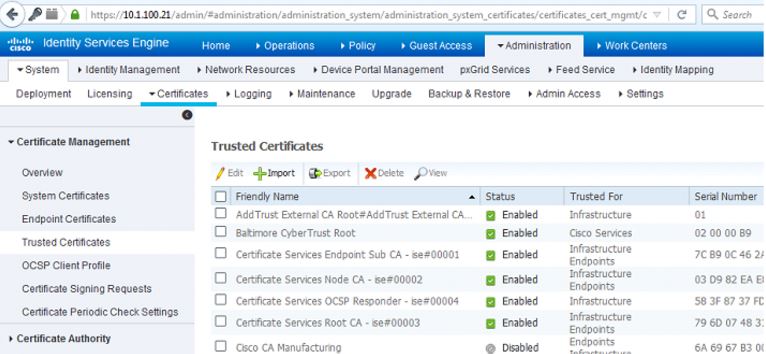
On the next page, upload the CA certificate that you just download. I like to give it a friendly name that makes sense to be and a description that explains what the certificate is - adding this kind of detail is always good for the other ISE administrators that might get left managing this later on. I check the boxes next to:
- Trust for authentication within ISE - This will all you to add new ISE nodes as long as they have the same trusted CA certificate loaded to their Trusted Certificate store.
- Trust for client authentication and Syslog - You would check this box if you want to use this certificate to authenticate endpoints that connect to ISE using EAP and/or trust a Secure Syslog server
- Trust for authentication of Cisco Services - You only need to check this if you want this certificate to be trusted for external Cisco services such as a feed service.

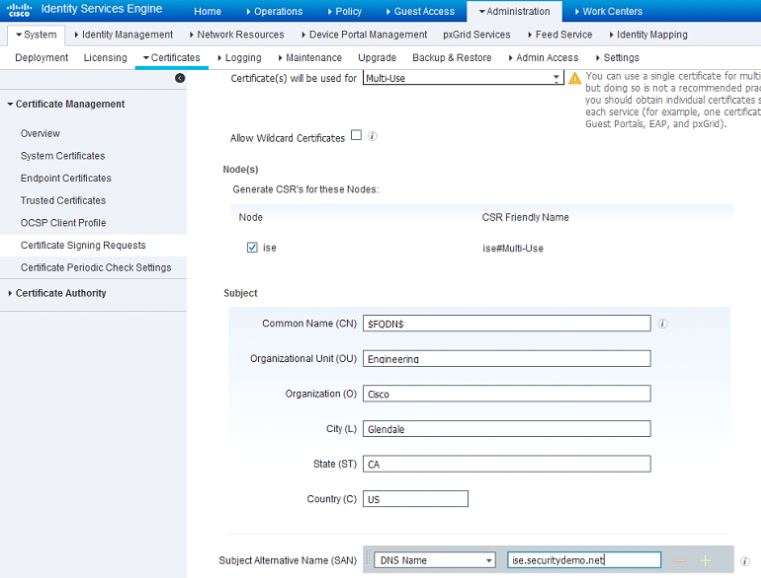
Now that we've add the CA certificate to the Trusted Certificate Store, we can now issue a Certificate Signing Request (CSR) and bind the resulting certificate to the ISE node. To do this we first have to issue the CSR by going to Administration>System>Certificates>Certificate Signing Requests and click on Generate Certificate Signing Requests (CSR).
On the page that comes up, certificate will be used for Multi-use in the drop-down. Check the box next to your ISE node and fill out the subject information based on what makes sense to you or your organization. After you've completed this, click on Generate and then click Export on the pop-up that comes up. This will download the CSR request you just created:
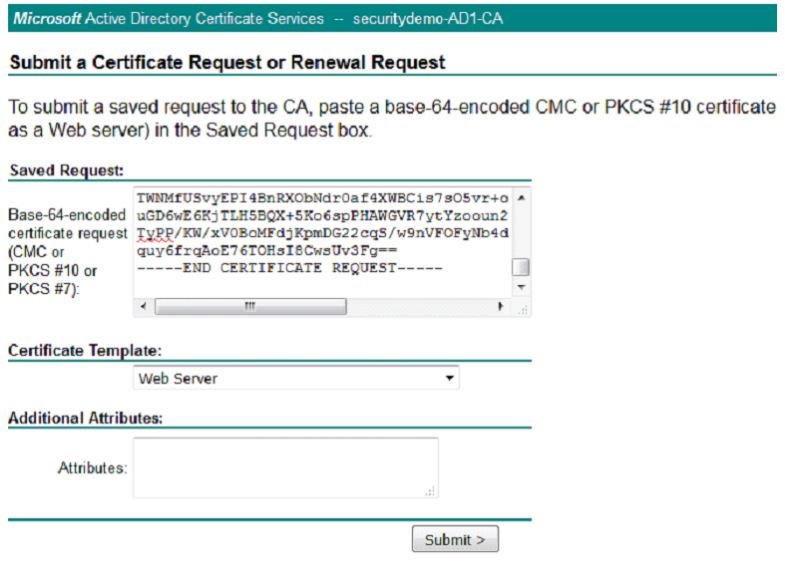
Open the CSR that you just downloaded in Notepad and reopen your Microsoft AD CA Web Enrollment page to the first page. Click on the Request a certificate link. On the next page, click on the advanced certificate request link.
One thing to note: In ISE 1.3 and 1.4, you were required to issue two CSRs at least if you're going to be using pxGrid. One would be for pxGrid and one would be for the rest of the services. I'll detail how to do it with earlier versions of ISE but be aware you can do it all on one CSR in ISE 2.0 and above.
At this point, you will be at the Certificate Request page. This is where you will use your CSR to generate a certificate. Copy and paste the body of the CSR from your Notepad into the Base-64-encoded certificate request field and under the Certificate Template drop-down, choose the Web Server (If you are using ISE 2.0 or 2.1, you can simple pick pxGrid as the template) template. Click Submit.
On the next page, choose the radio button for Base 64 encoded and click the Download certificate link. This will download the certificate signed by the CA that was generated from the CSR.
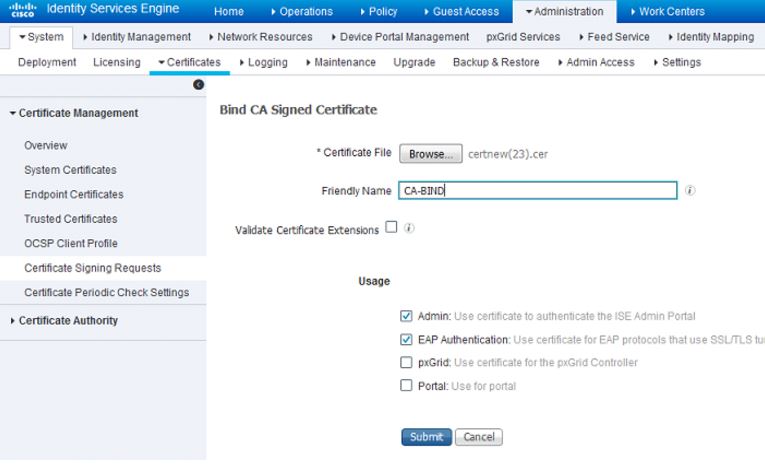
Going back into your ISE GUI, navigate to Administration>System>Certificates>Certificate Management>Certificate Signing Request and check the box next to the CSR you previously created. Click on the Bind Certificate button:

Next you will upload the certificate that you just downloaded and give it a friendly name for ISE. In this case, I just used "CA-BIND" as my friendly name. I also checked the boxes next to Admin and EAP authentication. You can choose the Portal as well but this is for Guest/Sponsor/Hotspot/etc portals so I would recommend using a publicly-signed certificate for that. The reason being is that if you have a user or guest coming into your network and your ISE portal is using a privately-signed certificate for the Guest Portal, they're going to get certificate errors or potentially have their browser block them from accessing it. To avoid all that, use a publicly-signed certificate for Portal use to ensure a better user experience.
After you click Submit, the ISE node should restart its services. Depending on the version and resources allocated to the VM, this can take anywhere from 5 to 15 minutes. To check the status of the application restarting, open the ISE command line and issue the show application status ise command.
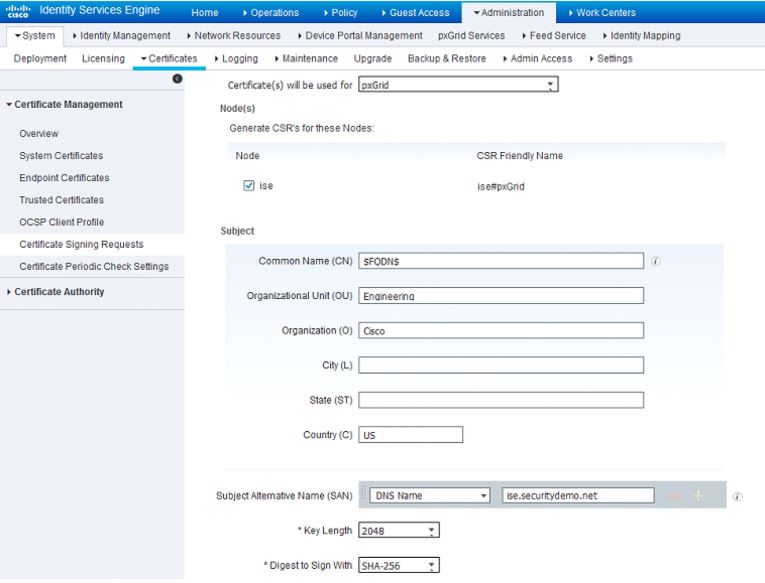
Since I will be utilizing pxGrid in my lab, I'm going to now configure the pxGrid certificate on ISE. After the ISE application restarts and you can log back into the GUI, navigate back to Administration>System>Certificates>Certificate Management>Certificate Signing Requests and create another CSR. This time specify that it will be used for pxGrid under the Certificate(s) will be used for field. After it is generated, export and download it:
Open the CSR in Notepad and open the AD CA Web Enrollment page in your browser. Request a certificate and go to advanced certificate request again. Copy the CSR into the Base-64-encoded certificate request field and this time we will be using the Pxgrid certificate template:
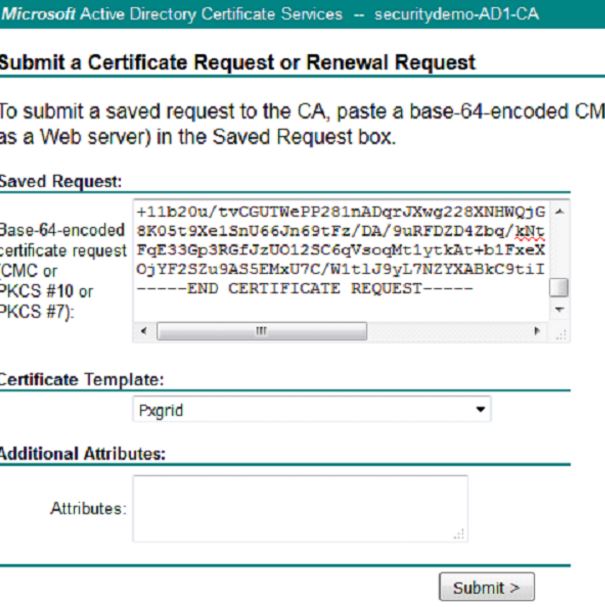
After clicking Submit, choose the radio button for Base 64 encoded and click the Download certificate link.
Back in your ISE GUI on the Administration>System>Certificates>Certificate Management>Certificate Signing Requests page, bind this newly downloaded certificate to ISE:

Click Submit. This time the ISE application will not restart. ISE will only restart when we're changing the Admin certificate.
Now we are going to create the Certificate Authentication Profiles. This profile is necessary for our authentication methods that we will create in later posts. Since we will be using an EAP certificate-based authentication method in our policy, ISE will compare the certificate received from a client with the one in the server to verify the authenticity of a user or computer. This is considered a much more secure method than the traditional username and password method.
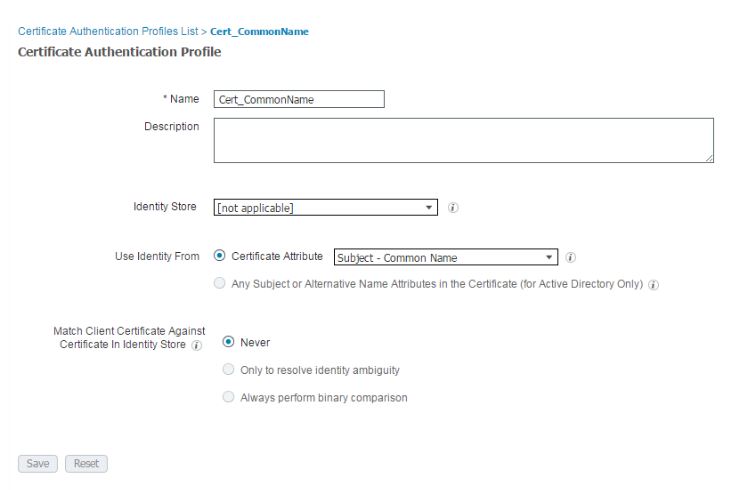
In the ISE GUI, navigate to Administration>Identity Management>External Identity Management>Certificate Authentication Profile and click Add.
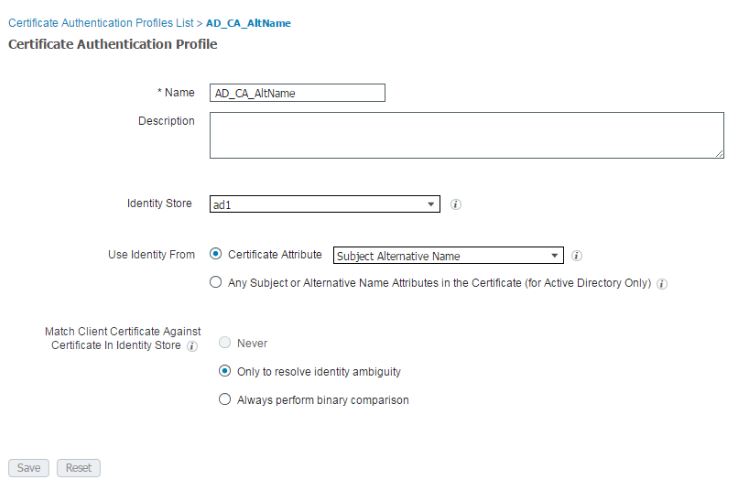
You can name the profile a name that makes sense to you. In this lab, I just named it AD_CA_AltName. From the Identity Store drop-down, choose your AD server to tie this certificate template to your Active Directory CA. Make sure the the Certificate Attribute radio button is chosen and from the drop-down box, choose Subject Alternative Name option. This specifies the value of the certificate attribute that ISE must retrieve from LDAP and compare against. On the Match Client Certificate Against Certificate in Identity Store option, I usually keep it at the default which is Only to resolve identity ambiguity.
Click Add again and create the following certificate profile which will be for BYOD in later posts:
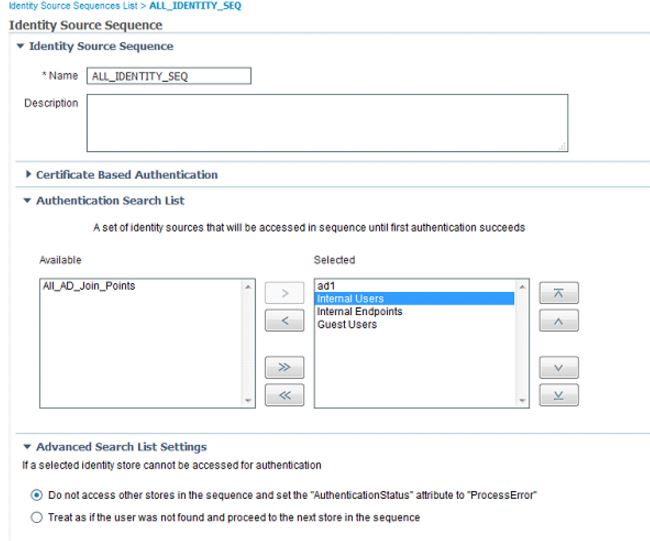
After creating the certificate profiles, I start creating the Identity Source Sequences which will be used later for our policies. Navigate to Administration>Identity Management>Identity Source Sequences and click Add. For my lab, I'm going to create an identity source sequence that includes all identity stores:
In order for ISE to issue certificates for BYOD through SCEP, we will now need to configure our SCEP profile. Navigate to Administration>System>Certificates>Certificate Authority>External CA Settings and click Add. In the following page, you will need to provide a name for this profile as well as link to your SCEP server. By default, the URL should be http://CA-ip-address/certsrv/mscep/mscep.dll
Be sure to test the connection on this profile before clicking Submit:

After creating this profile, we will create the certificate template to use this SCEP profile. Navigate to Administration>System>Certificates>Certificate Authority>Certificate Templates and click Add. The name of the template must be the same name of your BYOD certificate template in your Active Directory Certificate Authority. In the case of my lab, I named it BYOD. In the drop-down for SCEP RA profile, use the SCEP profile you just created (SecurityDemoSCEP in my lab) and click Save: