1. Verify Hostname and Settings
Certificates are based on names. Make sure the names are correct before starting.
From SSH CLI
admin: show web-security
Subject: CN=CUCM7-PUB.bbbburns.lab, OU=TAC, O=Cisco, L=RTP, ST=North Carolina, C=US
X509v3 Subject Alternative Name:
DNS:CUCM7-PUB.bbbburns.lab, DNS:CUCM7-Pub
Use CLI to change these settings if desired
In the next example we move to BXB, and set an Alternate name of “ThePub” so we can type that into our browser
admin: set web-security TAC Cisco BXB Massachusetts US ThePub
After running "set web-security" Tomcat must be restarted for the new certificate to be used when accessing CCMAdmin and CCMUser.
admin: utils service restart Cisco Tomcat
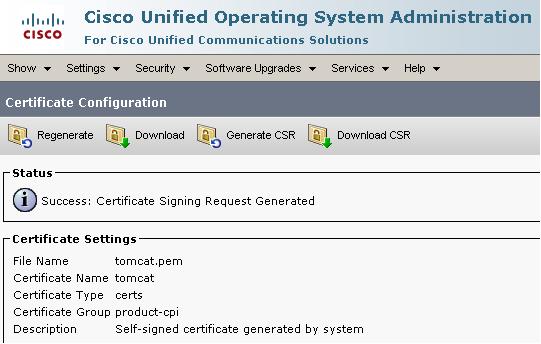
2. Generate and Download CSR
OS Admin > Security > Certificate Management > tomcat.pem > Generate CSR
Download CSR (CUCM7-Pub.csr)
Note: Prior to CUCM 8.0(3), these Tomcat CSRs were generated with 1024 bit RSA keys. With the resolution of defect
CSCso62711 Cert Manager should generates Tomcat CSR using RSA 2048 instead of 1024
CUCM in versions 8.0(3) and later will generate a 2048 bit key / CSR for Tomcat. This defect currently only addresses Tomcat in 8.0(3). Other types of CSRs (like CallManager) will be addressed in future versions. Follow defect CSCtn01236 for 2048 bit updates.
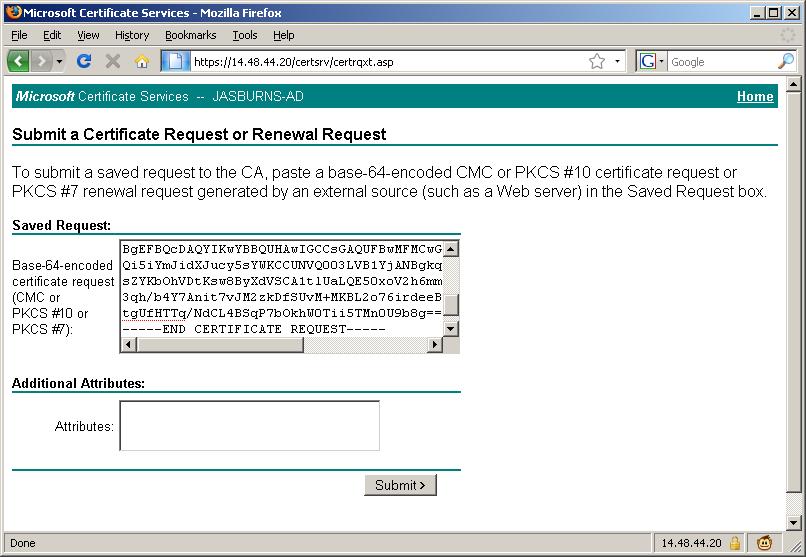
3. Submit CSR to CA
Open the CSR file downloaded from the previous step (CUCM7-Pub.csr in this example) in Notepad and copy the entire contents including the ---BEGIN CERTIFICATE REQUEST--- and ---END CERTIFICATE REQUEST-- lines.
If your CA is Windows 2k3
https://<CA Server Name: In my example JASBURNS-AD>/certsrv > Advanced Certificate Request
Paste the contents into this window to submit the request.
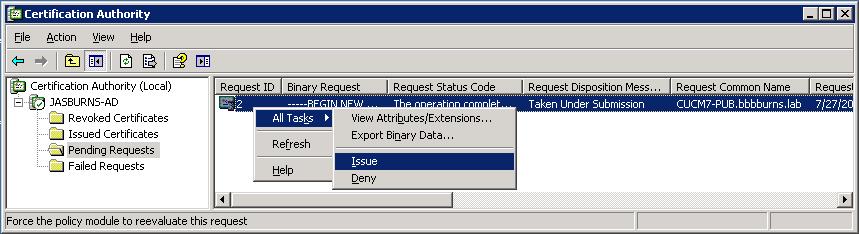
4. CA Approves CSR
This is where the magic happens.
The CA inspects the CSR and determines if the person submitting the CSR really owns CUCM7-PUB.bbbburns.lab
With Verisign or GoDaddy this step will require payment, and email or maybe even human verification
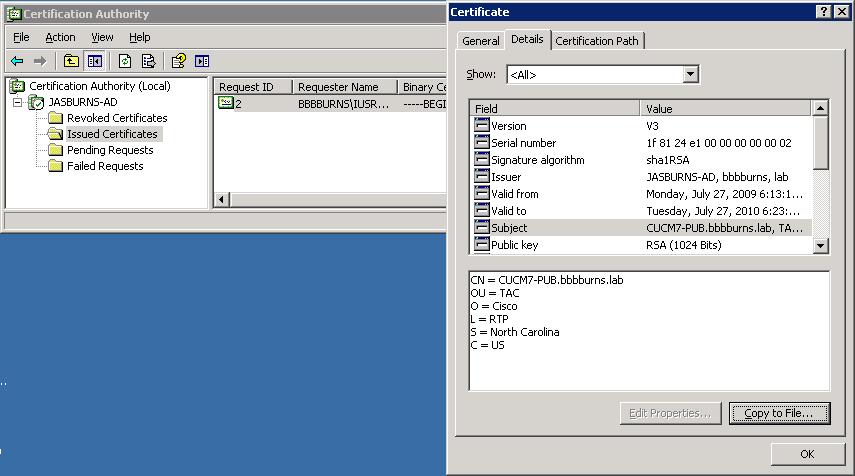
5. Server Admin Downloads Issued Cert
With Win2k3 go to CA MMC > Issued Certificates > Copy to file > Base-64 > (CUCM7-Pub.bbbburns.lab.cer)
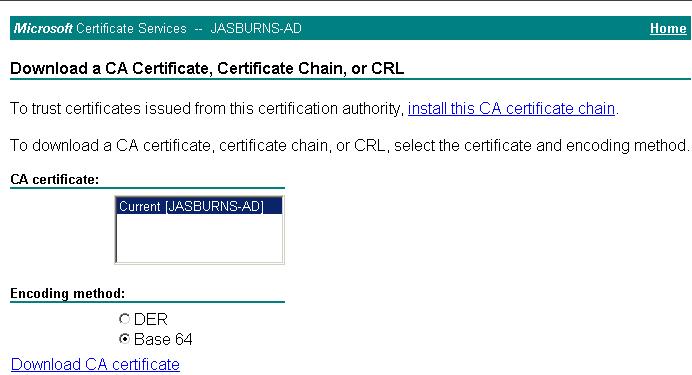
6. Server Admin downloads CA Cert
The Server Admin must build a complete chain of certs, so needs to download the root CA cert
https://<CA Server Name: In my example JASBURNS-AD>/certsrv > Download CA Cert > Base-64 > (jasburns-ad_PEM.cer)
7. Server Admin Uploads Root Certificate(s) as tomcat-trust
CUCM Server needs to have all certificates in the chain uploaded, starting at the top (root).
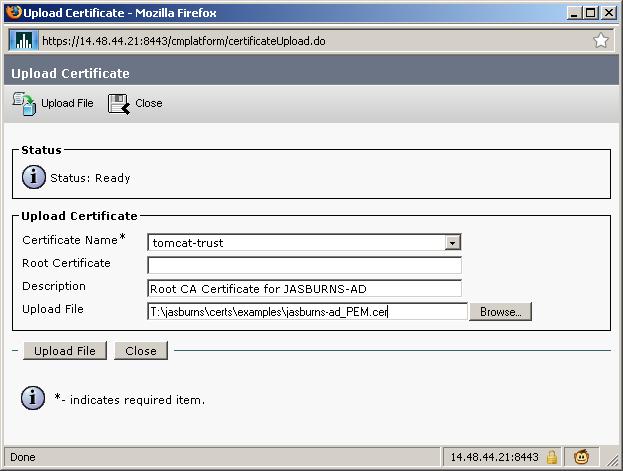
Note that the name of the file uploaded is jasburns-ad_PEM.cer. This is a Base64 encoded PEM file. Once it gets uploaded to CUCM though it will show up with filename JASBURNS-AD.pem. CUCM changes the name of the file to <SUBJECT CN>.pem.
7b. Uploading an intermediate certificate
This step is only necessary if the Certficate Authority (CA) has provided a signed certificate with multiple certificates in the certificate chain as shown.
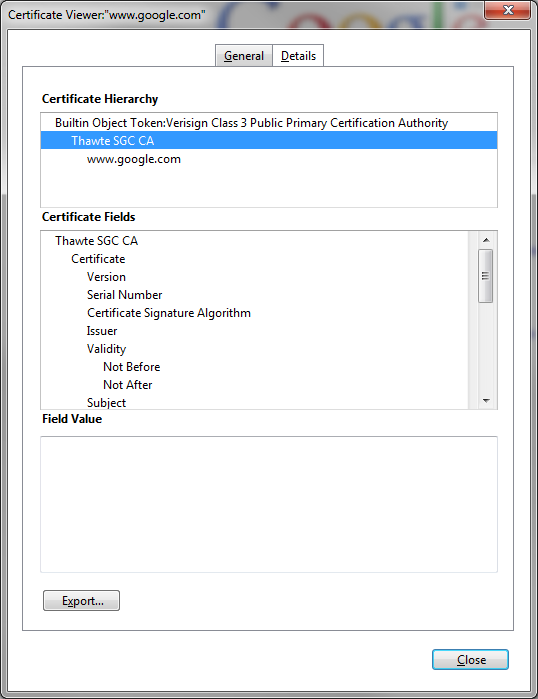
After uploading the root certificate in Step 7, export the intermedia certificate and upload it as a Tomcat-trust also while specifying the filename (minus the extension) of the root certificate in the "Root Certificate" field.
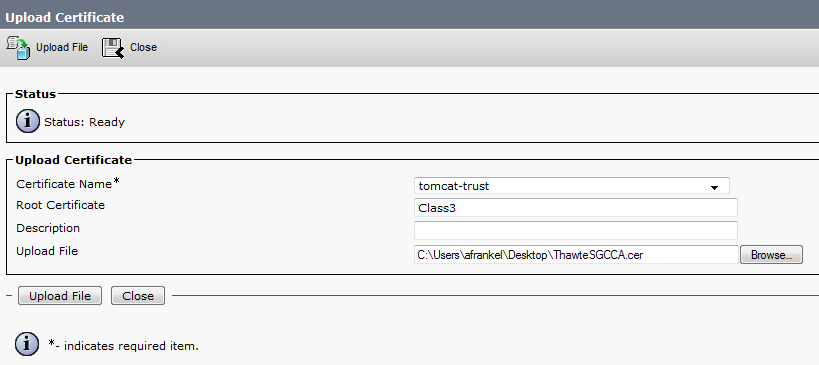
If there are more intermediate certificates in the chain, each one will need to be uploaded in order until finally uploading the signed certificate as shown in Step 8.
The purpose here is to build a chain of certificates. We upload the root certificate and leave the root cert field blank. When we upload the 1st intermediate certificate we put the file name of the root certificate in the root cert field. If there is 2nd intermediate, we put the name of the 1st intermediate in the root cert field. This builds the chain of trust that can be followed from the identity certificate to the root certificate.
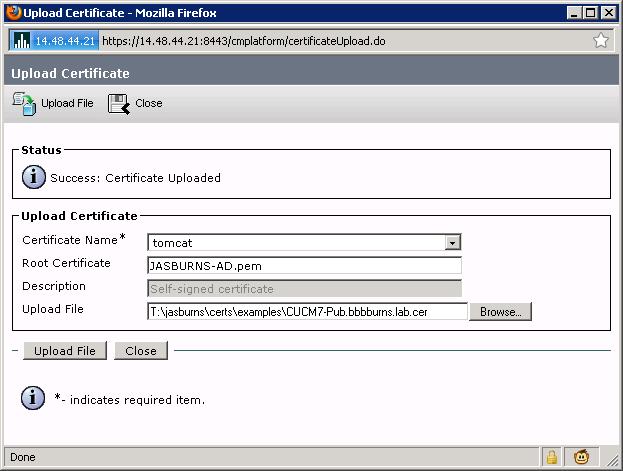
8. Server Admin Uploads Identity Certificate as tomcat
This is the identity certificate issued by the CA.
Complete the cert chain by specifying .pem root cert. Note that the name below is JASBURNS-AD.pem. That's because I went to the OS Admin Certificate page to get the name of the newly uploaded tomcat-trust certificate from the last step. This is VERY important.
The root certificate you specify here could be the name of the root cert, or the name of some intermediate cert. The purpose is to find the certificate that signed the identity certificate, and use that certificate file name in this root cert field.
9. Restart Tomcat
This one is pretty simple. Just restart Tomcat from the SSH CLI
admin: utils service restart Cisco Tomcat
When Tomcat comes back up you can access the CCMAdmin or CCMUser GUI to verify your newly added certificates in use.
